Neuros 442 Quick Start Manual
Portable media player/recorder
Hide thumbs
Also See for 442:
- Quick start manual (11 pages) ,
- User manual (1 page) ,
- User manual (38 pages)

Related Manuals for Neuros 442


Summary of Contents for Neuros 442
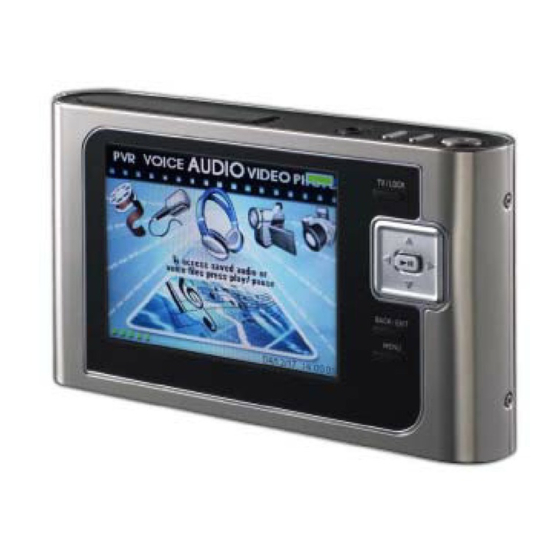
- Page 1 All manuals and user guides at all-guides.com ORTABLE EDIA LAYER ECORDER UICK TART UIDE Unpacking Your Unit 442 Digital Media Computer AC / DC adapter Support CD with manual and Earphone Ulead conversion software...
-
Page 2: Function Overview
When pressed for 2 seconds, locks (or unlocks if locked) all keys on the Neuros 442. Note: you will not be able to switch the Neuros 442 unit on/off if it has been locked using the TV/LOCK button. Before using the RESET key, always check the TV/LOCK key to be sure it is not locked. - Page 3 All manuals and user guides at all-guides.com 7. BACK/EXIT: While the Neuros 442 is in “Play” mode, press this button to stop and return to the previous menu. When not in “Play” mode, press this button to return to the previous menu.
- Page 4 5. You can redirect the video output from the Neuros 442 screen to a TV (or other device linked to it, like a cable converter or home theater control unit) by pressing the TV/LOCK button.
- Page 5 (until you stop it). If this folder has only one file, the Neuros 442 will play the file over and over until you exit the playing mode. If you have several files, they will be played one after another until you exit the playing mode.
- Page 6 1. Insert the single end of the supplied Line In/Out Cable to the Line In port on the top side of the Neuros 442 and insert the three (red, white, and yellow) connectors on the other end of the Cable into the corresponding colored ports for the device you will be recording from (the “source”...
- Page 7 1. Insert the single end of the supplied Line In/Out Cable to the Line In port on the top side of the Neuros 442 and insert at least the two (audio connectors) of the the three (red, white, and yellow) connectors on the other end of the...
- Page 8 Files Management icon from the main menu with the Navigation Joystick and press the Play/Pause button. 3. If you have an SD (“Secure Digital”) card in the Neuros 442, there will be a split screen (with “a: HD” [HD= “Hard Disk”] on the left side and “b: SD/MMC”...
- Page 9 “ ” 4. If a file selected to play or to view is not supported by the Neuros 442, you will see the message Unsupported. 5. To repeatedly play a Video or Audio file, press Menu and Repeat. You may choose “off”...
- Page 10 Bottom View SD/MMC Slot: Insert a memory card (“Secure Digital/Multi Media Card”) here. You can copy files from it to the Neuros 442. The files can be of any type that is supported: audio, pictures, video, voice recordings. Reset: If the Neuros 442 appears to be locked up, you can reset it by gently inserting the end of a paper clip in this small hole.
-
Page 11: Specifications
All manuals and user guides at all-guides.com Specifications ” Display: Slim Type Trans-reflective TFT Color LCD Luminance 230 cd / m2 White LED Backlight QVGA Resolution 320 x RGB x 240 Pixel Support Track Title, Artist display Storage: 40 GB HDD ”...
Need help?
Do you have a question about the 442 and is the answer not in the manual?
Questions and answers