
Related Manuals for Foremost HEIDI HSL-03192-1


Summary of Contents for Foremost HEIDI HSL-03192-1
- Page 1 HSL-03192-1 PATENT NO:US 7,845,502B1 FOREMOST Customer Service - 1.800.443.1410 8:30am - 5:30pm EST Monday - Friday customerservice@foremostgroups.com www.foremostgroups.com...
-
Page 2: Tools Needed
Congratulations on your purchase from FOREMOST . Before you begin, please check for missing parts. Please call FOREMOST Customer Service 1.800.443.1410 for parts and service. Please reference item # noted on the cover page. Do not use this product if parts are damaged, missing or broken. - Page 3 hardware (H1) - Ø6 wood dowel (H2) - plastic wall anchor (H3) - allen wrench qty. 8 pcs qty. 2 pcs qty. 1 pc (H4) - machine screw (H5) - wood screw (H7) - round sticker (H6) - wood screw qty.
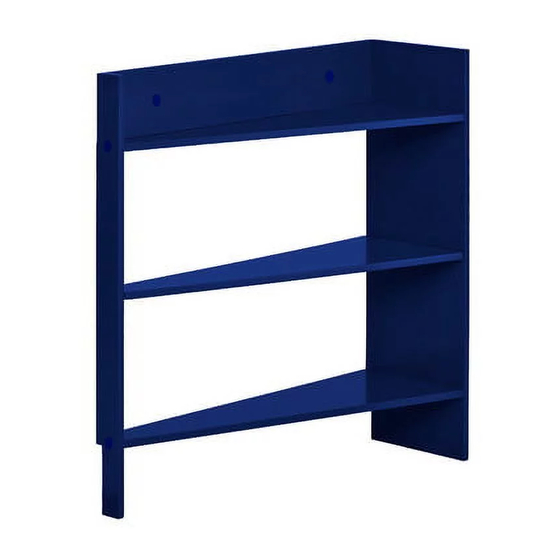
- Page 4 HEIDI JR. SHELF ITEM DESCRIPTION QUANTITY narrow side panel wide side panel fixed shelf adjustable shelf top stretcher spacer block Note: the notched out edge is the back of the item. the notches on panels A and B should face the same direction.
- Page 5 STEP 1. attach side panels (A) and (B) to fixed shelves (C) cover screw holes on panels (A&B) with round stickers (H7) (H1) - Ø6 wood dowel (H3) - allen wrench (H4) - machine screw qty. 8 pcs qty. 1 pc qty.
- Page 6 STEP 2. determine placement of shelf against wall and door opening PLACEMENT_TOP VIEW attach panel (E) to the top back notched out area of step 1 WALL WALL screw panel (C) to panel (E) from the underside using wood screws cover screw holes on underside of panel (C) with round stickers (H7) cover screw holes on top of shelves (C) with round stickers (H7) DOOR...
- Page 7 STEP 3. anchoring the shelf to the wall Note: if you have shoe moulding with your baseboards you will need to include spacer blocks (F) behind panel (E) , and use the longer wood screws (H6) for anchoring. if you are not using the spacer blocks (F) use the shorter wood screws (H5) for anchoring to the wall. place the unit in the corner of the wall and door, make sure the unit is pushed against the corner.
- Page 8 STEP 4. placing the adjustable shelf (D) using the shelf pins (H8) 4 x rubber bumper (H8) Note:place clear bumpers on edges of shelf to prevent door from damaging the shelf (H8) - shelf pin rubber bumper qty. 4 pcs qty.
Need help?
Do you have a question about the HEIDI HSL-03192-1 and is the answer not in the manual?
Questions and answers