
Related Manuals for Astro-Smart SMP-PRO-R2

Summary of Contents for Astro-Smart SMP-PRO-R2
- Page 1 User’s Manual Computerized Sky Master Pro System (Model SMP-PRO-R2, SMP-R2) SMP-R2 SMP-R2-PRO(OLED) R2-Enclosure SMP-R2-PRO(LCD) SMP-R2-RF Copyright Oct 17th 2020...
-
Page 2: Table Of Contents
GUI Interface Description Summary Using the Sky Master Pro Software........... 24 Configuration/Calibration of your Sky Master Pro Sensor Thresholds..........29 Astro-Smart ASCOM Software Interface With (Sequence Generator Pro)........... 36 Party ASCOM And Boltwood File Software Interfaces( Sky Roof)........39 Other 3 Blue Tooth Interface. -
Page 3: Overview
© 2010-2049, All rights reserved A. Overview The Astro-Smart Sky Master Pro weather stations are a cost-effective solution for astronomers to: Monitor and control based on the weather and sky conditions. Incorporate weather and environmental information and imaging data ... - Page 4 GUI interface. Typical Configurations for the SMP-PRO-R2, SMP-R2 are shown below used with a generic observatory with a role off roof or Dome control from remote computer with various sensors.
-
Page 5: Smp Family Purchase Configurations
Providing the Astronomical Community with Premier Products and Services Astro-smart.com Copyright Oct 2020 © 2010-2049, All rights reserved B. SMP Family Purchase Configurations. SMP-PRO-R2 (OLED) Page 5... - Page 6 Providing the Astronomical Community with Premier Products and Services Astro-smart.com Copyright Oct 2020 © 2010-2049, All rights reserved SMP-PRO-R2 (LCD) Page 6...
- Page 7 Providing the Astronomical Community with Premier Products and Services Astro-smart.com Copyright Oct 2020 © 2010-2049, All rights reserved SMP-R2 Page 7...
- Page 8 Providing the Astronomical Community with Premier Products and Services Astro-smart.com Copyright Oct 2020 © 2010-2049, All rights reserved SMP-R2-RF The Astro-Smart SMP family controllers are designed to be user friendly, serviceable, elegant and reliable and include the following features shown below: Page 8...
-
Page 9: Features
Tested with Diffraction Limited Clarity II, AAG SkyRoof . Alarms and Relay Control Rule Sets for Sky and Atmospheric Conditions. 8 Line OLED Display or 4 Line LCD Display On SMP-PRO-R2 SQM Sky Quality Meter Sensor And LUX Sky Brightness Sensor to measure Star Magnitude Per Arc Sec(MSPAS) and Naked Eye Star Magnitude(NELM). -
Page 10: Contents Of Box
SMP Family Controller. D. Contents of Box SMP-PRO-R2, SMP-R2 indoor unit. 2. R2 Enclosure for all R2 variety purchases. Cable length needs to be specified from indoor controller to R and R2 outdoor unit with turn key sensor package. SMP-R2-RF does not require a data cable and comes with RF interface. -
Page 11: Hardware Installation And Operation Warnings
Installation of SMP-PRO-R2 or SMP-R2 with chosen single data/control cable between your controller and R2 Full Sensor Fusion module. Cable length vary between 6 and 50 feet but can be custom. -
Page 12: Installation Of The Sky Master Pro Windows Software
5. You can Launch the app several ways. During install you can add a desktop shortcut along with windows menu driven app shortcut or directly from installed location on your computer at C:\Program Files (x86)\Astro-Smart\Sky_Master_Pro_Standard_Setup\Astro- Smart\Sky_Master_Pro_Standard_SW.exe. The app is located under the menu start button under Sky_Master_Pro_Standard_SW. - Page 13 Providing the Astronomical Community with Premier Products and Services Astro-smart.com Copyright Oct 2020 © 2010-2049, All rights reserved 7. Click the Open Port/Read Sky Master Pro button. If your Sky Master Pro successfully connects, you’ll see the Data Port Status section change. The Status will update with the current action, and the Progress Bar will indicate data is being transferred.
- Page 14 Providing the Astronomical Community with Premier Products and Services Astro-smart.com Copyright Oct 2020 © 2010-2049, All rights reserved Page 14...
- Page 15 Providing the Astronomical Community with Premier Products and Services Astro-smart.com Copyright Oct 2020 © 2010-2049, All rights reserved Page 15...
- Page 16 Providing the Astronomical Community with Premier Products and Services Astro-smart.com Copyright Oct 2020 © 2010-2049, All rights reserved Page 16...
- Page 17 Providing the Astronomical Community with Premier Products and Services Astro-smart.com Copyright Oct 2020 © 2010-2049, All rights reserved Page 17...
- Page 18 Providing the Astronomical Community with Premier Products and Services Astro-smart.com Copyright Oct 2020 © 2010-2049, All rights reserved Other features of the GUI and examples can be seen by demonstration on our website to browse support pages, video tutorials of this product and others.
-
Page 19: Quick Tour Of Your Pc Control Remote User Interface Summary
Providing the Astronomical Community with Premier Products and Services Astro-smart.com Copyright Oct 2020 © 2010-2049, All rights reserved G. Quick Tour Of Your PC Control Remote User Interface Summary Your SMP family controllers can be monitored or controlled from your computer. Just connect the USB cable and in the device manager of your operating system, you must know what port is used when connected. - Page 20 Providing the Astronomical Community with Premier Products and Services Astro-smart.com Copyright Oct 2020 © 2010-2049, All rights reserved Page 20...
- Page 21 Providing the Astronomical Community with Premier Products and Services Astro-smart.com Copyright Oct 2020 © 2010-2049, All rights reserved Page 21...
- Page 22 Providing the Astronomical Community with Premier Products and Services Astro-smart.com Copyright Oct 2020 © 2010-2049, All rights reserved Page 22...
- Page 23 Providing the Astronomical Community with Premier Products and Services Astro-smart.com Copyright Oct 2020 © 2010-2049, All rights reserved In the configuration offsets and presets tabs shown above, the user can do the following: 1. Save upto 4 presets for IR cloud data based on seasonal atmospheric changes.
-
Page 24: Gui Interface Description Summary Using The Sky Master Pro Software
Providing the Astronomical Community with Premier Products and Services Astro-smart.com Copyright Oct 2020 © 2010-2049, All rights reserved H. GUI Interface Description Summary Using the Sky Master Pro Software. Your Sky Master Pro app is a comprehensive app that gives you near real time information from your Sky Master Pro station. - Page 25 Providing the Astronomical Community with Premier Products and Services Astro-smart.com Copyright Oct 2020 © 2010-2049, All rights reserved 2. “Settings” Menu Item – The settings menu allows you to: a. Store a copy of the presets, current offsets and log file information. After selecting this command, you should see 3 files in C:\Sky_Master_Pro_Data directory.
- Page 26 Providing the Astronomical Community with Premier Products and Services Astro-smart.com Copyright Oct 2020 © 2010-2049, All rights reserved a. Relay Dome Output Panel – if you have the relay option, this allows you to control the relay and see its state.
- Page 27 Providing the Astronomical Community with Premier Products and Services Astro-smart.com Copyright Oct 2020 © 2010-2049, All rights reserved iv. Temperature – the current ambient temperature indicated by your outdoor unit. The temperature is reported in °C and °F. v. Dew Point – the temperature at which dew begins to form on the ground or on objects exposed to the sky.
- Page 28 Providing the Astronomical Community with Premier Products and Services Astro-smart.com Copyright Oct 2020 © 2010-2049, All rights reserved iii. SQM Frequency (Hz) – the frequency produced by the sensor. Bright skies produce a frequency up to 500 kHz. Dark skies produce a frequency as low as 4 iv.
-
Page 29: Configuration/Calibration Of Your Sky Master Pro Sensor Thresholds
Providing the Astronomical Community with Premier Products and Services Astro-smart.com Copyright Oct 2020 © 2010-2049, All rights reserved I. Configuration/Calibration of your Sky Master Pro Sensor Thresholds. Now that you’ve successfully connected, it’s time to calibrate and configure your Sky Master Pro’s sensor thresholds. - Page 30 Providing the Astronomical Community with Premier Products and Services Astro-smart.com Copyright Oct 2020 © 2010-2049, All rights reserved d. Click “Save Value” to save this to the C:\Sky_Master_Pro_Data\Offsets.txt file. Click “Upload” to save this to your controller. Note that the Message Box will indicate when the value is saved to the controller.
- Page 31 Providing the Astronomical Community with Premier Products and Services Astro-smart.com Copyright Oct 2020 © 2010-2049, All rights reserved 3. Cloud Presets. Now that your Sky Master Pro knows the correct temperature, you can configure the cloud presets. There are four cloud presets. These presets tell your Sky Master Pro the difference between the ambient temperature and the sky temperature under both clear conditions and cloudy conditions.
- Page 32 Providing the Astronomical Community with Premier Products and Services Astro-smart.com Copyright Oct 2020 © 2010-2049, All rights reserved d. If cloudy night, calibrate your Clouds Setpoint as per below. If it’s what you would consider a really cloudy night meaning you can’t see through the clouds and see stars this is a cloudy night to calibrate against.
- Page 33 Providing the Astronomical Community with Premier Products and Services Astro-smart.com Copyright Oct 2020 © 2010-2049, All rights reserved 4. Rain Voltage Threshold. You configure this value to determine how sensitive the Sky Master Pro controller is to rain. This is set at factory to 2.5 volts which means any voltage below this value indicates a raining condition and will close the contacts of the relay as the default state of the controller is to use the rain sensor to close relay contacts.
- Page 34 Providing the Astronomical Community with Premier Products and Services Astro-smart.com Copyright Oct 2020 © 2010-2049, All rights reserved 5. Notes on Relay Use on GUI as discussed in 4. The following is a summary of the GUI switches on regarding relay control per below.
- Page 35 Providing the Astronomical Community with Premier Products and Services Astro-smart.com Copyright Oct 2020 © 2010-2049, All rights reserved 6. Dew Control using the SMP-R2-RF version of product. The SMP-R2-RF product can control dew heating on rain/snow sensor using the Software GUI as shown below.
-
Page 36: Astro-Smart Ascom Software Interface With (Sequence Generator Pro)
Providing the Astronomical Community with Premier Products and Services Astro-smart.com Copyright Oct 2020 © 2010-2049, All rights reserved J. Astro-Smart ASCOM Software Interface With (Sequence Generator Pro). Page 36... - Page 37 Providing the Astronomical Community with Premier Products and Services Astro-smart.com Copyright Oct 2020 © 2010-2049, All rights reserved Page 37...
- Page 38 1. Load ASCOM setup installer on CD. 2. Select Astro-Smart Observing Conditions Driver under Sequence Generator Pro Environmental interface. 3. Select com port attached to SMP family controller unit and click on Done button which should close Astro-Smart configuration window.
-
Page 39: Other 3 Rd Party Ascom And Boltwood File Software Interfaces( Sky Roof)
Party ASCOM And Boltwood File Software Interfaces( Sky Roof). The Astro-Smart interface allows Boltwood File output which is very useful in control applications based on the environmental data collected from the SMP-R2 Family systems. By setting up a rule base conditions, the user can control telescope mount and dome control interfaces. - Page 40 Providing the Astronomical Community with Premier Products and Services Astro-smart.com Copyright Oct 2020 © 2010-2049, All rights reserved Page 40...
- Page 41 Providing the Astronomical Community with Premier Products and Services Astro-smart.com Copyright Oct 2020 © 2010-2049, All rights reserved Page 41...
-
Page 42: Blue Tooth Interface
33-50 feet. If blue tooth range maximum is required, an upgrade to Class 1 can be acquired from Astro-Smart with a range of 168 feet. 2. Open device manager on your computer and wait or verify that your Bluetooth drivers are installed. - Page 43 Bluetooth capable computer solution. The standard CSR 4.0 module provided is a Class 2 and works with all versions of windows within range of 33-50 feet. If blue tooth range maximum is required, an upgrade to Class 1 can be acquired from Astro-Smart which has a range of 168 feet.
- Page 44 Providing the Astronomical Community with Premier Products and Services Astro-smart.com Copyright Oct 2020 © 2010-2049, All rights reserved box is enabled by checking the box if not already checked. This should start your computers install of the serial port BT drivers to use with your SMP-R2/R system. Now, you need to add the HC06 Bluetooth device in your SMP-R2/R system to your computers serial ports in next step.
-
Page 45: Rf Interface
N. Specifications SMP-PRO-R2, SMP-R2 requires the following: At a minimum of 12 Volts DC at 2 amps a 2.1 mm DC power connector on your AC/DC supply. Center positive voltage, sleeve ground, sees Figure 1. -
Page 46: Smp Family Controllers Front Panel And Connector Diagram
© 2010-2049, All rights reserved Figure 1 DC power plug Note: Astro-Smart recommends you buy our certified tested power supplies for this product. Users can buy and connect their own power supplies to this product, but they do so at their own risk. - Page 47 © 2010-2049, All rights reserved 8 Line OLED Relay Output On/Off OInterface Jack USB Interface Pwr In Single Sensor Fusion Data Port Jack OLED Display Data: Rolling Display With Programmable Window Figure 2 SMP-PRO-R2(OLED) Break-Out Overview Model (2018). Page 47...
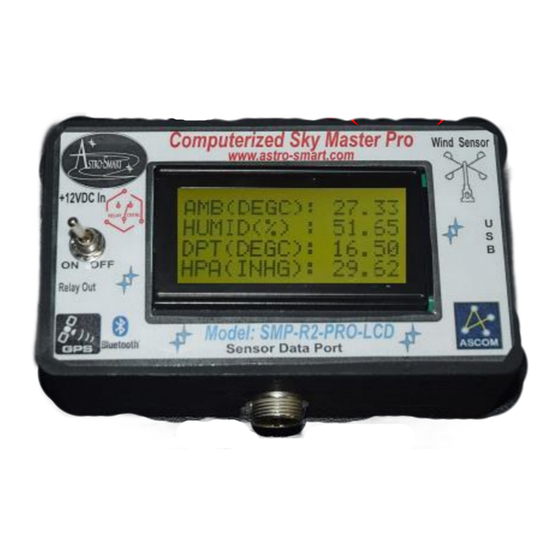
- Page 48 Pwr In On/Off Relay Output Single Sensor Fusion Jack 4 Line LCD Data Port Jack OInterface Example LCD Display Data: Rolling Display Window. 6 Panes Of Various Scrolling Sensor Data. Figure 3 SMP-PRO-R2 (LCD) Break-Out Overview Model (2019). Page 48...
- Page 49 Providing the Astronomical Community with Premier Products and Services Astro-smart.com Copyright Oct 2020 © 2010-2049, All rights reserved On/Off Relay Output Jack USB Interface Pwr In Single Sensor Fusion Data Port Jack Figure 4 SMP-R2 Break-Out Overview Model (2018). Page 49...
- Page 50 Providing the Astronomical Community with Premier Products and Services Astro-smart.com Copyright Oct 2020 © 2010-2049, All rights reserved Figure 5 SMP-R2-RF Break-Out Overview Model (2020). An online video demo of operation can be found on our website at : http://www.astro-smart.com/index.php?p=1_24...
-
Page 51: R2 Full Sensor Enclosure Front Panel And Connector Diagram
R2 Full Sensor Enclosure Front Panel And Connector Diagram The R2 Full Sensor Fusion Enclosure to be used with Computerized Sky Master Pro (Model- SMP-PRO-R2, SMP-R2) Configuration is shown below in Figure 6 below. Figure 6 R2 Full Sensor Fusion Enclosure Break-Out Overview Model (2018). Page 51... - Page 52 Providing the Astronomical Community with Premier Products and Services Astro-smart.com Copyright Oct 2020 © 2010-2049, All rights reserved Figure 7 R2 Full Sensor Fusion Enclosure Model (2019). The version above now has all connections underneath the sensor housing which are protected from the elements.
-
Page 53: Accessories
Copyright Oct 2020 © 2010-2049, All rights reserved Q. Accessories Another convenient accessory that Astro-Smart offers for your SMP- PRO-R2, SMP-R2 is the R2 full sensor fusion enclosure, which houses a 5 sensor cluster for Wind, Rain, SQM, Sky Lux Brightness, Cloud and Barometer Sensors. - Page 54 Premier Products and Services Astro-smart.com Copyright Oct 2020 © 2010-2049, All rights reserved As part of your R2 enclosure sensor package that Astro-Smart offers for your SMP Family Controller is the SQM(Sky Quality Meter) Standard sensor (4SQMS) plus sky brightness in Lux which comes standard.
- Page 55 SMP Family Controller that Astro-Smart offers is the Relay Output Option 1 or 2. Option 1 is a +5V plus LED indicator activated output which is embedded in the SMP-PRO/R to a user supplied relay device. Option 2 as shown above...
- Page 56 8 line OLED or 4 line LCD Display. Come standard with any SMP-R2 PRO purchase. COMMUNICATION Upgrade Options: Another convenient accessory add-on that Astro-Smart offers is the USB-3/2 7 Port Astro-Hub optional add on interface specifically designed for the SMP family controller.
-
Page 57: Astro-Smart's Product Goals
R. Astro-Smart’s Product Goals: Astro-Smart is the innovator of this elegant and convenient sky master sensor and control system solution to your telescope mount or observatory needs. The Computerized Sky Master System Controller Pro(SMP) family controllers are an economical yet superior Automation solution made available to the amateur or professional Astronomer. -
Page 58: Warranty, Policies, Copyright Notice
All products are guaranteed to the original purchaser to be free from defects in material and workmanship for the life of the product from the date of original purchase. Simply put, once you buy a Astro-Smart product we are committed to support you for as long as you own the product including free software and firmware upgrades for the product. - Page 59 © 2010-2049, All rights reserved Copyright Notice All Astro-Smart products are protected by U.S. and International Copyright laws. Unauthorized use, duplication, distribution or reproduction of any intellectual property including concepts, ideas or applications of these products are prohibited and are subject to International and U.S laws governing export and re- -smart.com Copyright...
Need help?
Do you have a question about the SMP-PRO-R2 and is the answer not in the manual?
Questions and answers