Advertisement
Quick Links
INSTALLATION / INSTALACIÓN / INSTALLATION
PREPARATION INSTRUCTIONS / INSTRUCCIONES
DE PREPARACIÓN / INSTRUCTIONS DE
PRÉPARATION :
• Shut off the water supply.
Abastecimiento de agua cerrado.
Couper l'alimentation en eau.
Sustituyendo una instalación existente, quite el
montaje viejo.
Si remplaçant une installation existante, enlevez
le vieux raccord.
• Clean sink mounting surfaces for your
Fregadero limpio en toda superficie para su nueva
instalación.
Nettoyer les surfaces de montage de lavabo pour
votre nouvelle installation.
• An access panel to the plumbing fittings is
required for the installation of the Roman Tub
check valves.
Se requiere un panel de acceso a los accesorios de
plomería para instalar las válvulas de control de la
bañera romana.
Un panneau d'accès menant aux raccords de
plomberie est requis pour l'installation des robinets
d'arrêt de baignoire romaine.
Tools Required / Herramientas Necesarias /
Outils requis :
Phillips screwdriver
2 Adjustable wrenches
2 Llave ajustables
2 Clé à molettes
Tournevis Phillips
move
Electric drill
Destornillador
Taladro eléctrico
cruciforme
Foreuses
électriques
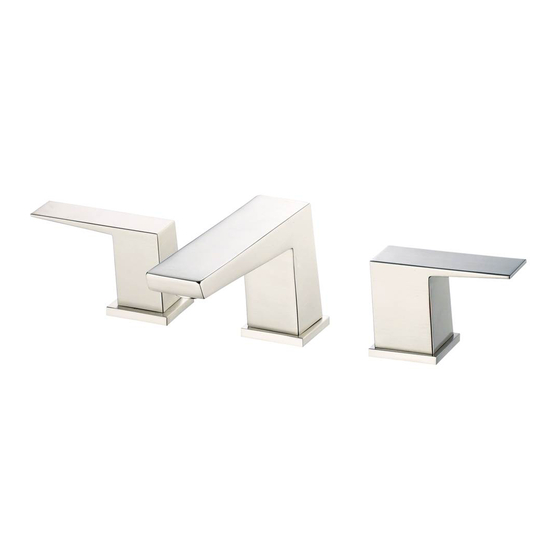
Single Handle Roman Tub Faucet
Grifo para bañera romana con una manija
Robinet pour bain romain à une manette
Shown / Mostrado / Illustré
GERBER
®
Gerber Plumbing Fixtures LLC.
2500 Internationale Parkway, Woodridge, IL 60517, U.S.A.
(Sales Office / Oficina de ventas / Bureau de vente
Toronto: 189 Earl Stewart Drive, Unit #5, Aurora, ON L4G 6V5, Canada
(CS & Tech / SC y Tec. / SC et Tech)
Montreal: 4610 Bois Franc, Montreal, QC H4S 1A7, Canada
www.gerberonline.ca 1-800-487-8372
1
G8-332
Advertisement

Related Manuals for Gerber Mid-Town G8-332

Summary of Contents for Gerber Mid-Town G8-332
- Page 1 Shown / Mostrado / Illustré GERBER ® Gerber Plumbing Fixtures LLC. 2500 Internationale Parkway, Woodridge, IL 60517, U.S.A. (Sales Office / Oficina de ventas / Bureau de vente Toronto: 189 Earl Stewart Drive, Unit #5, Aurora, ON L4G 6V5, Canada (CS &...
- Page 2 1. Shut off the main water supply before installation by turning the valves clockwise. Antes de realizar la instalación, cierre el suministro principal de agua girando las válvulas en sentido horario. Fermez l'alimentation principale en eau avant l'installation en tournant les valves d'alimentation dans le sens horaire. Caliente Chaud Cold...
- Page 3 Note: The air test plug is used not only to protect the spout hub but also to set the installation height above the deck. To make sure that the roman tub trim is installed onto the spout hub properly, complete the follow- ing steps: Nota: El tapón de prueba de presión del aire se usa no sólo para proteger el extremo del vertedor sino tam-...
- Page 4 Install one end of the hose to the spout adaptor and the other end to the shortest outlet of the valve body. To avoid twisting the copper supply hose, tighten the hose by using two wrenches; one to hold the supply hose in place and one to tighten the hose.
- Page 5 Drill a 1/4"(Φ6mm) hole in the sink. The hole should match the dimensions in the illustration shown on the right. The small hole is using the spout locating pin. The pin helps keep the spout from rotating after installation. 7/8” Haga un orificio de 1/4”...
- Page 6 11 . Before installing the handle assembly, install the body case and trim ring onto the valve stem and tighten with a wrench. Antes de instalar el conjunto del grifo, instale la caja de cuerpo y el anillo de la guarnición en el vástago de la válvula y ajuste con la llave.
- Page 7 14. After installing the faucet, remove the aerator and open the hot and cold water supplies. Check for any leaks. Turn on the faucet handle for one minute to flush debris from the faucet. Close the handle and re-assemble the aerator Una vez instalado el grifo, retire el aireador y abra el abastecimiento de agua caliente y fría.