
Related Manuals for anko AVD7


Summary of Contents for anko AVD7
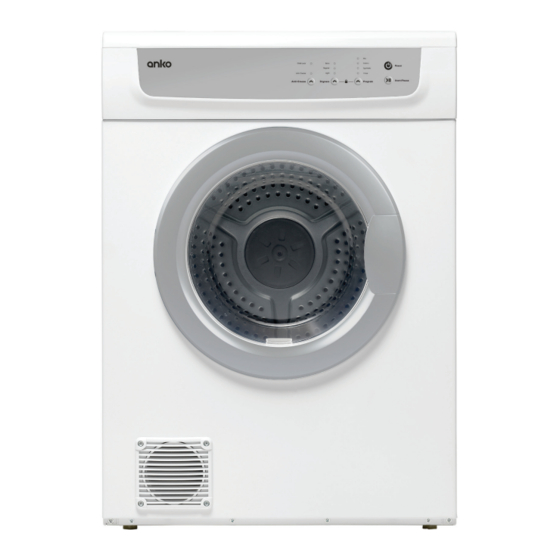
- Page 1 Vented Clothes Dryer 7kg Capacity Instruction Manual To ensure proper operation of this device, please Model no: AVD7 read this instruction manual carefully before using Rev: 05 the device and keep it for future reference.
- Page 2 Purchase Details For future reference, please record the following information which can be found on the rating plate and the date of purchase which can be found on your sales invoice. STORE DETAILS STORE NAME ADDRESS TELEPHONE PURCHASE DATE PRODUCT DETAILS MODEL NO.
-
Page 3: Table Of Contents
Contents 2 Purchase Details 4 Safety Instructions 8 Your Vented Dryer 9 Control Panel 10 Before First Use 10 Technical Specifications 11 Accessory Kit Components 12 Installation Instructions 15 Operating Your Vented Dryer 19 Cleaning and Maintenance 20 Troubleshooting 22 Warranty... -
Page 4: Safety Instructions
Safety Instructions GENERAL SAFETY INSTRUCTIONS Dryer Safety WARNING! Failure to follow these safety instructions could damage the clothes dryer or your clothes. You may then not be covered by warranty for this damage. Only plug this appliance directly into an AC power supply which is properly earthed and had the correct voltage. - Page 5 Safety Instructions (Continued) Fire Hazards • Some fabrics are not suitable for tumble drying. The following MUST NOT be placed in your dryer due to the risk of a fire or an explosion: • Item(s) that have been spotted or soaked with vegetable oil, cooking oil, suntan oil, linseed oil, salad oil, lubrication oil or grease.
- Page 6 Safety Instructions (Continued) To remove the lint filter, open the dryer door and simply lift the plastic filter out from its housing. You can click the lint filter open to allow easy access to remove the lint. Ensure that the plastic filter is clicked closed again before replacing into your clothes dryer.
- Page 7 Safety Instructions (Continued) Some guidelines for various fabric types: • Permanent press and synthetics - take out as soon as the dryer stops to reduce wrinkles. • Woollen articles - not recommended. Pull them to their original shape, then dry them flat. Vented dryers can shrink woollen articles.
-
Page 8: Your Vented Dryer
Your Vented Dryer Figure 3 - A diagram showing the main components of your vented dryer. 1. Top-board 2. Control Panel 3. Door 4. Front Panel 5. Side panel 6. Filter 7. Flex Tube (only to rear vent) 8. Power Plug 9. -
Page 9: Control Panel
Control Panel Figure 4- The control panel for your vented dryer 1. Power button 2. Start or Pause drying program 3. Drying program selector: 1 Hour, Synthetic, Cotton, Mixed Items 4. Child Lock (Dryness & Program button combination) 5. Dryness level selector: Light, Regular, Extra 6. -
Page 10: Before First Use
Before First Use Step 1. Power source and grounding The dryer employs alternative current with the rated voltage and frequency. When the voltage fluctuates between 6% of rated voltage, the dryer can work normally. Your clothes dryer should be on a dedicated power socket for both convenience and safety. Refer to safety notes in section 1.1 of this manual. -
Page 11: Accessory Kit Components
Accessory Kit Components ACCESSORY KIT CONTENTS PART NAME IMAGE/DIAGRAM Child Lock Extra Cotton Power Regular Synthetic Anti-Crease Light 1 Hour Start/Pause Anti- Crease Dryness Program Program Dryness Anti- Crease Start/Pause 1 Hour Light Anti-Crease Synthetic Regular Power Extra Child Lock Cotton PANTON E B L ACK 90% PANTON E COOL GR AY 4 C... -
Page 12: Installation Instructions
Installation Instructions POWER SOURCE AND GROUNDING It’s recommended to use the dryer on its own dedicated power outlet for both convenience and safety. The power outlet must be grounded. Important! If the power cord is damaged, it must be replaced by your local distributor or one of its authorised service representatives. - Page 13 When hang upside down, Fix the holde at the position of th Installation Instructions (Continued) When hang straight two screws. Fix the holder at the position of the two screws. When hang upside Step 3: Paste the installation positioning paper to the solid wall. down, Fix the holder at the position of the two screws.
- Page 14 Installation Instructions (Continued) Step 6: Fix the holder to the dryer machine. Place the unpackaged dryer machine on the floor. Unscrew the two screws at the back of the machine with a cross screwdriver. Take out the holder in the kit. Press the screws into the holes on the holder and then fasten them into the original screw holes.
- Page 15 Operation Instructions QUICK START 1. Ensure the dryer is switched on at the power outlet and add your wet clothes into the tumble drum. 2. Press the “Power” button to switch the dryer on. 3. Press the “Program” button to select your desired drying program. The LED light will indicate which program you select.
- Page 16 Operation Instructions (Continued) DETAILED OPERATION Step 1: Preparation before drying • Clothes should be washed before use within the dryer. • Always ensure the same types of clothes are dried together. • Try to sort your clothes to be dried into load that take a similar time to dry (for example heavier items separate from light items).
- Page 17 Operation Instructions (Continued) DETAILED OPERATION (CONTINUED) Program Functions Note: Maximum capacity for loads is based on the clothing when dry. Tip! At the completion of a drying program, the clothes dryer will circulate cold air. This ensures that your clothing is left at a temperature and that your clothes aren’t damaged. Note: the energy rating was calculated using the Cotton program and Extra dryness level.
- Page 18 Operation Instructions (Continued) GENERAL HINTS • Never tumble dry the following: Delicate items such as net curtains, woollen, silk, fabric with metal trim, nylon tights, bulky materials such as blankets, eiderdown, sleeping bags, feather quilts and any item containing rubber foam or materials similar to foam rubber. •...
-
Page 19: Cleaning And Maintenance
Cleaning and Maintenance By ensuring proper cleaning and maintenance of your Vented Dryer, you can ensure that it will have a long and fault free operation. WARNING! To avoid an electric shock, always unplug your dryer before cleaning. CLEANING THE FILTER •... -
Page 20: Troubleshooting
Troubleshooting BASIC TROUBLESHOOTING Check the points listed here before you call for help, and make sure that you have followed the Important safety Instructions within this manual. PROBLEM POSSIBLE CAUSES My dryer will not start - Plug is not firmly in its power socket, or the power outlet is not switched on. - Page 21 Troubleshooting (Continued) POSSIBLE FAILURES Certain problems are due to lack of simple maintenance or oversights, which can be solved easily without calling out a service technician. Before contacting your local Customer Care team, please check possible cause of malfunction and solution listed below. Once the problem has been eliminated, press the Start/Pause button to restart the program.
-
Page 22: Warranty
Warranty 24 Month Warranty Thank you for your purchase from Kmart. Kmart Australia Ltd warrants your new product to be free from defects in materials and workmanship for the period stated above, from the date of purchase, provided that the product is used in accordance with accompanying recommendations or instructions where provided. - Page 23 This page is intentionally left blank...
- Page 24 Model no: AVD7...
Need help?
Do you have a question about the AVD7 and is the answer not in the manual?
Questions and answers