Table of Contents
Advertisement
Quick Links
Advertisement
Table of Contents

Related Manuals for MCR Technologies Weigh Shark

Summary of Contents for MCR Technologies Weigh Shark
- Page 1 Weigh Shark kW Weig Weigh Shark Shark kW Inst Installation Man ion Manual Technologies Group, Inc. Technologies Grou nologies Group, Inc. , Inc. Sterling, IL. 61081 Ster g, IL. 61081 www.weighshark.shark.com sales@weighshark.com www.we sales@weig July. 8 , 2020 Marc 1, 2017...
- Page 3 Thank you for your purchase. Your Thank you for your purchase. Your ® Belt Scale has been carefully designed to provide you with years of carefully designed to provide you with years of carefully designed to provide you with years of operation and accuracy.
- Page 4 Much of the world estimates the main resistances with a single overall friction factor, based on history, though each of the main resistances is affected differently by the specific material, design and construction details. The Conveyor Equipment Manufacturers Association (CEMA) has long recognized the individual impact of various parts and configurations and include a set of power prediction equations addressing each in its “Belt Conveyors for Bulk Materials,”...
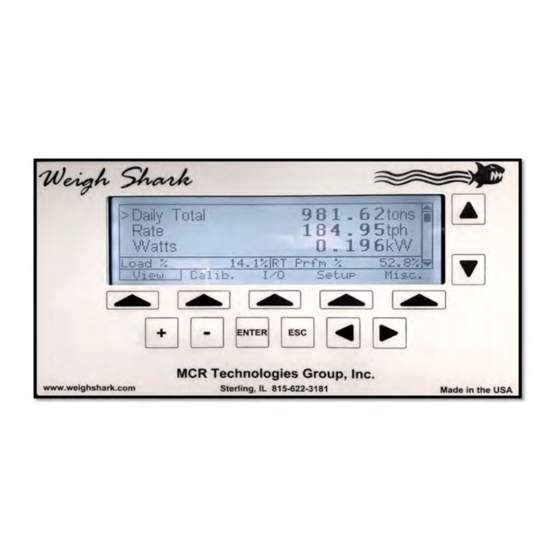
- Page 5 Belt Scale Installation The Weigh Shark kW belt scale uses the power draw of the conveyor drive motor to calculate the amount of material that is flowing over the conveyor. The integrator works in conjunction with a power meter to measure the power usage of the conveyor. This document covers the basic setup of the kW belt scale.
- Page 6 Settings VERY IMPORTANT DON’T SKIP THIS STEP 1. Setup – a. Go to menu Setup -> Calibration Setup and press ENTER. b. Use the UP arrow key until the CT Amps option is shown. This should match the amp value found on the current transformers for your applications.
- Page 7 SETTINGS: Go to SETUP > Scroll to Calibration Setup then Press ENTER. You must confirm or enter in the correct voltage of your system. If your Nominal Voltage value is correct you can scroll down to next line. If not, use down arrow key to scroll to move the >...
- Page 8 IF your Phase Per Output is not correct in photo above then with the > pointing at the line use the + or – button to change to be correct. IF your CT value is not correct then Arrow Down to CT Amp line. Press ENTER. Select EDIT.
- Page 9 Example 5. Press the Arrow under START when your Empty Belt passes a reference point start to measure and weigh your belt. The display will show you information during this step. Watch your belt make one (1) revolution and press the arrow under END after completion of this one revolution. 6.
- Page 10 PREVIOUS FEATURE Once you have established a Zero Number you have also established a belt length for your conveyor. By using the PRV (previous) feature on the screen, it will allow you to start a zero test without having to wait for your splice or mark on the belt.
- Page 11 IMPORTANT Calibration Options With the kW electric scale, you have two (2) options for the SPAN calibration process. 1. MATERIAL TEST: This is the preferred method since you are either running a known amount of material over the scale or you are catching material and weighing it over a legal for trade scale.
- Page 12 Span Calibration The Span Calibration is used to calibrate STEP 2: – the integrator to accumulate the correct weight based on a known amount of material passing over the conveyor. This step will require a known amount of weight to either be run over the conveyor or caught into a truck or loader that can be weighed.
- Page 14 Real Time Performance (RT Prfm%) Real Time Performance % is also shown on the default (View) screen. This shows you your performance RATE you are running based on the Standard Rate (your goal). The factory default setting is 350 TPH. You can change your Standard Rate to allow you to see what you are doing in relationship to your goal.
- Page 15 TOTALS There are four (4) independent totals with their own Production screen. They can be viewed, cleared and * printed separately. * (With optional ticket printer) Daily Total: This total is displayed on the default screen. It shows your accumulating total If you wish to clear off this total, press ENTER key while the cursor is pointing to the "Daily Total".
- Page 16 Analog Outputs (mA) You may use the standard analog output (4-20 mA) for monitoring your production to a chart recorder, PLC or any device that accepts 4-20 mA. Press arrow located under I/O to access these setup screens. Press ENTER while the cursor (>) is next to Analog Output to go to the setup screen.
- Page 17 When you have selected your desired functions; press the arrow under APPLY or EXIT to leave without saving the changes. To Isolate Current Loop Output Remove Jumpers J1 & J2 Current Loop Examples Output current Rate (TPH) Desired output: 500tph = 20mA 10tph = 4mA Set the following: Function: Rate...
- Page 18 Digital Inputs Press ENTER under I/O to access the Digital Inputs screen. You have 4 Inputs labeled Input 1, Input 2, Input 3 and Input 4. 1. Press the ▼ to place the cursor (>) next to Input 1. 2. Press ENTER to open the screen for entering your information. 3.
- Page 19 Digital Outputs You have 4 Digital Outputs labeled Output 1 through Output 4. They are located on the same screen as the Inputs. You will use the ▼to move your cursor to the Output you wish. 1. Press ENTER to go to the setup screen. 2.
- Page 20 TICKET PRINTER A Ticket Printer may be purchased and used to record Production Data. The ticket printer comes mounted inside a NEMA 4x fiberglass enclosure with clear window and lockable latch. The ticket printer can be used to print Production Data for any of the four (4) independent totalizers of the scale.
- Page 21 CUSTOMIZE TICKET 1. To add/edit the Scale Name and User Fields……. 2. Select SETUP Menu. 3. Press ▲ or ▼ keys to select Scale Name or Use Fields. 4. Press ENTER to edit. Press EDIT to display the cursor. 5. Use + - keys to change the character in the active field. 6.
- Page 22 • Connect 110/220 VAC, 12 VDC or 24 VDC to the sign. When marquee is powered up it should display its default message. • Connect sign to RS 485 serial plug in Weigh Shark scale. Refer to Wiring Diagram included.
- Page 23 Scale Network Setup IP Address The default IP address for all scales is 192.168.000.100. This should be changed to a unique value. If this will be on an existing network then refer to the network administrator for the proper ID address for this scale.
- Page 24 • Use the ◄ o ► keys to move the Cursor Left and Right. • Use the +/- keys to change each character. • When the value correct name is set, press the Key under Apply. The will save the value and return back to the setup menu.
- Page 25 Weigh Shark ® Modbus Serial and Ethernet Interface Version 1.2.0 8/28/06 by Steven Keller...
-
Page 26: Table Of Contents
Input Registers ......................... 4-1 Output Registers ........................4-1 Input and Holding Registers ..................... 4-2 Special Functions..........................5-1 Performing an Zero Calibration ....................5-1 Current Loop Output ......................... 5-1 Clearing Totals ......................... 5-2 Weigh Shark Modbus Interface 1.2.0 Table of Contents... -
Page 27: Technical Description
The Weigh Shark Modbus Slave interface allows a PLC, Operator Interface, PC or other Modbus Master device to access scale data over a RS-485 or Ethernet network. The Weigh Shark scale provides the Modbus Slave interface thru the RS-485 port (Port 2) or the 10/100 Base-T Ethernet network. -
Page 28: Port Setup
The RS-485 hardware port is a 3 pin terminal located at the top left side of the main circuit board. If the network cable is going to be run long distances it is recommended that it be isolated; contact factory for more details. Figure 1 Port Setup Weigh Shark Modbus Interface 1.2.0... -
Page 29: Rs-485 Port Termination Resistor
Locate the two jumpers (JP1) below and to the right of the 3 pin RS-485 terminal. Figure 2 - RS-485 Termination Jumpers ON • Remove the 2 jumpers and place them on only 1 pin each for storage. Figure 3 - RS-485 Termination Jumpers OFF Port Setup Weigh Shark Modbus Interface 1.2.0... -
Page 30: Ethernet Configuration
192.168.000.100. • Pressing EXIT during the edit process will exit the screen without making changes. Repeat the process for setting the network mask, gateway and name server. Port Setup Weigh Shark Modbus Interface 1.2.0... -
Page 31: Ethernet Hardware
3.2.2 Ethernet Hardware The Weigh Shark Remote Display accepts standard RJ-12 10/100 Base-T Ethernet connection. The network port is located to the right of the 24Vdc power terminals. Figure 5 shows the empty port and the port with a network cable plugged in. -
Page 32: Modbus Registers
Print Total 3 Ticket 93:11 Print Total 4 Ticket 93:12 Truck Load Out Clear 93:13 Truck Load Out Start 93:14 Truck Load Out Stop 93:15 Clear Truck Total 94:0 Print Truck Ticket 94:1 Modbus Registers Weigh Shark Modbus Interface 1.2.0... -
Page 33: Input And Holding Registers
Total 2 Accumulator in Tenth of Tons long Total 3 Accumulator in Tenth of Tons long Total 4 Accumulator in whole Tons long Run Time 1 in Seconds long Run Time 2 in Seconds Modbus Registers Weigh Shark Modbus Interface 1.2.0... - Page 34 Unfiltered Load Cell AD value long Filtered Load Cell AD Value long Unused long Scale weight in Hundredth of Lbs. long Set point Value for Input 1 long Set point Value for Input 2 Modbus Registers Weigh Shark Modbus Interface 1.2.0...
- Page 35 Truck Cutoff Weight in Hundredth of Tons unsigned long Truck Minimum Load in Hundredth of Tons unsigned long Truck Maximum Load in Hundredth of Tons unsigned long Current Truck Fill Time Modbus Registers Weigh Shark Modbus Interface 1.2.0...
- Page 36 Average Rate in hundredth of tons based on Run Time 1. unsigned int Cutoff Value unsigned Int Standard Rate in tph char Total 1 Name (16 characters) char Total 2 Name (16 characters) char Total 3 Name (16 characters) Modbus Registers Weigh Shark Modbus Interface 1.2.0...
- Page 37 ® Weigh Shark Modbus Interface v1.2.0 char Total 4 Name (16 characters) char Scale Name (26 Characters) char Truck ID (20 characters) Modbus Registers Weigh Shark Modbus Interface 1.2.0...
-
Page 38: 5.0 Special Functions
Modbus master. The current loop is a 16bit DAC. The value written to register 95 will directly output to the DAC. The Analog Output settings, Action, Averaging and Range will still affect the output. Special Functions Weigh Shark Modbus Interface 1.2.0... -
Page 39: Clearing Totals
Clear All Totals Clear Total 1 Clear Total 2 Clear Total 3 Clear Total 4 Clear Truck Totals c. After total is clear Register will read -1. Totals can be cleared at any time. Special Functions Weigh Shark Modbus Interface 1.2.0... - Page 40 REMOTE DISPLAY OPTION Power Over Ethernet Radio Wiring - RD 3 Power Over Ethernet Radio Wiring - INTEGRATOR...
- Page 41 Weigh Shark Warranty MCR TECHNOLOGIES GROUP, INC. manufactures the Weigh Shark Conveyor belt Scale and the Weigh Shark SI Dry Solids Impact Flow Meter. MCR TECHNOLOGIES GROUP, INC. offers a 2 Year Limited Warranty on parts against defective workmanship and failure. MCR TECHNOLOGIES GROUP, INC.
- Page 43 NOTES Scale Model: ____________ Control Box #:_________________ Installation Date: _________________________ Scale Designation: Conveyor Name: ____________________ Product: ____________________________ Initial Settings: (after calibration is complete) Belt Speed__________ ADC Gain:______________ Zero Reading________ Span Reading___________ Other Notes:...
- Page 44 Technologies Group, Inc. Home of the Weigh Shark, not just another scale company! Belt Scales & Integrator: Standard Troughing, Channel Inserts, European “Wing” B & C and Introducing our New kW Belt Scale Remote Displays: Networking Home of the Weigh Shark, not...
- Page 45 Technologies Group, Inc. Home of the Weigh Shark, not just another scale company! Integrator Belt Scales 4 Digital Inputs Easy to install and calibrate 4 Digital Outputs Fits any size belt 4-20mA (16bit) Current Loop ...
- Page 46 Technologies Group, Inc. Home of the Weigh Shark, not just another scale company! Belt Scales & Integrator: Standard Troughing, Channel Inserts, European “Wing” B & C and Introducing our New kW (Electric) Belt Scale Remote Displays: RD3 Networking up AggLink: Networking through the...
- Page 47 Technologies Group, Inc. Home of the Weigh Shark, not just another scale company! Solid Impact Flow Meter - EAB Metal Detectors (Analog) For Dry, Flowable Products Protect equipment and prevent metal objects from contaminating products. Magnets - Permanent and Electromagnet with manual and self clean Kiepe—...
- Page 48 Technologies Group, Inc. Home of the Weigh Shark, not just another scale company! kW Application Form (Please answer all questions) 1) Generator of Commercial power: 2) Single Phase or Three Phase: 3) Delta or Wye: 4) VFD: Yes or No...
Need help?
Do you have a question about the Weigh Shark and is the answer not in the manual?
Questions and answers