Table of Contents
Advertisement
Quick Links
Advertisement
Table of Contents

Summary of Contents for Serstech ARX
- Page 1 ARX USER MANUAL SERSTECH AB...
-
Page 2: Table Of Contents
Table of Contents Introduction to the Arx instrument ..................4 Instrument safety ......................4 Liability ..........................4 Handling ..........................5 Intellectual Property Rights ....................5 Equipment Modifications ....................5 Trademark Acknowledgments ................... 5 Support ..........................6 Contact Information ......................6 Invisible laser Safety Considerations .................. - Page 3 About ..........................2 USB Mass storage ......................3 Time and Date ........................3 Language .......................... 4 9.5 Factory Reset ......................... 5 9.6 System info ..........................5 Log out ..........................6 ChemDash ......................... 7...
-
Page 4: Introduction To The Arx Instrument
3B invisible laser. This manual describes the basic functions of the instrument. Functions may be different depending on the hardware and/ or software version in the device. The manual covers Arx devices with embedded software functionality version 5.5.0 or later. -
Page 5: Handling
For a safe handling Serstech AB recommends Users to do as following: § Store the product in a dry and ventilated environment. § Do not attempt to repair the product by yourself, contact SERSTECH or your SER- STECH reseller for service matters. -
Page 6: Support
United States, other countries or both. Support In case the User should requires technical assistance, should contact its SERSTECH reseller. If the User questions cannot be answered immediately, the reseller will forward all queries through the appropriate channels to ensure a rapid response. - Page 7 handheld instruments. There are no service panels, viewing op- tics or scanning elements; requirements for these objects are thus not applicable. There shall be a mechanical attenua- tor/beam stop available to make it possible to block the beam from the nozzle temporarily. The stop is released with the instru- ment enclosed Calibration Unit, which also makes double duty as a dust cap.
-
Page 8: Casing
Casing The Arx instrument with the Accessories is delivered in a crush proof, dust proof and water resistant Peli case. The Peli case, outer view. -
Page 9: Accessories
The Peli case, interior view. Accessories There are different accessories for different sample applications: 1. Vial holder 2. Vial 3. Vial holder rise 4. Strap attachment 5. Small-amount adapter 6. Calibration cap Vial holder Vials can readily be analyzed without any adapter. However, there is always a risk that stray light maty enter the spectrometer and disturb the measurement. - Page 10 holder both a beam block that ascertain laser safety and effective protection from stray light is obtained The holder accepts 4 ml standard vials with 14.8 mm outer To mount the vial holder, simply snap it in position on the probe tip. Place the vial into the vial holder.
- Page 11 When the vial is in position start the analysis. WARNING: Scanning a thermally sensi- tive material may cause burning of the target. If the sample is contained in a tightly sealed vessel (f.eg. a capped vial), pressure may build up during the scan, causing subsequent explosion of the vial.
- Page 12 The insert is placed at the bottom of the vial holder to allow the analyzing laser beam to be focused onto the lower region of the vial. First place the vial insert in the bottom of the vial holder Then place the vial on top of the vial insert.
- Page 13 When the vial is in position a part of the vial will be raised above the vial holder and it is not possible to screw on the cap of the vial holder. Start the analysis. NOTE: It is very important to reduce stray light from entering the instrument as much as possible, f.eg.
-
Page 14: Small Sample Adapter
Small sample adapter Any type of solid sample can be analyzed using the Arx instrument without any adapter. However, it may be hard to focus the analyzing beam onto very small samples. The small- amount adaptor has a conical shape and a small aperture. This makes it easier to point the analysing beam towards small samples. -
Page 15: Calibration Cap
USB Cable The supplied USB cable is the connection cable between the Arx and a PC, used to access ChemDash 2.0. The USB cable is also used to connect the optional USB charger to the instrument. - Page 16 The barcode reader is available when running the Advanced scan. To activate Barcode. Scroll down to Barcode option. Press OK to activate options. Use up and down arrows to select between On and Off. Press OK to confirm choice.
- Page 17 Scroll down to Start scan and press Press OK to highlight SCAN BAR- CODE option.
- Page 18 Point the barcode reader, on the in- strument´s backside, towards the barcode of the sample. Aim the barcode reader to- wards the barcode of the sam- ple. Try to get the crosshair onto the barcode of the sam- ple.
-
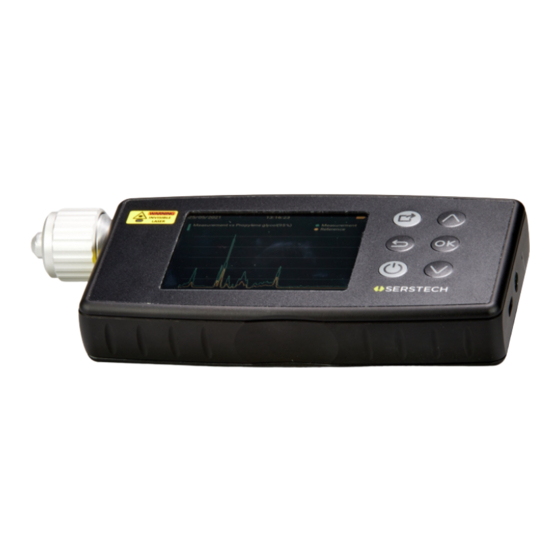
Page 19: Arx Instrument
If barcode needs to be re- scanned use arrow to select Rescan. Note! Pressing OK button when Continue is selected will start the laser without further warning. 4 Arx instrument 4.1 Instrument labels... - Page 20 On the front side of the instrument there is a clearly visible laser warn- ing label with a red indicator LED that is lit when the invisible laser is operating. On the backside of the instrument, it can be found: §...
-
Page 21: Instrument Keypad
§ Log out of the device 6. Down-arrow Use the up and down arrow buttons to move between the different items in the menus. 5 Arx log in In order to log in the Arx instrument, please follow all steps described below:... - Page 22 • button • Select your identity from the list in the window: If the instrument is started for the first time, there are two predefined users that may be used to access the instrument: Default, Admin Default, User • Scroll with the arrow keys be- tween the alternatives.
-
Page 23: Main Menu
6 Main menu Features of the Main menu are Scan, Scan History, Settings and Log out. You can quick access the Main menu by using the Quick Menu button and select Home. Select Scan if you want to: § Make a Quick scan of a sub- stance (uses high laser power, take caution with dark and/or ex- plosive substances) -
Page 24: Scan
Select Log out if you want to log of from the device. 7 Scan Quick scan This method is used for screening a list of restricted chemicals for the presence of a regulated substance(s) in the sample, f.eg. narcotics and explosives. Narcotics and explosives are two screen categories of the instrument. -
Page 27: Scan Analysis Result
7.1.1 Scan analysis result These are the possible outcomes of the Screen scan in the Screen category used for measurements: Table 1 narcotics precursor according to UN. Acetic anhydride... - Page 28 Inconclusive Result: There is no spec- trum in the libraries that matches the sample spectrum. You may want to re-test the sample while paying close attention to that the sample is correctly positioned at the in- struments focal point and the instrument is not exposed to strong ambient light.
- Page 29 The user has the possibility to add a label to the measured substance. The Label name can be selected by moving up/down with the help of the ar- rows and selecting the desired letter by clicking OK button. If the result is considered to be not sat- isfying, the user has the possibility to per- form an advanced scan by selecting the Go to advanced scan option.
- Page 30 There is also the possibility to view the Substance details by selecting this op- tion. The identified substance will be displayed. Some of the properties, such as match- ing percentage (94%), CAS number and some GHS details will be displayed. After seeing all desired details, the user must press Back button to return to the measurement screen.
-
Page 31: Advanced Scan
There is also the option of Adding to a local library the newly measured sub- stance. After selecting this, the user must give a name to the library using the key- board on the screen, moving up/down with the arrows. If the result seems not clear enough, the user has the possibility to Restart the Scan. - Page 32 Select Scan from the Main menu. Select Advanced scan. Adjust the Exposure as needed by clicking on it with OK button and then se- lect the desired number of seconds by going up/down with the arrows on the keyboard. Confirm the choice by clicking the OK button again.
- Page 33 Select Autofocus by clicking the OK button then choose between ON/OFF and confirm the choice by click- ing on OK again. Select Laser power by clicking the OK button and then choose between the op- tions: • High • Medium •...
- Page 34 Adjust the Delay start as needed by clicking on it with OK button and then select the desired number of seconds by going up/down with the arrows on the keyboard. Confirm the choice by clicking the OK button again. Select Barcode scan by clicking the OK button and then choose between ON/OFF and confirm the choice by clicking on OK again.
- Page 35 There is another warning saying that the barcode should be put in position. After the setup is made, the user must confirm the start of the action by clicking OK button when Scan Barcode option is selected. The result of this scanning will be a string of numbers.
- Page 36 Choose which library to be used as ref- erence for the measurements by scroll- ing with the arrows up/down and press- ing OK button in order to select the spe- cific library. After finishing, select Done. After finishing the configuration for the Advanced scan, the user must confirm the Start Scan action by pressing the OK button.
-
Page 37: Advanced Scan Analysis Result
7.2.1 Advanced scan analysis result These are the possible outcomes of the Screen scan in the Screen category used for measurements: Clear Ketamine HCl, locally regulated drug in many countries. Not regulated ac- cording to UN... - Page 38 Hazardous substance, not regulated ac- cording to narcotic conventions.
-
Page 39: Verify
Before the measurement you will choose a reference substance from the spectra li- braries. The Arx instrument will analyze the sample and compare it with the chosen refer- ence. The result is binary, either Pass (OK) if the sample is similar to the reference spec- trum or Fail (not OK) if the sample is different. - Page 40 Select one or several libraries you will use for the analysis. These can be from the recent substances you have worked with or from the pre-existing libraries. Select the substance you want to verify by writing its name with the help of the keyboard on the right of the screen (you scroll up and down and if you want to se- lect that specific letter, you click OK)
- Page 41 Once the desired substance is selected, the user must click on the lower button “Verify [substance name]”. Follow the different steps in the sample analysis: There is a warning regarding the laser activity. The lower progress bar shows the pro- gress of the current part of the scan pro- cess, beginning with the setting the laser temperature.
-
Page 42: Verify Analysis Result
Verify analysis result 7.3.1 There are two possible outcomes from the Verify scan, either Pass (OK) if the sample is like the reference spectrum or Fail (not OK) if the sample is different. Pass screen is displayed if the analyzed substance spectrum has sufficient corre- lation with the reference spectrum, f.eg. -
Page 43: Calibration Check
7.4 Calibration check To ensure the performance of the instrument it should be checked its calibration regu- larly, f.eg. daily check. To pass the calibration stage, the measured spectrum must corre- spond to 90% the reference spectrum of calibration substance Polystyrene of the Calibration cap. - Page 44 The calibration looks like any other scanning, the progress bar showing the advancement of the action. The result of the calibration control is shown in a pop-up message and can be as following: § Calibration check passed No changes are inferred. §...
-
Page 45: Scan History
ARX User Manual 8 Scan history The Scan history function allows you to examine the history of the measurements made with the instrument. Select Scan history from the Main menu. Scroll among the measurements you want to review. Choose the specific measurement you want to review. - Page 46 ARX User Manual The details visible in a measurement are those from a scan result.
-
Page 47: Settings
ARX User Manual Settings 9.1 About In the About screen the device settings for firmware and hardware are displayed. Select Settings in the Main menu. Select About. The device settings for firmware and hardware are displayed. Scroll using to view the information... -
Page 48: Usb Mass Storage
ARX User Manual 9.2 USB Mass storage Select Settings in the Main menu. Select USB Mass Storage and an icon will be displayed, showing that the device is connected to ChemDash via USB. 9.3 Time and Date In the Time and date screen the instrument time and date can be set. -
Page 49: Language
ARX User Manual Select Time and Date. The time and date are displayed. NOTE: Upon connection ChemDash, the Time and Date set- tings will be synced according to the settings in ChemDash. 9.4 Language The Language tab will show the user the language that the device is set on. -
Page 50: Factory Reset
ARX User Manual 9.5 Factory Reset The Factory Reset option is used to bring the device to its initial state. There will be a warning announcing that all the data saved / stored on the instrument will be lost. If the user agrees to that, the button Reset needs to be clicked. -
Page 51: Log Out
ARX User Manual The information available in this screen is: • Battery charge percentage • Laser temperature • Laser TEC?? • Detector temperature • Storage used Log out The Log out tab is logging the user out of the device. If the user clicks on it when selected, he/she will be taken back to the first Log in screen. -
Page 52: Chemdash
ChemDash ChemDash is a software developed by SERSTECH. The ChemDash system will inte- grate with the Arx spectrometers towards a powerful solution for Chemical Intelligence. ChemDash 2.0 is the perfect tool for managing intelligence, evidence and substance librar- ies. The User can gather and share information about substances and update one or many instruments either on PC or in the cloud. - Page 53 Serstech AB has created a unique patent pending product for identification of her- oin. The SERS kit is an active solution that, when used together with the Arx device, has proven to have excellent qualities when identifying heroin. The solution provides spot...
- Page 54 Demonstration To use the SERS kit please follow all steps in sequence, as described below: Turn on the Arx device and use your credentials to Log in. Please use the 90° angled adaptor as shown on the pic- ture.
- Page 55 ARX User Manual Remove the swab stick from the sample preparation bot- tle containing the solvent Meth- anol and dip it into the bag con- taining the powder. *Disclaimer: We would like to inform you that we have made a replacement on the sample prep- aration bottle.
- Page 56 ARX User Manual Now, from the sample prepara- tion bottle containing the solu- tion, break off the seal on top of the sample preparation bot- tle and place at least one drop in center the washer. Disclaimer: We would like to inform you that we have made a replacement on the sample prep- aration bottle.
- Page 57 ARX User Manual Use the blotting paper to ab- sorb any excess liquid from the washer. Note: the blotting per gentle and do not come in contact with the SERS-surface as there is risk of removing the solution from it.
- Page 58 ARX User Manual Now, place the washer on the center of the Active sam- ple holder. Note: Make sure that the washer is stable and placed exactly on the center of the Ac- tive sample holder as shown on pictures.
- Page 59 ARX User Manual Place the top of the Active sample holder onto the mounted bottom part that is at- tached to the Arx hand-held Raman spectrometer.
- Page 60 ARX User Manual Select Scan and then Identify. Select the Narcotics Library. Select Proceed. Click the power button on the top of the Her- oin ID device. Be sure that the SERS kit de- vice rotates. Start the analysis on Arx.
- Page 61 Let it run till the analysis ends. Then click the power button to turn the top of the Heroin ID device. The Serstech 100 Indicator will display the results. If you get Inconclusive as a result, please go back to the washer and add more than 1 drop of the prepared sample into the surface.
- Page 62 ARX User Manual Serstech Arx User Manual © 2021 Serstech AB This manual is issued by: Serstech AB Contact Information: Åldermansgatan 13 SE-227 64 Lund, SWEDEN info@serstech.com...
Need help?
Do you have a question about the ARX and is the answer not in the manual?
Questions and answers