Table of Contents
Advertisement
Available languages
Available languages
Quick Links
Instructions for Installation of Rechargeable Light Bars
Models: BL-BAR12RC / BL-CLN5RC / BL-BAR4RC
FEATURES
Slide magnets on for easy installation
Dimmable long life LED technology
3000/4000/5000K switch
Auto/Manual ON touch switch
IMPORTANT SAFETY INSTRUCTIONS
For use with 5VDC USB charger only
CAUTION: This product comes with the battery installed internally. DO NOT install or remove the battery
from the product. DO NOT dispose of batteries in trash, consult your local waste authorities for your
disposal/recycling options.
SECTION 1 –PREPARATION FOR INSTALLATION
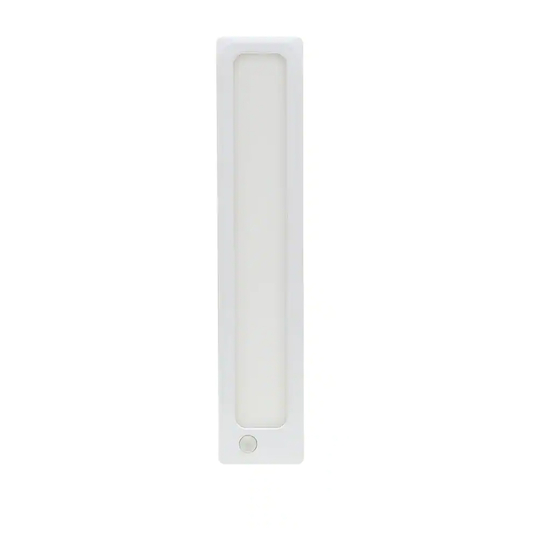
Become familiar with the parts of the light fixture, see diagram1.
Diagram 1.
G
A. Micro USB Micro charging port
B. Charge Indicator: Red when charging, Blue when fully charged
C. Slide Switch: 3000K / 4000K / 5000K / OFF used to set CCT or turn OFF
D. PIR senses motion when AUTO mode is selected
E. Touch Switch: change from Manual / AUTO
F. Slide Magnets
G. Key hole
Before first use, make sure to fully charge with Micro
USB cord (included) and wall charger (not included).
The charge indicator light will turn blue when fully
charged. See diagram 2
INCLUDES
BL-BAR12RC/ BL-CLNG5RC/ BL-BAR4RC Series
Rechargeable Light Fixture
4' USB charging Cord, (2)Metal plates with 3M
tape, (2)screws
E
D
C
F
A
B
B
E
D
Diagram 2.
C
A
F
G
Advertisement
Table of Contents

Related Manuals for WESTEK BL-BAR12RC


Summary of Contents for WESTEK BL-BAR12RC
- Page 1 Instructions for Installation of Rechargeable Light Bars Models: BL-BAR12RC / BL-CLN5RC / BL-BAR4RC INCLUDES FEATURES BL-BAR12RC/ BL-CLNG5RC/ BL-BAR4RC Series Slide magnets on for easy installation Rechargeable Light Fixture Dimmable long life LED technology 4’ USB charging Cord, (2)Metal plates with 3M...
- Page 2 SECTION 2 - Installation Diagram 3. Option A : Magnets installation Step 1. Placement of fixture. Determine location, clean surface to ensure adhesion. Step 2. Locate metal plates (included). Remove liners on back side of metal plates and adhere Sliding them on desired location.
- Page 3 Instructions pour l'installation des barres lumineuses rechargeables Modèles : BL-BAR12RC / BL-CLN5RC / BL-BAR4RC COMPREND FONCTIONNALITÉS Luminaire rechargeable série BL-BAR12RC / Faites glisser les aimants pour une installation facile BL-CLNG5RC / BL-BAR4RC Technologie LED longue durée à intensité variable Cordon de chargement USB de 4 pi, (2) Commutateur 3000/4000 / 5000K plaques métalliques avec ruban 3M, (2) vis...
- Page 4 SECTION 2 - Installation Diagram 3. Option A: installation d'aimants Étape 1. Placement du luminaire. Déterminez l'emplacement, nettoyez la surface pour assurer l'adhérence. Étape 2. Localisez les plaques métalliques (incluses). Retirez Sliding les doublures à l'arrière des plaques métalliques et collez- Magnets les à...
- Page 5 Instrucciones para la instalación de barras de luz recargables Modelos: BL-BAR12RC / BL-CLN5RC / BL-BAR4RC INCLUYE CARACTERISTICAS Deslice los imanes para una fácil instalación Luminaria recargable serie BL-BAR12RC / BL- Tecnología LED regulable de larga duración CLNG5RC / BL-BAR4RC Interruptor 3000/4000/5000 K...
- Page 6 SECCIÓN 2 - Instalación Diagrama 3. Opción A: instalación de imanes Paso 1. Colocación del accesorio. Determine la ubicación, limpie la superficie para asegurar la adherencia. Paso 2. Ubique las placas de metal (incluidas). Retire los Sliding revestimientos en la parte posterior de las placas de metal Magnets y adhiéralos en la ubicación deseada.
Need help?
Do you have a question about the BL-BAR12RC and is the answer not in the manual?
Questions and answers