Advertisement
Quick Links
Advertisement

Summary of Contents for BANGGOOD MinimumRC Spacewalker
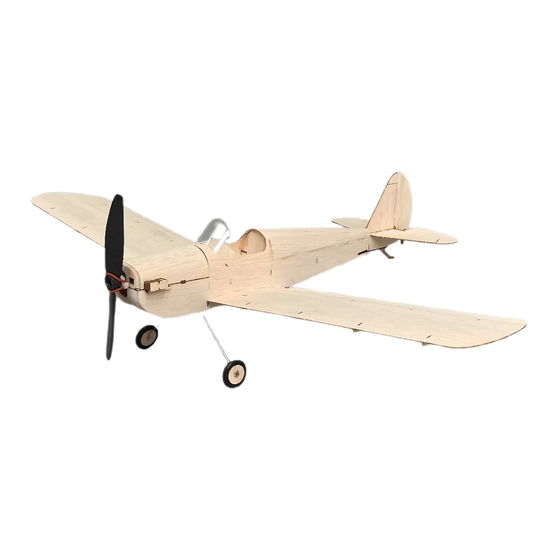
- Page 1 All manuals and user guides at all-guides.com MinimumRC Spacewalker Install Manual...
- Page 2 All manuals and user guides at all-guides.com 1.Stitching fuselage. 2.Take the fuselage partition (a total of 5), according to the installation of the tenon position.
- Page 3 All manuals and user guides at all-guides.com 3.Note that the installation is as much as possible to ensure that the partition is perpendicular to the deck. 4.Battery bracket parts.
- Page 4 All manuals and user guides at all-guides.com 5.Install battery bracket. 6.Battery hatch bracket parts.
- Page 5 All manuals and user guides at all-guides.com 7.Install battery hatch bracket. 8.Fuselage side mask.
- Page 6 All manuals and user guides at all-guides.com 9.Install the fuselage side of the mask in accordance with the tenon position, try to stick glue from the internal. 10.Fuselage tail mask support part.
- Page 7 All manuals and user guides at all-guides.com 11.Stick fuselage tail mask support part. 12.Cockpit mask.
- Page 8 All manuals and user guides at all-guides.com 13.Install the cockpit mask. Note that the front and rear edges of the mask should be aligned with the edge of the spacer frame and the trailing edge does not overlap with the tail mask support in the previous step. 14.Fuselage tail mask, can be rolled into the arc in order to install.
- Page 9 All manuals and user guides at all-guides.com 15.Install fuselage tail mask. 16.Head reinforcement tablets.
- Page 10 All manuals and user guides at all-guides.com 17.Install head reinforcement tablets. 18.Cabin reinforcement tablets.
- Page 11 All manuals and user guides at all-guides.com 19.Install cabin reinforcement tablets.。Note:After it is installed in place,both sides of the fuselage side of the mask should be 1mm longer than the bottom of the part to install the cabin mask. 20.Landing gear part.
- Page 12 All manuals and user guides at all-guides.com 21.Overlap 3 landing gear parts in sequence. 23.Install landing gear parts.
- Page 13 All manuals and user guides at all-guides.com 24.Stitching cabin mask. 25.Remove the battery compartment cover.
- Page 14 All manuals and user guides at all-guides.com 26.Install the cabin mask in accordance with the tenon position, try to stick glue from the internal. 27.Nose assembly.
- Page 15 All manuals and user guides at all-guides.com 28.Install nose assembly.
- Page 16 All manuals and user guides at all-guides.com 29.Polished the body. 30.Nose assembly(2mm thickness X1,1mm thickness X1).
- Page 17 All manuals and user guides at all-guides.com 31.Overlapping adhesive nose assembly 32.Hood bottom plate...
- Page 18 All manuals and user guides at all-guides.com 33.Install nose assembly 34.Hood bottom plate support parts.
- Page 19 All manuals and user guides at all-guides.com 35.Combined into the hood skeleton. 36.Engine cover mask. Can be rolled into the arc in order to install.
- Page 20 All manuals and user guides at all-guides.com 37.Install engine cover mask. 38.The hood is mounted on the fuselage and polished as a whole.
- Page 21 All manuals and user guides at all-guides.com 39.Use adhesive tape to attach to the aileron hinge as a hinge, and avoid the wing ribs mounting holes. After finished, cut off the part of the aileron connected to the wing, allowing the flaps to move freely.
- Page 22 All manuals and user guides at all-guides.com 40.Paste the ribs. Attention to distinguish the front and rear ends of the ribs.
- Page 23 All manuals and user guides at all-guides.com 41.Install the elevator drive. 42.Make elevator and rudder hinge with scotch tape, same method as aileron.
- Page 24 All manuals and user guides at all-guides.com 43.Install tail skid. 44.Install the battery compartment cover magnet.
- Page 25 All manuals and user guides at all-guides.com 45.Combine battery compartment cover. 46.Install the battery compartment base magnet.
- Page 26 All manuals and user guides at all-guides.com 47.Use a latch + magnet to secure the battery compartment cover. 48.Install the hood magnet.
- Page 27 All manuals and user guides at all-guides.com 49.Install the hood base magnets, please note the magnet polarity here. 50.Power system mounting parts.
- Page 28 All manuals and user guides at all-guides.com 51.Overlapping adhesive power system mounting parts 52.Use the screws to fix the power system mounting seat, and adjust the tension line by adjusting the depth of the adjusting screw.
- Page 29 All manuals and user guides at all-guides.com 53.Combine landing gear parts.
- Page 30 All manuals and user guides at all-guides.com 54.Install landing gear. 55.Make a gear block with a heat shrinkable tube.
- Page 31 All manuals and user guides at all-guides.com 56.Install the tail wing at the tenon position 56.Install the wing at the tenon position.Make sure the wings are symmetrical and free of distortion.
- Page 32 All manuals and user guides at all-guides.com 57.Aileron servo horn. 58.Fixed integrated receiver with hot melt adhesive or 704 silicone rubber.
- Page 33 All manuals and user guides at all-guides.com 59.The wire is bent into a chuck and is combined with a pull rod with a heat-shrink tubing to connect the pull rod and the linear servo.
- Page 34 All manuals and user guides at all-guides.com 60.The aileron servo is attached to the base plate with its own screws. 61.Screw the servo board.
- Page 35 All manuals and user guides at all-guides.com 62.Make the steel wire to aileron rod. 63.Install aileron pull rod and adjust the length to rudder face initial position.
- Page 36 All manuals and user guides at all-guides.com 64.Make the steel wire to tail rod hook. 65.Install tail wing servo horn and rods,adjust the length to rudder face initial position.
- Page 37 All manuals and user guides at all-guides.com 66.The power system is installed on the mounting seat according to the corresponding hole position, and is fixed by a little glue.
Need help?
Do you have a question about the MinimumRC Spacewalker and is the answer not in the manual?
Questions and answers