Advertisement
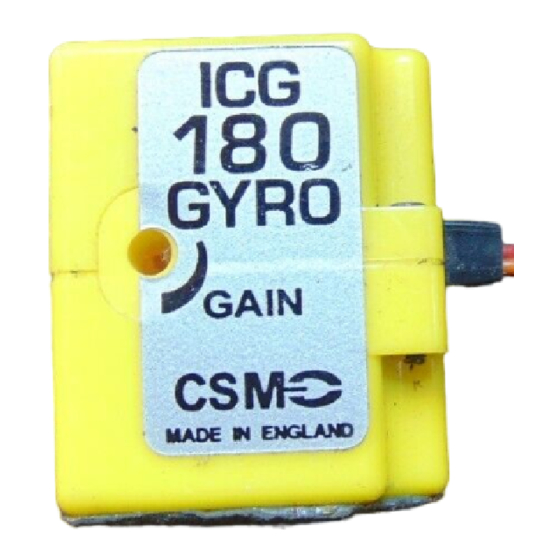
The ICG 180 has been designed as an easy to use beginners/sport gyro and is an
economic option to the high performance heading hold gyro.
This is a totally new design which features:
1. Durable, state of the art surface mount technology.
2. Internal vibration damping.
3. All new intelligent anti drift software.
4. Small, lightweight, single box design.
5. Built in Pilot Authority Mixing lets you stay in command through the most
strenuous manoeuvres. This eliminates the need for two gain settings.
6. Superior performance to any other gyro in it's class.
The wiring on this gyro is compatible with JR, Futaba, Hi-Tec, Graupner, Robbe and the
new style only (Blue Plug) Sanwa/Airtronics radio systems, to use this unit with other makes
of radio please check with the service centre in your country or e-mail the CSM service
centre.
Installation
To connect, simply plug in-line between the receiver and the appropriate servo. For tail
stabilisation this will be the rudder servo.
RECEIVER
ICG180
GYRO
CONNECTING THE GYRO
CONNECTING THE GYRO
CONNECTING THE GYRO
CONNECTING THE GYRO
Make sure the gyro is mounted parallel to the axis being sensed. For tail stabilisation yaw
movements are detected and the gyro should be mounted vertically (parallel to the main
rotor shaft)
Prototype Instructions
CSM ICG 180 Piezo gyro
SERVO
1
Advertisement
Table of Contents

Related Manuals for CSM ICG 180

Summary of Contents for CSM ICG 180
- Page 1 Prototype Instructions CSM ICG 180 Piezo gyro The ICG 180 has been designed as an easy to use beginners/sport gyro and is an economic option to the high performance heading hold gyro. This is a totally new design which features: 1.
- Page 2 Before final fixing you will need to identify which way up it needs to be for it to operate in the correct sense (as described below), however at this stage identify an appropriate location and fix temporarily until the sense check has been done. The location should be as rigid as possible (avoid the extreme front of the model unless the chassis is very rigid).
- Page 3 Remember that the final fixing should be done using the foam tape supplied with your gyro. (Spare foam is available as a CSM part) Useful tips. It helps to turn the gyro gain to full just while checking the sense, as this will maximise any correction so making it easier to see.
- Page 4 A. The gyro is reversed, re-mount the gyro the other way up in the model. Note reversing the rudder channel from the Transmitter will not correct this, the gyro must be physically re- mounted in the model. Q. I can't stop it wagging until I turn the gain down so low that the gyro is hardly working. A.
Need help?
Do you have a question about the ICG 180 and is the answer not in the manual?
Questions and answers