Table of Contents
Advertisement
Quick Links
Advertisement
Table of Contents

Summary of Contents for Great Plains Industries FM-300H
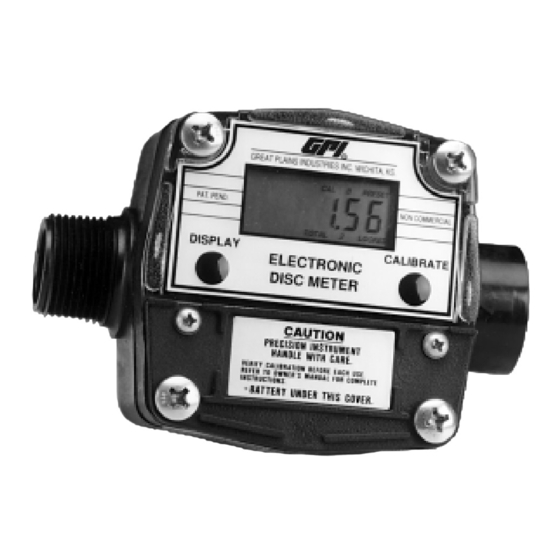
- Page 1 FM-300H FM-300HR Electronic Disc Meter Owner’s Manual 5252 East 36th Street North Wichita, KS USA 67220-3205 TEL: 316-686-7361 FAX: 316-686-6746 “ A G r e a t P l a i n s Ve n t u r e s S u b s i d i a r y ”...
-
Page 2: Table Of Contents
Cautions call your attention to practices or procedures which may cause dam- President age to your equipment. Great Plains Industries, Inc. Notes give you information that can im- prove efficiency of operations. It is your responsibility to: •... -
Page 3: Before Installation
2. When handling hazardous chemicals, INSTALLATION always follow the chemical manu- facturer’s safety precautions. Wear NOTE: To avoid damage to the inlet and protective clothing such as goggles, outlet, install this meter ONLY on gloves, and respirators, as instructed. plastic hose end or pipe fittings. 3. -
Page 4: Operations
Verify Meter Accuracy Turn On Before using, verify calibration and check The meter is on when any display is the meter’s accuracy. present. It turns on automatically when liquid flows through the meter. It can be 1. If desired, hold down DISPLAY for turned on manually by pressing and re- three seconds to zero the meter’s leasing the DISPLAY button. -
Page 5: Calibration
The Cumulative totalizer register is la- CALIBRATION beled as TOTAL 1 LOCKED indicating that it cannot be manually zeroed (Fig- Factory and Field Calibration ure 3). The Cumulative totalizer is cleared Curves only when the batteries are removed or go dead or when the Cumulative Total GPI flow computers have enhanced cali- reaches the maximum value of 999,999. - Page 6 Calibration Container Selecting a Different Calibration Setting The desired calibration container should be uniformly dependable and constructed To select a different calibration setting, with a graduated neck. The container’s first press and hold the CALIBRATE but- volume indicator should be clearly and ton.
- Page 7 Dispense-Display Field Calibration Procedure Your Actions Notes 1. Hold down CALIBRATE while pressing and Remember that Field Calibra- releasing DISPLAY until the Field Calibration tion curves are not preset. curve appears (“CAL C” message will be displayed). Release both buttons. 2.
- Page 8 Your Actions Notes 5. (continued) more fluid or repeatedly starting and stopping the flow - these actions will result in less accurate calibrations. 6. Once the flow has stopped, briefly press and When the display shows release both buttons. At this point the compu- “0000.00”...
-
Page 9: Maintenance
Your Actions Notes 10. To end calibration, press and hold both buttons After you release the buttons, for 3 seconds until you see “CAL End” message. the computer will resume normal operations with the new cal point(s) active. 11. If you HAVE NOT dispensed any fluid, you can After you release the buttons, exit calibration without changing the cal curve. - Page 10 Cleaning Figure 6 During use, the meter should be kept free of liquid to ensure drying does not occur inside the meter. If drying should occur, the nutator will stick or drag, affecting accuracy. If this occurs, clean- ing is required. Cleaning the Nutator 1.
- Page 11 CAUTION: Do not submerge the meter. Factory and Field Calibrations are not lost when the battery is replaced or 8. When the nutator turns freely, as- power is lost. They are saved in the semble and install following the in- meter’s computer and are available after structions below.
-
Page 12: Troubleshooting
3. Remove the battery and, if neces- 4. Install the new battery. sary, clean corrosion from the bat- When the battery is installed cor- tery terminals. (Figure 11) To prevent rectly, the computer powers on au- corrosion from condensation, coat tomatically. - Page 13 SYMPTOM PROBABLE CAUSE CORRECTIVE ACTION 1. Field Calibration not Field calibrate again or select Factory C. NORMAL FLOW- performed correctly Calibration. RATE BUT METER DOES 2. Nutator misaligned Disassemble meter and install nutator NOT COUNT again. Ensure O-ring and retainer clips (Meter comes on are in place.
-
Page 14: Illustrated Parts List
ILLUSTRATED PARTS LIST Item Item Part No. Description Req’d. Part No. Description Req’d. 120505-1 Housing Kit ......1 901001-78 O-ring ......... 1 904004-19 Screw, 1/4-20 x 1-3/4 in..4 902004-20 9 Volt Transistor Battery ..1 904005-29 Washer, 1/4 in....4 120501-3 Battery Cover and 120503-1... -
Page 15: Specifications
SPECIFICATIONS SERVICE Applications For warranty consideration, parts, or Flow Range: 2-20 GPM (7-75 LPM) other servicing information, please con- Operating Environment: Outdoor, oper- tact your local distributor. If you need fur- ating temperature range of +15°F to ther assistance, call the GPI Customer +130°F (-9°C to +54°C). - Page 16 Great Plains Industries, Inc. This product includes a 2 year warranty. Manufacturer’s sole obligation under the foregoing warranties will be limited to either, at Manufacturer’s option, replacing or repairing defective Goods (subject to limitations hereinafter provided) or refunding the purchase price for such Goods theretofore paid by the Buyer, and Buyer’s exclusive remedy...


Need help?
Do you have a question about the FM-300H and is the answer not in the manual?
Questions and answers