Table of Contents
Advertisement
Quick Links
Advertisement
Table of Contents

Related Manuals for Sakura FCA DUEL Series

Summary of Contents for Sakura FCA DUEL Series
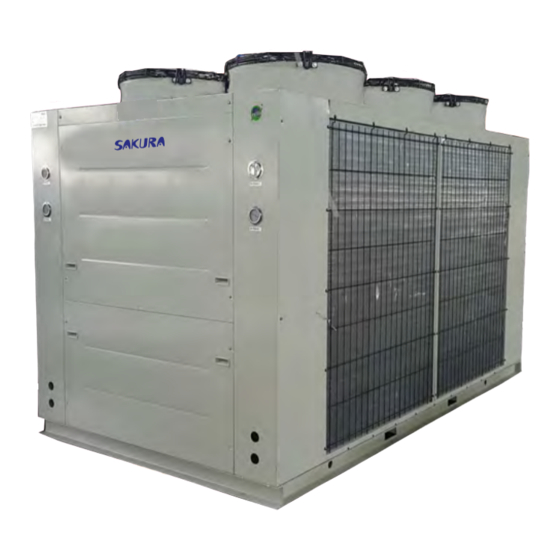
- Page 1 AIR-COOLED MODULAR CHILLER FCA 201-601 Models: Ref, S-(FR) 266 / 11 / 19...
-
Page 2: Table Of Contents
Content Product Nomenclature ............... 2 Features ..................3 Engineering Specifications ..............4 General Data ................. 4 Operating Range ................5 System Schematic Diagram ..............6 Controller, Features and Algorithm ........... ..7 Sound Data ................... 15 Sound Pressure Level ..............15 Dimensions .................. -
Page 3: Product Nomenclature
Product Nomenclature Air-Cooled Modular Chiller R410A Cooling Unit Size No. of Module Air-Cooled Modular Chiller Page 2... -
Page 4: Features
Features Simple Installation Compact and small footprint design of modular chillers minimizes the space needed for installation. The modular design reduces the cost of transportation and allows expansion of capacity when the needs arise in future, thus, reduce the initial investment. High Performance FCA's condenser is made of seamless inner groove copper tube which mechanically expanded and bonded to... -
Page 5: Engineering Specifications
Engineering Specifications General Data- FCA – (R410A) – 50Hz Model 66.0 100.0 132.0 166.0 198.0 Nominal Cooling Capacity 18.8 28.4 37.5 47.2 56.3 Nominal Input Power 22.1 36.4 46.6 59.8 73.6 62.2 Nominal Running Current 40.3 80.7 104.3 125.8 Power Source V/Ph/Hz 380-415 /3/50 Operation Control... -
Page 6: Operating Range
Operating Range Cooling Page 5... -
Page 7: System Schematic Diagram
System Schematic Diagram Model: FCA201/301/401/501/601 Page 6... -
Page 8: Controller Features And Algorithm
Controller Features and Algorithm 1. Introduction Specification Model: GSWP01A wired controller (to be used with GSWM01A printed circuit board). Product Specification The device has a dual color (red and green) LED, a LCD screen 12V DC power supply, and an input/output connecting port. Main Features Blue back lid LCD display. - Page 9 Description of Controller Buttons Button Description Button Description ON TIMER Unit ON timer setting MODE Mode Setting OFF TIMER Unit OFF timer setting TIMER Timer setting Data setting CLEAR Delete / exit CLOCK Time setting SET TEMP Temperature setting Day setting (Mon – Sun) ENTER Enter data/info HOUR...
- Page 10 2.4 ON / OFF Timer Setting The system has ON TIME and OFF TIME setting (Monday – Sunday). Press and hold ON TIMER (or “OFF TIMER”) button for 5 seconds, the buzzer will beep once (long beep) and system will enter into ON TIMER (or OFF TIMER) setting, the clock display will show “--:--“, and the LCD will show [SET TIME] and [ON] (or [OFF]) blinking, use “DAY”, “HOUR”...
- Page 11 2.8 Operational Data Inquiry Press and hold “SET” button for 5 seconds, this will enable operational data inquiry, unit module number display area will show the 9 subs menu as listed in following table, while temperature display area will show correspondent sub menu’s operational data.
- Page 12 2.9 Operational Data Setting Press and hold “ENTER” button for 5 seconds, this will enable operational data ▲ and ▼ buttons to setting, [PSW] and [UNIT] display will show “----”, use select number 1 to 9, as to enter the 4 digits password (password: 1688), then press “ENTER”...
- Page 13 2.10 Error Code Description Error Code Description Wired controller offline Chilled water flow switch disconnected TH4 - chilled water return sensor open or short circuit TH5 - chilled water supply sensor open or short circuit Modular unit(s) offline Compressor 1 high pressure Compressor 2 high pressure Compressor 1 low pressure Compressor 2 low pressure...
- Page 14 3. Modbus Protocol Specification- Optional For WP01V_BMS V1.0 3.1 Communication protocol The way of start communication:After the order is sent from master to slaver(WP01V_BMS), the communication is started。 3.2 The structure of Communication data (a)Interface Communication style:RS485-2W mode:RTU(Remote Terminal Unit) Synchronization mode Connector type:Blue Color Connector Mark A B (b)The bit rate:9600[bps]...
- Page 15 Address Description On/Off R/W Address 0 0=Off 1=On Error Code R Address 1 Bit7-0: Error Fault Code Bit15-8: Which one error 0: Main Unit 1: module 1 2: module 2 ..Status Bit & Output Bit R Bit15: 0.Water Cool Type 1.Fan Cool Type Bit14: 0.Control Outlet Water Temperature 1.Control Inlet Water Temperature Bit13: 0.Run Cool Mode 1.Run Heat Mode...
-
Page 16: Sound Data
Sound Data Sound Pressure Test Setup Sound Pressure Level 1/1 Octave Sound Pressure Level (dB, ref 20μPa) Overall Noise Model (dBA) Criteria 125Hz 250 Hz 500 Hz 1kHz 2khz 4kHz 8kHz FCA201 FCA301 FCA401 FCAC501 FCA601 Sound Power Level 1/1 Octave Sound Pressure Level (dB, ref 1pW) Model Overall (dBA) 125Hz... -
Page 17: Dimensions
Dimensions Model:FCA201/301 Model:FCA401 Page 16... - Page 18 Model:FCA501/601 Page 17...
-
Page 19: Wiring Diagrams
Wiring Diagrams Model: FCA201 FUSE2 T8A 250VAC +12V 5 6 7 8 GSWM01M V4.0 2017/06 12W24S_EE19 A B G V CN10 TH1 TH2 TH3 TH4 TH5 TH6 TH7 TH8 TH9 TH10 TH11 HPS HAND SET Page 18... - Page 20 Model: FCA301 FUSE2 T8A 250VAC +12V 5 6 7 8 GSWM01M V4.0 2017/06 12W24S_EE19 A B G V CN10 TH1 TH2 TH3 TH4 TH5 TH6 TH7 TH8 TH9 TH10 TH11 HPS HAND SET Page 19...
- Page 21 Model: FCA401/501/601 FUSE2 T8A 250VAC +12V 5 6 7 8 GSWM01M V4.0 2017/06 12W24S_EE19 A B G V CN10 TH1 TH2 TH3 TH4 TH5 TH6 TH7 TH8 TH9 TH10 TH11 HPS HAND SET Page 20...
- Page 22 DIP SWITCH Setting - Default Single Unit Operating (Default) Setting module unit [ 1 ] [ 2 ] [ 3 ] [ 4 ] Setting quantity of slave unit (set on master unit only) [ 1 ] [ 2 ] [ 3 ] [ 4 ] Function Setting...
- Page 23 DIP SWITCH Setting - Modular Unit Modular Units Operating Setting module unit [ 1 ] [ 2 ] [ 3 ] [ 4 ] Master Unit Slave Unit No.1 Slave Unit No.2 Slave Unit No.3 Slave Unit No.4 Slave Unit No.5 Slave Unit No.6 Slave Unit No.7 Setting quantity of slave unit (set on master unit only)
-
Page 24: Installation
Installation 1) Chiller Mounting The chiller must be placed on a rigid and solid surface, e.g. concrete floor, metal bracket with absorber. FCA201 module FCA201 2) Location of Installation: a) The location of installation should be well ventilated and not exposed to direct sunlight and rain b) Ensure the discharge of air and noise generated during operation does not disturb neighbors (at least 10 meters always from residential area). - Page 25 FCA201/301/401/501/601 Maintenance Maintenance Page 24...
- Page 26 3) Transportation To move or lift the unit, attach ropes to the hoisting hangers (4 pieces) available on the edge of the unit. Apply protector or support to avoid the ropes direct contact with coil and panel as shown in the diagram. 4) Water Piping a) Air vent must be installed at the highest position.
- Page 27 c) Install an expansion tank at the highest position as shown in the diagram. The capacity of the expansion tank is 0.03~0.034 of the water volume. d) Install 60 mesh Strainer to ensure the water quality is good. e) Ensure the flow switch is installed and function properly. f) Ensure all water pipes are well insulated g) Fill up water after water piping work complete.
-
Page 28: Servicing And Maintenance
Servicing and Maintenance 1. Check the water quality regularly. The strainer must be cleaned to prevent water system choke. 2. The location of the installation should be clean and well ventilated. Clean the condenser heat exchanger regularly 9 every 1~2 months). 3. - Page 29 Refrigerant R410A a) R410A is a zeotropic refrigerant mixture, the R410A liquid and vapor have different chemical composition when evaporates and condenses. b) When leaks occur, do not add new refrigerant to the system. Please vacuum the system thoroughly before recharging the R410A. The figures show the cylinder position for proper charging process.
-
Page 30: Troubleshooting
Troubleshooting When any malfunction of the air conditioner unit is identified, immediately switch off the supply to the unit. Check for the following fault conditions and causes for some simple troubleshooting tips. FAULT POSSIBLE CAUSES Power failure or communication bus failure The compressor does not operate "ERR CODE"... - Page 31 SAKURA CORPORATION 3-8-12 Utsukushigaoka, Aoba-ku, Yokohama Kanagawa, 225-0002, Japan Tel: + 81-45-909-5011 Fax: + 81-45-909-5012 E-mail: mail@sakura-aircon.com URL: www.sakura-aircon.com...
Need help?
Do you have a question about the FCA DUEL Series and is the answer not in the manual?
Questions and answers