
Subscribe to Our Youtube Channel
Related Manuals for Plockmatic 1000

Summary of Contents for Plockmatic 1000
- Page 1 Plockmatic 1000 High Capacity Stacker Operator Manual Provided By http://www.MyBinding.com http://www.MyBindingBlog.com...
- Page 2 Air Feed Collator and Feeder Model 1000 High Capacity Stacker Model 1010 Operator Manual April 2005 Part no. 18364...
-
Page 4: Table Of Contents
3.6.4 Air flow adjustment Integral stacker Docking the Lift Using the fan 3.10 Running a job using Model 1000 as a Collator 3.11 Running a job using Model 1000 as a Feeder 3.12 Storing a job 3.13 Retrieving a job 3.14... - Page 5 4.7.6 After calibration 4.7.5 Setup Paper Size (Collator and Feeder mode) Error screens 4.8.2 Integral Stacker 4.8.1 Collator/Feeder 4.8.3 External Stacker 4.8.4 Booklet Maker Troubleshooting Troubleshooting Technical Specification Technical Specification FeederPro Model 1000/1010 Operator Manual T10160...
-
Page 6: Introduction
NOTE: Machine must be connected to 230 VAC 10 Amps or 100/115 VAC 20 Amps dedicated circuit breaker for one outlet. FeederPro Model 1000/1010 Operator Manual T10160... -
Page 7: Getting To Know The Model 1000 And 1010
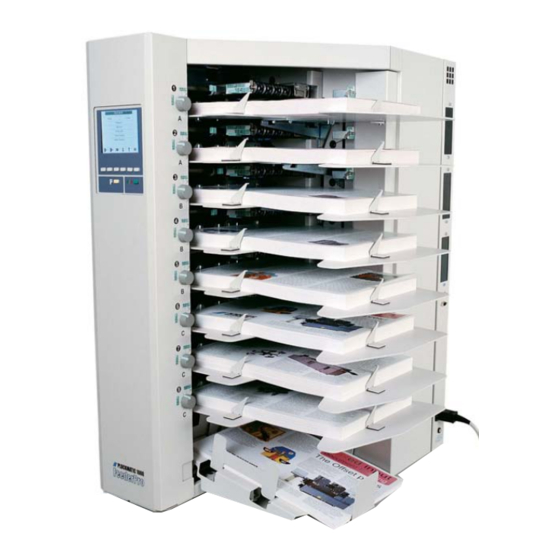
Getting to know the Model 1000 and 1010 Main Components Model 1000 Conveyor door LCD display Control panel (not present on Multi function buttons second or third tower) Set up guide button Outfeed area Start / stop button Base (optional) - Page 8 Main Components Model 1000, cont. Paper weight adjustment lever Integral stacker width adjustment Paper weight adjustment scale Secondary unit connector Paper size adjustment scale (i.e. secondary unit tower) Paper size adjustment lever NOTE: If no secondary unit is used, terminator plug part No.
-
Page 9: Main Components Model 1010
Lift, document table including has to be connected. Height adjustment Power cord receptacle Maximum load sign Fuse Docking instruction sign Docking latch Battery Indicator Bypass paper path Lowering Lift button Elevating Lift button Main power switch FeederPro Model 1000/1010 Operator Manual T10160... -
Page 10: Operator Instructions
”OK” button to reach the corresponding submenu. Then use the ”Up/Down” arrow buttons to reach the different items in that submenu and the ”Right/Left” arrow buttons to alter the settings. Right/Left Up/Down arrow buttons arrow buttons FeederPro Model 1000/1010 Operator Manual T10160... -
Page 11: One, Two Or Three Towers
Setting up the Model 1000 Below you will find instructions how to set up the Model 1000, and in what order the different settings and adjustments should be applied. These instructions are guide lines how to achieve optimum performance. Final adjustments and fine tuning may still have to be done since factors like paper quality, print quality, air humidity etc. -
Page 12: Bin Height Adjustment
Correcting separation errors If separation problems are experienced, alter bin height by Bin height adjustment lever raising or lowering the bin height adjustment lever from it’s original position NOTE: Also see item 3.6.2 and 3.6.4 FeederPro Model 1000/1010 Operator Manual T10160... -
Page 13: Air Flow Adjustment
If air flow should be increased or decreased is depending on paper weight and paper quality. NOTE: Also see item 3.6.3. Integral stacker When the integral stacker is to be used, slide the adjustable guides to the correct sheet size. Adjustable guides FeederPro Model 1000/1010 Operator Manual T10160... -
Page 14: Docking The Lift
Normally the fan should be switched off. Switch on the fan to facilitate stacking of static sheets. Lift the top cover to access the switch located on the right side (1) of the Model 1010 HCS. The fan only operates when the system is running. FeederPro Model 1000/1010 Operator Manual T10160... -
Page 15: Running A Job Using Model 1000 As A Collator
3.10 Running a job using Model 1000 as a Collator In the Main Menu, select ”Mode” using the ”Up/Down” buttons and press the ”OK” button. Select ”Collator” and press the ”OK” button. If you want to use any of the programs, select ”Programs”... - Page 16 3.10 Running a job using Model 1000 as a Collator, cont After a successfully completed calibration, the screen ”CURRENT JOB” will be shown. From this screen you can also choose to clear the counter by pressing the ”CLR” button, to save the job by pressing the ”MEM” button or to change settings made by pressing the ”ADJ”...
-
Page 17: Running A Job Using Model 1000 As A Feeder
3.11 Running a job using Model 1000 as a Feeder In the Main Menu, select ”Mode” using the ”Up/Down” buttons and press the ”OK” button. Select ”Feeder” and press the ”OK” button. NOTE: “Programs” are not available in ”Feeder Mode”. - Page 18 3.11 Running a job using Model 1000 as a Feeder, cont. After a successfully completed calibration, the screen ”CURRENT JOB” will be shown. From this screen you can also choose to clear the counter by pressing the ”CLR” button, to save the job by pressing the ”MEM” button or to change settings made by pressing the ”ADJ”...
-
Page 19: Storing A Job
Menu and press the ”OK” button. Select the stored job you want to retrieve with the ”Up/Down” arrow buttons and press the ”OK” button. To see information about a certain job, press the ”?” button. FeederPro Model 1000/1010 Operator Manual T10160... -
Page 20: Clearing A Job
Menu and press the ”OK” button. Select the stored job you want to clear with the ”Up/Down” arrow buttons and press the ”CLR” button. Press the ”ESC” button to go back or the ”OK” button to confirm. FeederPro Model 1000/1010 Operator Manual T10160... -
Page 21: The Menus
“Up/Down” arrow buttons and pressing the “OK” button. The different programming possibilities will be explained in item 4.2.1 to 4.2.5. NOTE1: “Programs” are not available in ”Feeder Mode”. FeederPro Model 1000/1010 Operator Manual T10160... -
Page 22: Insert Sheet Mode
Use this program when the covers are thicker than the body sheets. Select “Alternate Cover Mode” with the arrow but- tons. Press the “OK” button to confirm. Follow the procedure in section 4.7 to calibrate and start the job. FeederPro Model 1000/1010 Operator Manual T10160... -
Page 23: Manual Bin Selection Mode
To deselect a bin, use the arrow buttons and press the “cross” button. Load the sheets into the empty bins. Press the “OK” button to confirm. Follow the procedure in section 4.7 to calibrate and start the job. FeederPro Model 1000/1010 Operator Manual T10160... -
Page 24: Statistics
This program stops the collator after a chosen preset number of sets. Select number of sets with the “+” or ”-” buttons. The calibration set does not affect the preset counter. Press the “OK” button to confirm. FeederPro Model 1000/1010 Operator Manual T10160... -
Page 25: Added Features
If the opacity of the sheets varies so much that the Model 1000 indicates false doubles, the double sheet detection can be switched OFF. If switched OFF all bins are affected. The length double sheet detection is still functioning though. -
Page 26: Calibrate Mode
If you use the option ”Active Feed” the machine actually feeds a sheet from the block you selected, during the feeding calibration is done. Using the option ”No Feed” the program will go through the sequence without feeding any sheets. FeederPro Model 1000/1010 Operator Manual T10160... -
Page 27: Finishing (Collator And Feeder Mode)
Use the “Up/Down” arrow buttons so select between: “Offset”. Offset stacking. “Straight” Straight stacking. “Booklet maker” The set will be delivered to the booklet maker. Use the “Up/Down” arrow button to select this option. FeederPro Model 1000/1010 Operator Manual T10160... - Page 28 ”CURRENT JOB” will be shown. From this screen you can also choose to clear the counter by pressing the ”CLR” button, to save the job by pressing the ”MEM” button or to change settings made by pressing the ”ADJ” button. FeederPro Model 1000/1010 Operator Manual T10160...
- Page 29 This error screen tells you that there is a jam at the paper transport bridge. Remove the paper and restart the machine. 4.8.2 Integral Stacker This error screen tells you that the Integral Stacker is full. Empty the stacker before the system is restarted. FeederPro Model 1000/1010 Operator Manual T10160...
- Page 30 Check the control panels at the booklet maker, trimmer and squarefold to see what caused the problem. If necessary, consult the booklet maker and/or trimmer and/or squarefold operator manual how to correct the problem. FeederPro Model 1000/1010 Operator Manual T10160...
- Page 31 Avoid moving the paper stock between Buckled different climates both before and after the papers printing. The Model 1000 should be located in the same room as the printer to avoid this problem. Make sure levers at suction belt assys are adjusted correctly.
- Page 32 1011 x 672 x 783 mm (HxWxD) 39” 4/5 x 26” 1/2 x 30” 5/6 165 kg 363lb Weight Voltage 100/110/115/125V 50-60 Hz 20 Amps dedicated circuit or 220/230/240V 50-60 Hz 10 Amps dedicated circuit breaker for one outlet. FeederPro Model 1000/1010 Operator Manual T10160...
- Page 33 Notes...
- Page 34 Notes...
- Page 35 Notes...
Need help?
Do you have a question about the 1000 and is the answer not in the manual?
Questions and answers