Table of Contents
Advertisement
Quick Links
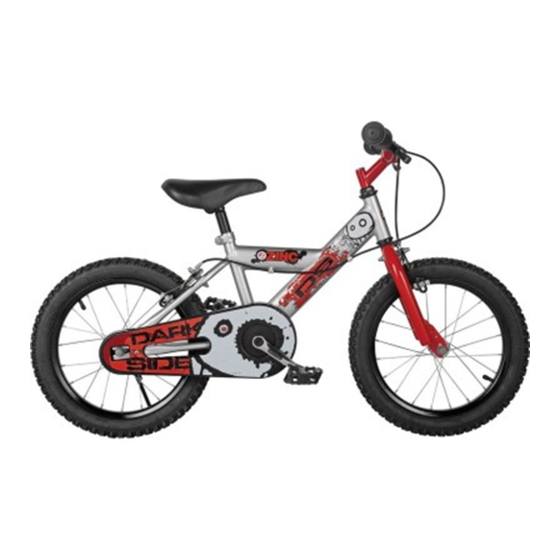
ZINC 16 inch Bike
Instruction Manual
Maintenance Guide
Important - Please take time to read the instructions carefully
Important
– Please read these tips fully.
These instructions contain important information that will help you get the best from your bike,
ensuring safe and correct maintenance.
If you need help or have damaged or missing parts, call the Customer Helpline on 0871 226 2034
332/2280
332/2228
Dec 2011
Advertisement
Table of Contents

Related Manuals for Zinc 332/2280

Summary of Contents for Zinc 332/2280
- Page 1 ZINC 16 inch Bike Maintenance Guide Instruction Manual 332/2280 332/2228 Important - Please take time to read the instructions carefully Important – Please read these tips fully. These instructions contain important information that will help you get the best from your bike, ensuring safe and correct maintenance.
-
Page 2: Table Of Contents
Contents Customer Helpline 0871 226 2034 In the Box .................................5 Parts ................................5 Tools ................................5 Assembly ................................6 Step 1 ................................6 Step 2 ................................7 Step 3 ................................9 Step 4 .................................10 Step 5 .................................11 Step 6 .................................14 Riding Advice ..............................15 Before Riding..............................15 Riding in Bad Weather ..........................16 Riding in the Dark ............................16 Riding Using Personal Music Players.......................16... - Page 3 Safety Information Customer Helpline 0871 226 2034 Important – Please read these instructions fully before starting assembly WARNING! This Bike has been designed, assembled and tested in accordance with the BS EN 14765:2005 standard to ensure your safety. To make sure the bike remains safe, it should only be used for recreational use.
- Page 4 Safety Information Customer Helpline 0871 226 2034 Important – Please read these instructions fully before starting assembly CAUTION! Only use suitable tools to assemble the bike. The use of unsuitable tools may lead to personal injury and damage to the bike. CAUTION! Always ensure all packaging is removed from the bike before assembly and use.
-
Page 5: In The Box
In the Box Customer Helpline 0871 226 2034 Parts Bike (supplied with rear wheel assembled) Handlebar and stem Seat post and saddle Front wheel Pedals (supplied in separate box) Tools Multitool (supplied in separate box) Hexagonal key (supplied in separate box) -
Page 6: Assembly
Assembly Customer Helpline 0871 226 2034 Step 1 IMPORTANT! Before assembling the bike, check all the parts indicated in the manual are in the box. Inspect the parts for signs of damage. Do not assemble the bike if you observe any damaged components. - Page 7 Assembly Customer Helpline 0871 226 2034 Step 2 Minimum Insertion Mark 2a Insert the Stem WARNING! When assembling the handlebars and stem, make sure it is inserted beyond the minimum insert mark. Failure to observe this warning may lead to a potentially unstable bike and may result in serious personal injury.
-
Page 8: Step 2
Assembly Customer Helpline 0871 226 2034 Step 2 (continued) Loosen Tighten 90° 90° 2b Align the Stem WARNING! When assembling the handlebars and stem to the bike frame, make sure the forks are facing in the correct direction. If the forks are assembled correctly, the front brake should be facing forwards. -
Page 9: Step 3
Assembly Customer Helpline 0871 226 2034 Step 3 (continued) Loosen Tighten Loosen Tighten 3c Adjusting the Position of the Saddle The angle of the saddle should be adjusted so that it is horizontal to the floor. To adjust the tilt of the saddle, loosen the saddle clamp nuts a quarter of a turn at a time using the multitool supplied until the saddle can be moved. -
Page 10: Step 4
Assembly Customer Helpline 0871 226 2034 Step 4 Tighten AntiClockwise Left Pedal (Red Sticker) Tighten Clockwise Right Pedal (Green Sticker) NOTE! The pedals and crank arms have colour coded stickers to indicate which pedal NOTE matches which crank arm NOTE! The threads on the left and right pedals are different. To prevent damage to the threads, only tighten the pedals in the direction indicated on the stickers. - Page 11 Assembly Customer Helpline 0871 226 2034 Step 5 Cable adjuster screw Cable adjuster lock nut Loosen Tighten Anchor bolt and nut Brake Cable wire 5a Disconnect the Front Brake Before the front wheel can be installed, the front brake must be disconnected. This allows the front tyre to pass between the brake pads during assembly.
-
Page 12: Step 5
Assembly Customer Helpline 0871 226 2034 Step 5 (continued) Loosen Tighten 5b Insert the Wheel Loosen the wheel nuts on both ends of the front wheel axle. Insert the axle of the front wheel into the slots at the bottom of the forks NOTE! The tyres may have a ‘Direction of Rotation’... - Page 13 Assembly Customer Helpline 0871 226 2034 Step 5 (continued) Cable adjuster screw Cable adjuster lock nut Anchor bolt and nut Brake Cable wire 5c Refit the Front Brake Squeeze the brake shoes together and using a pair of pliers, pull the inner brake cable tight.
-
Page 14: Step 6
Assembly Customer Helpline 0871 226 2034 Step 6 6 Inflate the Front and Rear Tyres WARNING! The front and rear tyres must be fully inflated before attempting to ride the bike. Under no circumstances should the tyres be inflated above the maximum pressure stated on the side of the tyres. -
Page 15: Riding Advice
Riding Advice Customer Helpline 0871 226 2034 Before Riding You should perform the following checks before riding your bike to ensure it is safe to use and operating correctly. 1. Is the Saddle Secure? While standing next to the bike, try and move the saddle from side to side. If the saddle moves you should retighten the seat post bolt or the saddle clamp nuts. -
Page 16: Riding In Bad Weather
Riding Advice Customer Helpline 0871 226 2034 Riding in Bad Weather WARNING! Always take extra care when riding in wet, foggy, windy or icy conditions. The brakes may not be as effective and the braking distances may be increased. When riding in bad weather i.e. wet, foggy, windy or icy, always wear bright, reflective clothing which is warm and waterproof. - Page 17 ZINC 16 inch Bike Maintenance Guide Important – Please read these tips fully. These instructions contain important information that will help you get the best from your bike, ensuring safe and correct maintenance. If you need help or have damaged or missing parts, call the Customer Helpline on 0871 226 2034...
- Page 18 Maintenance Instructions Safety Information Customer Helpline 0871 226 2034 Adjusting The Brakes Important – Please read these instructions fully before starting assembly Loosen Tighten Cable adjuster screw Cable adjuster lock nut Anchor bolt and nut Brake Cable wire Check the brake blocks make contact with the wheel rim and not the tyre.
- Page 19 Maintenance Instructions Customer Helpline 0871 226 2034 Inspecting and Maintaining the Wheels It is essential that you regularly inspect and maintain your wheels, especially if your bike becomes unstable or vibrates while riding. 1a. Inspect the Trueness of the Wheels Over the life of the bike, the wheels may begin to run out of true, i.e.
- Page 20 Maintenance Instructions Customer Helpline 0871 226 2034 Changing an Inner Tube If you have a puncture, you will need to remove and repair the inner tube. NOTE! To remove the inner tube you will need a set of tyre levers. NOTE 1a.
- Page 21 Maintenance Instructions Customer Helpline 0871 226 2034 Changing an Inner Tube (continued) 1b. Remove the Inner Tube from the Tyre Once the tyre is removed from one side of the wheel rim, carefully remove the inner tube starting with the valve. 1c.
- Page 22 Routine Maintenance Customer Helpline 0871 226 2034 Routine Maintenance Schedule Performing routine maintenance correctly on your bike will ensure you get years of trouble free use. Please keep this manual safe for future reference. It is recommended that the following maintenance schedule is adhered to. This will ensure the bike operates correctly and is safe to use.
- Page 23 Maintenance Instructions Customer Helpline 0871 226 2034 Before and After Each Ride You should perform the following checks before riding your bike to ensure it is safe to use and operating correctly. 1. Is the Saddle Secure? While standing next to the bike, try to move the saddle from side to side. If the saddle moves, you should retighten the seat post bolt or the saddle clamp bolts.
- Page 24 Routine Maintenance Customer Helpline 0871 226 2034 Every Month (continued) 3. Check that the Tyres are in Good Condition. Check the outside of each tyre for signs of damage including cuts, deformation, excessive wear or bald spots. If you tyre shows any signs of damage, it must be replaced immediately. Do not attempt to ride the bike with damaged tyres.
Need help?
Do you have a question about the 332/2280 and is the answer not in the manual?
Questions and answers