
Summary of Contents for Frama F-LINK 2 Fs 3 Series
-
Page 1: Table Of Contents
FRAMA Fs Series 3 USER MANUAL F-LINK 2 Table of contents LAN connectivity LAN wireless connectivity Appendix... -
Page 2: User Manual F-Link
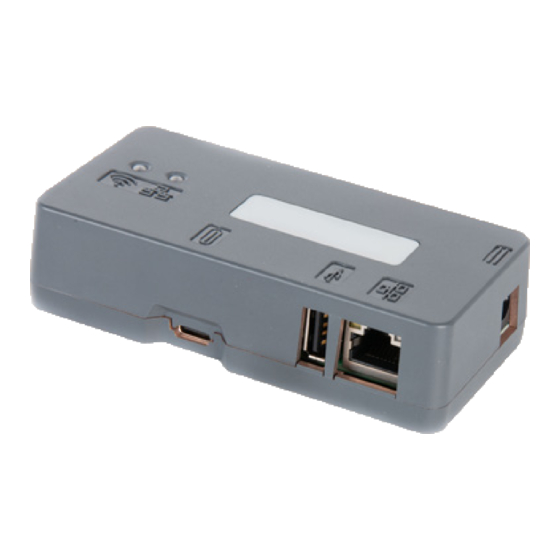
LAN connectivity The LAN connectivity works for the Frama Fs Series 3. LAN connection Plug the LAN Cable between the F-Link 2 and the customer Network Plug in the Power Adapter and wait until both status lights are On your Mobile Phone, look in wireless setting for available networks. -
Page 3: Frama Fs Series
Configuration of LAN / Router mode for F-Link 2 Step 1: Note: With your mobile phone, you must be connected with the box to modify settings On Home page: the LAN status should be UP and the IP address should be different from 192.168.123.1 Step 2: Go to NETWORK/LAN page Next, set the following parameters:... - Page 4 Configuration of Fs Series 3 franking systems Plug in the LAN cable to the Internet wall socket Plug in the LAN cable to the base and the Internet wall socket Power up the F-Link 2 Franking Systems Configuration On the Franking Systems go to Supervisor Mode (Manger), then to Communication Setting and configure following parameters Next, select LAN settings...
- Page 5 Also select DNS AUTO Confirm with OK Note: All next screens, just confirm until you reach Proxy menu Set Proxy to ON Confirm settings with OK Enter the Proxy configuration Sample settings. Ask the customer IT administrator for correct credentials. •...
-
Page 6: Lan Wireless Connectivity
However, make sure the F-Link 2 is fully functional by performing a Postal Inspection and an OLS Generic call on the franking systems. LAN Wireless connectivity The LAN Wireless connectivity works for the Frama Fs Series 3. Connect by Wireless... - Page 7 Configuration of Wireless mode for F-Link 2 Note: With your mobile phone, you must be connected with the box to modify settings Step 1: In the navigation, select Network /LAN Next, set the following parameters: Select Static (not DHCP) Sample settings. Ask the Network administrator for correct IP credentials: IP address: 192.168.99.1...
- Page 8 Next, enter the password of your WLAN and click „Connect“ After that, you should receive a success information Press OK Note: The WI-FI is activated if the green LED is lightnig The F-Link 2 is now connected to WI-FI. Now, the configuration of the franking machine will take place. Configuration of Fx Series franking systems Plug the LAN cable between the F-Link 2 and the franking Wireless...
- Page 9 Franking Systems Configuration Log in to the Supervisor Mode (Manager) and select Communication Settings from the Menu First, in menu Type of Connection ensure LAN is present Next, select menu LAN-Settings In Menu DHCP configuration select Manual to enter the fix IP Following images showing sample IP setting.
- Page 10 Next enter DNS settings Select Manual Enter 8.8.8.8 for the preferred DNS IP address Press OK Enter 8.8.4.4 for the alternate DNS IP address Press OK until you reach Proxy screen Select Proxy off and confirm with OK The F-Link 2 is successfully setup once you see both green lights on Congratulation! The F-Link 2 and the Franking Systems are successfully configured.
-
Page 11: Appendix
Appendix To switch off Wi-Fi mode To disable the current Wi-Fi mode go to Wireless Station, press Connect and enter an incorrect Password. Wait until the message „Impossible to connect to ssid“: appears. The green Wi-Fi Led turns to yellow. The chosen Wi-Fi station is disabled. To Reset F-Link 2 to Factory Default Step 1: Connect a USB key (drive) to a PC. - Page 12 0° to 40° Humidity Operating: 20% to 80% Dimensions: 105 x 54 x 27 mn Protocols/Port: TCP/IP V4.0 TLS V1.2 / Port 443 Certificate: Public Key: RSA key, 2048 bits Frama AG XXXXX D02.00 - 10.21 Switzerland F-Link 2 User Manual...
Need help?
Do you have a question about the F-LINK 2 Fs 3 Series and is the answer not in the manual?
Questions and answers