Table of Contents

Subscribe to Our Youtube Channel
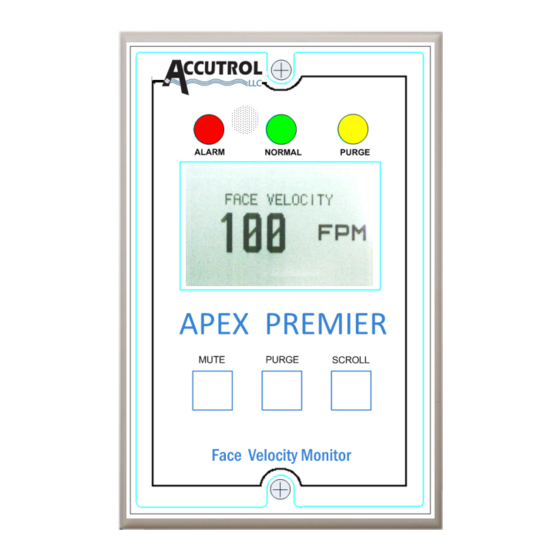
Related Manuals for Accutrol Apex Premier

Summary of Contents for Accutrol Apex Premier
- Page 1 Apex Premier Face Velocity Monitor Installation, Operation & Maintenance Manual Manual 0133MAN00015 Rev J Accutrol LLC 21 Commerce Dr. Danbury, CT, 06810 Tel: 203-445-9991 www.accutrolllc.com RITTEN FOR FIRMWARE VERSION TA OR LATER...
- Page 2 The exclusive remedy of the user or purchaser, and the limit of the liability of Accutrol or any other seller for any and all losses, injuries, or damage resulting from the use of this product shall be the return of the product...
-
Page 3: Table Of Contents
Table of Contents MODEL CODE DESCRIPTION ..........................5 OPTIONAL AND/OR SPARE PARTS LIST: ......................5 INTRODUCTION ............................... 6 GETTING STARTED / UNPACKING ........................8 STANDARD INSTALLATION ..........................9 1: C ........................ 9 HOOSING A UITABLE OCATION 2: C ........................9 UTTING THE OUNTING 3: (O... - Page 4 ..........................19 ERIFY EADING ................. 19 ELOCITY ALIBRATION OINT DJUSTMENT ..........................19 ERIFY EADING ................. 19 XITING UT OF THE ALIBRATION DJUSTMENT CONFIGURATION OF THE APM ........................20 DISPLAY MODES ..............................21 ............................21 LPHA ISPLAY ............................21 RAPHIC ISPLAY ............................
-
Page 5: Model Code Description
T-APM - Apex Premier F ONITOR Model Code Description T – A P M - __ __ Basic Model Number Includes; (1) Apex Premier Monitor (1) Hood Probe with 5’ Tubing (2) Mounting Screws (1) Quick Reference Guide (1) Mounting Template... -
Page 6: Introduction
Welcome to the Apex Premier Fume Hood Monitor Installation, Operation and Maintenance Manual. The Apex Premier Monitor (APM) has been designed to provide accurate and reliable real-time monitoring of fume hood face velocity on a wide variety of fume hoods including; variable air volume, constant air volume, and high performance - low flow. - Page 7 Removable Terminal Blocks to Simplify Wiring Important Considerations Prior to installing and calibrating your Accutrol APM , reference ANSI/ASHRAE STANDARD 110- 1995 for proper methods of testing performance of laboratory fume hoods. Per ASHRAE guidelines, “The performance of a laboratory fume hood in providing protection for the worker at the face of a hood is strongly influenced by the aerodynamic design of the hood, the ventilation of the laboratory room, and by other features of the laboratory in which it is installed.”...
-
Page 8: Getting Started / Unpacking
Figure 2, Supplied Equipment Item 1 - One (1) Apex Premier Fume Hood Monitor (APM), Part Number T-APM Item 2 - One (1) Quick Reference Guide, Part Number 0133MAN00016 Item 3 - One (1) Mounting Hole Template, Part Number 2111TAG00643 ... -
Page 9: Standard Installation
T-APM - Apex Premier F ONITOR Standard Installation Step 1: Choosing a Suitable Location Care must be observed when choosing a suitable location for the APM if the internal reference is being utilized (typical install). Locate a position on the fume hood pillar that is free from piping, electrical conduit or obstacles. -
Page 10: Step 4: (Optional) Installing The External Reference Probe
T-APM - Apex Premier F ONITOR Standard Installation Step 4: (Optional) Installing the External Reference Probe Once a suitable location has been selected for the Room Reference Probe, drill a 7/16” diameter (11mm) hole for mounting probe. Referencing Appendix D, feed the supplied clear tubing connected to the probe, through the drilled hole. -
Page 11: Electrical Connections
T-APM - Apex Premier F ONITOR Electrical Connections The steps to correctly wire the APM are as follows; reference Appendix C for proper wiring techniques and Appendix E for all electrical specifications of the APM. Step 1: Power For 24 VAC Control Power – On the back of the APM enclosure, remove the 2-position green terminal block labeled POWER INPUT. -
Page 12: Initial Power-Up Of Monitor
T-APM - Apex Premier F ONITOR Initial Power-Up of Monitor The monitor incorporates an initial self-test feature which can be activated on initial power up. During power-up, all 3 LEDs will turn on and the screen will display firmware version and date. To activate the interactive self-test;... -
Page 13: Calibration Basics
T-APM - Apex Premier F ONITOR Calibration of the APM Calibration Basics Because of the wide variation of fume hood types and configurations available, it is always necessary to perform field calibration of the APM. The purpose of field calibration is to correlate the APM’s internal velocity sensor with a measured face velocity of the fume hood to which it is installed using a calibrated instrument. -
Page 14: Two-Point Calibration Procedure
T-APM - Apex Premier F ONITOR Calibration of the APM Two-Point Calibration Procedure The Two-Point Calibration Procedure is recommended for most fume hood applications including constant volume and variable volume with setback and volume limits. The Two-Point calibration procedure requires two face velocity measurements to be taken and entered into the APM, one at a high face velocity and another at a low face velocity. -
Page 15: Three-Point Calibration Procedure
T-APM - Apex Premier F ONITOR Calibration of the APM Three-Point Calibration Procedure The Three-Point Calibration Procedure is intended for “Special Application” fume hoods that are typically difficult to calibrate using linear calibration techniques. Some examples of these special application hoods may include large walk-in hoods and custom hoods that have been designed for specific research or manufacturing applications. -
Page 16: Step 9: Traverse Hood Face At Min. Sash Position (High Velocity Point)
T-APM - Apex Premier F ONITOR Calibration of the APM Step 9: Traverse Hood Face at Min. Sash Position (High Velocity Point) Perform a face velocity traverse, with a calibrated instrument, across the open area of the fume hood face. Once the average face velocity reading is obtained, press the touch screen [SCREEN 8N]. -
Page 17: Step 5: Completion Of The One-Point Calibration
T-APM - Apex Premier F ONITOR Step 5: Completion of the One-Point Calibration The final screen in the calibration process allows you to exit completely out of the calibration and configuration menus and go into monitor mode, or to continue to the configuration section of the APM. -
Page 18: Manual Calibration Adjustments
T-APM - Apex Premier F ONITOR Calibration of the APM Manual Calibration Adjustments An interesting feature of the APM is a Manual Calibration Function which allows adjustment of the original calibration point(s) obtained during the one-point or two-point calibration routines. NOTE: This feature is not intended to replace the initial calibration process that is required upon initial installation and start-up. -
Page 19: Step 4B: Verify New Reading
T-APM - Apex Premier F ONITOR Calibration of the APM Step 4b: Verify New Reading The next displayed screen, [SCREEN 18K], will show a face velocity reading for the given position of the sash at that moment. It is a live reading and varying the sash position will vary the reading as expected. -
Page 20: Configuration Of The Apm
ONITOR Configuration of the APM The Apex Premier Monitor can be easily configured to adapt to a wide variety of applications. Many functions of the APM are selectable and can be disabled when not required. This section will discuss all of the configurable functions of the APM. -
Page 21: Display Modes
T-APM - Apex Premier F ONITOR Configuration of the APM To access the Configuration Menu, perform the steps outlined in the ENABLING THE TOUCH SCREEN AND PASSWORD PROTECTION section of this manual, and then simply select the CONFIG MENU button on the main screen [SCREEN 1]. -
Page 22: Numeric Display Mode
T-APM - Apex Premier F ONITOR Configuration of the APM Numeric Display Mode Numeric mode, which is the most commonly used display mode, provides a live reading of fume hood face velocity. Because real-time airflow measurements are dynamic by nature, the APM has an adjustable averaging function to smooth out the displayed velocity readings. - Page 23 T-APM - Apex Premier F ONITOR send a purge command to a controller; it can be configured to toggle a set of relay contacts found on the back of the APM on the terminal block, reference Appendix B. Page 23 of 61...
-
Page 24: Digital Input Configuration
T-APM - Apex Premier F ONITOR Configuration of the APM Digital Input Configuration There are two (2) discrete digital inputs located on the rear of the APM (see Appendix B for more details). These inputs are designed to be activated with a dry contact closure between the digital input and the common terminal. - Page 25 T-APM - Apex Premier F ONITOR Configuration of the APM Selection 6a: Unoccupied Low Alarm Set Point [SCREEN 6C] By choosing unoccupied mode for the digital input, the APM needs a new set of alarm points to “reset” to during unoccupied mode. Press the UNOCC LOW ALARM button to set the new unoccupied low alarm set point.
-
Page 26: Relay Output Configuration
T-APM - Apex Premier F ONITOR Configuration of the APM Relay Output Configuration There are two (2) discrete relay outputs located on the rear of the APM (see Appendix B). These outputs can be configured to react to either the purge button on the front panel or from an internal alarm indication. -
Page 27: Contrast Adjustment
T-APM - Apex Premier F ONITOR Configuration of the APM Selection 3: Configure High Voltage Output Level [SCREEN 4L] The next item to configure is the required high voltage output from the APM. This is the highest voltage the APM will provide indicating a high face velocity. For example, if the desired voltage output is 1 to 5Vdc, indicating 50 to 200FPM the value of 5Vdc would be entered using the plus and minus buttons [ ... -
Page 28: Alarm Configuration
The most important function of the APM is the ability to warn the operator of any impending problems with the air flow for a given hood. The Apex Premier Monitor utilizes both a high and low flow alarm set points in addition to a warning or “caution”... -
Page 29: Change Password
ATTENTION: Once the password has been changed, the new password is the only way into the configuration and calibration modes, the new password should be recorded for future reference. If the password is lost, the unit must be shipped back to Accutrol LLC, for re-programming at owners expense!) Step 1: Select CHANGE PASSWORD on the CONFIGURATION MENU, see [SCREEN 1F]. -
Page 30: Calibration Menu Selection
T-APM - Apex Premier F ONITOR Configuration of the APM Calibration Menu Selection The CALIBRATION MENU can be selected at any time from the CONFIGURATION MENU screen, see [SCREEN 1G]. Press the CALIBRATION MENU button to go to the CALIBRATION section of the APM (reference the CALIBRATION section of this manual for more information). -
Page 31: Maintenance
T-APM - Apex Premier F ONITOR Maintenance The APM is designed to provide years of service with little or no maintenance. Typically the only maintenance required is periodic cleaning of the front face of the APM with a clean, lint free cloth. The use of a mild detergent can be used to remove stains, but typically a damp cloth is all that is required. -
Page 32: Appendix A: Mounting Hole Template Dimensions
T-APM - Apex Premier F ONITOR APPENDIX A: Mounting Hole Template Dimensions Page 32 of 61 T-APM 0133MAN00015 - Rev J ECN - JUL 2017... -
Page 33: Appendix B: Apm Detailed Description
T-APM - Apex Premier F ONITOR APPENDIX B: APM Detailed Description Front of APM Mounting Screw Holes (2 places) Hood Probe Port HOOD ROOM PROBE PROBE WARNING! OBSERVE Optional Remote CORRECT POLARITY Room Reference E.S.D. POWER INPUT Probe Port HOT + NEUT.-... -
Page 34: Appendix C: Proper Wiring Techniques
T-APM - Apex Premier F ONITOR APPENDIX C: Proper Wiring Techniques Remove Terminal Block ½" ( 1.27cm Strip Insulation Insert wire Into Terminal Block Tighten Terminal Block Screw Do NOT Pinch Insulation or Leave Exposed Bare wires Re-Install the Terminal Block... -
Page 35: Appendix D: Reference Probe Installation
T-APM - Apex Premier F ONITOR APPENDIX D: Reference Probe Installation Drilled Mounting Surface Insert Tubing Through Pre-Drilled Hole Drilled Mounting Surface Press Reference Probe Firmly Into Mounting Hole and Attach to Reference Port Barb on Rear of APM Drilled Mounting... -
Page 36: Specifications
T-APM - Apex Premier F ONITOR APPENDIX E: Specifications ELAY UTPUTS NVIRONMENTAL Standard - Two independent SPST relays. Calibrated Temp. Range: 60º to 80º F Relay 1 fails to N.O., 0.5A at120VAC, 1A (15.6º to 26.7ºC) at30VDC Operating Temp. Range: 40º to 120º F Relay 2 fails to N.C., 0.5A at120VAC, 1A... -
Page 37: Appendix F: Configuration And Calibration Screens
T-APM - Apex Premier F ONITOR APPENDIX F: Configuration and Calibration Screens MAIN MENU CONFIGURATION MENU CONFIGURE DISPLAY SELECT PASSWORD SELECT OPTION SELECT DISPLAY Config TO CONFIGURE TYPE TO CONFIG Menu Menu 12345 Options displayed in DISPLAY Exit ACCEPT CANCEL... - Page 38 T-APM - Apex Premier F ONITOR APPENDIX F: Configuration and Calibration Screens D.I.-1 SELECT UNOCCUPIED D.I.-1 SELECT UNOCCUPIED D.I.-1 SELECT UNOCCUPIED D.I.-1 SELECT UNOCCUPIED LOW ALARM DELAY TIME LOW ALARM CAUTION BAND HIGH ALARM SETPOINT HIGH ALARM DELAY TIME RESET...
- Page 39 T-APM - Apex Premier F ONITOR APPENDIX F: Configuration and Calibration Screens RELAY OUTPUT 2 CONFIGURATION MENU SELECT HIGH VELOCITY HIGH PURGE ALARM SETPOINT ALARM ALARM SELECT OPTION NORMALLY OPEN TO CONFIGURE DISABLE CLOSE ON ALARM EXIT ALARMS NORMALLY CLOSED...
- Page 40 T-APM - Apex Premier F ONITOR APPENDIX F: Configuration and Calibration Screens 2 POINT CALIBRATION 2 POINT CALIBRATION CALIBRATION 1 POINT CALIBRATION SELECT HIGH FACE COMPLETE PERFORM TRAVERSE VELOCITY OPEN SASH TO WORKING ACROSS MINIMUM HEIGHT POSITION, WITH RESET POSITION...
- Page 41 T-APM - Apex Premier F ONITOR APPENDIX F: Configuration and Calibration Screens CONTRAST ADJUST 3 POINT CALIBRATION 3 POINT CALIBRATION 3 POINT CALIBRATION SELECT LOW FACE INCREASE DECREASE OPEN SASH TO THE FULL PERFORM TRAVERSE VELOCITY OPEN POSITION, WITH THE...
-
Page 42: Appendix G: Operator Screen Flow Charts
T-APM - Apex Premier F ONITOR APPENDIX G: Operator Screen Flow Charts Scroll Button Pressed Default Numeric Display Default Alpha Display Default Graphic Display Note: If No Activity for 30 seconds, return to default display screen FACE VELOCITY FACE VELOCITY... - Page 43 T-APM - Apex Premier F ONITOR APPENDIX G: Operator Screen Flow Charts NOTE: Digital input 1 and 2 screens are identical, if 2 From Default or more alerts occur at the same time, the monitor will Display Screen toggle between screens and display each screen for 10 seconds.
-
Page 44: Appendix H: Available External Alarm Messages
T-APM - Apex Premier F ONITOR APPENDIX H: Available External Alarm Messages ALARM SYSTEM ALARM EXTERNAL ALARM LOW FLOW ALARM HIGH FLOW ALARM LOWER SASH PLEASE CLOSE SASH FIRE ALARM BUILDING ALARM ... -
Page 45: Appendix I: Default Values Of Apm
T-APM - Apex Premier F ONITOR APPENDIX I: Default Values of APM Variable Name Factory Default Range for Variable High Alarm Mode Occupied Occupied or Unoccupied Occupied High Alarm Mode Disabled Disabled or Enabled Occupied High Alarm Set Point Disabled... - Page 46 T-APM - Apex Premier F ONITOR Analog Output Low Voltage Level 0.0 to 10.0V Analog Output High Voltage Level 10.0V 0.0 to 10.0V Analog Output Low Velocity Range 0 to 1000 FPM Analog Output High Velocity Range 1000FPM 0 to 1000 FPM...
-
Page 47: Appendix J: Troubleshooting
APM dead Input power problem to the APM power plug and firmly inserted into APM, also verify polarity is correct. APM displays Call Local representative or Accutrol LLC at message “Internal Internal communications not (203)-445-9991 for a Return Authorization Communications functioning properly number and return unit. -
Page 48: Appendix K: Additional Mounting Options
ONITOR APPENDIX K: Additional Mounting Options Due to the fact that the Apex Premier Monitor requires a minimum mounting depth, Accutrol offers 2 different mounting options to reduce the depth required for installation. The mounting options are specifically designed to mate to the APM and reduce the mounting depth by offsetting or extending the monitor into the lab space. - Page 49 T-APM - Apex Premier F ONITOR APPENDIX K: Additional Mounting Options Option 1: Accutrol Part # T-APM-EXTENDER1 The exploded view in figure K - 3 shows how the filler panel attaches to the mounting surface, and also how the APM mounts to the filler panel.
- Page 50 T-APM - Apex Premier F ONITOR APPENDIX K: Additional Mounting Options Option 1: Accutrol Part # T-APM-EXTENDER1 The 1:1 scale template in figure K – 4 can be used to locate the proper mounting holes when using a single extender filler panel. Note: this template is provided with the extender kit. Simply attach this template to the correct location on the fume hood and cut out the first dashed line as shown and drill two 1/8”...
- Page 51 T-APM - Apex Premier F ONITOR APPENDIX K: Additional Mounting Options Option 2: Accutrol Part # T-APM-EXTENDER2 This option kit contains two (2) filler panel and two (2) #8 sheet metal screws and will ” (59.5mm) above the mounting surface when installed as shown in figure offset the monitor 2 K-5 below.
- Page 52 T-APM - Apex Premier F ONITOR APPENDIX K: Additional Mounting Options Option 2: Accutrol Part # T-APM-EXTENDER2 The exploded view in figure K - 7 shows how the filler panels attach to the mounting surface, and also how the APM mounts to the filler panels.
- Page 53 T-APM - Apex Premier F ONITOR APPENDIX K: Additional Mounting Options Option 2: Accutrol Part # T-APM-EXTENDER2 The 1:1 scale template in figure K – 8 can be used to locate the proper mounting holes when using dual extender filler panels. Simply attach this template to the correct location on the fume hood, drill the required holes and cut out the center area as shown.
- Page 54 T-APM - Apex Premier F ONITOR APPENDIX K: Additional Mounting Options Option 3: Accutrol Part # T-APM-EXTENDER3 This option kit contains three (3) filler panels, two (2) #8 sheet metal screws, two (2) #6 ” (89.9mm) above the mounting surface when sheet metal screws and will offset the monitor 3 installed as shown in figure K-9 below.
- Page 55 T-APM - Apex Premier F ONITOR APPENDIX K: Additional Mounting Options Option 3: Accutrol Part # T-APM-EXTENDER3 The exploded view in figure K - 11 shows how the filler panels attach to the mounting surface, and also how the APM mounts to the filler panels.
- Page 56 T-APM - Apex Premier F ONITOR APPENDIX K: Additional Mounting Options Option 3: Accutrol Part # T-APM-EXTENDER3 The 1:1 scale template in figure K – 12 can be used to locate the proper mounting holes when using three extender filler panels. Note: this template is provided with the extender kit. Simply attach this template to the correct location on the fume hood and cut out the inner small dashed line as shown and drill two 1/8”...
-
Page 57: Appendix L: Document Revision History
T-APM - Apex Premier F ONITOR APPENDIX L: Document Revision History Revision History ECN # New Rev. New File Name T-APM – January 2016 MANUAL Front Cover page Updated company physical address Back Cover page Updated company physical address Page 57 of 61... -
Page 58: Index
T-APM - Apex Premier F ONITOR INDEX Alarm ......................4, 7, 21, 22, 23, 24, 26, 27, 34, 42, 43, 45 Alarm Configuration ..............................26 Alpha Display Mode ..............................20 analog output ................................24 Calibration Adjustments .............................. 17 Calibration Basics .............................. - Page 59 T-APM - Apex Premier F ONITOR Page 59 of 61 T-APM 0133MAN00015 - Rev J ECN - JUL 2017...
- Page 60 T-APM - Apex Premier F ONITOR Page 60 of 61 T-APM 0133MAN00015 - Rev J ECN - JUL 2017...
- Page 61 Proudly made in the USA! 21 Commerce Dr. Danbury, CT, 06810 Tel: (203) 445-9991 www.accutrolllc.com...
Need help?
Do you have a question about the Apex Premier and is the answer not in the manual?
Questions and answers