Table of Contents
Advertisement
Quick Links
Advertisement
Table of Contents
Troubleshooting

Summary of Contents for LOKERMANN Grand Tig 400 ACDC Pulse
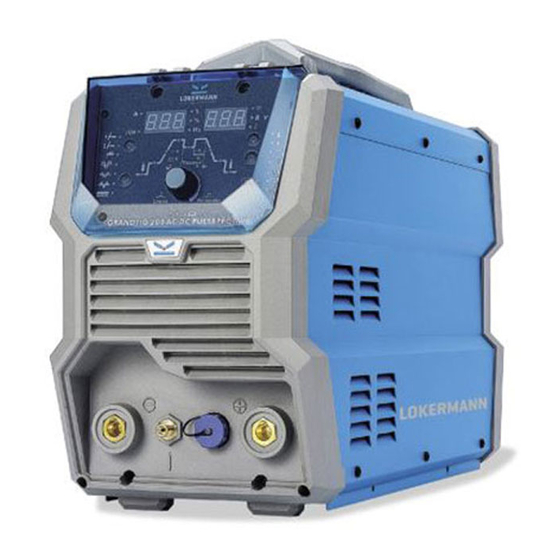
- Page 1 USER MANUAL INVERTER Based Welding Machines GRAND TIG 400 ACDC PULSE IMPORTANT: Read this OPERATOR MANUAL together with PRESCRIPTION AND COMPLIANCE MANUAL before to use this equipment. In case of loss one of two parts contact immediately your dealer. Allow the operator to consult this manual.
-
Page 2: Table Of Contents
CONTENT 1INSTALLATION WARNING 2 OVERVIEW 2.1 Features 2.2 Technical Data 2.3 Brief Introduction 2.4 Duty cycle and Over-heat 2.5 Working Principle 2.6 Volt-Ampere Characteristic 3 INSTALLATION & OPERATION 3.1 Layout for the front and rear panel 3.2 Power supply input connection 3.3 Installation &... -
Page 3: 1Installation Warning
INSTALLATION WARNING This machine is certified according to 60974-10:2014 Arc Welding Equipment Part 10: Electromagnetic Installation compatibility (EMC) requirement and the EUT belongs to Group 2 Class A. WARNING: This Class A equipment is intended for industrial use and it is not intended for use in warning residential locations where the elctrical power is provided by the public low-voltage supply system. -
Page 4: Overview
Overview IGBT module inverter technology for smooth & stable output, increased reliability and high duty cycle. Phase loss protection for automatic shut down if power supply phase loss occurs, Features to prevent damage. Integrated heavy duty industrial trolley and water cooler (optional). Lift TIG and HF start modes for versatility when welding around sensitive electronic equipment. -
Page 5: Brief Introduction
Brief GRAND TIG 400 AC DC PULSE adopts the latest Pulse Width Modulation (PWM) technology and the Introduction Insulated Gate Bipolar Transistor (IGBT) power modules. It uses switching frequencies in the 20KHz-50KHz ranges so as to replace the traditional line-frequency transformer type welding machines. Thus, machines are characterized with portability, small size, lightweight, low energy consumption and noise, etc. -
Page 6: Duty Cycle And Over-Heat
Duty The letter “X” stands for Duty Cycle, which is defined as the portion of the time a welding machine cycle and can weld continuously with it’s rated output current within a certain time cycle (10 minutes). Over-heat The relation between the duty cycle “X” and the output welding current “I” is shown as the right figure. If the welding machine is overheating, the IGBT over-heat protection sensing will send a signal to the welding machine control unit to cut the output welding current OFF and light the over-heat pilot lamp on the front panel. - Page 7 Installation (1) “-” Output terminal. & (2) TIG torch remote connection socket. * Operation (3) TIG torch gas connector. (4) “+” Output terminal. (5) Inlet gas connector. (6) Water cooler remote connection socket. (7) Input power cable. Layout for (8) Power switch Control Panel the front (9)...
- Page 8 Duty cycle and Water / Air Cooling Selection Button (14) Over-heat When using the integrated water cooling system with a water cooled torch, select the ‘water’ option (16). This will activate the water cooler power (the water cooler must also be switched on the rear panel) and the water cooling protection system.
- Page 9 TIG welding current setting indicator (4) Sets the main welding current. Unit(A) and setting range (10-320A/400A/500A). Base current setting indicator (5) Only available when pulse mode (12) is selected. Sets the current of the low/ base pulse. Unit(A) and setting range (10-320A/400A/500A). Down slope setting indicator (6) When the trigger is released, the welding current will reduce gradually over the time selected down to 0.
- Page 10 AC Triangle Wave Welding Output (27) Reduced heat input for same current setting. Especially useful for welding thin metal. AC Square Wave (28) Focused arc for maximum penetration, fast travel speed with best directional control. AC Sine Wave Welding Output (29) Traditional AC TIG welding wave form.
-
Page 11: Installation & Operation For Mma Welding
Power The TIG welding machine is designed to operate on a 3phase 380-400-440V AC power supply. supply input When the power supply voltage is over the safe work voltage, there are over voltage and under Connection voltage protection inside the welder, the alarm light will on, at the same time, the current output will be cut off. -
Page 12: Operation For Mma Welding
3.3.2 According to the above method to install is correct, turn the power switch, so that the power Operation switch is “ON” position, then the power indicator light, the fan comes on, the device work properly. for MMA Set to ‘MMA’ welding mode. Welding Set the welding parameters as required using the parameters control knob (following the instructions in the previous section). -
Page 13: Installation & Operation For Tig Welding
Installation Switch the ON/OFF Switch (located on the rear panel) to OFF. & Operation Connect the earth lead to “+”, tighten clockwise; Connect the earth clamp to the work piece. for TIG Contact with the work piece must be firm contact with clean, bare metal, with no corrosion, Welding paint or scale at the contact point. -
Page 14: Remote Current Control
3.4.3 Remote The welding machine can accept remote current control from a potentiometer/ analogue signal or current a digital up/down button signal. Potentiometer remote control will change the current from the 5A control minimum to the maximum set using the machine current control .Using an up/ down button remote signal, the current may be increased or decreased in 1A increments, or ‘scrolls’... -
Page 15: Electrodes
TIG Welding with Filler Wire Technique It is necessary in many situations with TIG welding to add a filler wire into the weld pool to build up weld reinforcement and create a strong weld. Once the arc is started the torch tungsten is held in place until a weld pool is created, a circular movement of the tungsten will assist is creating a weld pool of the desired size. - Page 16 Electrode Tip/Flat The shape of the tungsten electrode tip is an important process variable in precision arc welding. A good selection of tip/flat size will balance the need for several advantages. The bigger the flat, the more likely arc wander will occur and the more difficult it will be to arc start. However, increasing the flat to the maximum level that still allows arc start and eliminates arc wonder will improve the weld penetration and increase the electrode life.
-
Page 17: Tig Welding Troubleshooting
3.4.6 TIG Welding The following chart addresses some of the common problems of TIG welding. In all cases of equipment trouble malfunction, the manufacturer’s recommendations should be strictly adhered to and followed. shooting NO. Trouble Possible Reason Suggested Remedy Use pure Argon. Check cylinder Incorrect Gas or No Gas has gas, connected, turned on and torch valve is open... -
Page 18: Remote Control Configuration
Remote control The welding machine can be configured to communicate exclusively with wireless foot pedal or remote Configuration control panel. This is done by a simple process of synchronising the wireless remote control and the machine frequencies. Each interface frequency assigned is unique, so it is possible to use several wireless control systems/machines in the same area with no problems. - Page 19 Incorrect Gas Use pure Argon gas Yellowish residue / Set the gas flow between 10 - 15 smoke on the Inadequate gas flow l/min flow rate alumina nozzle & Inadequate post flow gas Increase the post flow gas time discoloured Alumina gas nozzle too Increase the size of the alumina gas tungsten...
-
Page 20: Wire Foot Pedal Configuration
3.5.2 Wire foot pedal ● When plug the twelve-lead aero-socket of pedal switch in it. Welder will identify the pedal switch, the welding current knob on the front panel will can’t use, and only 2T can be selected. Configuration ● When use the adjustment knob of max-welding current beside the pedal, can set the max-current you want. -
Page 21: Operation Notices
Operation ▲ Read Section §1 carefully before starting to use this equipment. Notices ▲ Connect the ground wire with the machine directly. ▲ Ensure that the input is three phase: 50/60Hz, 380V-400V-440V ±10%. ▲ Before operation, none concerned people should not be around the working area and especially children. -
Page 22: Troubleshooting
Troublesh- Before the welding machines are dispatched from the factory, they have already been tested ooting and calibrated accurately. It is forbidden for anyone who is not authorized by our company to do any change to the equipment! Maintenance course must be operated carefully. If any wire becomes flexible or is misplaced, it maybe potential danger to user! Only professional maintenance staff that isauthorized by our company could overhaul the machine! Be sure to shut off the Main Input Power before doing any repair work on the welding machine! -
Page 23: List Of Error Code
List of error Error Type Error code Description Lamp status code Yellow lamp(thermal Over-heating(1st thermal relay) protection) always on Yellow lamp(thermal Over-heating(2nd thermal relay) protection) always on Yellow lamp(thermal Thermal relay Over-heating(3rd thermal relay) protection) always on Yellow lamp(thermal Over-heating(4th thermal relay) protection) always on Yellow lamp(thermal Over-heating(Program in default) -
Page 24: Electrical Schematic Drawing
Electrical schematic drawing... - Page 25 LOKERMANN Srl, Via Produzione 16/18, 37044, Cologna Veneta, (VR)-Italy, Tel: +39 0442 1722469 lokermann@lokermann.eu - www.lokermann.eu...
Need help?
Do you have a question about the Grand Tig 400 ACDC Pulse and is the answer not in the manual?
Questions and answers