Table of Contents
Advertisement
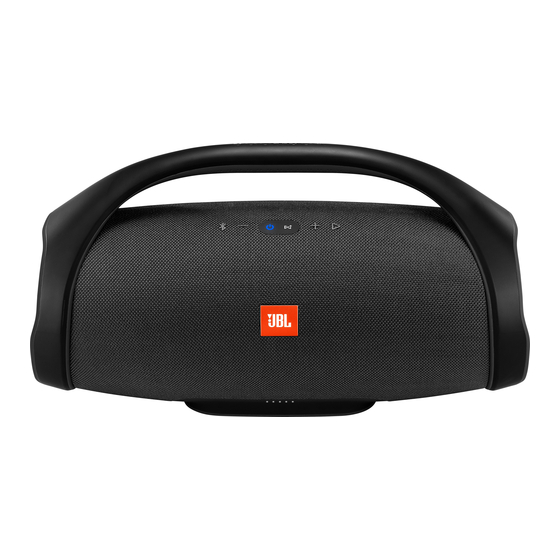
BOOMBOX
Portable Bluetooth Speaker with passive bass radiators, 10000 mAh(7.4V) battery for 24 hours of playtime
and charging of other devices through dual USB, and IPX7 waterproof.
SKU: JBLBOOMBOXBLKAM, JBLBOOMBOXBLKEU, JBLBOOMBOXBLKAS, JBLBOOMBOXBLKCN,
JBLBOOMBOXBLKJN, JBLBOOMBOXGRNAM, JBLBOOMBOXGRNEU, JBLBOOMBOXGRNAS,
JBLBOOMBOXGRNCN, JBLBOOMBOXGRNJN, JBLBOOMBOXBLKBR, JBLBOOMBOXGRNBR,
JBLBOOMBOXSQUADAM, JBLBOOMBOXSQUADEU, JBLBOOMBOXSQUADAS,
JBLBOOMBOXSQUADCN, JBLBOOMBOXSQUADJN, JBLBOOMBOXSQUADBR.
Released by Global Quality
Service Manual
(S/N Starting from PL)
harman/kardon, Inc.
Ver. 2.2 Feb. 2020
Advertisement
Table of Contents

Related Manuals for JBL JBLBOOMBOXBLKAM

Summary of Contents for JBL JBLBOOMBOXBLKAM
- Page 1 (S/N Starting from PL) Portable Bluetooth Speaker with passive bass radiators, 10000 mAh(7.4V) battery for 24 hours of playtime and charging of other devices through dual USB, and IPX7 waterproof. SKU: JBLBOOMBOXBLKAM, JBLBOOMBOXBLKEU, JBLBOOMBOXBLKAS, JBLBOOMBOXBLKCN, JBLBOOMBOXBLKJN, JBLBOOMBOXGRNAM, JBLBOOMBOXGRNEU, JBLBOOMBOXGRNAS, JBLBOOMBOXGRNCN, JBLBOOMBOXGRNJN, JBLBOOMBOXBLKBR, JBLBOOMBOXGRNBR, JBLBOOMBOXSQUADAM, JBLBOOMBOXSQUADEU, JBLBOOMBOXSQUADAS, JBLBOOMBOXSQUADCN, JBLBOOMBOXSQUADJN, JBLBOOMBOXSQUADBR.
-
Page 2: Table Of Contents
Table of Contents Technical Specifications....................... 3 Safety Instruction, Warning & Notes ................... 4 Software Upgrade Procedure ...................... 7 Block Diagram ........................... 11 Schematic Diagram – EQ ...................... 12 Schematic Diagram - Jack ......................13 Schematic Diagram - Key ......................14 Schematic Diagram - LED ...................... -
Page 3: Technical Specifications
Technical Specifications Bluetooth version: 4.2 Support: A2DP 1.3 AVRCP 1.6 HFP 1.6 Transducers: 4 inch woofer x 2, 20mm, Tweeter X 2 Output power: 2 X 30W (AC mode); 2 X 20W (Battery mode) Frequency response: 50Hz – 20kHz ... -
Page 4: Safety Instruction, Warning & Notes
Safety Instruction, Warning & Notes... -
Page 7: Software Upgrade Procedure
Software Upgrade Procedure 1. Plug in the DC plug of adaptor and connect micro USB to your computer 2. Power on the product 3. Long press Vol + and BT button together 10 seconds to enter DFU mode. If success, Power button and Connect + flash light blue and white correspondingly. - Page 8 6. ‘Harman HID DFU Tool’ window pops out. It shows device in the list. Then, click ‘OK’ 7. Select the dfu file that you want to upgrade. Then, click ‘Start Upgrade’.
- Page 9 8. Click ‘Yes’ if you want to continue the upgrade 9. Start firmware upgrade...
- Page 10 10. After upgrade success, click ‘Finish’ 11. Check firmware version by long press Connect + and Vol - . The product can speak the firmware version.
-
Page 12: Schematic Diagram - Eq
VCC3.3V VCC3.3V CONE1 1.0mm EQ_KEY TP10 EQ_LED_UP EQ_LED_DOWN 100nF 16V EQ_KEY 100K VCC3.3V VCC3.3V LED14 LED15 LED12 LED13 White White White White EQ_LED_UP EQ_LED_DOWN Description of Changes/Notes Rev. Project Name BOOMBOX Requirement of Tymphany Parts: Product: Premium Loudspeakers 1. Comply with Tymphany QSI057-1031 "Green Product Chemical Substances File Name: T651000007530 BOOMBOX EQ BD hwv2.0.0 2017526.SchDoc (Hui Zhou) Co. -
Page 13: Schematic Diagram - Jack
PADS_5V D1_N USB3_5V D1_P PADS_G 20/4A TP15 D2_N 600R@100MHz 120R@100MHz MIC_OUT TP16 D2_P PADS_MIC TP17 D3_P 120R@100MHz 10uF 0.1uF TP18 D3_N USB1_5V USB3_5V D3_P 120R@100MHz AUX_DET_G USB2_5V PADS_L PADS_D3_P DC-09-LF CJ12 AUX IN_L CONJ1 120R@100MHz PADS_AG PADS_D3_N 0.1uF 100pF PADS_R CONJ3 AUX IN_R D3_N... -
Page 14: Schematic Diagram - Key
VCC3.3V VCC3.3V VCC3.3V VCC3.3V VCC3.3V VOL- VOL+ PLAY CONNECT RK11 VOL- VOL+ PLAY/PAUSE CONNECT TP16 TP17 TP18 TP19 TP20 RK10 RK12 100K 100K 100K 100K 100K CONK1 STB_3V3 VCC3.3V 1.0mm POWER VCC3.3V VCC3.3V VCC3.3V LED8 LED9 VOL- STB_3V3 LED10 LED11 LED6 LED7 VOL+... -
Page 15: Schematic Diagram - Led
VCC3.3V VCC3.3V CONL1 LED1 LED2 LED3 LED4 LED5 LED6 LED1 LED2 White White White White White LED3 LED4 TP10 TP11 LED5_R LED5_W TP13 TP12 LED1 LED2 LED3 LED5_W LED4 LED5_R Description of Changes/Notes Rev. Project Name BOOMBOX Requirement of Tymphany Parts: Product: 1. -
Page 16: Schematic Diagram - Main
AMP_VCC AMP_VCC AMP_VCC 10uH C304 C305 0.1uF 0.1uF 220uF 220uF 4.7uF 4.7uF 1000pF 1000pF C150 C257 330pF 0.01uF C155 C157 R187 TP64 L_WF 0805 L_WF+ 120R@100MHz 3.3R C268 TPA3116D2 L_WF- 120R@100MHz HW Gain: +26dB AMP_VCC R188 R192 TP65 2.5mm R285 0805 MODSEL MODSEL... - Page 17 AMP_VCC 10uH AMP_VCC C306 C230 C231 C307 330pF 0.01uF 220uF 220uF 4.7uF 4.7uF 0.1uF 1000pF 0.1uF 1000pF R203 R204 TP10 120R@100MHz R_TW 0805 R_TW+ 3.3R TP111 TPA3116D2 C280 TP112 HW Gain: +26dB R_TW- 120R@100MHz AMP_VCC R205 R206 2.5mm TP12 R286 C198 0805 C186...
- Page 18 VBAT +5V0 10uH C182 0.1uF C183 C185 C189 120R@100MHz VBAT AMP_VCC R296 4.7uF TP124 120R@100MHz 120R@100MHz 5.1R 4.7uF 330pF 100nF R159 +5V0 120R@100MHz C147 330pF R266 120R@100MHz BAT_AMP_VCC VBAT1 49R9 4.7R R122 0.012R 1206 R162 CJQ4407 C169 C188 C140 C141 R123 0.012R 1206 3.3uH...
- Page 19 ANT1 TP37 DCIN_20V VCC3V3 TP78 R126 DC_DETE C154 10pF TP79 C156 TCLLZ18V R127 R152 C158 PIN76_22 LL34 PIN75_35 R160 TP83 2SC2712 TP84 VCC3V3 R161 MOSI MOSI DC_POW_ON MISO BT MIC_R+ 2SC2712 MISO C159 SPI_CS# 600 OHM BT MIC_R- SPI_CS# 100nF C161 R295 6.3V...
- Page 20 Version Date Description of Changes/Notes U7_VCC R174 R175 U7_VCC U7_REF BT MIC_R+ VCC3V3 33pF R178 R177 C194 C196 C195 C203 100pF BT MIC_R 100nF 10uF 10uF 6.3V 6.3V 33pF U7_REF TP2412-TSR R179 BT MIC_R- R180 U19_VCC U7_REF U19_VDD DSP_RESET C191 6.3V BT MIC_L- C200...
- Page 21 Version Date Description of Changes/Notes VDD3V3 Bias1 1N4148WS VDD3V3 1N4148WS VDD3V3 C104 680pF VDD3V3 C105 4.7uF L_TW_OP 6.3V C106 C107 6.3V C109 L_TW_OP C108 6.3V 10uF 100nF 4.7uF 100nF Bias1 10uF 6.3V 6.3V 100K 100nF 10uF TP2412-TSR Bias1 TP2412-TSR R87+R30=396.8 K TP2412-TSR 6.3V 390K...
- Page 22 AMP_VCC SK34A TP114 RED7_8_9 WHITE_NTC2_6 DCIN_20V SK34A BLUE_NTC1_5 YEL_BAL_EN_4 AK34A C118 BLACK_3_2_1 120R@100MHz 10uF VBAT 0.01R TP115 R125 1206 TP18 TP68 C116 C151 C114 TP17 0.1uF TP116 AO3400 TP20 TP19 10uF 120R@100MHz 0.01R 120R@100MHz C123 C115 0.1uF 6.8uH 1206 C227 0.1uF CHARGE1_OUT CHARGE2_OUT...
- Page 23 AVCC3V3 U3_VCC U4U3_REF TP43 TP45 R101 TP46 TP48 USB3_5V 600R@100MHz R128 U3_VCC R330 100nF 100nF 4.7uF R331 6.3V 2.2uF 330pF 50V AUX_L- NO USE R332 AGND R333 6.3V AUX_L+ AGND TP44 TP47 AGND TP24 330pF U4U3_REF TP2412-TSR U3_VCC PADS_L Gain:0dB 100pF AUX_LIN AGND...
-
Page 24: Schematic Diagram - Usb
TP01 TP04 TP05 USB3 PADS_5V_0 RJ03 PADS_G_0 MIC_TEST RJ04 RJ01 Vbus TP03 LJ01 TP02 PADS_D3_0_P SHELD CJ01 GND0 PADS_D3_0_N 100nF RJ05 RJ06 DJ01 DJ02 RJ02 UN1159C-N1211-7H G GND0 GND0 Description of Changes/Notes Rev. Project Name BOOMBOX Requirement of Tymphany Parts: Product: 1. -
Page 25: Pcb Layout - Eq
PCB Layout – EQ PCB Layout – Jack PCB Layout – Key Version 1.0 2017/7/3| Service Manual... -
Page 26: Pcb Layout - Led
Version 1.0 2017/7/3| Service Manual... -
Page 27: Pcb Layout - Usb
PCB Layout – USB Version 1.0 2017/7/3| Service Manual... -
Page 28: Mechanical Exploded View
MECHANICAL EXPLODED VIEW - MAIN UNIT T910400024630 HANDLE ASSY BLK/SQUAD BOOMBOX T910400030020 HANDLE ASSY GRN BOOMBOX T910400024520 MID HOUSING BLK BOOMBOX T910400024530 END CAP BLK BOOMBOX T04-1G05A4102 PR ASSEMBLY R BLK BOOMBOX T04-1G05A4104 PR ASSEMBLY R GRN/SQUAD BOOMBOX T910400026590 BOTTOM COVER ASSY BLK/SQUAD T910400026600 BOTTOM COVER ASSY GRN T910400028300 GRILLE ASSY GRN BOOMBOX T910400024670 GRILLE ASSY SQUAD BOOMBOX... - Page 29 MECHANICAL EXPLODED VIEW - MIDDLE HOUSING ASSY (DIAGRAM A) Pos. T910400024570 WOOFER 4" 4R 8KHZ BOOMBOX PL T180200010350 WF RUBBER CUSHION BOOMBOX PL T180700006270 WATER-PROOF MESH SINGLE SIDE BOOMBOX PL D BOOMBOX PL A11 T910400024730 RUBBER BUTTON BLK/SQUAD BOOMBOX PL A11 T910400024740 RUBBER BUTTON GRN BOOMBOX PL A12 T641700118200 FFC 13P 180MM CSR BOOMBOX PL A12 T641700160200 FFC 13P 130MM QCC BOOMBOX PL...
- Page 30 GRILLE ASSEMBLY EXPLODED VIEW (DIAGRAM B, ONLY FOR REFERENCE) GRILLE ASSY BLK P/N: T910400024620 GRILLE ASSY GRN P/N: T910400028300 GRILLE ASSY SQUAD P/N: T910400024670...
- Page 31 HANDLE ASSEMBLY EXPLODED VIEW (DIAGRAM C, ONLY FOR REFERENCE) HANDLE ASSY BLK/SQUAD P/N: T910400024630 HANDLE ASSY GRN P/N: T910400030020...
- Page 32 BOTTOM COVER ASSEMBLY EXPLODED VIEW (DIAGRAM D) Pos. T180200010340 IO DOOR INSIDE O RING BOOMBOX PL T910400024170 LED BOARD ASSY BOOMBOX PL T910400026590 BOTTOM COVER BLK/SQUAD BOOMBOX PL T910400026600 BOTTOM COVER GRN BOOMBOX PL T180200010270 RUBBER FOOT BLK BOOMBOX PL T910400024540 IO DOOR CSR BOOMBOX PL T910400034160 IO DOOR QCC BOOMBOX BLK/SQUAD PL T910400034180 IO DOOR QCC BOOMBOX GRN PL...
- Page 33 LEFT & RIGHT SIDE COVER EXPLODED VIEW (Diagram E, Only for reference) T690600002000 MIC OMNI-DIRECT 6MM BOOMBOX T180700006260 MIC WATER-PROOF MESH BOOMBOX T910400024590 TWEETER R 20MM 4R 20KH BOOMBOX T180200010320 L&R HOUSING O RING BOOMBOX T180200010360 TW RUBBER CUSHION BOOMBOX T910400024580 TWEETER L 20MM 4R 20KH BOOMBOX Pos.
-
Page 34: Packaging Exploded View
PACKAGING EXPLODED VIEW... -
Page 35: Spare Parts List
JBL BOOMBOX PL SPARE PARTS LIST V2.1 Pos. No. Description T910400031300 PR ASSEMBLY L GRN/SQUAD BOOMBOX PL T910400031280 PR ASSEMBLY L BLK BOOMBOX PL T910400024620 GRILLE ASSY BLK BOOMBOX PL T910400028300 GRILLE ASSY GRN BOOMBOX PL T910400024670 GRILLE ASSY SQUAD BOOMBOX PL... - Page 36 Q1,Q10,Q1 T586001860437 NMOS 60V L2N7002LT1G BOOMBOX PL Q3,Q4 T586002602738 NMOS 60V 2N7002DW-7-F BOOMBOX PL Q5,Q7 T5860032204A1 NMOS 30V GP3400A BOOMBOX PL SW1,SW2, SW3,SW4, T670200006100 CHIP SWITCH 4P W4.5 H1.6 P3.4 BOOMBOX PL SW5,SW6 SW1,SW2, T670200006100 CHIP SWITCH 4P W4.5 H1.6 P3.4 BOOMBOX PL SW3,SW4, SW5,SW6 U1,U5,U6,U...
- Page 37 T640100032600 POWER CORD 2P CN BOOMBOX PL T640100032800 POWER CORD 2P EU BOOMBOX PL T640100033200 POWER CORD 2P JN BOOMBOX PL T640100033100 POWER CORD 2P KOR BOOMBOX PL T640100034000 POWER CORD 2P THA BOOMBOX PL T640100032900 POWER CORD 2P UK BOOMBOX PL T180000003770 DESICCANT K PL...
-
Page 38: Disassembly Instruction
Disassembly Instruction 1. Rotate the end cap on left and right sides anticlockwise. You can do it by putting the product upside down on rubber sheet to get higher friction, and then rotate the main unit. 2. Unscrew total 12pcs screws (8pcs each side) on handle left and right sides... - Page 39 3. Take away the handle from the main unit 4. Tear the grille by hand, then you can see 4pcs screws on grille...
- Page 40 5. Unscrew 4pcs screws and take the grille away 6. Unscrew 8pcs screws on the button holder 7. Take button holder away...
- Page 41 8. Take the button rubber away 9. Unscrew 6pcs screw on right housing 10. Detach right tweeter cable and microphone cable Right tweeter cable Microphone cable...
- Page 42 11. Unscrew 6pcs screw on left housing 12. Detach left tweeter cable Left tweeter cable 13. Take the microphone away Microphone...
- Page 43 14. Unscrew total 6 pcs screws to take left and right tweeters away 15. Take 2pcs rubber rings away Rubber rings 16. Unscrews total 16pcs (8pcs each woofer) screws on woofers...
- Page 44 17. Detach woofer plugs 18. Take 2pcs woofers away 19. Take 2pcs woofer rubber rings away Woofer rubber rings...
- Page 45 20. Take out key board 21. Detach FFC cable on key board 22. Detach FFC cable between main board to key board and detach BT antenna from the mid housing FFC cable BT Antenna...
- Page 46 23. Detach all cables from main board 24. Unscrews total 5pcs screws on main board Screws 25. Take main board away from mid housing...
- Page 47 26. Cut the cable tie on ferrite ring 27. Take out the ferrite ring 28. Unscrew total 10pcs screws on bottom cover Screw locations...
- Page 48 29. Separate bottom cover from mid housing 30. Take battery away 31. Unscrew 3pcs screws on I/O door cover...
- Page 49 32. Unscrew 4pcs screws on EQ board and 3pcs screws EQ button holder. Then you can take EQ button, EQ button holder and EQ board away 33. Unscrew 2pcs screws on LED board and remove LED board 34. Unscrew 4pcs screw on I/O board cover...
-
Page 50: Service Information
Module/parts changes Part Change in new revision: Please note JBL BOOMBOX has changed BT Module to Qualcomm QCC from existing CSR solution. New and old module are not compatible. New parts for product with S/N starting from below cut in number. -
Page 51: Revision List
Revision List Version 1.0 *Initial release for JBL Boombox, Aug. 2017 Version 1.1 *IPart Numbers updated on page 28, 29, 32, 33, 35 and 36, Dec. 2017 Version 1.2 *Main Board Layout Diagram updated to high resolution picture on page 26, Jan. 2018 Version 1.3...
Need help?
Do you have a question about the JBLBOOMBOXBLKAM and is the answer not in the manual?
Questions and answers