Table of Contents
Advertisement
Available languages
Available languages
Quick Links
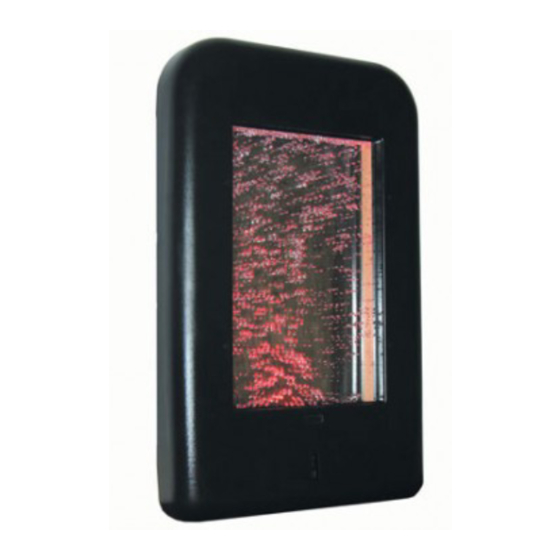
1. Product Name
Bubble Wall Panel by ROMPA®
2. Product Code
18523
3. Colour
Black or white
4. Brief Description
The best of both worlds ‐ a panel and a bubble tube in one. A brilliant product from
ROMPA® creating an enthralling fusion and brilliant Snoezelen® room feature.
5. Contents
• 1 x Panel
• 1 x Power Supply Control Unit with leads attached
Advertisement
Table of Contents

Summary of Contents for Rompa 18523
- Page 1 1. Product Name Bubble Wall Panel by ROMPA® 2. Product Code 18523 3. Colour Black or white 4. Brief Description The best of both worlds ‐ a panel and a bubble tube in one. A brilliant product from ROMPA® creating an enthralling fusion and brilliant Snoezelen® room feature. 5. Contents • 1 x Panel • 1 x Power Supply Control Unit with leads attached ...
-
Page 2: Detailed Description
6. Snoezelen® Stimulations • Sight • Sound 7. Best Use Use in a darkened environment, for maximum visual impact. 8. Compatible ROMPA® Products 17274 – Super Interactive Switch Box 20698 – BCB Water Treatment Fluid 19847 – 8 Colour Wirefree Controller 19939 – Wi Fi Interactive Carpet switch Set by ROMPA® 18870 ‐ Talking Cube by ROMPA® 20402 – Mini Talking Cube 20563 – Wi Fi Microphone by ROMPA® 19214 – Colour Changing Panel by ROMPA® 9. Starting Up • Fill with water. • Plug into mains socket. 10. Detailed Description The best of both worlds ‐ a panel and a bubble tube in one. A brilliant product from ROMPA® creating an enthralling fusion and brilliant Snoezelen® room feature. Watch the bubbles move and colours change, or control these interactively with one of ROMPA®'s many compatible switches and switching systems. Compatible with Super Interactive Switch ... - Page 3 OPERATION 1. There are two screw holes on each side of the Power Supply should you wish to wall mount the unit, or secure it to the floor. Note: please wall mount in a well ventilated area. No fixings are supplied as these depend on the surface the unit will be attached to. The Power Supply box weighs 1.3kg. 2. Plug the Power Supply into the Bubble Wall Panel (locate the hexagon shaped socket at the top right of the panel and connect the circular end of the power supply lead into it). 3. Plug the other end of the Power Supply in at the wall. 4. Switch on at the wall. There may be a slight delay. 5. The unit will begin to flash, displaying a sequence of coloured lights, and bubbles will begin to rise up the Bubble Wall. Turn the wheel in the centre of the controls (labelled below) to adjust the speed of the light change. ...
-
Page 4: Led Light
LED Light Please note: The Connector marked J is for the 17274LED Super Interactive Switch Box only. Connecting any other cable to this socket may cause permanent damage to the Bubble Walls. Ensure that water does not come into contact with the electronic circuit boards in the Bubble Wall. Please take extreme care when filling/emptying the Bubble Wall to ensure that the electronics remains dry. You now have several options: 1. Allow your Bubble Wall to function passively – that is to say that the colours will change in sequence. 2. Use a round 5 button switch box to control bubbles and just 4 colours – red, blue, green and yellow. Please see www.rompa.com for details of these – 17274LED. Connect the switch to the socket labelled J in the image on the previous page. 3. Use the Bubble Wall to respond to Wi Fi products, such as the Talking Cube, 8 Colour Wirefree Controller etc. When used in conjunction with Wi Fi products, the Bubble Wall will be lit in the colour chosen by the user. ... - Page 5 USING THE SUPER INTERACTIVE SWITCH BOX 17274 (THE ROUND 5 BUTTON SWITCH BOX ‐ NOT INCLUDED IN 18523) • To select a coloured light press one of the four buttons (red, green, yellow, blue) on the top. • To stop the bubbles press the central button on the top. Release the button to make the bubbles start again. On the underside of the Switch Box there is a dial labelled BUBBLES with two options – NORMALLY ON and NORMALLY OFF. Switch between these so that one way the bubbles start if the central button is pressed and the other way the bubbles will stop if the central button is pressed. • To adjust the speed of the light change/flash rate use the SPEED and DELAY buttons underneath labelled COLOURS. ® YOU CAN ADD AN EXTERNAL SWITCH (JACK) – When a ROMPA switch is plugged into the Jack Socket (M) on the side of Push Button Switch Box, most other controls will be over‐...
- Page 6 5. With the left hand dial set to COLOURS and the right hand one to HOLD, then the Bubbles will be on all of the time and the Lights will start when the ROMPA switch is activated and will only stop when the ROMPA switch is activated again. ...
-
Page 7: Technical Specification
12. Technical Specification Size: 115 x 72.5 x 11 cm Weight: 45kg when full Capacity: 4.4 litres of water Power supply: 240 Volt (U ‐ 110V) 110V Output 12V AC 60W 240V Output 12V AC 60W Output: 12v DC 5A 60W max Cover: phthalate‐free CE: The power supply is UL listed – E1494743G58, and meets the requirements of BS EN61558‐1 and BS EN61558‐2‐6 Class II Transformer ... -
Page 8: Installation
13. Installation Choose a safe and suitable location for your panel. The panel is ONLY to be used in dry environments. The ambient temperature should not exceed 40°C. No fixings are included in this product for the wall. When fixing it to the wall please consult a suitably qualified professional builder or from an estates department to understand the construction of the wall the panel is to be fixed to, so that the correct fittings can be used Attach fixings such as mirror plates to the back of the panel. Check the fixings e.g. mirror plates you buy can easily support 20kg. You may wish to attach two mirror plates to the back of the panel at the top and two on the back at the bottom. When attaching fixings to the back of the panel please proceed with caution – be aware that there are electrical assemblies inside the panel. This Panel should not be used in a Porter 18518/18522. To fill with water, Locate the four screw covers on the front of the panel – two one third of the way down and two one third of the way up. Remove the four screw covers from the front of the Bubble Wall. Slide a flat edge (e.g. blunt knife) under the covers to remove them. Remove the four positive (cross‐head) screws and washers. Put these four screws, screw covers and washers in a safe place! Carefully pull the front off. Check the drainage valve of the hose is closed. ... - Page 9 Replace the front and screws and screw covers. Since the bottom of the panel front is deeper than the top it is not possible to put the panel front on upside down. ...
-
Page 10: Care And Maintenance
14. Care and Maintenance • Wipe the exterior of the Panel with a clean, soft and very slightly dampened cloth. Do not allow the Panel to become wet. Never use solvents or liquid detergents inside the Bubble Wall. • Do not strike the Panel – handle it with appropriate care. TO EMPTY THE BUBBLE WALL 1. Remove the four screw covers, screws and washers that secure the front of the Bubble Wall. Put these in a safe place. 2. Remove the front. 3. Reach inside the panel and gently locate the drain hose with the blue valve on the end. 4. Hold the blue valve over a bucket or recipient to catch the water. 5. Release the blue valve by turning it. 6. Turn blue drain valve anti‐clockwise to start flow and clockwise to stop the flow. 7. Refill the panel as required, checking that the drainage valve is closed. Since this product contains LED (light emitting diodes) rather than spotlights, it will not be necessary to change any lamps. GENERAL CARE 1. Top the water level up as required. Subject to the warmth in the room and the use of this panel, the water level may need topping up every 4 to 7 days. 2. To remove any dirt inside the panel follow the above instructions, rinse the case with the valve open and once finished close the valve. 3. To prevent the growth of microbes in the water, change the water monthly. Empty the panel altogether if it is not to be used for long periods. Use BCB Water Treatment Fluid ... -
Page 11: Troubleshooting
Lights but no bubbles • Have you connected a Super Interactive Switch Box (17274) to make your Bubble Wall interactive? Is the Switch Box firmly connected? Turn the Switch Box over – is it set to ‘Bubbles On’? If it is not, set it to this. Super Interactive Switch Box does not work • Is the Switch Box firmly connected? Turn the Switch Box over – is it set to ‘Bubbles On’? If it is not, set it to this. Further copies of these instructions can be downloaded at www.rompa.com We hope you find our instructions invaluable. If you have any suggestions for improving them further your comments will be greatly received – please contact us at producthelp@rompa.com BUBBLE WALL PANEL 18523, January 2012 Copyright ROMPA®Ltd ... - Page 12 1. Nome do Produto Painel Parede de Bolhas 2. Código do Produto 18523 3. Cor Preto ou branco 4. Descrição Breve O melhor de dois mundos – um painel e uma coluna de água num só. Um produto brilhante que torna a sua sala de Snoezelen cativante. 5. Conteúdo • 1 x Painel • 1 x Fonte de alimentação ...
- Page 13 6. Estimulações Snoezelen • Visão • Som 7. Melhor Utilização Utilize num ambiente escuro, para máximo impacto visual. 8. Compatibilidade com Produtos Rompa 17274 – Painel de Controlo 20698 – Líquido de Tratamento de Água 19847 – Painel de Controlo de 8 Botões 19939 – Tapetes Interativos WiFi 18870 – Cubo Falante 20402 – Mini Cubo Falante 20563 – Microfone WiFi 19214 – Painel Mudança de Cor 9. Começar • Encha com água. • Ligue na tomada. 10. Descrição Detalhada O melhor de dois mundos – um painel e uma coluna de água num só produto. Um produto brilhante que vai tornar a sua sala de Snoezelen mais cativante. Observe a movimentação das bolhas e a mudança de cores, ou controle‐as interactivamente com um dos muitos ...
- Page 14 FUNCIONAMENTO Existem dois buracos para parafusos nas laterais da fonte de alimentação, caso pretenda montar na parede ou fixar no chão. Nota: por favor monte na parede numa área bem ventilada. Não são fornecidos acessórios de fixação pois estes dependem da superfície onde vai fixar. A fonte de alimentação pesa 1.3kg. Ligue a fonte de alimentação ao painel (canto superior direito do painel). Ligue a outra ponta da fonte de alimentação na tomada. Pode haver um pequeno atraso quando ligar. O painel vai começar a piscar, exibindo uma sequência de luzes coloridas e as bolhas vão começar a subir pela parede de bolhas. Rode o botão no centro dos controlos (I) ajustar a velocidade da mudança de cor. ...
- Page 15 Tem agora diversas opções: Deixe a sua Parede de Bolhas funcionar passivamente – o mesmo será dizer que as cores mudam sequencialmente. Utilize o painel de controlo de 5 botões para controlar as bolhas e apenas 4 cores – vermelho, azul, verde e amarelo. Por favor visite www.rompa.com para mais detalhes acerca do painel 17274. Ligue o painel na ligação J ilustrada na imagem anterior. Utilize a parede de bolhas para responder a produtos WiFi, tais como o Cubo Falante, Painel de Controlo de 8 Botões, etc. Quando utilizada em conjunto com produtos WiFi, a Parede de Bolhas acende na cor selecionada pelo utilizador. ...
- Page 16 • Para ajustar a velocidade a que a cor muda/pisca, utilize os botões SPEED e DELAY. PODE ADICIONAR UM SWITCH EXTERNO (JACK) – Quando liga um switch Rompa na ligação jack M na lateral do painel de controlo, a maioria dos restantes controlos serão substituídos. Existem nove possibilidades quando utiliza um switch Rompa. Utilize os botões na parte de baixo do painel de controlo: Com o botão da esquerda na posição COLOURS e o da direita na posição FLASH ON, as bolhas vão estar sempre ligadas e as luzes acendem quando o switch Rompa for ativado. Com o botão da esquerda na posição BUBBLES e o da direita na posição FLASH ON, as luzes vão estar sempre acesas e só tem bolhas quando ativar o switch Rompa. ...
-
Page 17: Especificações Técnicas
Com o botão da esquerda na posição BOTH e o da direita na posição FLASH ON, as bolhas e as luzes vão estar desligadas e só ligam quando o switch Rompa for ativado. Com o botão da esquerda na posição BOTH e o da direita na posição FLASH OFF, as bolhas e as luzes vão estar sempre ligadas e só param quando o switch Rompa for ativado. Com o botão da esquerda na posição BOTH e o da direita na posição HOLD, as luzes e ... - Page 18 13. Instalação Escolha uma localização segura e adequada para colocar o seu painel. O painel SÓ DEVE ser usado em ambientes secos. A temperatura ambiente não deve exceder os 40º. Os acessórios de fixação não estão incluídos. Quando for fixar este produto na parede, por favor consulte um profissional qualificado para saber o tipo de construção da parede em que vai instalar o painel, para que possa utilizar acessórios de fixação adequados. Pode utilizar suportes dos espelhos na parte de trás do painel para fazer a fixação. Os Suportes devem aguentar facilmente 20kg. Deve colocar dois suportes junto ao topo do painel e dois suportes junto ao fundo. Quando estiver a colocar os suportes, proceda com cuidado – existem componentes elétricos no interior do painel. ...
- Page 19 Volte a colocar a parte da frente, parafusos e tampas. Uma vez que a parte de baixo do painel é mais funda do que a parte de cima, não é possível colocar a tampa ao contrário. ...
-
Page 20: Cuidado E Manutenção
Tem luzes mas não tem bolhas • Ligou um painel de controlo 17274? Está bem ligado? Vire o painel ao contrário – está definido em ‘BUBBLES ON’, se não estiver, coloque nessa posição. O painel de controlo não funciona • O painel está bem ligado? Vire‐o ao contrário – está definido em ‘BUBBLES ON’? Caso não esteja, coloque nessa posição. Painel Parede de Bolhas 18523, January 2012 Copyright ROMPA®Ltd...
Need help?
Do you have a question about the 18523 and is the answer not in the manual?
Questions and answers