Table of Contents
Advertisement
Quick Links
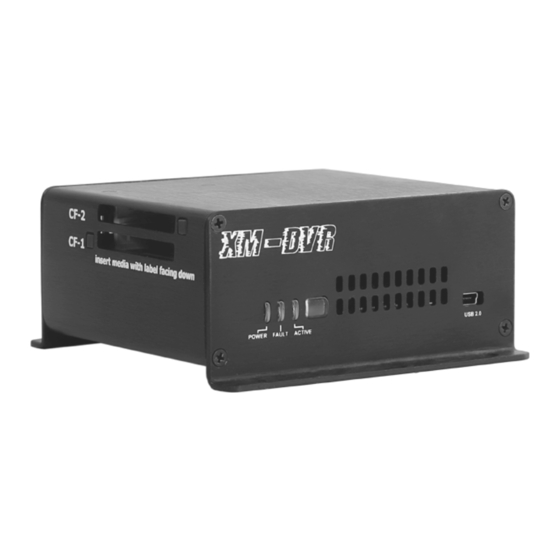
Datatoys XM-DVR Pro
Dual Channel Recorder
Proudly Made in Milwaukee, WI
User Manual
XM-DVR Pro Dual Channel DVR
December 2009
Page 1 of 32
Manual Rev 3.05
Introduction
Warning Cautions and Notes
Define
Warnings
System Overview
Packing List
Functional Overview
Component Overview
Recorder
Power Supply
DVI Harness
Installation
Connections
DVR Connections
DVI Connections
Recorder Installation
Power Supply Installation
Camera Installation
Cable Installation
Using the System
Before you begin
Recording
Reviewing Events
DVR Playback
Connecting a Monitor
Event Playback
PC Playback
Transferring Events
Playing Events
Editing Events
Menu and Settings
Remote Control
On-Screen Display
Setup
Audio/Video
Alarm
Clock
Zones
Storage
Password
OSD
System
Factory Default
Playback
Plan
About
Camera Settings
Troubleshooting
Accessories
Warranty
Contact
XM-DVR Pro Dual Channel DVR
December 2009
.............................. 3
... 3
. 3
.. 3
4
. 4
.. 5
6
.. 6
.. 7
7
8
. 8
.... 9
.. 10
... 11
... 12
. 13
. 13
14
. 14
.. 14
.................... 15
15
.
15
. . 16
.. 17
.. 17
... 18
... 18
.. 19
19
.. 20
.. 21
22
... 23
24
.. 24
25
25
. 26
. 26
.. 26
. 27
. 27
.. 27
28
...29
.. 30
31
... 31
Page 2 of 32
Manual Rev 3.05
Advertisement
Table of Contents

Related Manuals for Datatoys XM-DVR Pro

Summary of Contents for Datatoys XM-DVR Pro
- Page 1 Camera Settings Troubleshooting ...29 Accessories .. 30 Warranty Contact ... 31 User Manual XM-DVR Pro Dual Channel DVR Page 1 of 32 XM-DVR Pro Dual Channel DVR Page 2 of 32 December 2009 Manual Rev 3.05 December 2009 Manual Rev 3.05...
- Page 2 Congratulations on your purchase of the Datatoys XM-DVR Pro! The XM-DVR Pro the highest quality MPEG2 recorder available, with an advanced encoding algorithm and one of the highest bit rates. The XM-DVR Pro is used world wide in The XM-DVR Pro is available in four variants: film, aviation, military, motorsports and many other applications.
-
Page 3: Functional Overview
RS232, or by the IR remote control. The XM-DVR Pro records the video and audio files to media in a secure format • which can be transferred to a PC via the DVR2PC software. Once transferred the files can be viewed with any MPEG2 media player or burned to a DVD. -
Page 4: Installation
Connections DVI: Mates with DVI Connector on the XM-DVR Pro • Please refer to diagram below for proper connection of your XM-DVR Pro and its AV-OUT: Mates with AV-OUT cable or monitor. • components. All connections are indexed and should be hand tightened. Extension SWTCH: Mates with patch cable or record stop/start switch. - Page 5 This power connection will supply for various audio inputs. the XM-DVR Pro, cameras, microphones and auxiliary devices with power. Audio Video Output Connection: One (1) AV-OUT connection can be found on the DVI-Harness in the form of a male 4-PIN connector.
-
Page 6: Recorder Installation
The XM-DVR Pro is designed to be mounted with 10-24 or 10-32 bolts through the four mounting holes in the front and rear plates of the DVR. The XM-DVR Pro can be mounted in any orientation while maintaining access to the media bays and clearance for connections. -
Page 7: Camera Installation
To stop the recording you may simply cut power to the XM-DVR Pro. When power is cut the unit will automatically close the Once cabling and all other components are installed, connect the system per the file from the last archive point. -
Page 8: Reviewing Events
Once a monitor is connected, insert the compact flash card, and boot the DVR. CAUTION Never insert or remove a memory card from the XM-DVR Pro while power The DVR will take 20-30 seconds to boot and you will see the splash screen appear is being supplied to the unit. - Page 9 For optimal playback it is recommended you deinterlace files while viewing. In Transferring Events VLC this can be done by clicking Video>Deinterlace>Blend CAUTION Never insert or remove a memory card from the XM-DVR Pro while power is being supplied to the unit. This may damage equipment and render your recordings useless.
-
Page 10: Menu And Settings
Menu and Settings On-Screen Display All settings for the XM-DVR Pro are configured through the on-screen display. To Remote Control view the on-screen display you must connect a monitor per the instructions on page Button Function: Once the DVR boots you notice a blue info bar at the bottom of the screen. - Page 11 Video Timeout - upon loss of video signal, this is the amount of time the • system waits before closing the file. XM-DVR Pro Dual Channel DVR Page 21 of 32 XM-DVR Pro Dual Channel DVR Page 22 of 32 December 2009 Manual Rev 3.05...
- Page 12 NOTE To set the XM-DVR Pro to start recording on power up with out a switch the Alarm This menu contains the switch settings for stopping and starting recordings. following settings are recommended. Pre Alarm – 0 • Post Alarm – Inf •...
- Page 13 Restore factory defaults Erase disk Change password NOTE Settings are saved by scrolling to Save and pressing the right arrow. XM-DVR Pro Dual Channel DVR Page 25 of 32 XM-DVR Pro Dual Channel DVR Page 26 of 32 December 2009 Manual Rev 3.05...
- Page 14 About Factory Default – restore settings to their factory-preset values • Displays firmware and related information, such as version and date. XM-DVR Pro Dual Channel DVR Page 27 of 32 XM-DVR Pro Dual Channel DVR Page 28 of 32 December 2009 Manual Rev 3.05...
-
Page 15: Troubleshooting
Trouble Shooting Accessories The DVR is equipped with three Datatoys offers a wide variety of accessories that can be added to your DVR. status lights: Power – Green • Monitors Fault – Red • Active – Amber • Several monitors are available that can be added to... -
Page 16: Warranty
Warranty Motorsports-Exchange.com LLC (Datatoys) warrants that each new XM-DVR Pro will be free of defective materials and workmanship for a period of one (1) year from the date of original purchase. Motorsports-Exchange.com LLC will remedy and such defect by repair or replacement (at our option) of the unit, provided the unit is delivered to the address listed above, intact, with all transportation charges prepaid, and accompanied by a copy of the original receipt and return authorization number.
Need help?
Do you have a question about the XM-DVR Pro and is the answer not in the manual?
Questions and answers