Table of Contents
Advertisement
Quick Links
Advertisement
Table of Contents

Summary of Contents for TELELYNX IDH2-3000 Series
- Page 1 MULTI CHANNEL MODEL IDH2-3000...
-
Page 2: Safety Instructions
Make sure the AC power is unplugged in case of operator services within the device casing or close to power supply are needed. Only TELELYNX trained and approved staff is permitted to perform live line operation and maintenance within the device casing. -
Page 3: Table Of Contents
§2.2 System Requirements ....................... 8 §3 Operating the Device ........................9 §3.1 Quick Start ........................9 §3.2 Web Management Operations of IDH2-3000 Series ............10 §3.2.1 User Login ......................10 §3.2.2 User Management ....................12 §3.2.2.1 Add new user .................... 12 §3.2.2.2 Edit users’... - Page 4 §3.3 Front Panel Operation of IDH2-3000 Series ..............54 Annex A: Technical Specifications of IDH2-3000 Series .............. 56 Annex B: QAM Reference Information ..................58 Annex C: Frequently Asked Questions ................... 59...
-
Page 5: Introduction
§ § IDH2-3000 Series is a new generation of Multifunctional Modular IP Multiplexer-Scrambler-QAM modulator, which can receive TS from the three IP interfaces, and then multiplex, scramble and process it with channel coding. It adopts our newly developed functions such as “Module Management”, device scrambling, and channel modulation. -
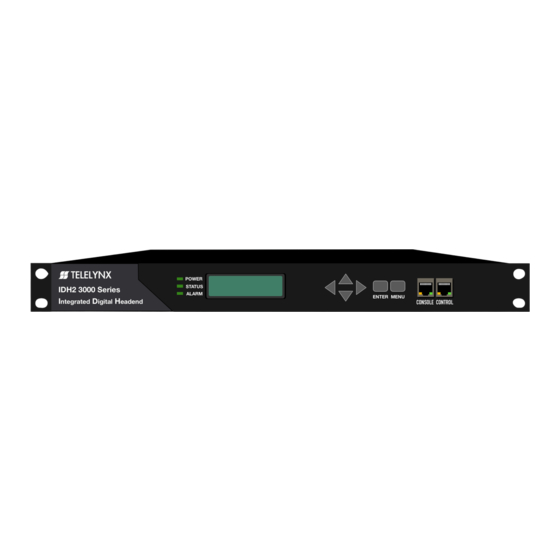
Page 6: Front Panel
§ § As shown in figure 2, the rear panel of IDH2-3000 Series consists of one power supply socket, one power switch, one RJ45 management port, two ASI inputs, two RF outputs (main output and testing output), and a grounding point. - Page 7 L3 switch in the IP head end installation. RF Outputs: RF-OUT port is used to connect IDH2-3000 Series’ output signal to digital CATV system, HFC network or digital terrestrial transmission station via coaxial cables; the RF-20dB port is used for monitoring.
-
Page 8: Before Use The Device
0x47. The TS stream (except the stream with UDP format) also can be output from ASI interface, with standard format of 188 byte. IDH2-3000 Series may be able to receive multiple transport streams from any devices with the TS format complies with the above-mentioned format. -
Page 9: Operating The Device
§ § § Please follow the procedures below if it is the first time for you to use IDH2-3000 Series for constructing digital TV head-end system: Construct your hardware environment, including chassis installation, power supply system deployment, and connecting switches, IDH2-3000 Series, the preceding device(s)(e.g. IRD, encoders, etc.), terminal receivers (DVB-C), TV monitors, management workstation and CAS server... -
Page 10: Web Management Operations Of Idh2-3000 Series
There is a factory default administrator user “admin” in IDH2-3000 Series with password of “000000”. Please use this user and password to login to the system for the first time operation of IDH2-3000 Series. But changing of password for this user is strongly recommended, and the new password should be kept safely. - Page 11 If you have never saved your parameters, all the parameters will change to the default state. So if you want to save your own parameters, please click in lower right corner after you finish setting IDH2-3000 Series. -11-...
-
Page 12: User Management
§ § We recommend you to change the user and password after logging by the default user and password for the safety. You can edit your user information in the user management page. Click “device setting” in the home page, and then you have the device setting page, as shown in the figure below: Fig.6 Device setting page Click “user management”... -
Page 13: Edit Users' Information
In this bar, you can edit your user’s password and that will be accomplished by clicking “submit”. 【Remark】: You could not delete the “admin” user, but you can change the password of this user. When you use IDH2-3000 Series for the first time, you should change admin’s password at first and then save this password. -
Page 14: Delete An User
§ § 3 Delete an user In the user information list in this page, click the “delete” button in the same row to delete this user. 【Remark】: You will not permit to delete admin user but can delete the normal user. -14-... -
Page 15: Basic Parameter Setting
In the page of figure 11, input a right IP address in the “IP settings” bar, then click “submit” to set IDH2-3000 Series’ network parameter. 【Remark】: To ensure the proper working of device, you should guarantee that the management port IP address and IDH2-3000 Series’ management server IP are in the same network segment -15-... -
Page 16: Mac Address Setting
“time synchronization protocol” bar. 【Remark】: When you set a right network clock server address, IDH2-3000 Series will update his system clock with the period which the user sets if SNTP service and network clock server are enabled. -
Page 17: Advanced Parameter Setting
§ § In the “system setting” page, click “Advanced setting” in the “select option” area To enter the parameter setting page, as shown in the figure below: Fig.11 Advanced setting page In this page, you could import/export/reset the parameters, back-up/recover the parameters, upgrade/back-up the software, import the authorization document, restart the device,etc. - Page 18 Fig.13 document uploading management page System will checkout the uploading document, if its format is right, there will appear mark in the “uploading” bar and “document checkout” bar. Click “Submit” button, you’ll have this dialog box: Click “YES” button to import the parameters. 【Remark】: 1.
- Page 19 § § Back-up the parameters: In the page of figure 15, there is a “parameter Backup/Restore” bar: Fig.14 “parameter back-up/recover” bar Fill in the “input parameter description information” (just like 2012-08-22), click “Backup” button, you’ll have this dialog box: Click ”YES” button, system will create a new back-up document. In the same time, “input parameter description information”...
- Page 20 § § As shown in the figur12, you can choose the upgrade document in the “Software Upgrade/Export” bar, then import it to upgrade the device. Click “Browse” button, you’ll have this dialog box: Select the upgrade document, click “Open” button, as shown below: Click “Upgrade”...
-
Page 21: Device Authorization
As shown in the figure 12, you can import the authorization file to upgrade the device. As shown in the table 1: IDH2-3000 Series has multiple types of authorization, please verify the authorization type before you buy this device. After buying this device, if you want to get a higher configuration, you can also contact with our salesman to buy the authorization. - Page 22 Fig.16 Device reboot information Click “YES” button, to reboot the device. -22-...
-
Page 23: Input/Output Setting
§ Click “Input/Output” hyperlink in the navigation menu of the home page to input/output setting page of IDH2-3000 Series, as shown below. Fig.17 Input/Output Setting, main page The number and the name of input/output channel of the device are listed in the “Select Items” in the left side of this page, as shown below: Fig.18 List of the input/output channel... -
Page 24: Configuration Of The Modulation Channel
Fig.19 Channel Settings § § As shown in figure 19, click “output channel” hyperlink, the page of the configuration of Modulation channel is shown in “channel settings” page, as shown below: Fig.20 Configuration page of Modulation channel Channel parameters: Standard of the ITU encoding, bandwidth, frequency, modulation mode, symbol rate, inversion of spectrum, switch of the modulation, gain and switch of the RF can be set in this page of the “channel settings”. - Page 25 Standard of the ITU Encoding: Annex A/B/C Frequency range: 54 – 860 MHz Bandwidth:6/8MHz Modulation Module:16/32/64/128/256QAM Inversion of spectrum:ON/OFF Switch of Modulation:ON/OFF Gain:0.00 – 20.00 (0.25 step size) Switch of RF:ON/OFF 【Remark】: 1. J.83 Annex A is the standard of Europe, J.83 Annex B is the standard of North American; Annex C is the standard of Japan;...
-
Page 26: Multiplexing Setting Of Programs
§ Click “MUX Setting” hyperlink in the navigation menu of the home page to Multiplexing setting page of IDH2-3000 Series, as shown in figure 21 Fig.21 Multiplexing setting of programs The multiplex parameter configurations are listed in the “Select Items” in the left side of this page, including the module selection, general setting, manual PID map, manual PSI inserter, NIT edit, input service and output service. -
Page 27: General Setting
The default of input/output character-sets, time zone and TDT/TOT can be set in this page. § § The character-sets setting and transform functions built in IDH2-3000 Series to ensure the received program information over transport stream can be displayed correctly, meanwhile ensure this information can be displayed correctly in the next device. -
Page 28: Pid Mapping Function
get this time zone. 【Remark】: 1. At present UTC + 8:00 is used in China. § 、 § 、 The TDT table update cycle and TOT switch can be set in the column of TDT/TOT setting. TDT update cycle(per second): update the TDT table with cyclical time. TOT switch: set it on, the device insert TOT table in the sent transport stream. - Page 29 Fig.24 PID mapping Click “add” button in the bottom of this page, a new column of PID parameter setting will display, as shown below: Input TS index: choose the input TS channel from 1 to 8. Input PID: select the PID, which is needed to map. Output TS index: choose the output channel from 1 to 4.
-
Page 30: Psi Information Insertion
§ § IDH2-3000 Series supports the PSI data update, i.e.: OTA file, BAT, SDT e.g.. The maximum size of the total updated file is 1smaller than the total size and the bandwidth of the updated data is smaller than the total bandwidth. - Page 31 After select, click the “upload” bottom The system will automatically skip to the upload management page, as shown below: The system will adjust the uploaded PSI file, if the file is uploaded correctly and the file layout is correct, the column of “upload status” and “file adjust” will display this characteristic: Click the “Submit”...
-
Page 32: Nit Edit
The NIT of the transport stream of DTV support the information of the physical layer of the network, IDH2-3000 Series supports edit NIT manually. As shown in figure 27, click “NIT edit” button, the NIT edit page is shown in the right side of the main... - Page 33 FEC outer-coding are selected by drop-down list, the other parameters are manually input. After the configuration, click “Submit” button at right-bottom of the page to save the setting. IDH2-3000 Series supports the edit of NIT Network Descriptor and NIT TS Descriptor. 【Remark】the range of NIT version: 1-31...
- Page 34 NIT Network descriptor edit: click button at the right-top of the page, the box of the descriptor type will display below. Fig.29 NIT Network descriptor edit Click “Add” button, a new column of NIT network descriptor will display and can be edit, as shown below: “Switch”...
-
Page 35: Input Service
After that click the “Delete” button in the bottom of this page, then, click “Submit”, the selected NIT information will be deleted. § § As shown in figure 29, there is a button at the right top of the page. This button can control the transmission of all the NIT information. - Page 36 Fig.32 Input channel list As shown in figure 33, click any hyperlink of channel (i.e.: “TS 0001”), the input TS program information can be checked at the right side of the page. Fig.33 Input TS program information § § As shown in figure 34, click button at the bottom of the page, the system will search the corresponding channel automatically, and display the information, as shown below: Fig.34 Input service information...
- Page 37 The information of the TS is displayed above the program list, as shown below: Fig.35 TS information Click any “ ” button at the right side of the program name, the details spread up below: Fig.36 Program TS information § §...
- Page 38 After the configuration, click “Submit” button at right-bottom of the page to save the setting. § § IDH2-3000 Series supports batch program multiplexing. It means multiplex all the programs of one channel to another selected channel. As shown below: Fig.38 Program TS information Open the drop-down list box of “the output location of the batch select program”...
-
Page 39: Output Service
Fig.39 Batch multiplexing § § As shown in figure 40, “Keep Services When Failed”, “Default Charset” and “Analyze Timeout” are also in this page: Search overtime: when the search time is over the user setting, the search will stop. Default input character-sets: detail in 3.2.6.1.1 Switch of deletion after failure: when the search failure, switch on will delete all the information of current page. - Page 40 Shown as figure 42, click a channel link, for example “TS002”, to enter the output TS program information page, shown as below: Fig.42 Output TS information page § § Shown as figure 43, the output TS information page will display the TS related information, such as TS ID, PAT version, PMT version, SDT version, CAS, output programs, etc.
- Page 41 【Remark】PAT、CAT、SDT version range:0 – 31. § § IDH2-3000 Series allows users to edit each individual program information. Click button at the front of the program name to open the program information. Editable information include program name, program number, PMT information, PCR PID, EIT information, CA related information, ES information, etc.
- Page 42 CA information Click button in front of SCS CAS to open the CA information list. Users can type the value of CA PID in the corresponding box and turn ON/OFF the CA channel, then click “Submit” button to validate the setting. ...
- Page 43 Fig.45 Delete Single Program Click “Submit” button to delete the program. To delete all programs, check the “Service Remove Mark Select All” box at the lower left corner, shown as below: Fig.46 Delete All Programs All programs’ service remove mark will be automatically checked, then click “Submit” button to delete all programs.
-
Page 44: Scrambling Setting
§ § Click “Scrambling Setting” link in the navigation bar to enter the program scrambling setting page, shown as below: Fig.47 Scrambling Setting page In “Select Items” column, there are scrambling configuration options including General Setting, CAS Configuration, and Services Scramble Setting. Fig.48 Select Items -44-... -
Page 45: General Setting
“Submit” button to validate the setting. § § § § IDH2-3000 Series support up to 4 CAS simul-crypt, with each CA channel can be configured independently. Shown as figure 49, unfold “CAS Configuration” menu to select the CA channel 1-4: -45-... - Page 46 ECMG Port (DEC): the port number of the ECM generator; 【Remark】To ensure IDH2-3000 Series can correctly receive the ECM data from the CAS, the value of ECMG IP and ECMG port on the IDH2-3000 Series must be the same as their counterparts on the CAS server.
-
Page 47: Services Scrambling Setting
Fig.51 Communication Status As shown in figure 51, when the communication between IDH2-3000 Series and CAS is valid, the status lights for ECM and EMM display ; if the communication is failed, the light will be ;... - Page 48 CA descriptors will be replaced by new CA descriptor which are generated by IDH2-3000 Series. For pass-through mode, those original CA descriptors will be persisted. IDH2-3000 Series supports up to 4 CAS simul-crypt. The CAS’s AC information is available for use only when the CAS is ON.
-
Page 49: Monitoring
§ § Click “Monitor” button in the navigation bar to enter the monitoring page, shown as below: Fig.55 Monitoring Page In the monitoring page, users can monitor the device temperature and other alarming related information. In the “Select Items” column, there are two categories: Alarms and Bitrate Monitor, shown as below: Fig.56 Select Item -49-... -
Page 50: Alarms
§ § Unfold “Alarms” menu to open the alarming information page, shown as below: Fig.57 Alarms Menu § § Click “Display” button, the alarm display page will be shown as below: Fig.58 Alarm Information Shown as figure 58, left column displays multiple alarm information. When there is no alarm, the status light will be ;... - Page 51 Trap: when it is ON, IDH2-3000 Series will send the trap information to server through SNMP. Panel: when it is ON, the alarm light on the front panel of IDH2-3000 Series will display the alarm. Log Level: set level of severity for the alarm, from lowest to highest level: disable, info, warning, critical.
-
Page 52: Bitrate Monitor
Temperature: the temperature of the current daughter board (C/F). Fan Status: the working status of the fan. 3.3V/5V/12V:the value of each voltage detector. Inserter Bitrate: The real-time data rate of each daughter board. § § Unfold the “Bitrate Monitor” menu to select to monitor the input/output bit rate, shown as below: Fig.60 Bitrate Monitor Menu §... - Page 53 § § Unfold the “Output Channel” menu to enter the output channel bit rate monitoring page, shown as below: Fig.62 Output Channel Bit Rate Monitoring Shown as figure 62, the left column displays the real-time bit rate of each channel; the right column enable users to set the bit rate alarm setting, including lower limit, upper limit, and the enable switch Lower Limit: when the real-time bit rate is lower than this lower limit value, it will trigger an alarm.
- Page 54 § § Front panel LCD display of IDH2-3000 Series will show some initializing messages of the device at boot up stage, such as but not limited to company logo, model number, etc. If there is an error during boot up, then it will display the error message.
- Page 55 Set the management port subnet mask of IDH2-3000 Series. Press “ENTER” key to remove cursor. Default Use “←” and “→” keys to switching Subnet Mask 255.255.255.0 between different digits of the subnet mask. Press “ENTER” key to apply changes. Set the management port gateway of IDH2-3000 Series.
- Page 56 Common Technical Specifications Characteristic Properties Specifications AC Input Voltage 85~260VAC AC Input Frequency 50~60Hz Power Supply & Consumption Power Consumption No. of Power Supply Modules 2, operation in parallel Operating Temperature 5°C ~40°C (41°F ~104°F) Operating/Storage Storage Temperature -25°C ~70°C (-13°F~158°F) Environment Air Pressure 86~106KPa...
- Page 57 NIT/BAT: Use uploaded files TDT/TOT: Optional Scrambling & CAS interfaces Characteristic Properties Specification Scrambling algorithm DVB-CSA Scrambling Embedded scramblers number Table update CAT/PMT Simul-Crypt CAS number SCS interface ETSI TS 103 197 CAS Interface ECMG interface EMMG interface TCP/UDP EMM bandwidth 0~3Mbps/TS RF Output Technical Specifications Characteristic...
- Page 58 J.83 Annex A: Table of constellation, bandwidth, symbol rate and bit rate. Constellation QPSK 16QAM 32QAM 64QAM 128QAM 256QAM Minimum bit Rate(Mbps) Maximum bit Rate(Mbps) Minimum Bandwidth(MHz) 1.15 1.15 1.15 1.15 1.15 1.15 Maximum bandwidth(MHz) 8.05 8.05 8.05 8.05 8.05 8.05 Minimum Symbol Rate(Mbaud) Maximum Symbol Rate(Mbaud)
- Page 59 Plug in the power supply cable plugged in Check if the manage computer and the Network connect error manage port of IDH2-3000 Series has The error message “ cannot find been connected to a same network server” appears on the screen...
Need help?
Do you have a question about the IDH2-3000 Series and is the answer not in the manual?
Questions and answers