Table of Contents
Advertisement
Quick Links
Advertisement
Table of Contents

Summary of Contents for Hexagon AgrOn Ti10
- Page 1 Copyright © 2019 by Hexagon agriculture. All rights reserved.
-
Page 2: Table Of Contents
1 Introduction 2 Safety instructions 2.1 Allowed usage 2.2 Use risks 2.3 Electromagnetic compatibility 3 Displays overview 3.1 Overview of the HxGN AgrOn Ti10 3.1.1 System components 3.1.2 View s 3.1.3 Product identification 3.1.4 CAN connector pinout 4 Equipment's installation 4.1 Displays's fixation... - Page 3 12.1.4 Exporting markers 12.1.5 Settings 12.1.6 Exporting pending files 12.2 Importing data 12.3 Deleting data 13 System settings 13.1 Modo normal 13.1.1 About 13.1.2 Language and region 13.1.3 System mode 13.1.4 Support mode 13.1.5 Netw ork troubleshooting 13.2 Advanced mode 13.2.1 Change passw ord 13.2.2 Logging 13.2.3 Netw ork...
-
Page 4: Introduction
1. Introduction This manual contains important information on how to install, configure, and use the display. To access the complete manual with all other display features and products, download the document version available from the Hexagon Agriculture website support (https://hexagonagriculture.com/support/manuals). -
Page 5: Safety Instructions
2. Safety instructions · Allowed usage · Use risks · Electromagnetic compatibility 2.1 Allowed usage The following instructions aim to inform users about the inherent risks to display operation as well as how to avoid them. Only use the display computer on vehicles with farming purposes such as tractors, sprayers, Warning planters, fertilizer applicators, subsoilers, trucks, among others. - Page 6 Electromagnetic radiation might even affect humans and animals. Although the product meets the regulations and standards in force, Hexagon Agriculture cannot completely exclude the possibility of other devices being disturbed or people and animals being affected.
-
Page 7: Displays Overview
3. Displays overview · Overview display Ti10 3.1 Overview of the HxGN AgrOn Ti10 The HxGN AgrOn Ti10 is a complete precision farming guidance system with the following functions: Figure - General application 3.1.1 System components Display's monitor GNSS antenna... -
Page 8: Product Identification
USB interface Figure - Connector identification Connector A Connector C Connector B See page 12 for more information on the connectors. 3.1.3 Product identification The product type (model) and serial number are indicated on a label on the back of the display. Record the type and serial number in your manual and inform them when contacting technical support. - Page 9 User manual - Machine Automation Solution - V3R003 9 / 102...
-
Page 10: Equipment's Installation
4. Equipment's installation · Display's fixation · SIM Card installation · Antenna installation 4.1 Displays's fixation The display installation must be performed by a qualified technician. Read the safety Warning instructions before performing the installation steps. Warning Do not mount the display where it can be struck by an airbag. Ti10 display fixation Choose an appropriate location for securing the display monitor within reach of the operator while seated in a normal operating position and in front of the operatorʼs field of vision. -
Page 11: Antenna Installation
To install the SIM card, proceed as follows: On the back of the display, remove the four screws as shown in the figure. Use the lowered space to make it easier to open the lid; Figure - Opening the lid Pull the insert down and open to a 90-degree angle;... - Page 12 Figure - Ti10 monitor display antenna installation User manual - Machine Automation Solution - V3R003 12 / 102...
-
Page 13: Running Display For The First Time
5. Running display for the first time Warning We recommend starting the vehicle before turning the display on. 5.1 Starting the device To turn the monitor on, proceed as follows: Press the On Button on the front panel of the display for one second; The display will show the screen for selecting Language, Time Zone, and Theme;... -
Page 14: Job Section
6. Job section A job section consists of the combination of various information that characterize a performed job, such as the performed activity, in which farm, in which field, etc. In order to operate the display, there must always be a running work session, which may have been previously created or completely new. -
Page 15: Inserting A Job Section
6.2 Inserting a job section The way to create a new job section will depend on the type of startup: · If operating in conventional mode, go to next topic New job section in conventional mode, · If operating in fast mode, go to topic New section on fast start mode. -
Page 16: Removing A Job Section
Figure - lmplement and vehicle 6.3 Removing a job section To remove a job section on fast start mode, proceed as follows: Select a Job section among those presented on the screen; Select option Delete; A confirmation message will be displayed; Confirm the operation by selecting Yes;... -
Page 17: Operation Screen
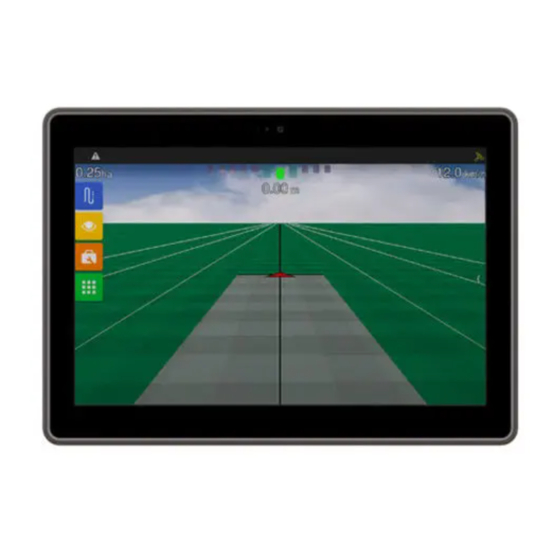
7. Operation screen The operation consists of the main screen where the activities are in fact executed according to all the configured parameters and activations. The display operation screen changes to suit the context of use that depends on the vehicle and related activity. For example, truck-type vehicles performing trips use the Mode of operation with routes, while tractors in the field use the Mode of operation with lightbar. - Page 18 Figure - Alerts - Solutions The following alarm categories are issued by the display: · GNSS information; · Odometer information; · CAN information (connection to the drivers); · Power supply; · Anticide; · Speed limit; · Memory; · Planting monitor; ·...
- Page 19 Disconnected GNSS GNSS connection Please ensure that the cable is properly connected. antenna You are operating outside the speed range deemed appropriate for good Outside the speed Input controller input application. You may improve the speed range by changing the range system calibration.
- Page 20 The transport module configured for this implement is disconnected. Transport driver CAN device error Ensure that the CAN bus cables are properly connected and that the disconnected module is not damaged. The planting monitoring module configured for this implement is Planting monitor CAN device error disconnected.
- Page 21 antenna itself. The system is approaching the end of the guide. Get ready to maneuver Guide End of guide the vehicle. The selected guide is loading. This alert will automatically disappear as Guide - Loading Guide is loading soon as the guide is loaded and the automatic pilot is ready for use. Please wait.
-
Page 22: Connectivity Information
setting may decrease the heating. Communication The system is unable to establish proper communication with the Autosteering pilot failure automatic pilot controller. Check the CAN communication cables. Autosteering pilot Shut off remotely The automatic pilot button or footswitch has been triggered. The system is unable to maintain the trajectory due to excessive cabin Autosteering pilot Very rough terrain... -
Page 23: Lightbar
Indicates connectivity to mobile data networks. For details, access topic Mobile data config. · Cloud Indicates the display is online and authenticated on the Hexagon Agriculture services. · Wi-Fi Indicates whether or not the display is connected to a Wi-Fi network. When pressed, it displays details about the network connection. -
Page 24: Main Menu
Figure – Insert and remove information To make the current time available on the operation screen, select Time as one of the Important information options. 7.5 Main menu When dragging your finger from the left corner of the screen to the center, a tab will be displayed with the main menu buttons. -
Page 25: Tools
Figure - Visualization Change environment Alternates the visualization on the operation screen between 2D and 3D. Brightness Alters the brightness of the display screen. Zoom Increases or decreases the zoom on the operation screen. You can zoom in and out of the maps using the pinch gestures, making it quicker and easier for the user to zoom in and out. - Page 26 · Markers · Perimeter · Drift position 7.5.3.1 Markers In the Tools option, you can place flag-type markers on the map to mark the location of obstacles or other points of interest such as rocks, holes, anthills, and wet areas. Icon Description Marker function...
- Page 27 Figure - Flags It is possible to import/export the flag maps on the file transfer screen. For more information, Important check the Files chapter. 7.5.3.2 Perimeter On the Tools option it is possible to delimit an areaʼs perimeter. In order to do so, proceed as follows: Press the Perimeter option and then press the option to begin marking;...
- Page 28 Figure - Removing perimeter loops It is possible to import a ready-made perimeter file into the on-board computer, see the topic Importing files. 7.5.3.3 Drift position In the Tools option, it is possible to use the Drift position feature to demarcate a known field position and later use it to sync the GNSS position.
-
Page 29: Configuration Menu
On the operation screen, select the Tools option; Press the Drift position option; Select the Position adjustment option; The system will correct the GNSS position, bringing the marked to the indicated location. To use the position adjustment, the vehicle cannot be more than thirty meters from the Important marker. -
Page 30: Context Bar
Job section Selection of the directory in which to save the data collected by the monitor. Files Selection of the location to extract the data and/or insert maps using a pendrive. System settings Shows the System settings. Operate Enters operation mode. -
Page 31: Gnss
8. GNSS Important The system mode must be set to Advanced so that the GNSS option is made available. The GNSS settings are available on the Configuration menu – GNSS. Important The visible fields can be different according to the selected GNSS model. Figure - GNSS Port Serial GNSS communication port. - Page 32 · OEM7 DUAL ANTENNA PPP: TerraStar-C paid signal; · OEM7 DUAL ANTENNA PPP BASIC:TerraStar-L paid signal; · OEM7 NTRIP: L1+L2 with NTRIP; · OEM7 PPP: L1+L2 e sinal pago Terrastar- · OEM7 PPP BASIC: L1+L2 and TerraStar-L paid signal; · OEM7 SBAS: L1+SBAS;...
- Page 33 This configuration will only be available for all Novatel GNSS models (Novatel, Novatel NO GLIDE, Novatel SBAS, OEM617, OEM617 NTRIP, OEM628, OEM628 PPP, OEM628 PPP Important BASIC, OEM628 SBAS, OEM7, OEM7 DUAL ANTENNA PPP, OEM7 DUAL ANTENNA PPP BASIC, OEM7 NTRIP, OEM7 PPP, OEM7 PPP BASIC, OEM7 SBAS, OEM7 RTK, RTK). Enter the activation code to release GNSS board models: Figure - Activate GNSS NMEA output...
- Page 34 Figure - Firmware update When the device starts, if there is a firmware update available, the device will ask if you wish Important to update to the newest version. RTK ASSIST This setting will only be available for the GNSS model OEM628 NTRIP, OEM628 RTK, OEM7 Important NTRIP and RTK..
-
Page 35: Ntrip Server
This configuration will only be available when selecting the GNSS models: NTRIP, OEM7 Important NTRIP or OEM617 NTRIP, which are available for AgrOn Ti10 equipment. RTK must be enabled, otherwise an alert will be displayed on the operation screen To access NTRIP support, proceed as follows: Press the GNSS option in the Settings menu;... -
Page 36: Ntrip Server
Figure - NTRIP Status · Status NTRIP Connected; Connected - intermittent corrections; Disconnected; Incorrect username or password; Incorrect base (or too distant); Missing GGA messages; Not configured; Internal error or no connection. · Base position (lat,long) Indicates in which latitude and longitude position the NTRIP base is sending the corrections. ·... -
Page 37: Nmea Output
NTRIP Server 8.2 NMEA output The NMEA output is a serial output that may be used to circulate NMEA messages for the Novatel GNSS for external devices. Important The NMEA output is unavailable for GNSS with RTK correction. The NMEA output uses the Serial 2 output of the chicoteTi10 display (Connector B), and a Important suitable cable is required. -
Page 38: Operation
Messages are restricted by the baud so that the port can always transmit messages without Warning loss of characters. Select the output messages that must be sent and their transmission frequency, which will be restricted by the previously chosen baud. This will allow external devices to use this data, which have a standardized format, in their operation. - Page 39 Indicates that the system is not communicating with the GNSS module. By pressing the GNSS icon, it is possible to view the total number of satellites connected to the system, and it is also possible to see a detail of the information. The information below is valid for Novatel receivers only and does not consider altitude, only Important horizontal coordinates.
-
Page 40: Vehicle
9. Vehicle To select a vehicle, proceed as follows: Select the Vehicle option on the Configuration menu; Select the desired vehicle on the box to the left of the screen; Ensure the settings are correct and press OK. Warning Incorrect vehicle selection may compromise the entire validity of the work. Figure - Vehicle selection If no vehicles have been created, it will not be possible to access the Configuration menu for the Important... -
Page 41: Editing The Vehicle
Select the Vehicle type and enter the required settings; Confirm the operation selecting Save. Figure - Vehicle settings The following parameters must be set: · Wheelbase Distance, in meters, from the center of the rear axis to the Center of the front axis. Fundamental for calculating the control routine. -
Page 42: Removing The Vehicle
Alter the desired fields in the Vehicle configuration screen; To confirm, select the Save option. 9.3 Removing the vehicle Important Feature available only in Advanced mode. To remove a vehicle, proceed as follows: Select the Vehicle option in the Configuration menu; Select the vehicle you wish to remove;... -
Page 43: Implement
10. Implement Depending on the selected implement, features may be enabled or disabled on the display. Important For example, when selecting the Guidance, only the Guidance and auto steering pilot features will be enabled (in case there is a vehicle configured). To select an implement, proceed as follows: Select the Implement option in the Configuration menu;... -
Page 44: Editing The Implement
Enter the implement measurements in meters. For measurements smaller than one meter, insert Warning the value fractionally. For example, given a 60 centimeter measurement, enter 0.60. Before taking the measurements, ensure the implement is in level ground and in straight position. For more details on the configuration of each implement, check the related activities: ·... - Page 45 Select the Test option; The system will present the test options for the selected implement. Figure - Implement test For tests using the implement hydraulic motors, use the motor speed recommended by the Important manufacturer (e.g.,1800RPM for a tractor) in order to have a minimum 48l/min flow in the hydraulic system.
-
Page 46: Guidance
11. Guidance The navigation aid systems allow input economy and better use of the work area, once they minimize the overpass during input application and culture treatments. They have the following work precisions up to 95% of the time: Use this setting GNSS L1 - GPS+Glonass 28 cm (15 min each pass) GNSS L1/L2 - GPS+Glonass... - Page 47 This parameter can only be altered here for the Guidance product. For the others products, the Important width must be altered directly on the implementʼs settings. · Sensitivity (in meters) Specifies the offset required for a LED in the light bar to light up. This value is associated with the five LEDs in the center of the light bar.
-
Page 48: Wayline Settings
11.1.2 Wayline settings This screen is divided into two types of settings. It contains the settings for saving the guide in the operation, and also for the parameters used for curves and maneuver detection, as described in the following topics. ·... - Page 49 active guide. Figure - Realign Two different behaviors are possible when selecting this option, it is necessary to previously configure the default behavior as described below. To define the behavior of the realignment option, proceed as follows: 1. Select the Guidance option in the Configuration Menu; 2.
- Page 50 Two different behaviors are possible when selecting this option, it is necessary to previously configure the default behavior as described below. This option is similar to Realign, but instead of using the vehicle/antenna location for the adjustments, here they are made according to the values and direction manually indicated by the operator. Figure - Manual adjustments To define the behavior of the realignment option, proceed as follows: 1.
- Page 51 Select the Guidance settings option; Select the Advanced settings option; Enter the values for the curve configurations; Press OK to confirm the operation. Figure - Guidance settings The following parameters are available for setting: 01 - Maneuver detection The maneuver detection settings affect how the device detects that the vehicle has performed a U movement to exit a guide line and enter another.
- Page 52 adaptive curve. For example, using the data in the figure, as soon as the operator drives over 5m (Distance) with an error lower than 0.3m (Error), the approximation to the guide line will be classified as successful and the display will begin capturing the modification of the guide line.
-
Page 53: Reverse Detector
11.1.3 Reverse detector Enable this function to detect when the vehicle is in reverse. To alter the automatic reverse detection settings, proceed as follows: Access the Guidance option from the Configuration menu; Select the Reverse detector option; Press the Detect reverse option to alternate between Yes and No; Press OK to confirm the operation. -
Page 54: Odometer
If the implement is performing the opposite motion to that indicated by the arrows on the screen, the operator must simply press the arrow to indicate that the movement is inverted. Warning The occurrence of a false movement is more common at first GNSS syncing or after the vehicle has been stationary for a long time. -
Page 55: Apply Outside Map
Figure - Select perimeter To clear the loaded perimeter, select the Clear perimeter option 11.1.6 Apply outside map The Apply off the map function is used to indicate whether the application should exceed the perimeter limits or not. · The equipment will not cut the application when leaving the area of the defined perimeter. ·... - Page 56 · Parallel line; · Parallel curve; · Adaptive curve; · Pivot; · Line A + Angle. Warning To set the way of saving the guide, visit topic Guide settings. 11.2.1.1 Parallel line The A-B linear trajectory is used to define a line in the field to which all work lines will be parallel. Configuring trajectory Icon Description...
- Page 57 to the original curve. The current curve and the parallel curves immediately to the right and to the left are shown Configuring trajectory points Icon Description Guide Parallel curve Point A Point B To draw the guide, proceed as follows: On the operation screen, select the Guide option on the left side menu Select the trajectory mode as Parallel curve Position your vehicle on the field over the point where you wish to start and press Point A to mark the...
- Page 58 On the operation screen, select the Guide option on the left side menu Select the trajectory mode as Adaptive curve Position your vehicle on the field over the point where you wish to start and press Point A to mark the beginning of the curve Drive to the end point on the field and press Point B to mark the end of the trajectory The smallest distance between points A and B is of 30 meters.
- Page 59 Select the trajectory mode as Pivot; Position your vehicle at the beginning of the curve trajectory; Press Point A; Drive to route point B and press Point B; Drive to route point C and press Point C. Figure - Pivot Figure - Curve generation Points A, B, and C may be pressed at any point in the circumference.
-
Page 60: Working With An Active Guide
Important The saved guides that may be used as reference are only those of type Parallel line A-B. At the end of this procedure, a reference line 0 (zero) is created, as well as parallel lines in both sides. Lines to the right will be positive (+) while lines to the left will be negative (-). - Page 61 Realign the guide by moving the GNSS position The GNSS system is subject to information variation. It is recommended to use the Realign GNSS function if, after pausing the operation for a while, the guide does not show the same location as before when you start over again. This function transfers the GNSS position guide automatically until the point where the antenna/vehicle is, aligning it with the guide (zero error).
- Page 62 Move the guide by manually adjusting the GNSS position Field displacement is used to move the line 2 cm at a time to the right or to the left. It is recommended when it is necessary to make a fine adjustment to the line that may have dislocated. As the position of the GNSS is changed, it is not possible to access the original guide again, if Important the intention is to reuse the guides to do another job in the area already worked, use the other...
-
Page 63: Managing Guides
Important In this case, a new guide similar to the original is being drawn in the indicated location. Figure - Manual adjustment guide 11.2.2.3 Disable guide This option is used to disable a guide that is active. This button does not delete the guide from the system, it only unloads it from the field so that Important the user can create a new guide or load another one from the Guide manager. - Page 64 · It may be a guide created in an on-board device from a manufacturer other than Hexagon Agriculture. In this case, if there is incompatibility, the guide is imported as a Line map. User manual - Machine Automation Solution - V3R003...
- Page 65 To learn how to import a Line map to the on-board computer, check topic Import guide. 11.2.3.1 Save guide Important This feature will only be available if the selected guide is temporary. When a new guide is created, if the used had selected guide saving options Never save or Always ask and denied saving the guide, it will still be available in the Wayline management as a temporary guide and the user will have a chance to save it again.
- Page 66 The previously saved guide will not be overwritten. If the imported guide was created in a Hexagon Agriculture display, it can be imported as an Original guide or as a Line map, depending on how it was exported. See topic Export guide.
- Page 67 Important The export format is a shape file (.shp). Guides can be exported in two ways: Original guide In this case, only the original guide is exported, without its parallels. In this format, the equipment recognizes the original guide and may import it again in the same format, then create the parallels. This option is not available for exporting a Line map, in which case it is impossible to know Important which is the original guide.
- Page 68 Figure - Export guide 11.2.3.4 Edit guide name Important This feature will not be available if the selected guide is temporary. This option allows editing the name of a saved guide. Icon Description Guide Guide management Edit To edit a guide name through the Guide manager, proceed as follows: On the operation screen, select the Guide option followed by Guide management;...
- Page 69 Figure - Edit guide name 11.2.3.5 Delete guide Important This feature will not be available if the selected guide is temporary. This option allows deleting a previously created guide. Icon Description Guide Guide management Delete To edit a guide name through the Guide manager, proceed as follows: On the operation screen, select the Guide option followed by Guide management;...
-
Page 70: Files
12. Files The display allows data transfer from or to a pendrive. This is useful to import or export data from/to your on-board computer to/from other display units. The following options are available for transfer: · Operation maps Maps that contain information collected by the display such as seed sensors per line, GPS date and time, vehicle error relative to the guide, seed, fertilizer, and liquids application, application width, tractor speed, alarms, among others. -
Page 71: Exporting A Prescription Map
Figure - Data transfer Press OK; Select the format to which you wish to export: § Display files (SAIG); § Google Earth kml files; § Shapefile (shp, dbf, prj e shx). Figure - Data transfer - Formats Press OK; When the transfer is finished, press OK. 12.1.2 Exporting a prescription map To export a recommendation map or line map, proceed as follows: Select option Files from the Configuration menu;... -
Page 72: Exporting Guides
12.1.3 Exporting guides To export a guide or a line map, proceed as follows: Select option Files from the Settings menu; Select option Export to USB; Select option Waylines; Select the desired option: Original guide (proprietary) or Line map (generic); If Original guide is selected, wait for exporting on the next screen;... -
Page 73: Exporting Pending Files
Select Files from the Configuration menu; Select option Export to USB; Select option Settings; Select the settings you wish to export among those listed; Press OK; When the transfer is finished, press OK. Warning It is possible to select more than one file to export. Figure –... -
Page 74: Deleting Data
Select option Import from USB; Select the type of data you wish to import: § Operation map; § Prescription map; § Guides; § Markers; § Settings. Select the desired option and press OK; When the transfer is finished, press OK. Warning To learn more about importing guides, see topic Import guide. -
Page 75: System Settings
13. System settings The general system settings are available in Configuration menu - Settings. Figure - System settings 13.1 Modo normal 13.1.1 About Shows the software version for the display, the processor (CPU) and screen (LCD) temperatures, the serial number, as well as shows information on the GNSS data, among others. - Page 76 To update the system manually it is possible to download the file to the pendrive through the Important website of Hexagon Agriculture, in the part of Support. In Software update the updates that have been automatically downloaded by the system and/or updates available through...
- Page 77 When an error occurs and the display can no longer operate, the recovery mode will show on your screen. The diagnostic information obtained from the display must be sent to Hexagon Agricultureʼs technical support when requested. To collect the data, proceed as follows: Insert a pendrive into the display USB port;...
- Page 78 13.1.1.3 CPU information Indicates CPU temperature Figure - CPU temperature 13.1.1.4 Network information This screen indicates the state of the deviceʼs network: offline or online. When the device is online, the following information is also presented: · Ethernet interface · MAC address ·...
-
Page 79: Language And Region
Figure - GNSS information 13.1.1.8 Legal information Shows information on use licenses. 13.1.2 Language and region In this option it is possible to select the visualization Language, to set the Time zone, and to select the color Theme for the display. Figure - Language and region ·... -
Page 80: Support Mode
· Language and region; · Support; · External settings; · System mode; · Network troubleshooting. Advanced mode In this mode, other than the basic features in normal mode, the user has access to advanced features of the on-board computer. Used mainly by technicians. The following features are enabled in advanced mode: ·... -
Page 81: Advanced Mode
The drivers that may be connected to the display are: · Controller; · Deep; · Sprayer; · Gate; · Auto steering; · Planting monitor; · Transport; · Machine monitor; · Cutting section; · Logic controller · Ant killer controller. · Reset Clears the address for all the devices connected to the CAN ·... -
Page 82: Logging
This feature allows changing the password for accessing the Advanced mode To change the password, proceed as follows Select option Settings from the Configuration menu Go to Advanced mode Select option Change password Enter the new password and confirm pressing OK 13.2.2 Logging Important Feature only available in Advanced mode. -
Page 83: Network
Figure - Freeing memory 13.2.3 Network Important Feature available only for the Advanced mode. To enable your display for the Mobile data and Wi-Fi, proceed as follows: Select option Settings from the Configuration menu; Go to Advanced mode; Press Network; Select the desired network. -
Page 84: Activation
On the upper bar of the operation screen, the Mobile network icon will become available and may present two states: Active and Inactive. Figure - Mobile on the operation screen 13.2.3.2 Wi-Fi network settings Some displays have two Wi-Fi connections: internal and external Wi-Fi. The internal Wi-Fi Important may be requested when the display is purchased, while the external Wi-Fi may be acquired at a later time. -
Page 85: Firmware Update
13.2.4.1 Pendrive procedure To activate a feature using a pendrive, proceed as follows: Insert the pendrive with file “ActivationCode.sig”; Press Import; Press Activate; Check the success or failure message. 13.2.4.2 Manual procedure To manually activate a feature, proceed as follows Fill in the H0 through H7 and Fix fields Press Import;... -
Page 86: External Settings
Figure - Firmware update 13.2.6 External settings On the external settings screen, it is possible to set the horn and the operation switches. Figure - External settings - displays Ti10 · Internal buzzer Turns the sound alarm on and off. If it is On, some alarms will be notified with beeps. If it is Off, the horn will never beep. -
Page 87: Data Synchronization
Important The flag sensor buttons are available for the display Ti10. · Primary CAN This option you can select Isobus or HxAg. 13.2.7 Data synchronization Important Feature available only in the Advanced mode. On the data syncing screen it is possible to configure automatic software updates. The automatic update is only possible it the display is connected to the Internet. - Page 88 Important Feature available only in the Advanced mode. On this screen it is possible to see the RFID tags read by the equipment. To access the list, proceed as follows: Select the Settings option in the Configuration menu; Enter Advanced mode; Select the RFID tag list option;...
-
Page 89: Plc
Figure - View reader configuration When clicking on an item in the list, the user is taken to the tag information screen, where he can define a new trailer, see topic tag information for more details. 13.2.8.1 Information tag The configurations of the tag selected in the list are presented. On this screen it is also possible to define a new trailer for tag allocation. - Page 90 Figure - PLC settings To access the list, proceed as follows: Select the Settings option in the Configuration menu; Enter Advanced mode; Select the PLC option; Select the Trailer or Truck option according to the vehicle. Figure - PLC selection Truck If you selected the Truck option, you can update the firmware, according to the topic firmware...
- Page 91 O estado da conexão pode ser: · Sinal de Alerta Significa que a sincronização foi estabelecida e que o firmware está desatualizado, neste caso é preciso atualizá-lo ou não conseguirá acessar suas configurações. Para atualizar o firmware, proceda da seguinte forma: Selecione o dispositivo que deseja atualizar, para isso, clique sobre o número de série;...
- Page 92 Figure - Update via PLC Update via OTA By selecting this option, the system will attempt to connect to the Wi-Fi network configured to send the firmware to the device. It will not be necessary a robust PLC cable in this type of update, as it will only be used to Important communicate to the device the data of the network that will be used for update.
- Page 93 Figure - Device config The following options are available: · Trailer Id Enter the trailer identification code. · Trailer length in meters Enter the size of the trailer in meters. · Trailer position Number corresponding to the order of the trailer in the connection sequence, the trailer in position 1 corresponds to the one closest to the truck cabin.
-
Page 94: Assistance And Remote Acess
To have remote access in Visualization mode, the technician needs to have the deviceʼs serial number and access it through the web software that Hexagon Agriculture used to provide remote assistance. It is possible to identify that the Ti on-board computer is being visualized remotely by a technician through the visualization indicator icon on the bottom right corner of the screen. - Page 95 Figure - Operation mode icon Remote access may be interrupted at any time by pressing the access icon on the bottom Important right corner of the screen. The display will display a message for the user to confirm access interruption. User manual - Machine Automation Solution - V3R003 95 / 102...
-
Page 96: Technical Features
15. Technical features 15.1 Display Ti10 Monitor data Material: 10,1ʼʼ LCD, 1280X800 pixel, 16,7M colors with touch interface; · · Processing: Quad Core 1.2 GHz, 2 GB RAM; · Storage: 32 GB FLASH; · Dimensions: 250 (W) X 177 (L) X 47 (H) mm; ·... - Page 97 Tecnology Technical features · Wi-Fi IEEE802.11a/b/g/r · Bluetooth 5.0BR/EDR/LE Mobile network Technology Bands · Band 1 (2100 MHz) · Band 3 (1800 MHz) · Band 5 (850Mhz) · Band 7 (2600 MHz) · Band 8 (900 MHz) · Band 28 (700MHz) ·...
-
Page 98: Fcc Statement (Applicable Only In The Usa)
Operating this device in a residential area may cause harmful interference, in which case the user must correct the interference at his own expense. Functional alterations or modifications not expressly approved by Hexagon Agriculture may void Warning the userʼs authority to use the display. -
Page 99: Compliance With European Directive 1999/5/Ec (R&Tte)
17. Compliance with European Directive 1999/5/EC (R&TTE) By means of this term, Hexagon Agriculture declared that the display meets the basic requirements and other important provisions of Directive 1999/5/EC. The compliance declaration can be found at http://www.hexagonagriculture.com Class 1 device in accordance with European Directive 1999/5/EC (R&TTE). Can be marketed and put into operation without restriction in a Member State of the European Union. -
Page 100: Problems And Solutions
18. Problems and solutions Problem Solution Check the power supply; Check the fuse; Display will not turn on Check if the connections are secure; Check if the cable is not broken (use a multimeter to test the voltage). Check if the GNSS is in an area with sky-bound view. In covered areas, the signal will become too low and may note locate properly;... -
Page 101: Glossary
19. Glossary CAN – The Controller Area Network is an internal communication network that intercommunicates components within the vehicle. It must ensure message delivery, the absence of message conflicts, minimum delivery times, low cost, and ability to operate reliably in an environment with electrical noise. BEC –... -
Page 102: Warranty Certificate
About the Warranty 1. Hexagon Agriculture guarantees the proper functioning of the product(s) indicated above and that it markets, and commits, for a twelve-month period* as of the data of issuance of the respective invoice, comprised of the three months of...
Need help?
Do you have a question about the AgrOn Ti10 and is the answer not in the manual?
Questions and answers