Table of Contents
Advertisement
Available languages
Available languages
Quick Links
OWNER'S MANUAL
WASHING
MACHINE
Before beginning installation, read these instructions carefully.
This will simplify installation and ensure that the product is installed
correctly and safely. Leave these instructions near the product after
installation for future reference.
FH495BDS(0~9)
MFL67655177
www.lg.com
Advertisement
Chapters
Table of Contents

Related Manuals for LG FH495BDS Series


Summary of Contents for LG FH495BDS Series
- Page 1 OWNER’S MANUAL WASHING MACHINE Before beginning installation, read these instructions carefully. This will simplify installation and ensure that the product is installed correctly and safely. Leave these instructions near the product after installation for future reference. FH495BDS(0~9) www.lg.com MFL67655177...
-
Page 2: Table Of Contents
TABLE of CoNTENTS This manual is produced for a group of products and may contain images or content different from the model you purchased. This manual is subject to revision by the manufacturer. SAfETy INSTruCTIoNS ........03 Important Safety Instructions ...............05 INSTALLATIoN ............08 Specifications ..................08 Accessories ..................08... -
Page 3: Safety Instructions
SAfETy INSTruCTIoNS The following safety guidelines are intended to prevent unforeseen risks or damage from unsafe or incorrect operation of the product. The guidelines are separated into ‘WArNING’ and ‘CAuTIoN’ as described below. This symbol is displayed to the indicate matters and operations that can cause risk. - Page 4 3. You can take your appliance either to the shop where you purchased the product, or contact your local government waste office for details of your nearest authorised WEEE collection point. For the most up to date information for your country please see www.lg.com/global/recycling...
-
Page 5: Important Safety Instructions
It can cause electric shock or injury. • Only an authorized repair person from LG Electronics service centre should • This appliance is heavy. Two or more disassemble, repair, or modify the people may be needed to install and product. - Page 6 This can cause fire. • In case of flood, stop using the product and contact the LG Electronics service • Remove the power plug when you clean centre. Contact with water can cause the product. Not removing the plug may electric shock.
- Page 7 Disposal • Before discarding an old appliance, unplug it. Render the plug useless. Cut off the cable directly behind the appliance to prevent misuse. • Dispose of the packaging material (such as vinyl and styrofoam) away from children. The packaging material can suffocate a child.
-
Page 8: Installation
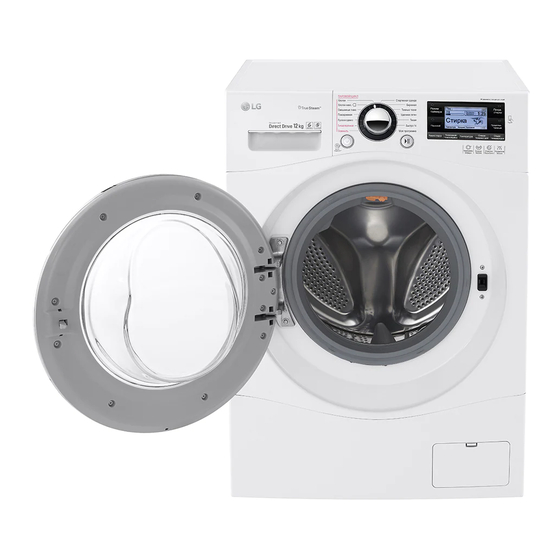
INSTALLATIoN Specifications Transit bolts Power plug Drawer Control panel Drum Door Drain hose Drain plug Drain pump filter Cover cap (Location may vary depending on products) Adjustable feet • Power supply : 220‒240 V~, 50 Hz • Size : 600 mm (W) X 640 mm (D) X 850 mm (H) •... -
Page 9: Installation Place Requirements
Installation place requirements • Do not install your washing machine in rooms where freezing temperatures may occur. Frozen hoses may Location burst under pressure. The reliability of the electronic control unit may be impaired at temperatures below freezing point. • Please ensure that when the washing machine is installed, it is easily accessible for an engineer in the event of a breakdown. -
Page 10: Unpacking And Removing Shipping Bolts
unpacking and removing Install the hole caps. Shipping Bolts • Locate the hole caps included in the accessory pack and install them in the shipping bolt holes. Lift the washing machine off the foam base. • After removing the carton and shipping material, lift the washing machine off the foam base. -
Page 11: Using Non-Skid Pads (Optional)
• It is most effective to install the non-skid pads • You can obtain rubber cups (p/no.4620ER4002B) from under the front legs. If it is difficult to place the the LG Service Centre. pads under the front legs, place them under the NoTE back legs. -
Page 12: Leveling The Washing Machine
Leveling the Washing Machine Connecting Inlet Hose If the floor is uneven, turn the adjustable feet as required • Water supply pressure must be between 0.1 MPa and (Do not insert pieces of wood etc. under the feet). Make 1.0 MPa (1.0‒10.0 kgf/cm sure that all four feet are stable and resting on the floor •... - Page 13 Connecting Hose to Water Tap Push the adapter onto the end of the tap so that the rubber seal forms a watertight connection. Connecting screw-type hose to tap with thread Tighten the four fixing screws. Screw the hose connector onto the water supply tap. Push the inlet hose vertically upwards so that the rubber seal within the hose can adhere completely to the tap and then tighten it by screwing it to the...
- Page 14 Connecting Hose to Washing Machine Push the adapter onto the end of the tap so that the rubber seal forms a watertight connection. Make sure that there are no kinks in the hose and that Tighten the adapter ring plate and the four fixing they are not crushed.
-
Page 15: Installation Of Drain Hose
Installation of Drain Hose Electrical Connections (In the uK only) • The drain hose should not be placed higher than 100 cm above the floor. Water in the washing machine The wires in the mains lead are coloured in accordance may not drain or may drain slowly. -
Page 16: Operation
opErATIoN using the Washing Machine Choose the desired washing cycle. • Press the cycle button repeatedly or turn the Before the first wash, select a cycle (Cotton 60 °C, add cycle selector knob until the desired cycle is a half load of detergent), allow the washing machine selected. -
Page 17: Sorting Iaundry
Sorting Iaundry Caring before loading. • Combine large and small items in a load. Load Look for a care label on your clothes. large items first. • This will tell you about the fabric content of your • Large items should not be more than half the garment and how it should be washed. -
Page 18: Adding Cleaning Products
Adding Cleaning products NoTE • Do not let the detergent harden. Detergent Dosage Doing so may lead to blockages, poor rinse performance or odour. • Detergent should be used according to the instruction of the detergent manufacturer and selected according •... - Page 19 using tablet • Do not leave the fabric softener in the detergent drawer for more than 2 days (Fabric softener may Open the door and put tablets into the drum. harden). • Softener will automatically be added during the last rinse cycle.
-
Page 20: Control Panel
Control panel power button options • Press the power button to turn the washing • This allows you to select an additional cycle machine on. and will light when selected. • To cancel the Time Delay function, the power • Use these buttons to select the desired cycle button should be pressed. -
Page 21: Programme Table
programme Table Washing programme Maximum programme Description fabric Type proper Temp. Load Provides better performance by 40°C Cotton Coloured fast garments (shirts, combining various drum motions. (Cold to 95°C) nightdresses, pajamas, etc) Rating Provides optimised washing and normally soiled cotton 60°C Cotton Large performance for large amount of... - Page 22 Maximum programme Description fabric Type proper Temp. Load Coloured laundry which is lightly soiled fast. This cycle provides fast washing 20°C CAUTION : Use less than Speed 14 time for small loads and lightly soiled 2.0 kg 20g of detergent (for 2.0kg (20ºC to 40ºC) clothes.
- Page 23 Extra Options Time Steam Turbo Medic rinse+ programme Steam pre Wash favorite Intensive Delay Softener Wash rinse Spin ● ● ● ● ● ● ● ● ● Cotton ● ● ● ● ● ● ● ● Cotton Large ● ● ●...
- Page 24 operating Data programme Max RPM Cotton 1400 Cotton Large 1400 Easy Care 1200 1400 Allergy Care 1400 Silent Wash 1000 Steam refresh Duvet 1000 Sports Wear Dark Wash 1400 Speed 14 Gentle Care Stain Care 1400 NoTE • Information of main washing programmes at half load. Time in Water in Energy in...
-
Page 25: Option Cycle
option Cycle Steam (optional) Steam features enhanced washing performance with Time Delay low energy consumption. Steam Softener sprays steam You can set a time delay so that the washing machine after a spinning cycle to reduce creases and make the will start automatically and finish after a specified time laundry fluffy. - Page 26 pre Wash Temp. If the laundry is heavily soiled, the Pre Wash cycle is The Temp. button selects the wash and rinse recommended. temperature combination for the selected cycle. Press this button until the desired setting is lit. All rinses use Press the power button.
- Page 27 Spin Child Lock ( • Spin speed level can be selected by pressing the Spin Select this function to lock the buttons on the control button repeatedly. assembly to prevent tampering. • Spin Only Locking the control panel Press the power button. Press and hold the Child Lock button for 3 Press the Spin button to select RPM.
-
Page 28: Using Smart Function (Optional)
Installation of the application a more detailed guide on how to use the Tag On function. • Search "LG Smart Laundry" on the Google Play Store • Depending on the smart phone manufacturer and from your smart phone. Android OS version, the NFC activation process may differ. - Page 29 Directive 1999/5/EC. The complete Declaration of Conformity may be requested through the following postal address: LG Electronics European Shared Service Center B.V. Krijgsman 1 1186 DM Amstelveen The Netherlands or can be requested at our dedicated DoC website:...
-
Page 30: Maintenance
MAINTENANCE Care and Cleaning of the Interior WArNING • Unplug the washing machine before cleaning to • Use a towel or soft cloth to wipe around the washing avoid the risk of electric shock. Failure to follow machine door opening and door glass. this warning may result in serious injury, fire, •... -
Page 31: Cleaning The Drain Pump Filter
Cleaning the Drain pump filter After cleaning, turn the pump filter and insert the drain plug. • The drain filter collects threads and small objects left in the laundry. Check regularly that the filter is clean to ensure smooth running of your washing machine. •... -
Page 32: Cleaning The Dispenser Drawer
Cleaning the Dispenser Drawer Tub Clean (optional) Detergent and fabric softener may build up in the Tub Clean is a special cycle to clean the inside of the dispenser drawer. Remove the drawer and inserts and washing machine. check for buildup once or twice a month. A higher water level is used in this cycle at higher spin speed. -
Page 33: Caution On Freezing During Winter
Caution on freezing During • After closing the tap, disconnect the cold inlet hose from the tap, and remove water while keeping the Winter hose facing downwards. • When frozen, the product does not operate normally. Make sure to install the product where it will not freeze during winter. - Page 34 How to Handle freezing • When water is removed completely from the drum, close the hose plug used for removal of residual • Make sure to empty the drum, pour warm water of water, select Rinse and Spin, and press the Start/ 50–60 °C up to the rubber part inside the drum, close pause button.
-
Page 35: Using The Smart Diagnosis™ Function
Use this function if you need an accurate diagnosis transmitted for analysis. by an LG Electronics service centre when the product NoTE malfunctions or fails. Use this function only to contact •... -
Page 36: Troubleshooting
TrouBLESHooTING • Your washing machine is equipped with an automatic error-monitoring system to detect and diagnose problems at an early stage. If your washing machine does not function properly or does not function at all, check the following before you call for service: Diagnosing problems Symptoms reason... - Page 37 Symptoms reason Solution Electrical power cord may not be plugged in or connection may be • Make sure plug fits tightly in wall outlet. loose. • Reset circuit breaker or replace fuse. Do Washing machine does House fuse blown, circuit breaker not increase fuse capacity.
-
Page 38: Error Messages
Error Messages Symptoms reason Solution Water supply is not adequate in • Check another tap in the house. area. Water supply taps are not • Fully open tap. completely open. Water inlet hose(s) are kinked. • Straighten hose(s). The filter of the inlet hose(s) are •... - Page 39 Symptoms reason Solution • Close the door completely. Ensure door is not open. If ‘ ’ is not released, call for service. • Unplug the power plug and call for service. • Close the water tap. Water overfills due to the faulty •...
-
Page 40: Warranty
• Damage or failure caused by incorrect electrical current, voltage, or plumbing codes, commercial or industrial use, or use of accessories, components, or consumable cleaning products that are not approved by LG. • Damage caused by transportation and handling, including scratches, dents, chips, and/or other damage to the finish of your product, unless such damage results from defects in materials or workmanship. - Page 41 Not draining caused by Clean the pump filter. clogging of pump filter. Water is not coming because Clean the inlet valve filter water inlet valve filters are or reinstall the water inlet clogged or water inlet hoses hoses. are kinked. Inlet Filter Water is not coming because Clean the detergent...
- Page 42 Level Service trips to deliver, pick The warranty covers up, install the product or for manufacturing defects instruction on product use. only. Service resulting from The removal and reinstallation improper Installation is not of the Product. covered. 1° If all screws are not installed properly, it may cause Install 4 screws at each excessive vibration (Pedestal...
-
Page 43: Operating Data
opErATING DATA Product fiche_Commission Delegated Regulation(EU) No 1061/2010 Supplier’s name or trade mark Supplier’s model FH495BDS(0~9) Rated capacity Energy efficiency class A+++ Awarded an “EU Ecolabel award” under Regulation (EC) No 66/2010 Weighted annual energy consumption (AEC) in kWh per year based on 220 standard washing cycles for cotton programmes at 60 °C and 40 °C at full and partial load, and the consumption of the low-power modes. - Page 44 Memo...
- Page 45 Memo...
- Page 46 Memo...
- Page 47 Antes de iniciar a instalação, leia cuidadosamente as instruções. Esta ação simplificará a instalação e garantirá que o produto é instalado de forma correta e segura. Após a instalação, guarde estas instruções num local próximo ao produto para consulta futura. FH495BDS(0-9) www.lg.com...
- Page 48 ÍNDICE Este manual foi elaborado para um conjunto de produtos e pode incluir imagens ou conteúdos que não correspondem ao modelo comprado. Este manual está sujeito a revisão por parte do fabricante. INSTruçõES DE SEGurANçA ......03 Instruções importantes de segurança ..........05 INSTALAção ............08 Especificações..................08 Acessórios ...................08...
-
Page 49: Instruções De Segurança
INSTruçõES DE SEGurANçA As diretrizes de segurança seguintes destinam-se a evitar riscos ou danos imprevistos resultantes de utilização incorreta ou perigosa do produto. As diretrizes encontram-se divididas em “AVISo” e “ADVErTÊNCIA”, conforme descrito abaixo. Este símbolo é apresentado para assinalar assuntos e utilizações que podem representar perigo. - Page 50 3. Pode levar o seu aparelho à loja onde o adquiriu ou contactar a sua entidade local de recolha e tratamento de resíduos para obter mais informações sobre o ponto de recolha WEEE autorizado mais próximo. Para obter informações mais atualizadas relativas ao seu país, visite www.lg.com/global/recycling...
-
Page 51: Instruções Importantes De Segurança
• Este equipamento é pesado. Poderão ser autorizado pelo centro de atendimento necessárias duas ou mais pessoas para da LG Electronics pode desmontar, instalar e mover o equipamento. Não o reparar ou alterar o produto. Uma fazer pode resultar em ferimentos. - Page 52 Estes produtos da LG Electronics. O contacto com contêm materiais tóxicos. água pode provocar choque elétrico. • Não ligue vários produtos às mesmas •...
- Page 53 Eliminação • Antes de eliminar um equipamento antigo, desligue-o. Inutilize a ficha. Corte o cabo diretamente atrás do equipamento para evitar uma utilização indevida. • Elimine o material da embalagem (tal como vinil e esferovite) para fora do alcance de crianças. O material da embalagem pode provocar asfixia.
-
Page 54: Instalação
INSTALAção Especificações Parafusos de transporte Ficha elétrica Gaveta Painel de controlo Tambor Porta Tubo de drenagem Tampão de drenagem Filtro da bomba de drenagem Tampa de proteção (a localização pode variar dependendo dos produtos) Pés ajustáveis • Tensão de alimentação: 220‒240 V~, 50 Hz •... -
Page 55: Requisitos Do Local De Instalação
requisitos do local de instalação • Não instale a sua máquina de lavar roupa em divisões onde podem ocorrer temperaturas abaixo de zero. Localização Tubos congelados podem estourar sob pressão. A fiabilidade da unidade de controlo eletrónico pode ser prejudicada a temperaturas abaixo de zero. •... -
Page 56: Desembalar E Remover Os Parafusos De Transporte
Desembalar e remover os Instale as tampas para buracos. parafusos de transporte • Localize as tampas para buracos incluídas no conjunto de acessórios e instale-as nos buracos Retire a máquina de lavar roupa da base de dos parafusos de transporte. esferovite. -
Page 57: Utilizar Placas Antiderrapantes (Opcional)
• Pode obter vedantes de borracha (n.º de peça • É mais eficaz instalar as placas antiderrapantes 4620ER4002B) no Centro de atendimento da LG. por baixo dos pés dianteiros. Se for difícil colocar as placas por baixo dos pés dianteiros, coloque- oBSErVAção... -
Page 58: Nivelar A Máquina De Lavar Roupa
Nivelar a máquina de lavar roupa Ligar o tubo de entrada Se o piso for irregular, gire os pés ajustáveis conforme • A pressão de abastecimento de água deve estar entre necessário (não introduza pedaços de madeira, etc. 0,1 MPa e 1,0 MPa (1,0‒10,0 kgf/cm sob os pés). - Page 59 Ligar o tubo a uma torneira de água Empurre o adaptador na direção da extremidade da torneira para que a vedação de borracha Ligar tubo tipo parafuso a uma torneira com forme uma ligação impermeável. Aperte os quatro rosca parafusos de fixação. Aperte o conetor do tubo à...
- Page 60 Ligar o tubo à máquina de lavar roupa Empurre o adaptador na direção da extremidade da torneira para que a vedação de borracha forme Certifique-se de que o tubo não fica dobrado nem uma ligação impermeável. esmagado. Aperte a placa anular do adaptador e os quatro Quando a sua máquina de lavar roupa tem duas parafusos de fixação.
-
Page 61: Instalação Do Tubo De Drenagem
Instalação do tubo de drenagem Ligações elétricas (apenas no reino unido) • O tubo de drenagem não deve ser colocado a mais de 100 cm acima do solo. A água na máquina de As cores dos fios na ligação à rede estão em lavar roupa pode não conseguir drenar ou drenar conformidade com o código seguinte: lentamente. -
Page 62: Funcionamento
fuNCIoNAMENTo Utilizar a máquina de lavar roupa Escolha o programa de lavagem pretendido. • Prima o botão programa repetidamente ou gire Antes da primeira lavagem, selecione um programa o botão seletor de programa até o programa (Algodão 60 °C, adicione meia medida de detergente) pretendido ser selecionado. -
Page 63: Separar A Roupa
Separar a roupa Cuidados antes de encher a máquina. • Combine peças grandes e pequenas numa Procure uma etiqueta de conservação nas suas carga. Coloque as peças grandes em primeiro roupas. lugar. • A mesma especificará o conteúdo do tecido da •... -
Page 64: Adicionar Produtos De Limpeza
Adicionar produtos de limpeza oBSErVAção • Não deixe o detergente solidificar. Dose de detergente Essa ação pode provocar bloqueios, mau enxaguamento ou odores. • O detergente deve ser utilizado de acordo com as instruções do fabricante do detergente e selecionado •... - Page 65 utilizar pastilhas • Não deixe o amaciador de roupa na gaveta do detergente durante mais de dois dias (o amaciador de Abra a porta e coloque as pastilhas dentro do roupa pode solidificar). tambor. • O amaciador será automaticamente adicionado durante o último programa de enxaguamento.
-
Page 66: Painel De Controlo
painel de controlo Tempo Restante Lavagem Botão oN/off Seleção de programa • Prima o botão oN/off para ligar a máquina de • Os programas estão disponíveis de acordo lavar roupa. com o tipo de roupa. • Para cancelar a função Final diferido, deve •... -
Page 67: Tabela De Programas
Tabela de programas programas de lavagem Temp. Carga programa Descrição Tipo de tecido adequada máxima Oferece um melhor desempenho 40 °C Algodão combinando diversos movimentos do (Água fria Roupas de cores permanentes tambor. até 95 °C) (camisas, camisas de noite, pijamas, Valor Oferece um desempenho de lavagem etc.) e roupa de algodão com um nível... - Page 68 Temp. Carga programa Descrição Tipo de tecido adequada máxima Roupa de cores que suja rapidamente. Este ciclo fornece um tempo de 20 °C ADVERTÊNCIA: Utilize menos do que 14 Minutos lavagem rápido para pequenas cargas (20 °C a 2,0 kg 20 g de detergente (para uma carga e roupas pouco sujas.
- Page 69 Opções extra Vapor com final Pré- Turbo Enxaguamento Enxaguamento + programa Vapor efeito favorito Intensivo diferido lavagem Wash Cuidado Centrifugação Amaciador ● ● ● ● ● ● ● ● ● Algodão Algodão peças ● ● ● ● ● ● ● ●...
- Page 70 Dados de funcionamento programa RPM máx. Algodão 1400 Algodão peças grandes 1400 fibras 1200 1400 Anti alergias 1400 Lavagem silenciosa 1000 refrescar vapor Edredão 1000 roupa desportiva roupa de cor 1400 14 Minutos roupa delicada Especial manchas 1400 oBSErVAção • Informações sobre os principais programas de lavagem com meia carga. Tempo Água em Energia...
-
Page 71: Programa De Opção
programa de opção Vapor (opcional) Vapor apresenta um melhor desempenho de lavagem final diferido com um menor consumo energético. Vapor com efeito Pode definir um tempo de atraso para que a máquina de Amaciador pulveriza vapor após um programa de lavar roupa inicie e termine automaticamente após um centrifugação para reduzir vincos e tornar a roupa macia e intervalo de tempo especificado. - Page 72 Pré-lavagem Temperatura Se a roupa estiver muito suja, recomendamos o O botão Temperatura seleciona a combinação programa de Pré-lavagem. de temperatura de lavagem e enxaguamento para o programa selecionado. Prima este botão Prima o botão oN/off. até a configuração pretendida acender. Todos os enxaguamentos utilizam água fria da torneira.
- Page 73 Centrifugação Bloqueio Crianças ( O nível de velocidade de centrifugação pode ser Selecione esta função para bloquear os botões do selecionado premindo o botão Centrifugação painel de controlo para evitar a sua manipulação. repetidamente. • Apenas centrifugação Bloquear o painel de controlo Prima o botão oN/off.
-
Page 74: Utilizar A Função Smart (Opcional)
Instalação do equipamento obter um guia mais detalhado sobre como utilizar a função Tag On. • Procure “LG Smart Laundry” na Google Play Store no • Dependendo do fabricante do smartphone e da seu telemóvel. versão do SO Android, o processo de ativação da função NFC pode variar. - Page 75 Declaração de conformidade da uE Por este meio, a LG Electronics European Shared Service Center B.V., declara que esta máquina de lavar roupa está em conformidade com os requisitos essenciais e outras disposições da Directiva 1999/5 / CE. A declaração completa de conformidade pode ser solicitada através do seguinte endereço postal:...
-
Page 76: Manutenção
MANuTENção Cuidado e limpeza do interior AVISo • Desligue a máquina de lavar roupa da corrente • Utilize uma toalha ou um pano macio para limpar em elétrica antes de iniciar a limpeza para evitar torno da abertura da porta e para limpar o vidro da o risco de choque elétrico. -
Page 77: Limpar O Filtro Da Bomba De Drenagem
Limpar o filtro da bomba de Após a limpeza, gire o filtro da bomba para a direita e introduza o tampão de drenagem. drenagem • O filtro de drenagem recolhe fios e pequenos objetos deixados nas roupas. Verifique regularmente se o filtro está... -
Page 78: Limpar A Gaveta Do Dispensador
Limpar a gaveta do dispensador Limpeza da cuba (opcional) Detergente e amaciador de roupa podem acumular na A Limpeza da cuba é um programa especial para limpar gaveta do dispensador. Retire a gaveta e as divisórias e o interior da máquina de lavar roupa. verifique se existe acumulação uma ou duas vezes por É... -
Page 79: Cuidado Com O Congelamento Durante O Inverno
Cuidado com o congelamento • Após fechar a torneira, desligue o tubo de entrada de água fria da torneira e remova a água enquanto durante o inverno mantém o tubo virado para baixo. • Quando congelado, o produto não funciona normalmente. - Page 80 Como lidar com o congelamento • Quando a água for removida por completo da cuba, feche a tampa do tubo utilizado para a remoção • Certifique-se de que esvazia o tambor, verta água da água residual, selecione Enxaguamento e quente a 50–60 °C sobre a parte de borracha no Centrifugação e prima o botão Início/pausa.
-
Page 81: Utilizar A Função Smart Diagnosis
Assim que o sinal sonoro parar, retome a conversa com o operador do Centro de Informação ao Diagnosis™ Cliente LG, que depois poderá ajudá-lo a utilizar as Se o produto avariar ou falhar, utilize esta função se informações transmitidas para análise. -
Page 82: Resolução De Problemas
rESoLução DE proBLEMAS • A sua máquina de lavar roupa está equipada com um sistema automático de monitorização de erros para detetar e diagnosticar problemas numa fase inicial. Se a sua máquina de lavar roupa não funcionar corretamente ou não funcionar de todo, verifique o seguinte antes de telefonar para a assistência: Diagnosticar problemas Sintomas... - Page 83 Sintomas Motivo Solução O cabo de energia elétrica pode não • Certifique-se de que a ficha encaixa estar ligado ou a ligação pode estar perfeitamente na tomada elétrica. solta. • Rearme o disjuntor ou substitua o fusível. A máquina de lavar roupa fusível queimado na casa, disjuntor Não aumente a capacidade do fusível.
-
Page 84: Mensagens De Erro
Mensagens de erro Sintomas Motivo Solução O abastecimento de água não é • Verifique outra torneira na casa. adequado para o local. As torneiras de abastecimento de • Abra totalmente a torneira. água não estão totalmente abertas. O(s) tubo(s) de entrada de água está/ •... - Page 85 Sintomas Motivo Solução • Feche bem a porta. Certifique-se de que a porta não está Se “ ” não apagar, entre em aberta. contacto com a assistência. • Desligue a energia e entre em contacto com a assistência. • Feche a torneira da água. Enchimento excessivo de água •...
-
Page 86: Garantia
• A retirada e reinstalação do Produto caso esteja instalado num local inacessível ou não esteja instalado de acordo com as instruções de instalação publicadas, incluindo os manuais de instalação e do utilizador da LG. • Danos resultantes de utilização incorreta, abuso, instalação, reparação ou manutenção incorretas. Uma reparação incorreta inclui a utilização de peças não aprovadas ou especificadas pela LG. - Page 87 Impossibilidade de drenagem devido a entupimento do filtro da Limpe o filtro da bomba. bomba. A água não está a entrar porque os filtros da válvula de entrada Limpe o filtro da válvula de água estão entupidos ou os de entrada ou reinstale os tubos de entrada de água estão tubos de entrada de água.
- Page 88 Nível Viagens de serviço para entrega, A garantia cobre apenas recolha, instalação do produto defeitos de fabrico. A ou para instruções sobre a assistência resultante de utilização do produto. Remoção Instalação incorreta não é e reinstalação do Produto. abrangida. 1° Se todos os parafusos estiverem instalados incorretamente, Instale quatro parafusos...
-
Page 89: Dados De Funcionamento
DADoS DE fuNCIoNAMENTo Ficha de produto_Regulamentação da Comissão Delegada (EU) N.º 1061/2010 O nome do fornecedor ou marca comercial Modelo do fornecedor FH495BDS(0-9) Capacidade Classe de efi ciência energética A+++ Premiada com “Prémio EU Ecolabel” ao abrigo da Regulamentação (EC) N.º 66/2010 Não Consumo anual de energia estimado (AEC) em kWh por ano baseado em 220 ciclos standards de lavagem para kWh/... - Page 90 Circular...
- Page 91 Circular...
Need help?
Do you have a question about the FH495BDS Series and is the answer not in the manual?
Questions and answers