Table of Contents
Advertisement
Quick Links
Advertisement
Chapters
Table of Contents
Troubleshooting

Summary of Contents for BUSKRO Apollo BK-IDM-4H
- Page 1 Apollo Ink Delivery System User’s guide V1.2 Part No. 9103326...
- Page 2 Neither Buskro Ltd. nor its dealers or distributors shall be liable to the purchaser nor any other person or entity with respect to any liability, loss, or damage caused or alleged to be caused directly or indirectly by this manual.
-
Page 3: Table Of Contents
BK760 Power Cable ......................2-17 2.3.1.4 BK1700 Power Cable ......................2-17 Communication Cable Setup................2-18 2.4.1 RS232 COM Serial Cable Connection ............2-18 2.4.1.1 Serial Ribbon Cable Attachment ..................2-18 2.4.1.2 Serial Ribbon Cable Software Setup .................. 2-19 Buskro Ltd. Apollo Ink Delivery System... - Page 4 4.1.5 Ink Pen Disposal and Clean-up................ 4-4 4.1.6 Ink Pen Storage ....................4-4 Lifetime of Components..................4-4 5.0 Troubleshooting Guide .................5-0 Troubleshooting ....................5-1 Appendix A – Assembly Drawings Appendix B – Assembly Drawings Buskro Ltd. Apollo Ink Delivery System...
-
Page 5: General Information
General Information Chapter General Information Buskro Ltd. Apollo Ink Delivery System... -
Page 6: Description
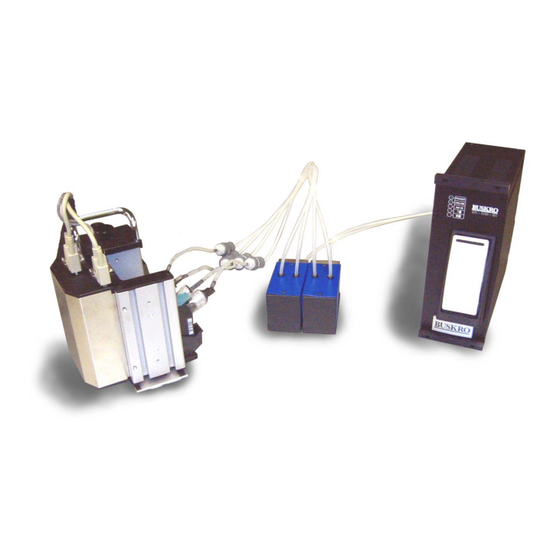
(p/n BKINK-VERBK350) and distributes it to a number of ink pens (p/n BKINK- VERBKPEN), up to a maximum of 8 pens, for a total vertical coverage of 4”. It communicates with Buskro Inkjet Controllers (Compose V6.04 or later) via a serial RS232C connection to provide level sensing and cartridge status information. -
Page 7: Features
1.2.6 Lower Consumable Costs In addition to improving operational reliability through reduced downtime, ink costs, including both cartridge and pen replacement, can result in a 20-30% saving over traditional HP Versatile Ink Pens. Buskro Ltd. Apollo Ink Delivery System... -
Page 8: Specifications
Item Specification Note Vertical Resolution 600 DPI Horizontal Resolution 150, 200, 300, 400, 600 DPI Software-selected Ink Supply Ink Cartridge (350 ml) Ink Composition Pigmented, water based Pen Type 42 ml, Thermal ink-jet 2.5 Buskro Ltd. Apollo Ink Delivery System... -
Page 9: Production And Consumption Rates
3 Ink consumption is based on a 6-line address containing on average 100 characters using an Arial 11 point font. Specifications are based on empirical study, and where not obtainable, on manufacturer’s specifications. Buskro Ltd. Apollo Ink Delivery System... -
Page 10: System Drawings
Bracket, Ink Delivery Module, BK700 9103267 Regulator Module, 6’ BK-BULKREG-06 Bracket, Regulator Module 9103243A Ink Pen, Bulk, HP Versatile Black, 42mL BKINK-VERBKPEN Cable, IDM Serial Communication BK-CAB-IDMCOM Cable, IEC Type, 120 VAC BK-CAB-IEC120 Priming Tool BK-BULKPRIME Buskro Ltd. Apollo Ink Delivery System... - Page 11 102 mm. I.L. IDM Overall Length 12.13” 308 mm. I.H. IDM Overall Height 10.48” 266 mm. Supply Station Extension 1.34” 34 mm. C.L. Casing Length 9.99” 254 mm. C.H. Casing Height 9.35” 237 mm. Buskro Ltd. Apollo Ink Delivery System...
- Page 12 Ink Pen Overall Width 3.90” 99 mm. I.L. Ink Pen Overall Length 0.70” 18 mm. I.H. Ink Pen Overall Height 4.25” 108 mm. Ink Pen Height 3.63” 92 mm. Ink Line Length 9” 229 mm. Buskro Ltd. Apollo Ink Delivery System...
- Page 13 Ink Cartridge, Versatile Black, 350 mL Dimensions Symbol Description Dimensions B.W. Ink Cartridge Overall Width 2.04” 52 mm. B.L. Ink Cartridge Overall Length 6.52” 166 mm. B.H. Ink Cartridge Overall Height 4.37” 111 mm. Buskro Ltd. Apollo Ink Delivery System...
-
Page 14: Ink Delivery System Installation
Ink Delivery System Installation Chapter Ink Delivery System Installation Buskro Ltd. Apollo Ink Delivery System... -
Page 15: Regulator Module
Remove the existing screws (SHCS 5/16-18 UNC) that are used to Figure 2-1 attach to the bridge ( ) end bracket to the rails. Depending on the kind of bridge assembly you have, there may be one or two screws. Buskro Ltd. Apollo Ink Delivery System... - Page 16 0.83” to 1.83” above the printhead nozzles. Use the two longer screws (SHCS 5/16-18 UNC) to secure it in place Figure 2-2 Place the regulator mount back onto bracket. Figure 2-2: Attaching Regulator Assembly to the bridge. Buskro Ltd. Apollo Ink Delivery System...
-
Page 17: Mounting Onto A Base
Figure 2-5 for the BK460 tabletop and for the BK660 tabletop. Mount to either one of these threaded hole. Figure 2-4: Mounting on a BK460 tabletop. Buskro Ltd. Apollo Ink Delivery System... -
Page 18: Regulator Module Height
Figure 2-7 Figure 2-8 bridge ( ) or the other by adjusting the mount along the bracket ( 1.83" 0.83" Figure 2-6: Regulator module height differential (0.83” to 1.83’) above the ink pen’s nozzle plate. Buskro Ltd. Apollo Ink Delivery System... - Page 19 Note: Ensure that the regulator module is 0.83” (21 mm) to 1.83” (46.5 mm) above nozzle plate level for proper ink pen operation. Figure 2-7: Adjusting the Regulator module bracket height along the bridge. Figure 2-8: Adjusting the Regulator module mount height along the bracket. Buskro Ltd. Apollo Ink Delivery System...
-
Page 20: Ink Delivery Module
The Apollo Ink Delivery Module (IDM) shown in can be mounted on various Buskro products including the BK700 controller, BK760/660/460 system, and BK1700 controller. This is accomplished by attaching an IDM mounting bracket on existing BK700 or BK760/660/460 units, while on BK1700 controllers, the rack-mount compatible IDM would be installed directly into a rack. -
Page 21: Attaching The Idm Bracket To The Bk460/660 Controller
Route all cables except for the IDM’s power cable through the same rectangular opening located at the top of the controller. Then route the cables in the same path as the monitor’s cables. Figure 2-10: Apollo IDM mounted on a BK460/660 Controller. Buskro Ltd. Apollo Ink Delivery System... -
Page 22: Securing The Idm Into The Bk700 Idm Bracket
(DO NOT remove the screws completely) and slide the reservoir out as shown Figure 2-12 . Tighten the screws back down. EXISTING HP RESERVOIR ASSEMBLY Figure 2-12: Removing the existing HP reservoir assembly Buskro Ltd. Apollo Ink Delivery System... - Page 23 Take the power cable and route the IEC end of it through the same center opening from the bottom up. Attach the power cable to the back of the module. Repeat steps 1 to 6 if a second IDM is used for the opposite side of the controller. Buskro Ltd. Apollo Ink Delivery System...
- Page 24 Place the Apollo IDM on the IDM mounting bracket. Use the two screws (p/n 404510) to secure the IDM in place as shown Figure 2-15 Figure 2-15: Securing the Apollo IDM to the BK700 IDM bracket. Buskro Ltd. Apollo Ink Delivery System...
-
Page 25: Bk760 System Installation
Place the IDM on the bracket such that its front face is oriented towards the operator. Then, line it up with the fastening slots in the bracket. Figure 2-17 Attach the two screws to the IDM and s ecure them ( Buskro Ltd. Apollo Ink Delivery System... - Page 26 Chapter 2 Ink Delivery System Installation Page 2-12 Figure 2-16: Attaching the Apollo IDM bracket to the BK760 monitor tray. Figure 2-17: Securing the Apollo IDM to the BK760 IDM bracket. Buskro Ltd. Apollo Ink Delivery System...
- Page 27 Chapter 2 Ink Delivery System Installation Page 2-13 ROUTE SERIAL CABLE THROUGH HERE. Figure 2-18: Routing of the Serial Cable in BK760. Buskro Ltd. Apollo Ink Delivery System...
-
Page 28: Bk1700 Controller Installation
Route both serial and power cable along the side of the controller. The Figure 2-20 side door should be opened to facilitate this operation. See Figure 2-19: Apollo IDM mounted into the BK1700 controller rack. Buskro Ltd. Apollo Ink Delivery System... -
Page 29: Cable Attachment Instructions
The steps required to connect the power and serial cables are as follows: 1. Connect the power cable into a power source. 2. Connect the communication cable. 3. Identify the serial port in Compose. Buskro Ltd. Apollo Ink Delivery System... - Page 30 Chapter 2 Ink Delivery System Installation Page 2-16 Ink Delivery Module IEC Power Receptacle RS232 Connector (DB9) Alarm Connector 4 Channel Ink Port Figure 2-21: Location of Cable Attachments Buskro Ltd. Apollo Ink Delivery System...
-
Page 31: Power Cable
The power cable for the IDM should be attached to the power supply module (p/n BK- PSM-4H) of the BK1700 controller. This module is situated on a lower shelf with connection occurring at the back. Buskro Ltd. Apollo Ink Delivery System... -
Page 32: Communication Cable Setup
(rightmost one) located at the top of the motherboard cage assembly. Figure 2-23 Figure 2-23: Insertion of the Serial ribbon cable into the motherboard’s COM port located at the top of the motherboard cage assembly. Buskro Ltd. Apollo Ink Delivery System... -
Page 33: Serial Ribbon Cable Software Setup
Communication port icons, double click on the first Communication Figure 2-25 port and click on the enable button ( Make note of what COM port is used by the serial ports. Repeat step 11 for the second Communication port if required. Buskro Ltd. Apollo Ink Delivery System... - Page 34 Chapter 2 Ink Delivery System Installation Page 2-20 Figure 2-24: System Icon in the control panel. Figure 2-25: Enabling Serial Ports in the Device Manager. Buskro Ltd. Apollo Ink Delivery System...
-
Page 35: Serial-To-Usb Cable Connection
Click on the Hardware tab and click on Device Manager button. Under “Ports (COM & LPT)”, check to see what COM port number Figure 2-27 appears beside “Prolific USB-to-Serial Comm Port”. In , this is displayed as COM12. Buskro Ltd. Apollo Ink Delivery System... -
Page 36: Serial Cable Setup (To Comtrol Rocketport Card)
Follow the step-by-step instructions included with the Serial Communication Card (p/n BK-COMM) to install this onto the motherboard and setup the software configuration. Note the COM port number used to attach to the IDM. Buskro Ltd. Apollo Ink Delivery System... -
Page 37: Compose Iq Software Setup
Ensure that HP Ink ports have been set to the COM port used by the Figure 2-28 IDM communication cable. See Click OK, exit Compose and Restart the computer. Figure 2-28: Compose Setup Screen Buskro Ltd. Apollo Ink Delivery System... -
Page 38: Compose Iq - Multi-Apollo Ink Delivery System Setup
5-8). This can be modified by performing the following steps in the setup menu: Figure 2-29 Open the setup dialog box ( ) in Compose IQ and click on the “Print Heads” tab. Figure 2-29: Compose IQ Setup Screen Buskro Ltd. Apollo Ink Delivery System... -
Page 39: Installing Module Ink Lines
Press down on the connector’s metal clips to eject them. Insert the regulator ink line(s) into the ink ports on the back of the Figure 2-32 module ( ). Ensure that the metal clips pop up when they are inserted. Buskro Ltd. Apollo Ink Delivery System... - Page 40 Ink Delivery System Installation Page 2-26 Route umbilical through here. Figure 2-31: Routing the regulator ink lines through the BK1700 controller. Figure 2-32: Inserting the regulator ink line connectors into the back of the IDM. Buskro Ltd. Apollo Ink Delivery System...
-
Page 41: Using The Ink Pens
2.7.2 to learn how to use the Quick Disconnects). Note: Too much air in the ink pen can potentially damage it or cause ink to leak out. Follow the step-by-step instructions to prime the ink line (Section 4.1.4). Buskro Ltd. Apollo Ink Delivery System... -
Page 42: Ink Pen Removal
Lift up the blue tab of the ink pen that is being removed and fold it back Figure 2-34 completely (as shown in the upper pen of Remove the ink pen from the printhead. Buskro Ltd. Apollo Ink Delivery System... -
Page 43: Using The Quick Disconnects Fittings
Once completely inserted, release the tab. To disconnect the fittings, simply press the white tab. The male end should be ejected. Figure 2-35: Connecting the regulator ink line to the ink pen or priming tool. Buskro Ltd. Apollo Ink Delivery System... -
Page 44: Alarm Module (Optional)
Alarm Connector Figure 2-36: Location of the 6-pin alarm Connector at the back of the IDM N.C. Switch 12 VDC Terminal Pins N.O. Switch Figure 2-37: Pin designation of the alarm connector Buskro Ltd. Apollo Ink Delivery System... - Page 45 Note: If you intend to attach an electrical warning device to this output, please consult with Buskro LTD. The Weidmuller part numbers that mate with this connector are the following: BLC 5.08B, BLIDC 5.08B, BLT 5.08B, BLZ 5.08B, and BLZF 5.08B.
-
Page 46: Operating Instructions
Operating Instructions Chapter Operating Instructions Buskro Ltd. Apollo Ink Delivery System... -
Page 47: Apollo Ink Delivery Module (Bk-Idm-4H)
. In order for the system to pump and monitor ink levels, an RS232 connection must be made between the IDM and Buskro Inkjet controller. The RS232 (DB9) receptacle is situated on the back panel of the IDM. -
Page 48: Low-On-Ink Condition
IDM will go to INK OUT. Unrecognized Cartridge ON when an unrecognized cartridge is used (i.e. from another supplier). Only Buskro cartridges will work. Cartridge Error/No Ink ON when there is a cartridge error (i.e. bad electrical connection, burst bag, smart chip problem, etc) or an Ink Out condition (no more ink). -
Page 49: Ink Out Condition
The ink cartridge contains 350 mL of ink, enough ink to refill one ink pen over eight times. These cartridges can only be used once and must be purchased through Buskro LTD. Ink cartridges purchased elsewhere will not work with this system. -
Page 50: Inserting An Ink Cartridge Into The Idm
OFFLINE. Try another ink Table 3-1 cartridge and/or refer to Once ONLINE, the system is ready for use. Figure 3-5: Side illustration of the cartridge insertion procedure. Buskro Ltd. Apollo Ink Delivery System... -
Page 51: Removing An Ink Cartridge From The Idm
3.3.2.1 Activating the Ink Delivery System Note: The system will only function with Buskro ink cartridges. Ink cartridges purchased elsewhere will not enable the system to commence the ink pumping operation. If a cartridge is not present, follow the instructions listed in section 3.3.1. -
Page 52: Replacing An Empty Ink Cartridge
(follow Section 4.1.4 to prime the ink line). Print Cartridge Quick Disconnect Fitting Buskro Ltd. Apollo Ink Delivery System... -
Page 53: Pen Replacement
Remove the ink pen by following the instructions cited in section 2.7.2. Insert a new ink cartridge by following instructions in Section 2.7.1. Ensure the system is properly activated as outlined in instructions 3.3.2.1. Buskro Ltd. Apollo Ink Delivery System... -
Page 54: Printhead Maintenance
Printhead Maintenance Chapter Printhead Maintenance Buskro Ltd. Apollo Ink Delivery System... -
Page 55: General Maintenance
The general procedure for cleaning an ink cartridge is to wipe the nozzle plate with a moist cotton cloth (can be purchased through Buskro with p/n 800900). Only distilled or de-ionized water should be used to avoid mineral deposits from building up on the pen. -
Page 56: Interconnect Pad Cleaning
(Section 4.1.1). Once this is done, the ink plugs can be forced out or purged by printing test patterns at high resolutions (i.e. 660 DPI). This process should be repeated until the missing lines are eliminated. Buskro Ltd. Apollo Ink Delivery System... -
Page 57: Ink Line Priming
Be sure to do this slowly and watch for air bubbles in the syringe. Once the bubbling has stopped, disconnect the syringe and reconnect the regulator back to the ink pens. Figure 4-2: Inkline Priming Buskro Ltd. Apollo Ink Delivery System... -
Page 58: Ink Pen Disposal And Clean-Up
10-15 ink refills (400mL). Note: Do NOT refill ink cartridges. Refilling processes and the use of incompatible inks may disrupt the printing system, potentially resulting in damage to the printing device, reduced print quality and user dissatisfaction. Buskro Ltd. Apollo Ink Delivery System... -
Page 59: Troubleshooting Guide
Troubleshooting Guide Chapter Troubleshooting Guide Buskro Ltd. Apollo Ink Delivery System... -
Page 60: Troubleshooting
(Section 2.1.1.2). Ensure the IDM is online. Wipe and purge Missing lines/streaks in printhead. text or graphics. Re-insert the ink pen into the printhead. Clean the interconnect pads. Install a new ink pen. Buskro Ltd. Apollo Ink Delivery System... - Page 61 Ink is seeping from the regulator nozzles. assembly is at the correct height (Section 2.1.1.2). Verify that the Text characters and regulator graphic are light. assembly is at the correct height (Section 2.1.1.2). Replace ink pens. Buskro Ltd. Apollo Ink Delivery System...
- Page 62 The Ink Delivery Module POWER connection. The unit has not been powered on ONLINE can run from a power input of 100 – 240 VAC at 50/60 Hz. Ensure the power switch has been turned on. Buskro Ltd. Apollo Ink Delivery System...
- Page 63 Compose is loaded print bars 5-8 are even though there are included with the two IDS systems that are Apollo Array physically installed technology. Review section 2.5 of POWER the user manual. ONLINE Buskro Ltd. Apollo Ink Delivery System...
- Page 64 HP Regulator Mount Assembly (9103243A)........... A-19 Figure A-12: Manifold Block, Hybrid Out Assembly (9103298A)....... A-20 Figure A-13: Upper Bracket Assembly, HP Module (9103479A) ........ A-22 Figure A-14: Cable, Power Input Switched, Apollo Module (9103609A)....A-23 Apollo Ink Delivery System Buskro Ltd.
- Page 65 It is matched with the top number in the balloon pointing at the associated part. Part Number: This column represents the Buskro part number. Quantity: This represents the total number of a given part in an assembly. It is matched with the bottom number in the balloon pointing at the associated part.
-
Page 66: Table A-1: Apollo Ink Delivery System, 4", Bk660, 6', Na (660-Idm4H-06Na
Please note the changes in each item number for the different kinds of systems: Apollo Ink Delivery, System, 2”, BK660, 6’, NA (660-IDM2H-06NA) Item Part Number Quantity Description Reference BK-BULKREG-06 Regulator Module, Apollo 6’ Page A-12 BKINK-VERBKPEN Ink, HP Cartridge, Bulk, Versatile Black Apollo Ink Delivery System Buskro Ltd. -
Page 67: Figure A-1: Apollo Ink Delivery System, 4", Bk660, 6', Na (660-Idm4H-06Na
MOUNT THE REGULATOR SO THAT THE BOTTOM IS USE THE BRAIDED SLEEVING (9101776) 1.0 TO 2.0" ABOVE THE TO TIE TUBES TOGETHER. LEAVE 7" OF BOTTOM OF THE PRINTHEAD THE TUBING EXPOSED ON EACH END. Apollo Ink Delivery System Buskro Ltd. -
Page 68: Table A-2: Apollo Ink Delivery System, 4", Bk700, 6', Na (700-Idm4H-06Na
BKINK-VERBKPEN Ink, HP Cartridge, Bulk, Versatile Black Apollo Ink Delivery, System, 4”, BK700, 15’, NA (700-IDM4H-15NA) Item Part Number Quantity Description Reference 9101776 166” Sleeving, Braided, Expandable BK-BULKREG-15 Regulator Module, Apollo 15’ Page A-12 Apollo Ink Delivery System Buskro Ltd. -
Page 69: Figure A-2: Apollo Ink Delivery System, 4", Bk700, 6', Na (700-Idm4H-06Na
1.0 TO 2.0" ABOVE THE BOTTOM OF THE PRINTHEAD MOUNTS TO THE BRACKET HOLDING THE INKWELL ON THE SIDE OF THE BK700. DEFAULT SIDE IS THE RIGHT SIDE OF CONTROLLER. LEFT VERSION SHOWN HERE. Apollo Ink Delivery System Buskro Ltd. -
Page 70: Table A-3: Apollo Ink Delivery System, 4", Bk760, 6', Na (760-Idm4H-06Na
Apollo Ink Delivery System, 2”, BK760, 6’, WD (760-IDM2H-06WD) Item Part Number Quantity Description Reference 9103256 Cord, 10A/250 VAC, 3m, Harmonized, IEC BK-BULKREG-06 Regulator Module, Apollo 6’ Page A-12 BKINK-VERBKPEN Ink, HP Cartridge, Bulk, Versatile Black Apollo Ink Delivery System Buskro Ltd. -
Page 71: Figure A-3: Apollo Ink Delivery System, 4", Bk760, 6' (760-Idm4H-06Na
Apollo Ink Delivery System, 4”, BK760, 6’ (760-IDM4H-06NA) BRIDGE SHOWN FOR REFERENCE MOUNT THE REGULATOR SO THAT THE BOTTOM IS 1.0 TO 2.0" ABOVE THE BOTTOM OF THE PRINTHEAD MONITOR TRAY SHOWN FOR REFERENCE Apollo Ink Delivery System Buskro Ltd. -
Page 72: Table A-4: Apollo Ink Delivery System, 4" Bk1700, 6', Na (1700-Idm4H-06Na
BKINK-VERBKPEN Ink, HP Cartridge, Bulk, Versatile Black Apollo Ink Delivery, System, 4”, BK1700, 15’, NA (1700-IDM4H-15NA) Item Part Number Quantity Description Reference 9101776 166” Sleeving, Braided, Expandable BK-BULKREG-15 Regulator Module, Apollo 15’ Page A-12 Apollo Ink Delivery System Buskro Ltd. -
Page 73: Figure A-4: Apollo Ink Delivery System, 4" Bk1700, 6' (1700-Idm4H-06Na
Assembly Drawings Page A-10 Figure A-4: Apollo Ink Delivery System, 4” BK1700, 6’ (1700-IDM4H-06NA) BRIDGE SHOWN FOR REFERENCE MOUNT THE REGULATOR SO THAT THE BOTTOM IS 1.0 TO 2.0" ABOVE THE BOTTOM OF THE PRINTHEAD Apollo Ink Delivery System Buskro Ltd. -
Page 74: Table A-5: Syringe Assembly, Apollo Bulk Ink (Bk-Bulkprime
Tubing, Silicone, ¼” OD x 1/8” ID 9101292 Syringe, 30 cc 9103061 2x 4” Tubing, LDPE, 1/8” ID x 3/16” OD, 90 Duro 9103303 Coupling Body, Male, 1/8” O.D., NS4 Figure A-5: Syringe Assembly, Apollo Bulk Ink (BK-BULKPRIME) Apollo Ink Delivery System Buskro Ltd. -
Page 75: Table A-6: Unit, Regulator Module, 6' (Bk-Bulkreg-06
Please note the changes in the item number for the 15’ system: Unit, Regulator Module, 15’ (BK-BULKREG-15) Item Part Number Quantity Description Reference 9103061 180” Tubing, LDPE, 1/8 ID x 3/16 OD, 90 Duro Apollo Ink Delivery System Buskro Ltd. -
Page 76: Figure A-6: Unit, Regulator Module, 6' (Bk-Bulkreg-06
Appendix A Assembly Drawings Page A-13 Figure A-6: Unit, Regulator Module, 6’ (BK-BULKREG-06) FOR 39" BRIDGE, LENGTH = 48" FOR 22" BRIDGE OR LESS, LENGTH = 24" Apollo Ink Delivery System Buskro Ltd. -
Page 77: Table A-7: Module, Apollo Ink Delivery Module, 4-Channel (Bk-Idm-4H
439008 Lockwasher, No. 10, External Tooth 439009 Lockwasher, No. 10 615322 Female Screwlock, 4-40 UNC 9101627 Buskro Serial Number Label 9102341A Cable, Hybrid IDS board I/O 9102862A Cable, Power Input, HP Module Page A-16 9102995 Ink Supply Station, Modular, Hybrid... -
Page 78: Figure A-7: Module, Apollo Ink Delivery Module, 4-Channel (Bk-Idm-4H
Module, Apollo Ink Delivery Module, 4-Channel (BK-IDM-4H) Note: When attaching the tubing (9103059) to the Ink Supply Station, insert it directly into the port without removing the rubber ring or the plastic clamp already in place. Apollo Ink Delivery System Buskro Ltd. -
Page 79: Table A-8: Cable, Power Input, Hp Module (9102862A
Terminal, Ring, #10, 22-18 AWG, Red 609117 Connector, Push-On, 22-18 AWG, Red 609530 Connector, Push-On, 22-18 AWG, Red, 187 9102246 5” Wire, #18, Green/Yellow Hookup 9102862 Receptacle, Male, 250VAC/10A, IEC Figure A-8: Cable, Power Input, HP Module (9102862A) Apollo Ink Delivery Module Buskro Ltd. -
Page 80: Table A-9: Front Panel Assembly, Hp Module (9102997A
Screw, FHCS, 10-32 UNF x 1/4" 420006 Nut, 6-32 UNC 439006 Lockwasher, No. 6 9102941 Handle, Module 9102997 Plate, Front, Hybrid Module 9103027 Cover, Hybrid Ink Shell 9103183 Nameplate, Buskro Logo Figure A-9: Front Panel Assembly, HP Module (9102997A) Apollo Ink Delivery Module Buskro Ltd. - Page 81 9103067 Manifold Block, Hybrid Regulator Inlet 9103304 Fitting, 10-32 UNF, 1/8” I.D, PP 9103305 Fitting, 10-32 UNF, 3/32” I.D, PP Figure A-10: Manifold Block, Regulator Inlet, Assembly (9103067A) USE TEFLON TAPE FOR THREAD SEALANT Apollo Ink Delivery Module Buskro Ltd.
-
Page 82: Table A-11: Hp Regulator Mount Assembly (9103243A
HP Regulator Mount Assembly (9103243A) Item Part Number Quantity Description Reference 404510 Screw, BHCS, 10-32 UNF x 1/4” 9103243 Bracket, Hybrid Regulator Height Adjust 9103266 Mount, HP Regulator Unit Figure A-11: HP Regulator Mount Assembly (9103243A) Apollo Ink Delivery Module Buskro Ltd. -
Page 83: Table A-12: Manifold Block, Hybrid Out Assembly (9103298A
Adapter, 1/4 NPT Male x 1/8 NPT Female Figure A-12: Manifold Block, Hybrid Out Assembly (9103298A) APPLY THREAD SEALER THE END OF THE CHECK VALVE WITH THE VISIBLE SPRING SHOULD FACE TOWARDS THE CENTRE OF THE MANIFOLD. Apollo Ink Delivery Module Buskro Ltd. -
Page 84: Table A-13: Upper Bracket Assembly, Hp Module (9103479A
Power Supply, Switching, 12VDC/1.7A 9102960 Valve, Flow Control, 10-32 UNF 9102994 Board, IDS Interface 9103025A Cable, 12VDC, HP Module 9103299 Board, Hybrid IDM LED Indicator 9103479 Upper Bracket, Hybrid Module 9103482A 8” Cable, Ribbon, DB9 Male Buskro Ltd. Apollo Ink Delivery Module... -
Page 85: Figure A-13: Upper Bracket Assembly, Hp Module (9103479A
Appendix A Assembly Drawings Page A-22 Figure A-13: Upper Bracket Assembly, HP Module (9103479A) SET THE FLOW CONTROL VALVE TO A PRESSURE OF 5 PSI Buskro Ltd. Apollo Ink Delivery Module... - Page 86 Contact, Female, #22-28, SPOX 9102772 Keying Plug, Universal Polarizing Pin Figure A-14: Cable, Power Input Switched, Apollo Module (9103609A) Colour Function Black Line Keying Plug Keying Plug White Neutral GLUE KEYING PLUGS INTO PIN 2 AND 3. Buskro Ltd. Apollo Ink Delivery Module...
- Page 87 Electrical Drawings Appendix Electrical Drawings List of Schematics Figure B-1: Electrical Schematic, HP Hybrid Rackmount (9102998AE) ....... B-2 Buskro Ltd. Apollo Ink Delivery System...
- Page 88 Appendix B Electrical Drawings Page B-2 Figure B-1: Electrical Schematic, HP Hybrid Rackmount (9102998AE) Buskro Ltd. Apollo Ink Delivery System...
Need help?
Do you have a question about the Apollo BK-IDM-4H and is the answer not in the manual?
Questions and answers