
Related Manuals for Vaillant timeSWITCH 160


Summary of Contents for Vaillant timeSWITCH 160
- Page 1 Operating instructions For the operator Operating instructions timeSWITCH Dual-channel timer with weekly programme GB, IE...
-
Page 2: Table Of Contents
3.3.2 Basic display ..............10 Operating modes ............30 3.3.3 Selection levels ..............12 5.2.1 Operating modes for the heating circuit ....30 3.3.4 Setting level ..............12 5.2.2 Operating modes for hot water production ... 30 Operating instructions timeSWITCH 160 0020132032_00... - Page 3 ....................41 Service and troubleshooting ........35 Cleaning the timer ............35 Detecting and rectifying faults ........35 Decommissioning ............36 Replacing the timer ............36 Recycling and disposal ..........36 Warranty and customer service ......37 Vaillant warranty ............37 Vaillant Service ...............37 Operating instructions timeSWITCH 160 0020132032_00...
-
Page 4: Notes On The Operating Instructions
– they are available whenever required, – they are kept for the full service life of the appliance, – they are available to all subsequent operators. Operating instructions timeSWITCH 160 0020132032_00... -
Page 5: Applicability Of The Instructions
You can view the serial number under "Menu ¬ Information ¬ Serial number" (¬ fig. 4.9). CE label The CE labelling shows that, based on the type overview, the units comply with the basic require- ments of the applicable directives. Operating instructions timeSWITCH 160 0020132032_00... -
Page 6: Safety
Risk of minor personal injury The warning notes are classified in accordance with the severity of the possible danger using the following danger signs and signal words: Risk of material or environ- Caution! mental damage Operating instructions timeSWITCH 160 0020132032_00... -
Page 7: Structure Of Warnings
The timeSWITCH timer is a dual-channel timer switch which features daily and weekly programmes for time-dependent control of a Vaillant boiler with and without hot water pro- duction. If the unit is used with a Vaillant combi-boiler, it can take over the programming of the warm start function (control of hot water release). -
Page 8: Basic Safety Instructions
Caution! Frost protection and monitoring devices are only active when the unit is supplied with power. The mains switch on the unit must be set to the position "I". Operating instructions timeSWITCH 160 0020132032_00... -
Page 9: Description Of The Appliance
4 Left selector button Appliance design Functionality The timeSWITCH timer controls the operating times of a Vaillant heating system and the hot water production of a connected domestic hot water cylinder. Heating installation You can use the timeSWITCH timer to set the operating times for the heating system for different times of the day and for different days of the week. -
Page 10: Access Level For The Operator
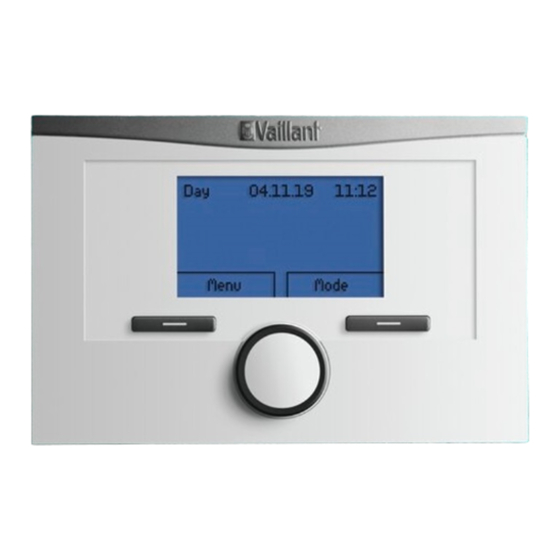
The basic display appears when you: – press the left selector button and thus exit selection level 1. – do not operate the timer for more than 5 minutes. Operating instructions timeSWITCH 160 0020132032_00... - Page 11 – the current function (3) of the right selector button may differ. If, for example, you press the left selector button, the cur- rent function of the left selector button switches from "Menu" (¬ fig. 3.2) to "Back" (¬ fig. 3.3). Operating instructions timeSWITCH 160 0020132032_00...
-
Page 12: 3.3.3 Selection Levels
2 Current functions of the right and left-hand selector buttons 4 Current functions of the right and left-hand selector buttons (soft key functions) (soft key functions) 3 List entries of the selection levels 5 Setting level 4 Current function or selection level Operating instructions timeSWITCH 160 0020132032_00... -
Page 13: Operation
The display shows a highlighted selection level, a setting > Press the left selector button "Menu". level or a highlighted value with white font on a black back- ground. A flashing, highlighted value means that you can change the value. Operating instructions timeSWITCH 160 0020132032_00... - Page 14 > Press the right selector button "Select". function "Select" (the next selection level down). Basic settings Language Date / Time Display Back Select 4.4 Selection level 2: "Language" The timer is now in selection level 2. Operating instructions timeSWITCH 160 0020132032_00...
- Page 15 > Turn the control knob to change the value. Back Change > Press the right selector button, "OK", to confirm the change. 4.6 Setting level: Value for hours highlighted The timer has saved the changed date. Operating instructions timeSWITCH 160 0020132032_00...
- Page 16 Daylight saving Back Change 4.8 Setting level: Change saved > Press the left selector button "Back" repeatedly to switch back to the next selection level up and to access the basic display from selection level 1. Operating instructions timeSWITCH 160 0020132032_00...
-
Page 17: Overview Of Menu Structure
Period 2: _ _ : _ _ - _ _ : _ _ Period 3: _ _ : _ _ - _ _ : _ _ Back Select Back Select 4.9 Overview of menu structure Operating instructions timeSWITCH 160 0020132032_00... - Page 18 Back Change Basic settings Display Language Display contrast Date / Time Display Back Select Back Change Basic settings Factory reset Factory reset Time programmes Everything Back Select Back Select 4.9 Overview of menu structure (continued) Operating instructions timeSWITCH 160 0020132032_00...
-
Page 19: Overview Of Setting And Read-Out Options
"Operating mode". The currently activated mode is stated in the top left of the basic display. If you have activated an advanced function, the display indi- cates the advanced function. Operating instructions timeSWITCH 160 0020132032_00... - Page 20 Factory reset Own setting Current mode Auto Automatic mode Active Comfort Comfort mode Not active System Off System Off Not active Advanced function Party function Active, Not active Not active 4.1 Overview of operating modes Operating instructions timeSWITCH 160 0020132032_00...
-
Page 21: 4.3.2 Overview Of Operating Levels
Mo - Fr, 07:00-23:30 Sa - Su, Mo - Su 07:00-22:00 Period 1: 00:00 24:00 h:min 10 min Start - End Period 2: Start - End Period 3: Start - End 4.2 Overview of operating levels Operating instructions timeSWITCH 160 0020132032_00... - Page 22 Date 01.01.00 31.12.99 dd.mm. Day.Month.Year 01.01.00 Day-light savings – Off, Auto Display Display contrast – Factory reset Time programmes – – – Yes, No Everything – – – Yes, No 4.2 Overview of operating levels Operating instructions timeSWITCH 160 0020132032_00...
-
Page 23: Operating And Display Functions
You can set the functions via the left selector button "Menu". The path details given at the start of each function descrip- tion indicate how you reach this function in the menu structure. 5.1.1 Reading information "Menu" ¬ "Information" Operating instructions timeSWITCH 160 0020132032_00... -
Page 24: Setting Timer Programmes
The time programmes are only effective for the heating cir- the factory settings (¬ tab. 4.1). cuit and hot water production in the "Automatic mode". Operating instructions timeSWITCH 160 0020132032_00... - Page 25 If, for example, you need a different period for just one periods set for a block. working day in the week, first set the times for the entire block "Monday - Friday". Then set the different period for the working day. Operating instructions timeSWITCH 160 0020132032_00...
- Page 26 The timer switches the heating circuit to comfort mode within the time period and the boiler is ready for operation. The timer switches the heating circuit off outside this time period and the boiler is not ready for operation. Operating instructions timeSWITCH 160 0020132032_00...
-
Page 27: Days Away From Home Scheduling
However, if the text in the display should appear in a lan- guage that you do not understand, you can set a different language as follows: Operating instructions timeSWITCH 160 0020132032_00... -
Page 28: Setting The Date
You can set the display contrast in relation to the bright- Select this function to set the current time. ness of the surroundings, to ensure that the display is All functions that contain a time relate to the set time. clearly legible. Operating instructions timeSWITCH 160 0020132032_00... -
Page 29: 5.1.10 Restoring Factory Settings
Everything "Menu" ¬ "Basic settings" ¬ "Factory reset" ¬ "Everything" By selecting "Everything" you will reset all of the settings you have made back to the factory settings. This also includes settings such as "Date/Time". Operating instructions timeSWITCH 160 0020132032_00... -
Page 30: Operating Modes
If you have not set any periods, the timer uses the Outside the time period the timer switches the heating periods set in the factory settings for hot water production mode to (¬ tab. 4.1). System OFF (frost protection active) Operating instructions timeSWITCH 160 0020132032_00... -
Page 31: Advanced Function
The advanced function switches to the comfort mode. tion in the menu structure. The advanced function is deactivated when the next period starts or if you cancel the advanced function first. The heat- ing system will then return to the pre-set mode. Operating instructions timeSWITCH 160 0020132032_00... -
Page 32: Service Message
"Back", then the basic display appears again. down of the heating system. > If the timer displays an error message, inform a heating engineer. Operating instructions timeSWITCH 160 0020132032_00... -
Page 33: Energy-Saving Tips
Uniform heating troller. Often, in a dwelling with central heating, only one room is heated. Through the surrounding surfaces of this room, i.e. walls, doors, windows, roofs, floors, the unheated adjoining Operating instructions timeSWITCH 160 0020132032_00... - Page 34 5 to 10 minutes during a ventilation boost. The air humidity falls and the room is easier to heat up. You will feel warmed even if the room temperature is the same. Operating instructions timeSWITCH 160 0020132032_00...
-
Page 35: Service And Troubleshooting
Display is dark Appliance fault Inform your author- ised heating No changes in the dis- engineer play via the rotary knob No changes in the dis- play via the selector buttons 7.1 Detecting and rectifying faults Operating instructions timeSWITCH 160 0020132032_00... -
Page 36: Decommissioning
> In this case, make sure that the Vaillant unit and any accessories are properly disposed of at the end of their useful life. -
Page 37: Warranty And Customer Service
Warranty and customer service Warranty and customer service Vaillant warranty We only grant a Vaillant manufacturers warranty if a suita- bly qualified engineer has installed the system in accord- ance with Vaillant instructions. The system owner will be granted a warranty in accordance with the Vaillant terms and conditions. -
Page 38: Technical Data
Technical data Technical data Description Unit VTS 160 Operating voltage Umax Current consumption < 50 Protection type IP 20 Protection class Max. permissible ambient °C temperature Height Width Depth 10.1 timeSWITCH technical data Operating instructions timeSWITCH 160 0020132032_00... -
Page 39: Glossary
Operating level for the operator use. This operating level contains all the functions available to be changed by the operator. Operating instructions timeSWITCH 160 0020132032_00... - Page 40 If the room temperature falls below the pre-set value, the thermo- static radiator valve opens and the heating water flow rate increases and the room temperature rises again. Operating instructions timeSWITCH 160 0020132032_00...
-
Page 41: Index
Heating circuit system OFF ............30 Hot water production automatic mode ......... 30 Hot water production comfort mode ........31 Days away from home scheduling .......... 27 Disposal ..................36 Domestic hot water cylinder ............9 Operating instructions timeSWITCH 160 0020132032_00... - Page 42 Overview of operating levels ............ 21 Language selection ..............27 Overview of operating modes ..........19 Menu ....................11 Party function ................31 Menu structure ............... 10, 17 Periods ..................24 Preparation ..................9 Restoring factory settings ............29 Operating instructions timeSWITCH 160 0020132032_00...
- Page 43 Setting level .................. 12 Setting the date ................28 Setting the display contrast ............. 28 Setting the time ................28 Soft key function ................11 Technical data ................38 Type overview ................. 5 Warranty ..................37 Operating instructions timeSWITCH 160 0020132032_00...
- Page 44 Supplier Manufacturer...
Need help?
Do you have a question about the timeSWITCH 160 and is the answer not in the manual?
Questions and answers
I need a manual in PDF form or a printed book I can buy from you
Can you supply a manual for operating a Vaillant time switch 160