MTD Series 080 Operator's Manual
Mtd push mower operator's manual
Hide thumbs
Also See for Series 080:
- Operator's manual (37 pages) ,
- Owner's manual (20 pages) ,
- Operator's manual (16 pages)
Table of Contents
Advertisement
Available languages
Available languages
Safe Operation Practices • Set-Up • Operation • Maintenance • Service • Troubleshooting • Warranty
O
'
M
peratOr
s
anual
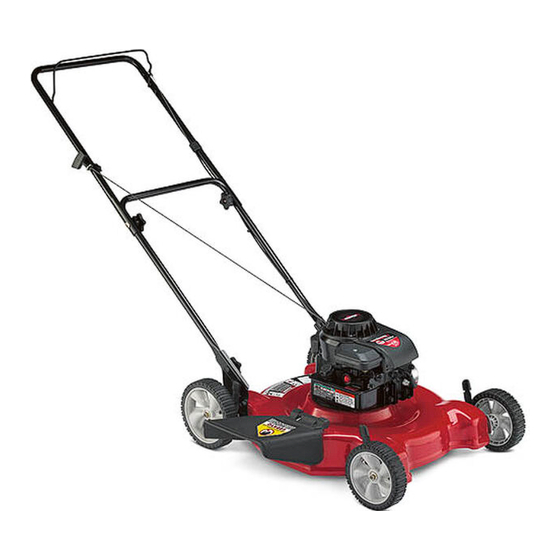
Push Mower — Model Series 080
WARNING
READ AND FOLLOW ALL SAFETY RULES AND INSTRUCTIONS IN THIS MANUAL
BEFORE ATTEMPTING TO OPERATE THIS MACHINE.
FAILURE TO COMPLY WITH THESE INSTRUCTIONS MAY RESULT IN PERSONAL INJURY.
MTD LLC, P.O. BOX 361131 CLEVELAND, OHIO 44136-0019
Printed In USA
Form No. 769-04300
(August 21, 2008)
Advertisement
Chapters
Table of Contents

Related Manuals for MTD Series 080


Summary of Contents for MTD Series 080
- Page 1 Safe Operation Practices • Set-Up • Operation • Maintenance • Service • Troubleshooting • Warranty ’ peratOr anual Push Mower — Model Series 080 WARNING READ AND FOLLOW ALL SAFETY RULES AND INSTRUCTIONS IN THIS MANUAL BEFORE ATTEMPTING TO OPERATE THIS MACHINE.
-
Page 2: Table Of Contents
To The Owner Thank You Thank you for purchasing a Lawn Mower manufactured by MTD LLC. It was carefully engineered to provide excellent performance when properly operated and maintained. Please read this entire manual prior to operating the equipment. It instructs you how to safely and easily set up, operate and maintain your machine. -
Page 3: Safe Operation Practices
Important Safe Operation Practices WARNING: This symbol points out important safety instructions which, if not followed, could endanger the personal safety and/or property of yourself and others. Read and follow all instructions in this manual before attempting to operate this machine. Failure to comply with these instructions may result in personal injury. - Page 4 A missing or damaged discharge cover can cause blade contact or thrown object injuries. Many injuries occur as a result of the mower being pulled over the foot during a fall caused by slipping or tripping. Do not hold on to the mower if you are falling; release the handle immediately.
- Page 5 Service Safe Handling Of Gasoline: To avoid personal injury or property damage use extreme care in handling gasoline. Gasoline is extremely flammable and the vapors are explosive. Serious personal injury can occur when gasoline is spilled on yourself or your clothes, which can ignite.
-
Page 6: Spark Arrestor
Notice Regarding Emissions Engines which are certified to comply with California and federal EPA emission regulations for SORE (Small Off Road Equipment) are certified to operate on regular unleaded gasoline, and may include the following emission control systems: Engine Modification (EM), Oxidizing Catalyst (OC), Secondary Air Injection (SAI) and Three Way Catalyst (TWC) if so equipped. -
Page 7: Safety Symbols
Safety Symbols This page depicts and describes safety symbols that may appear on this product. Read, understand, and follow all instructions on the machine before attempting to assemble and operate. Symbol READ THE OPERATOR’S MANUAL(S) Read, understand, and follow all instructions in the manual(s) before attempting to assemble and operate DANGER —... - Page 8 2 — i ectiOn MpOrtant peratiOn ractices...
-
Page 9: Assembly & Set-Up
• One Engine Operator’s Manual Assembly NOTE: This lawn mower is shipped without gasoline or oil in the engine. Fill up the gasoline and oil as instructed in the accompanying engine manual BEFORE operating your mower. For shipping purposes, the chute deflector on your mower is held in an upright position by a retainer. - Page 10 If satisfied with the height of the handle, tighten the star knobs at the ends of the lower handle shown in Fig. 3-3. For convenience of operation, you may adjust the handle height as follows: Figure 3-3 NOTE: Each end of the lower handle must be placed in the same position on the mounting brackets.
- Page 11 Mulching Baffle (If Equipped) If your mower is equipped with an optional mulching baffle, install it on the right side of the deck. Follow the sequence indicated here. Lift up and hold the side-discharge chute deflector and insert the bottom lip of the mulching baffle inside the chute opening See Fig.
-
Page 12: Controls & Features
Controls and Features Recoil Starter Blade Control The blade control is attached to the upper handle of the mower. Depress and squeeze it against the upper handle to operate the unit. Release it to stop engine and blade. WARNING: This blade control is a safety device. Never attempt to bypass its operations. -
Page 13: Operation
Using Your Lawn Mower Be sure lawn is clear of stones, sticks, wire, or other objects which could damage lawn mower or engine. Such objects could be accidently thrown by the mower in any direction and cause serious personal injury to the operator and others. -
Page 14: Maintenance & Adjustment
Always observe safety rules when performing any maintenance. • The warranty on this lawn mower does not cover items that have been subjected to operator abuse or negligence. To receive full value from warranty, operator must maintain the lawn mower as instructed here. -
Page 15: Service
To ensure safe operation of your mower, periodically check the blade bolt for correct torque. Off-Season Storage The following steps should be taken to prepare your lawn mower for storage. • Clean and lubricate mower thoroughly as described in the lubrication instructions. -
Page 16: Troubleshooting
Troubleshooting Problem Engine Fails to start Engine runs erratic Engine overheats Occasional skips (hesitates) at high speed Idles poorly Excessive Vibration Mower will not mulch grass Uneven cut Cause Blade control disengaged. Spark plug boot disconnected. Fuel tank empty or stale fuel. Engine not primed (if equipped with primer). - Page 17 Notes...
-
Page 18: Illustrated Parts List
Model Series 080... - Page 19 Lock Nut, 3/8-16 741-04242 Height Adjuster Bearing 687-02342 Pivot Arm 731-1034B Hinged Chute Deflector Assembly 736-0741 Bell Washer, .760 OD x 1.25 OD Model Series 080 Ref. Part Number Description 738-1172 Shoulder Screw 734-1988 Front Wheel, 7 x 1.8, Bar 710-0599 TT Screw, 1/4-20 x .5...
-
Page 20: Warranty
MANUFACTURER’S LIMITED WARRANTY FOR The limited warranty set forth below is given by MTD LLC with respect to new merchandise purchased and used in the United States and/or its territories and possessions, and by MTD Products Limited with respect to new merchandise purchased and used in Canada and/ or its territories and possessions (either entity respectively, “MTD”). -
Page 21: Spanish
Medidas importantes de seguridad • Configuración • Funcionamiento • Mantenimiento • Servicio • Solución de problemas • Garantía anual del OperadOr Podadora de Empuje — Modelo Serie 080 ADVERTENCIA LEA Y SIGA TODAS LAS INSTRUCCIONES DE ESTE MANUAL ANTES DE PONER EN FUNCIONAMIENTO ESTA MÁQUINA. - Page 22 Al propietario Gracias Gracias por comprar una máquina podadora fabricada por MTD LLC. La misma ha sido diseñada cuidadosamente para brindar excelente rendimiento si se la opera y mantiene correctamente. Por favor lea todo este manual antes de operar el equipo. Le indica cómo configurar, operar y mantener la máquina con seguridad y fácilmente.
-
Page 23: Importante Medidas Importantes De Seguridad
Medidas importantes de seguridad ADVERTENCIA: La presencia de este símbolo indica que se trata de instrucciones importantes de seguridad que se deben respetar para evitar poner en peligro su seguridad personal y/o material y la de otras personas. Lea y siga todas las instrucciones de este manual antes de poner en funcionamiento esta máquina. - Page 24 No ponga las manos o los pies cerca de las piezas rotatorias o en la tolva de la cortadora. El contacto con las cuchillas puede producir la amputación de manos y pies. Una cubierta de descarga faltante o dañada puede provocar el contacto con la cuchilla o lesiones por objetos arrojados.
- Page 25 Niños Pueden ocurrir accidentes trágicos si el operador no está atento a la presencia de niños. Por lo general a los niños les atraen las podadoras y la actividad de podar el césped. No entienden los riesgos ni los peligros. Nunca dé por sentado que los niños permanecerán en el mismo lugar donde los vio por última vez.
- Page 26 Nunca trate de ajustar una rueda o la altura de corte mientras el motor está en marcha. Los componentes de la tolva para recorte, cubierta de descarga y escudo de riel, están sujetos a desgaste y daños que podría dejar expuestas partes que se mueven o permitir que se arrojen objetos.
- Page 27 Símbolos De Seguridad Esta página representa y describe la seguridad los símbolos que pueden parecer en este producto. Lea, comprenda, y siga todas instrucciones en la máquina antes procurar para reunir y operar. Símbolo LEA EL MANUAL(S) DEL OPERADOR Lea, comprenda, y siga todas instrucciones en el manual (manuales) antes procurar para reunir y operar PELIGRO—...
- Page 28 2 — M ectiOn edidas iMpOrtantes de seguridad...
-
Page 29: Ensamblado Y Configuración
Montaje y Configuración Contenido de la caja • Una Podadora • Uno Manual de Operador de Motor Montaje NOTA: Esta unidad se envía sin gasolina ni aceite en el motor. Llene con gasolina y aceite como se indica en las instrucciones que se incluyen en el manual de motor adjunto ANTES de poner en funcionamiento su podadora. - Page 30 Si está satisfecho con la altura de la manija, apriete las tuercas de mari posa en los extremos de la manija inferior mostrados en la Fig. 3-3. Para comodidad de la operación, puede ajustar la altura de la manija como sigue: Figura 3-3 NOTA: Cada extremo de la manija superior debe ser colocado en la misma posición relativa.
- Page 31 Tolva de Abono (De Ser equipado) Si su podadora está equipada con un deflector opcional para abono, instálelo al lado derecho de la plataforma. Siga la secuencia que se indica. Levante y sostenga el deflector del lado de la descarga e inserte el labio inferior de la tolva de abono dentro de la apertura del canal.
-
Page 32: Controles Y Características
Controles Y Características Arrancador de retroceso Tolva de abono Control de Cuchilla El control de la cuchilla está unido a la manija superior. Presione la manija de control de la cuchilla contra la manija superior para operar la unidad. Suelte la manija de control de la cuchilla para detener el motor y la cuchilla. -
Page 33: Funcionamiento
Funcionamiento Encendido del Motor ADVERTENCIA: Asegúrese que ninguna persona aparte del operador permanezca cerca de la podadora mientras arranca el motor u opera la misma. Nunca encienda un motor en espacios cerrados o en una zona con poca ventilación. El escape del motor contiene monóxido de carbono, un gas inodoro y letal. -
Page 34: Mantenimiento Y Ajustes
Mantenimiento Y Ajustes Mantenimiento Recomendaciones Generales • Respete siempre las reglas de seguridad cuando realice tareas de mantenimiento. • La garantía de esta podadora no cubre elementos que han estado sujetos al mal uso o la negligencia del operador. Para recibir el reembolso total de la garantía, el operador deberá... -
Page 35: Servicio
Servicio Cuidado de la Cuchilla ADVERTENCIA: Cuando saque la cuchilla de corte para afilarla o reemplazarla, protéjase las manos usando un par de guantes para trabajo rudo o un trapo grueso para sostener la cuchilla. Inspeccione periódicamente el adaptador de la cuchilla en busca de rajaduras, especialmente cuando golpee un objeto extraño. -
Page 36: Solución De Problemas
Solución de problemas Problema El motor no arranca El motor funciona de manera errática El motor recalienta Saltos ocasionales (pausas) a alta velocidad Funciona mal en marcha lenta Causa El control de lámina se retiró. Alambre de bujía desconectado. Depósito de combustible combustible vacío o añejo. - Page 37 Problema Demasiada vibración Cuchilla floja o desequilibrada. Cuchilla abollada. La podadora no abona Césped húmedo. el césped Césped excesivamente alto. La cuchilla de la cortadora no está afilada. Corte desigual La posición de las ruedas no es correcta. La cuchilla de la cortadora no está afilada. Causa Apriete la cuchilla y el adaptador.
- Page 38 Otes...
- Page 39 Otas...
-
Page 40: Piezas De Reemplazo
GARANTÍA LIMITADA DEL FABRICANTE PARA La siguiente garantía limitada es otorgada por MTD LLC con respecto a nuevos productos adquiridos y utilizados en Estados Unidosy/o sus territorios y posesiones, y por MTD Products Limited con respecto a nuevos productos adquiridos y utilizados en Canadá y/o sus territorios y posesiones (cualquiera de las dos entidades, respectivamente, “MTD”).
Need help?
Do you have a question about the Series 080 and is the answer not in the manual?
Questions and answers
Por donde sale el aceite de la máquina?
The oil comes out from the oil fill location shown in Figure 1 of the manual.
This answer is automatically generated