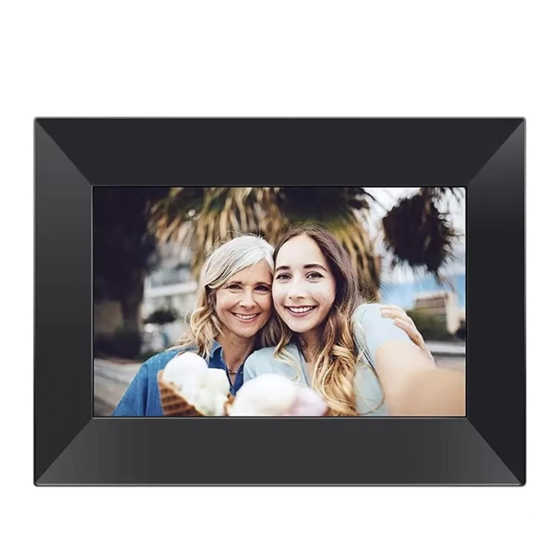
Summary of Contents for Feelcare HN-DPF1005
- Page 1 Feelcare USER MANUAL HN-DPF1005 Before connecting, operating or adjusting this product, please read this user’s manu- al carefully and completely. ENGLISH...
- Page 2 4 2 5 1. POWER Use power adapter to power on the frame. When it is on, press and hold power button for approximately 2 seconds to access reboot or power off menu. Short press on power button will turn off/ onscreen (but leave the photo frame in on position).
- Page 3 4. Micro SD (Support maximum 32G micro SD card) Load external micro SD memory cards here. Photos in the micro SD card can’t be displayed directly in the frame, you have to upload/import photos from mi- cro SD card to the frame first. You can export/ copy photos from the frame to micro SD card.
-
Page 4: Table Of Contents
Contents Contents Getting started Frameo quick setup Start using Frameo Navigating your Frameo Settings My frame Manage photos My Friends Display Slideshow Wi-Fi Notifications Backup and Restore Help About... -
Page 5: Getting Started
Getting started Congratulations on your brand new Frameo photo frame! If you are new to using Frameo then start by following the Frameo quick setup or follow the on-screen guide when powering it on for the first time. Once you have set up your Frameo frame, you can start connecting it to your friends and family. Frameo app To send photos to your frame, use the Frameo app for iOS or Android. -
Page 6: Start Using Frameo
Start using Frameo Next step is to connect Frameo with your friends and family by providing them with a code from your frame. If you want to be able to send photos to the frame yourself, start by downloading the app for iOS or Android on App Store or Google Play. -
Page 7: Navigating Your Frameo
Navigating your Frameo Swipe left or right to go through your photos. To access the menu, simply tap once on the screen. In the menu you will find the most used features. Add friend This will generate a code that you can share with your friends and family so they can connect and send photos to your frame. - Page 8 The Fill frame option is the default. The photo is scaled so that it fills the whole screen. It will be centered around what is selected as the most important part. See the first picture below. Fit to frame will make sure that the entire photo is shown on the screen. See the second picture below.
- Page 9 Power menu Tap the power icon to access the power menu. Here you can power off using , restart your frame using or enter sleep mode using NB. Make sure to always use the power off button on the device or in the power menu to turn Frameo off.
-
Page 10: Settings
Settings Through the settings, you can personalize your frame to your needs. My frame Frame name Changes the name of your frame. This is also the name that connected friends and family will see in their list of connected frames in the smartphone app. Frame location Changes the location of your frame. -
Page 11: My Friends
Show/hide photos Select which photos to hide by tapping them. Hidden photos will NOT be deleted from your frame and you can always select them to be shown again. to hide or show all photos. Delete photos Select photos that you want to permanently delete from your frame by tapping the photo. to select or deselect all and to permanently delete the selected photos. -
Page 12: Display
From the options menu you can also delete a friend, by pressing the DELETE FRIEND button. This will remove the friend from the list and thereby remove their permission to send photos to the frame. You will then be asked to confirm the removal and if you would like to remove all photos previously received from this friend. -
Page 13: Wi-Fi
Photo display order Sets the order in which your photos are displayed on the frame. ● By date taken: Photos are shown in order of when it was taken. ● By date received: Photos are shown in order of when it was received. ●... -
Page 14: Notifications
Notifications Show notifications Enables/disables whether notifications are shown in the slideshow (e.g. when a new photo is received). Notification volume Adjust the volume level for notification sounds. Storage space Enables/disables notifications shown when frame storage is low. Backup Enables/disables notifications shown if automatic backup has failed. Network connection Enables/disables notifications showing network connection status. -
Page 15: Backup And Restore
Backup and Restore Backup frame to external storage (e.g. microSD card) Tap to make a backup of your photos, friends and settings. The time of the latest successful backup is also displayed here. Any existing backup on the external storage will be overridden! Automatic backup If checked, your frame will automatically take a backup within 30 hours of receiving new photos or making changes to your frame. -
Page 16: About
Share anonymous analytics data Sharing anonymous analytics data helps us tremendously to improve the Frameo software. We understand if you do not wish to share this data with us. Keep it checked if you wish to help us improve Frameo. Set unchecked to deny the sharing of anonymous analytics data. Guide Opens the quick start guide, that was shown when you first started the frame. - Page 17 Powerhousepc Holdings Warranty Policy The product is guaranteed to be free from defects for a period of 12 months from the date of purchase. Defects that occur within this warranty period, under normal use and care will be repaired or replaced at our discretion, solely at our option with no charge for parts and labour.


Need help?
Do you have a question about the HN-DPF1005 and is the answer not in the manual?
Questions and answers