Advertisement
Quick Links
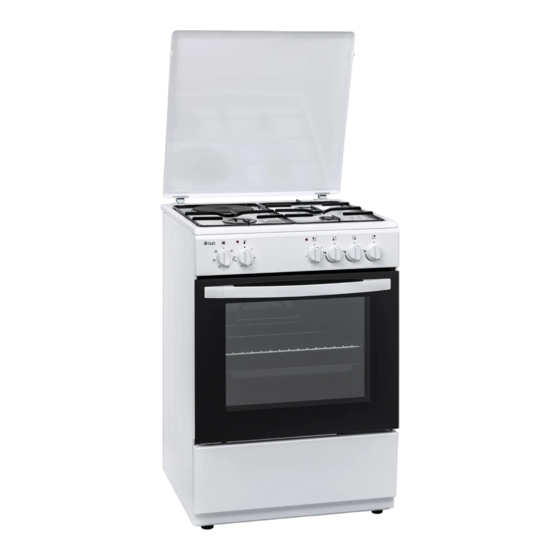
FREESTANDING COMBINE SERVICE MANUAL
CHANGING SIDE PANELS
Before changing the side panel ;
Take off all components possible to move/fall or defect:
Grids and pan supports, knobs, burner caps & heads, trays, warmer drawers etc
1
-Lay down the oven
Pay attention to put sytrofoam on the ground
Advertisement

Summary of Contents for AYA ACM66W/3
- Page 1 FREESTANDING COMBINE SERVICE MANUAL CHANGING SIDE PANELS Before changing the side panel ; Take off all components possible to move/fall or defect: Grids and pan supports, knobs, burner caps & heads, trays, warmer drawers etc -Lay down the oven Pay attention to put sytrofoam on the ground...
- Page 2 FREESTANDING COMBINE SERVICE MANUAL -Unscrew the inner panel and side panel connections. ( apply this procedure for one panel. Do not try to remove both side panels at once. ) -Unscrew all surrounding screws on the side panel -Unscrew the front and rear plinth.
- Page 3 FREESTANDING COMBINE SERVICE MANUAL -Unscrew the rear panel...
- Page 4 FREESTANDING COMBINE SERVICE MANUAL -The side panel sets free - you may remove and change it. Repeat the same procedure backwards when assemblying the new side panel...
- Page 5 FREESTANDING COMBINE SERVICE MANUAL CHANGING REAR PANELS You have to remove bottom panel first. Detach all screws on bottom rear panel to remove -Remove exhaust protection cover to take off rear top panel...
- Page 6 FREESTANDING COMBINE SERVICE MANUAL CHANGING GAS COOKTOPS ( Table-Top Hobs & Double Ovens ) 1) Table-top hobs : -Remove knobs, and screws around burner body. -Then you may change cooktop 2) Freestanding Models with or without Metal Lid -Unscrew the back angle irons at the bottom of the plate.
- Page 7 FREESTANDING COMBINE SERVICE MANUAL Changing Cooktops ( with Lid ) : Pull off the plastic cooktop hinge counterparts. 1-Unscrew the burner body, then cooktop comes free. -Hold up from the back side of the cooktop.
- Page 8 FREESTANDING COMBINE SERVICE MANUAL Then slightly push forward ; to release the cooktop from the hooks. Cooktop hooks Follow the above steps backwards- to remount the cooktop. Please note that : a) Cooktop must be put on the hooks completely...
- Page 9 FREESTANDING COMBINE SERVICE MANUAL b) Do not forget to put the washer ; when screwing the hinge counterparts. washer 3) Freestanding Models with Glass Lid Remove glass lid. Fixate the nuts at bottom ( by a nipper ) and then unscrew...
- Page 10 FREESTANDING COMBINE SERVICE MANUAL Unscrew the burner body- then the cooktop comes free.
- Page 11 FREESTANDING COMBINE SERVICE MANUAL CHANGING GLASS LIDS Take off the hinge cover plastics on the left / right side of glass lid Turn the hinge screws to fix the glass lid.
- Page 12 FREESTANDING COMBINE SERVICE MANUAL If not solved, change the lid with a new one.
- Page 13 FREESTANDING COMBINE SERVICE MANUAL Placing Cooktop Lids ( Glass ) Put on the hinge cover plastics on the left / right side of glass lid Place the cooktop hinges into the glass lid profile.
- Page 14 FREESTANDING COMBINE SERVICE MANUAL Set the glass lid, it is completed! Turn the hinge screws to adjust the glass lid if necessary...
- Page 15 FREESTANDING COMBINE SERVICE MANUAL CHANGING SPARK PLUG WITH CABLE For Oven & Grill Burner Remove spark plug manually ( of oven/grill burner ) spark plug for oven burner spark plug for grill burner Pull back and remove the spark module manually...
- Page 16 FREESTANDING COMBINE SERVICE MANUAL Pull back and remove "spark plug with cable"out of the rear panel. The other end of spark plug is connected to the ignitor box. Pull off the terminal of oven/grill burner wiring.
- Page 17 FREESTANDING COMBINE SERVICE MANUAL...
- Page 18 FREESTANDING COMBINE SERVICE MANUAL CHANGING OVEN BURNER AND INJECTOR Unscrew the two screws and remove the burner cover.
- Page 19 FREESTANDING COMBINE SERVICE MANUAL Pull back and remove the spark module manually. To remove the thermocouple ( ffd ) pull backwards manually.
- Page 20 FREESTANDING COMBINE SERVICE MANUAL Open drawer. Unscrew the connection screw under the burner box. Use a short , appropriate handhold screwdriver.
- Page 21 FREESTANDING COMBINE SERVICE MANUAL Remove the oven burner by moving right-left sides in the burner box. 6-Then you will see the injector; Unscrew the oven burner injector with the correct wrench.
- Page 22 FREESTANDING COMBINE SERVICE MANUAL CHANGING INNER GLASS Unscrew the shown 2 screws at the Picture.
- Page 23 FREESTANDING COMBINE SERVICE MANUAL HANDLES/KNOBS If handle is loose ; replace and tighten it. If not solving ; change with a new one HANDLE ASSEMBLY TYPES : 3D SOLID TYPE OVEN DOOR HANDLE ASSEMBLY flat washer handle assembly stud ( new ) screw...
- Page 24 FREESTANDING COMBINE SERVICE MANUAL SOLID TYPE OVEN DOOR HANDLE ASSEMBLY INNER COVER OVEN DOOR HANDLE ASSEMBLY flat washer handle assembly stud ( new ) screw...
- Page 25 FREESTANDING COMBINE SERVICE MANUAL CHANGING GRILL BURNER AND INJECTOR If ignition is available for gas grill ; there is a sparking plug ( white) Pull back and remove the spark module manually. To remove the thermocouple ( ffd ) pull backwards manually.
- Page 26 FREESTANDING COMBINE SERVICE MANUAL Uncscrew the grill burner from the cavity.
- Page 27 FREESTANDING COMBINE SERVICE MANUAL Pull back and remove the grill burner Unscrew the grill burner injector with the correct wrench. Change the injector with a new one from the spare kit. Caution : Do not apply excessive force during screwing the grill burner to the oven cavity, as you may cause enamel fractures.
- Page 28 FREESTANDING COMBINE SERVICE MANUAL CHANGING GAS DELIVERY TUBES Unscrew the burner body from gas delivery tube by the wrench...
- Page 29 FREESTANDING COMBINE SERVICE MANUAL Then unscrew the gas valve end of gas delivery tube by the wrench Do not ever use crashed, cracked or sprained gas delivery pipes ! defective gas delivery pipe defective gas delivery pipe...
- Page 30 FREESTANDING COMBINE SERVICE MANUAL CHANGING GAS COLLECTOR / MANIFOLD Unscrew the gas manifold brackets...
- Page 31 FREESTANDING COMBINE SERVICE MANUAL Unscrew the two screws of manifold on the front panel. Unscrew the three connection screws on cooktop left angle iron ( back of oven )
- Page 32 FREESTANDING COMBINE SERVICE MANUAL CHANGING FLAME FAILURE DEVICE (FFD) a) Changing Thermocouple for Gas Grill Burner Pull back the thermocouple manually. ( Apply the same for spark plug ) spark plug thermocouple To remove the cable of thermocouple ; Pull back and remove the ffd completely.
- Page 33 FREESTANDING COMBINE SERVICE MANUAL b ) Changing Thermocouple for Oven Burner To remove the burner cover, unscrew front and back connection screws. Pull back the thermocouple manually. ( Apply the same for spark plug ) thermocouple To remove the cable of thermocouple ; Pull back and remove the ffd completely.
- Page 34 FREESTANDING COMBINE SERVICE MANUAL CHANGING EXHAUST BODY Assemble the exhaust ( 38 ) by fixing with the springs ( 317 ) on the rear top panel ( 28 ) RESİM...
- Page 35 FREESTANDING COMBINE SERVICE MANUAL CHANGING DIGITAL TIMER Pull off the cable contacts from Digital timer...
- Page 36 FREESTANDING COMBINE SERVICE MANUAL Unscrew the Digital Timer from front Panel. Correct the position of timer and check if problem solved.
- Page 37 FREESTANDING COMBINE SERVICE MANUAL If still not solved ; change the timer buttons. If problem can not be solved; change digital timer.
- Page 38 FREESTANDING COMBINE SERVICE MANUAL CHANGING MECHANICAL TIMER Remove front panel and then unscrew the mechanical timer. CHANGING BURNER BODY Take off the thermocouple : unscrew with a wrench from the burner body.
- Page 39 FREESTANDING COMBINE SERVICE MANUAL Press the spark plug segment and hold the spark plug Hold up the spark plug and remove with cable Then fix the burner body manually (or by an apparatus), and unscrew the nut between gas delivery tube and burner body. The burner body becomes free to change.
- Page 40 FREESTANDING COMBINE SERVICE MANUAL To prevent gas leak ; pay attention the connections to be tight when changing components...
-
Page 41: Changing Cooktop
DOUBLE OVEN COMBINE SERVICE MANUAL CHANGING COOKTOP Unscrew the back angle irons at the rear bottom of the plate. Hold up the cooktop slightly from backwards. Take off the earthing cable... - Page 42 DOUBLE OVEN COMBINE SERVICE MANUAL Hold the cooktop vertical, then take off all regler connections. ( While reassembling, the wirings must be appropriate with mentioned on the labels ) Then the cooktop is free to change.
- Page 43 DOUBLE OVEN COMBINE SERVICE MANUAL CHANGING OVEN LIGHT BUTTON / IGNITOR BUTTON Take out the front panel first. oven light button Attention : Do not push back the front panel hardly and fast ; this may cause the button wirings get harmed. Please hold it until you take off the terminal contacts. Remove the plastic contacts of wiring terminals ( with a nipper )
- Page 44 DOUBLE OVEN COMBINE SERVICE MANUAL Then push the hooks surrounding and push forward the button to remove.
- Page 45 DOUBLE OVEN COMBINE SERVICE MANUAL Insert a new button ; set it appropriate into the hole. Reassemble the wiring terminals to button ;...
- Page 46 DOUBLE OVEN COMBINE SERVICE MANUAL Pay attentionto the cables not be destroyed while mounting the front panel. - All steps are similar for the ignitor button.
-
Page 47: Changing Oven Light
DOUBLE OVEN COMBINE SERVICE MANUAL CHANGING OVEN LIGHT Turn and remove the glass cover of the oven light . Then pull back the lamp glass cover of the lamp Pull of the terminals of oven light If harmed/defective, change the wiring harness... - Page 48 DOUBLE OVEN COMBINE SERVICE MANUAL Press the hooks on the oven light (by a screwdriver) and then push into the cavity.
- Page 49 DOUBLE OVEN COMBINE SERVICE MANUAL CHANGING FUNCTION SELECTOR SWITCH Pull off the signal lamp manually - to remove from the panel...
- Page 50 DOUBLE OVEN COMBINE SERVICE MANUAL On the left; 4 hotplate switches and on the right; function selector switch.
- Page 51 DOUBLE OVEN COMBINE SERVICE MANUAL Remove wiring contacts out of the switch ; by a nipper. ( While reassembling the wirings, please refer to circuit diagrams )
- Page 52 DOUBLE OVEN COMBINE SERVICE MANUAL Then unscrew the switch from the inner panel Please hold the switch from its surroundings - not from its top and bottom surfaces Do not compress the bottom plates of switch ! In this case, you may cause short circuit and switch may not work correctly.
- Page 53 DOUBLE OVEN COMBINE SERVICE MANUAL CHANGING ELECTRIC COOKTOPS AND HOTPLATES a) Changing Cooktop ( with Metal Lid ) Unscrew the back angle irons at the rear bottom of the plate. Pull off the plastic cooktop hinge counterparts.
- Page 54 DOUBLE OVEN COMBINE SERVICE MANUAL then slightly hold up the cooktop from backwards If you try to remove cooktop suddenly ; this may cause theconnections get harmed ! Take off the earthing cable terminal from the rear-left hotplate heater...
- Page 55 DOUBLE OVEN COMBINE SERVICE MANUAL Take off the wiring sockets from each hotplate heater.
- Page 56 DOUBLE OVEN COMBINE SERVICE MANUAL Then the cooktop becomes free. CHANGING HOTPLATE ELEMENTS Unscrew the hotplate bottom fixation screws, and remove hotplate housing.
- Page 57 DOUBLE OVEN COMBINE SERVICE MANUAL Repeat the same procedure backwards when assemblying the hotplates again.
- Page 58 DOUBLE OVEN COMBINE SERVICE MANUAL Attention: the connections must be tightened - in order to fixate the hotplates.
- Page 59 DOUBLE OVEN COMBINE SERVICE MANUAL...
- Page 60 DOUBLE OVEN COMBINE SERVICE MANUAL For productions after 2008 ; HOTPLATE FIXING ELEMENTS ( 37008787 ) MUST BE SCREWED AS SHOWN BELOW : HOTPLATE FIXIN 3) 8 hotplate housing earthing vent is moved on the new cookers We do no recommend to use hotplate fixing brackets on old cookers. new vent old vent...
- Page 61 DOUBLE OVEN COMBINE SERVICE MANUAL CHANGING OVEN ELECTRICAL HEATING ELEMENTS 1.Ring ( Circular ) Heating Element : Unscrew the ring heating element from the rear of cavity. Pull out the wiring connections manually. The ring heater will be free then. 2.
- Page 62 DOUBLE OVEN COMBINE SERVICE MANUAL Unscrew the top&grill heating element from the rear of cavity. Pull out the wiring connections manually. The ring heater will be free then. 3. Bottom Heating Element : Pull off the terminals of bottom heating element.
- Page 63 DOUBLE OVEN COMBINE SERVICE MANUAL Take up the wrapping insulation ( rockwool ) slightly , then unscrew the right and left connections of bottom heating element. Press down the bottom heating element cover, then pull slightly backwards.
- Page 64 DOUBLE OVEN COMBINE SERVICE MANUAL Hold up the heating element slightly and take out. Repeat this procedure backwards ; to replace the component.
- Page 65 DOUBLE OVEN COMBINE SERVICE MANUAL DISASSEMBLY OF FAN MOTOR Disassemble the nut as below direction to remove. After that, remove the screws which hold fan motor.
- Page 66 DOUBLE OVEN COMBINE SERVICE MANUAL CHANGING HEATING ELEMENTS & HOT SURFACE INDICATOR LIGHTS If you need to change the heating element, unscrew the screws of cooktop Remove the terminals of heating element that you want to change. ( by a nipper ) Put the heating element on a smooth surface, then take off the heating element assembly spring and bracket.
- Page 67 DOUBLE OVEN COMBINE SERVICE MANUAL The numbers on the heating element ; a ) refer to the mounting holes of bracket&spring b ) must match with numbers on the bottom cover of hob Now you may change the heating element with a new one. do not touch heating element resistances !
- Page 68 DOUBLE OVEN COMBINE SERVICE MANUAL How to Change the Hot Surface Indicator Light Group : Unscrew the indicator light group ( with wiring )
- Page 69 DOUBLE OVEN COMBINE SERVICE MANUAL Then detach the silicone cable Remove hot surface indicator group ( with wiring ) and change with a new group.
- Page 70 DOUBLE OVEN COMBINE SERVICE MANUAL CHANGING THERMOSTAT Pull off the signal lamp manually - to remove from the panel...
- Page 71 DOUBLE OVEN COMBINE SERVICE MANUAL Thermostat and oven switch is placed on the left side of the cooker. oven switch thermostat Remove wiring connections by a nipper Unscrew the thermostat from the inner panel...
- Page 72 DOUBLE OVEN COMBINE SERVICE MANUAL The capillary tube of thermostat; ends on the thermostat bulb inside cavity Manually remove thermostat bulb out of its brackets. Now it is safe to pull back and remove thermostat bulb from the rear outlet. Thermostat becomes free then.
- Page 73 DOUBLE OVEN COMBINE SERVICE MANUAL CHANGING ELECTRIC EXHAUST Push down the pin and open which holds exhaust by using fingers.
- Page 74 DOUBLE OVEN COMBINE SERVICE MANUAL ASSEMBLY OF ANTI TIP BRACKET DOVEL ANTI-TIP BRACKET SCREW...
- Page 75 DOUBLE OVEN COMBINE SERVICE MANUAL...
- Page 76 DOUBLE OVEN COMBINE SERVICE MANUAL CHANGING CONNECTION UNIT OF INDUCTION HOBS Unscrew all surrounding screws of hob : Remove all wirings connected :...
- Page 77 DOUBLE OVEN COMBINE SERVICE MANUAL While reassembling please refer to circuit diagrams unscrew earthing cable...
- Page 78 DOUBLE OVEN COMBINE SERVICE MANUAL Press on the hooks of connection unit ( WITH A SCREWDRIVER You may remove and change connection unit. CHANGING HEATING ELEMENT (IHE) & TOUCH CONTROL UNIT Unscrew all surrounding screws of hob.
- Page 79 DOUBLE OVEN COMBINE SERVICE MANUAL Remove ceramic glass of hob Pull off terminal connections on the heating element ( IHE ) Remove heating element and change with another if necessary.
- Page 80 DOUBLE OVEN COMBINE SERVICE MANUAL To change the touch control unit ; remove connected wirings...
-
Page 81: Terminal Connection
DOUBLE OVEN COMBINE SERVICE MANUAL TERMINAL CONNECTION There is a circuit diagram on terminal box. It could be changed. Press on the hooks of connection unit for opening terminal box. Check wiring or change according to sticker on terminal box P.S.
Need help?
Do you have a question about the ACM66W/3 and is the answer not in the manual?
Questions and answers