Advertisement
Quick Links
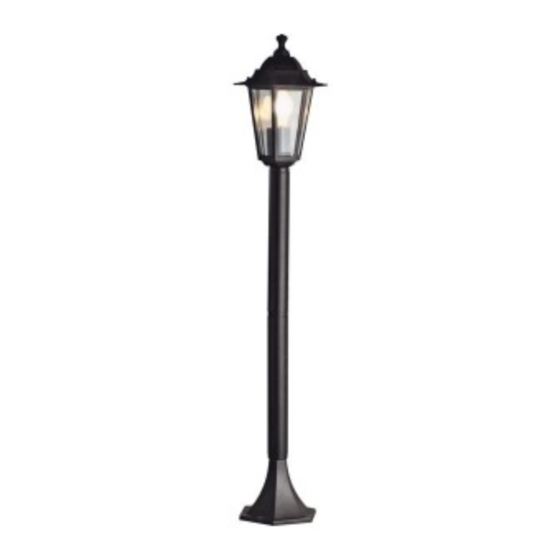
Components
A
1 x Lamp
1 x Base
E
Fittings
A
2 x Long Screw
B
2 x Wall Plug
D
6 x Plastic Plug
E
2 x Screw
1 x Cover
B
C 1 x Top
D
2 x Tube
6 x Decoration Glass
F
C
6 x Short Screw
G
1 x Top Screw
F
6 x Bracket
1M Black Garden Post
Simple Assembly Instructions
IMPORTANT
1. Read these instructions carefully and
familiarise yourself with the procedure
before assembling the unit.
2. Check that you have all the component
parts following the list on the back
cover and familiarise yourself with
each part before proceeding.
-
Please keep for future reference
3. Take all the fittings out of the plastic bag
and separate them into their groups.
4. Ensure you have enough space to lay out
all the parts before assembly.
5. To avoid scratching it is recommended
that you assemble the unit on a soft
level surface.
Advertisement

Related Manuals for Argos 432/0315

Summary of Contents for Argos 432/0315
- Page 1 Components 1M Black Garden Post 1 x Lamp 1 x Cover C 1 x Top Simple Assembly Instructions Please keep for future reference 2 x Tube 1 x Base 6 x Decoration Glass IMPORTANT Fittings 3. Take all the fittings out of the plastic bag 1.
- Page 2 Assembly Instructions Assembly Instructions Stage 1 – Stage 2 – Fitting the Lamp Fitting the Base NOTE: Ensure electricity is NOTE: Ensure electricity is switched off at the mains before switched off at the mains before fig. 3 installing or maintaining any installing or maintaining any light fixture.
- Page 3 Assembly Instructions Assembly Instructions Stage 2 – Stage 3 – Fitting the Base Fitting the Decoration Glass NOTE: Before drilling into any fig. 5 location carefully check to avoid NOTE: Ensure the Plastic Plugs any hidden pipes or wires. Also are firmly located on the Base, check the desired location.
- Page 4 Caution Technical Data 1. Indoor and outdoor use. fig. 10 Model No. 432/0315 2. Connect to 230V/240V~, 50Hz. Input Voltage 3. If in doubt about fitting this product. Please 230V~240V~, 50Hz consult a suitably qualified electrician. Max. Wattage 4.
Need help?
Do you have a question about the 432/0315 and is the answer not in the manual?
Questions and answers