Table of Contents
Advertisement
Available languages
Available languages
Quick Links
Microwave Oven
Use and Care Manual
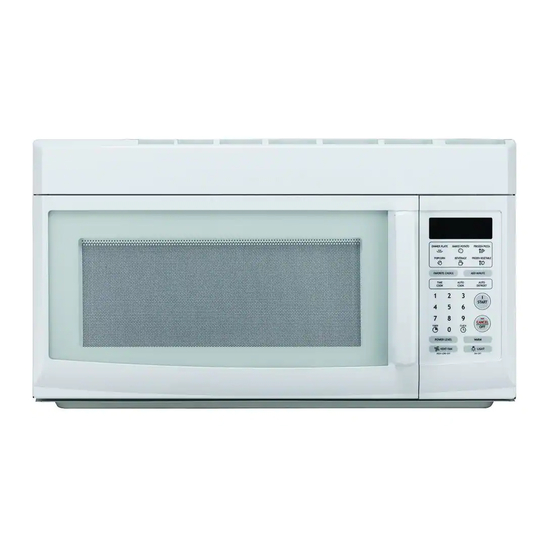
MCO165UW / MCO165UB
Table of Contents
Introduction............................................. 1
Exposure to Excessire Microwave
Energy....................................................... 1
Important Safety Instructions ......... 2~3
Installation Recommendations............ 4
Control Panel ...................................... 5~6
Oven Features at a Glance .................... 7
Operating Basics .............................. 8~12
Special Features.............................. 12~16
Care and Cleaning ......................... 17~19
Questions and Answers ...................... 20
Before You Call..................................... 21
Warranty..................................................22
IMPORTANT SAFETY INSTRUCTION
Never operate the oven when it is empty or
without the glass turntable.
Advertisement
Chapters
Table of Contents

Related Manuals for Magic Chief MCO165UW


Summary of Contents for Magic Chief MCO165UW
-
Page 1: Table Of Contents
Microwave Oven Use and Care Manual MCO165UW / MCO165UB Table of Contents Introduction..........1 Precautions to Avoid Possible Exposure to Excessire Microwave IMPORTANT SAFETY INSTRUCTION Energy............1 Never operate the oven when it is empty or Important Safety Instructions ..2~3 without the glass turntable. -
Page 2: Introduction
I n t r o d u c t i o n Congratulations on your purchase of an over-the range microwave oven. For best results, we suggest reading this guide carefully. You will find instructions on the proper operation and maintenance of your microwave. -
Page 3: Important Safety Instructions
IMPORTANT SAFETY INSTRUCTIONS When using electrical appliances, basic safety 12. Do not operate this appliance if it has a damaged precautions should be followed, including the following: cord or plug, if it is not working properly or if it has been damaged or dropped. - Page 4 IMPORTANT SAFETY INSTRUCTIONS cont. 23. To avoid exposure to dangerous high voltage, DO 31. Do not use a thermometer in food you are NOT REMOVE THE SPLATTER SHIELD microwaving unless the thermometer is designed or inside the oven cavity. recommended for use in the microwave oven. 24.
-
Page 5: Installation Recommendations
I n s t a l l a t i o n R e c o m m e n d a t i o n s Remove all packing materials both outside and inside the Do not under any circumstance cut or remove the oven before using the oven. -
Page 6: Control Panel
To u c h C o n t r o l P a n e l The Touch Control Panel allows you to set the oven controls with the touch of a finger. It’s designed to be easy to use and understand. 11. - Page 7 <MCO165UW/ MCO165UB> Each time a pad is touched, a BEEP will sound. When CANCEL/OFF Pad is touched during oven operation, the oven will stop, however, all programmed information is retained. To clear all information, touch the CANCEL/OFF Pad again. NOTE:...
-
Page 8: Oven Features At A Glance
O v e n F e a t u r e s a t a G l a n c e 11. DOOR HANDLE - Pull to open door. Door 15. HOOD CONTROLS must be securely latched for oven to operate. Vent Fan - Press High, Low or Off Light - Press On or Off 12. -
Page 9: Operating Basics
O p e r a t i n g B a s i c s Time-of-Day Clock Time Cook/Power Level Basic Instructions Basic Instructions 1. Touch the CLOCK Pad. 1. Touch the TIME COOK Pad. 2. Set the time of day by touching the 2. - Page 10 O p e r a t i n g B a s i c s Power Level Cooking Guide Add Minute The power levels on your microwave oven can The ADD MINUTE Pad provides a convenient be compared to the surface units on a range. way to heat foods at full power with one touch High (power level 10) or full power is the fastest of a pad or add an extra minute to your cooking...
- Page 11 Auto Defrost Conversion Chart If weight is in then weight is converted Use the defrost setting for defrosting meats, ounces- to tenths-of-a-pound. poultry and fish from 0.1 pounds to 6.0 pounds. 1 to 2-oz. 3 to 4-oz. Basic Instructions 5-oz. 6 to 7-oz.
- Page 12 O p e r a t i n g B a s i c s Defrost by Time Guide (Power Level 3) Items and Weight Defrosting Standing Procedures and Techniques Time Time Beef Ground Beef/1 lb. 10-12 min. 5 min. Break apart and remove thawed portions with fork.
-
Page 13: Special Features
Two Stage Cooking This feature lets you program two sequential using two different power levels. It automatically operations such as defrosting and cooking or cooking changes power settings and cooking time. Basic Instructions 1. Touch the TIME COOK Pad. 5. Touch the TIME COOK Pad again. 2. - Page 14 S p e c i a l F e a t u r e s Dinner Plate Baked Potato Basic Instructions Basic Instructions 1. Touch the BAKED POTATO Pad: 1. Touch the DINNER PLATE Pad. once for 1 medium potato (7 oz.) 2.
- Page 15 To Program Favorite Choice Signal Sound, Auto Cook and Clock Display: Basic Instructions 1. Touch the AUTO COOK Pad until the Touch FAVORITE CHOICE Pad four times desired food is displayed. * “OPt” will be displayed. 2. Touch the number pad indicated on the Cooking Guide for the cooking weight desired.* To Change Signal Sound: 3.
- Page 16 S p e c i a l F e a t u r e s Auto Start Tips on setting Auto Start: Before setting, check that the correct time of The AUTO START feature allows you to program your day is displayed. oven to begin cooking at a preset time of day - up to a delay of 11 hours and 59 minutes.
- Page 17 Control Lockout To Set Fan to Run for a Specific Time: 1. Start fan by touching the VENT FAN Pad. The oven operation can be locked to prevent the microwave from accidentally being turned on. 2. Program run time. All oven functions can be locked. Touch the TIMER Pad and hold for 3 seconds.
-
Page 18: Care And Cleaning
C a r e a n d C l e a n i n g Microwave Oven Interior Glass Tray/Turntable The oven interior should be cleaned after each Allow to cool before removing and cleaning. use with a damp cloth to keep it free from Wash in soapy water or dishwasher. - Page 19 The Exhaust Feature To Remove Grease Filter The exhaust hood feature on your microwave To remove grease filter, grasp the “finger hold” oven is equipped with two metal filters which on the filter and slide to the rear. Then pull filter collect grease.
- Page 20 C a r e a n d C l e a n i n g Light Bulb Replacement Cooktop Light Oven Light To replace the combination cooktop light/ To replace oven light: night light: 1. Disconnect power at main fuse or circuit breaker or pull plug.
-
Page 21: Questions And Answers
C o m m o n Q u e s t i o n s a n d A n s w e r s & Q.Can I open the door when the oven is Q. What do the various beeps mean? operating? A. -
Page 22: Before You Call
B e f o r e Yo u C a l l Check the following to be sure a service call is necessary: If noting on the oven operates: If the interior of oven collects moisture: check for a blown circuit fuse or a tripped this is normal. -
Page 23: Warranty
Under no circumstances is the consumer permitted to return this unit to the factory without prior written consent from MC Appliance corp. Model Parts Labor Magnetron (Part Only) Type of Service MCO165UW One-Year One-Year Eight Years In- Home MCO165UB For Service or Assistance please call 888 775-0202... - Page 24 Horno de Microondas Guía del Usuario MCO165UW / MCO165UB Tabla de Materias Introducción ..........1 Instrucciones Importantes sobre Seguridad..........2~4 Recomendaciones para INSTRUCCIÓN IMPORTANTE DE SEGURIDAD la instalación ...........5 Nunca funcione el horno cuando es vacío o sin la Característica de Protección plato giratorio de cristal.
-
Page 25: Introducción
I n t r o d u c c i ó n Felicitaciones por su compra de un horno de microondas para ser instalado sobre la estufa. A fin de obtener mejores resultados, le sugerimos leer atentamente esta guía. En ella encontrará instrucciones sobre el funcionamiento y mantenimiento apropiado de su microondas. -
Page 26: Instrucciones Importantes Sobre Seguridad
INSTRUCCIONES IMPORTANTES SOBRE SEGURIDAD Cuando se usan equipos eléctricos deben seguirse (ver la advertencia anterior) deben ser ciertas reglas básicas de seguridad, incluyendo lo perforados para dejar escapar el vapor durante siguiente: la cocción. Las bolsa de cocinar “hervibles” y las bolsas de plástico herméticamente selladas ADVERTENCIA - Para reducir el riesgo deben ser rasgadas, agujereadas o ventiladas. - Page 27 INSTRUCCIONES IMPORTANTES SOBRE SEGURIDAD 22. No se apoye en la puerta del horno. La puerta está diseñada para cerrar herméticamente y ... continuación sellar en forma debida para un funcionamiento 19. Cuando limpie las superficies de la puerta y del seguro.
- Page 28 piezas del horno y los utensilios y asimismo el horno esté en funcionamiento. causar quemaduras de la piel. 28. Envolturas de plástico: Use solamente aquellos 34. Los alimentos instantáneos pueden ser tipos diseñados para horno de microondas y colocados en el microondas en bandejas de evite formar un sello hermético.
-
Page 29: Recomendaciones Para La Instalación
Recomendaciones para la Instalación Retire todos los materiales de empaque tanto del obligación personal reemplazarlo con un exterior como del interior del horno antes de usalo. El tomacorriente mural de tres clavijas puesto a tierra. horno requiere movimiento libre del aire para su Bajo ninguna circumstancia corte o retire la tercera funcionamiento correcto. -
Page 30: Característica De Protección Automática Del Ventilador
Característica de Protección Automática del Ventilador Los artefactos de cocinar instalados debajo del velocidad baja si ocurren temperaturas excesivas. Si microondas pueden, bajo ciertas condiciones de uso esto sucede, el ventilador no puede ser apagado continuo, causar temperaturas suficientemente altas manualmente pero se apagará... -
Page 31: Panel De Control Sensible Al Tacto
Panel de Control Sensible al Tacto El Panel de Control Sensible al Tacto le permite programar los controles del horno con el toque de un dedo. Está diseñado para fácil uso y comprensión. 11. ‘DISPLAY’ (INDICADOR VISUAL) - Despliega 12. ‘ADD MINUTE’ (AGREGAR MINUTO) - Oprima la hora del día, el tiempo o la temperatura durante las esta tecla para tiempo de cocción de 1 minuto, para funciones de cocción, el nivel de energía que está... - Page 32 <MCO165UW/ MCO165UB> Cada vez que se oprima una tecla, se escuchará una SEÑAL SONORA. Cuando usted enchufa el horno, la visualización enrollará “(TOUCH CLOCK PAD TO ENTER TIME OF DAY) la PISTA del RELOJ del TACTO PARA INCORPORAR HORA”. Si la potencia se interrumpe en cualquier momento, la secuencia antedicha se repite.
-
Page 33: Características Generales Del Horno
Caracteristicas Generales del Horno 11. MANIJA DE LA PUERTA - Tire de la 15. CONTROLES DE LA CAMPANA manija para abrir la puerta. La puerta debe ‘Vent Fan’ (Ventilador) - Oprima ‘High’, mantenerse firmemente cerrada para que el ‘Low’ u ‘Off’. horno funcione. -
Page 34: Funciones Básicas
F u n c i o n e s b á s i c a s Reloj Empezar con el más corto de los tiempos recomendados de cocción y agregar más tiempo según se necesite. Instrucciones básicas Controlar los alimentos mientras se cocinan. 1. - Page 35 F u n c i o n e s B á s i c a s Guía de Cocción de los ‘Add Minute’ (Agregar Minuto) Niveles de Energía La tecla ‘ADD MINUTE’ es una manera conveniente de calentar alimentos con energía Los niveles de energía en su horno de microondas máxima, ya sea oprimiendo una sola tecla o pueden ser comparados a los elementos superiores de...
- Page 36 Descongelamiento automático Tabla de conversión Usar la función descongelar para carnes, aves y Si el peso está en entonces el peso es pescado desde 0,1 libras hasta 6,0 libras. onzas (gramos)- convertido a décimas de una libra. 1 a 2 onzas (28 a 57 g) 0,1 (45 g) Instrucciones básicas 3 a 4 onzas (85 a 113 g)
- Page 37 F u n c i o n e s B á s i c a s Descongelación Usando la Guía de Tiempo (Nivel de Energía 3) Tiempo de Tiempo do Artículos y Peso Procedimientos y Técnicas Descongelación Reposo Carne de Res Carne de Res Molida / 0,450 kg (1 libra) 10-12 min.
- Page 38 Sugerencias Generales para la Descongelación 1. No descongele carne que aún esté envuelta. Al 7. Durante la Descongelación Automática, el estar envuelta se puede comenzar a cocer. horno le indicará dar vuelta el alimento. En Siempre retire la envoltura exterior y la bandeja. este momento abra la puerta del horno y revise el Coloque el alimento en una parrilla resistente a alimento.
-
Page 39: Características Especiales
F u n c i o n e s B á s i c a s Cocción en dos etapas Esta función permite programar dos operaciones, una potencia. Cambia automáticamente los niveles de después de la otra, por ejemplo descongelar y cocinar potencia y los tiempos de cocción o cocinar utilizando dos niveles diferentes de Instrucciones básicas... - Page 40 Bandeja de cena Patatas asadas Instrucciones básicas Instrucciones básicas 1. Pulsar la tecla DINNER PLATE (bandeja 1. Pulsar la tecla BAKED POTATO de cena). (patatas asadas): 2. Aparecerá “12” en el visor. una vez para 1 patata mediana (7 onzas) dos veces para 2 patatas medianas El tiempo programado (2:40) aparecerá...
- Page 41 C a r a c t e r í s t i c a s e s p e c i a l e s Opción favorita Para programar y modificar la función opción favorita : 1. Pulsar la tecla COOK TIME (tiempo de cocción).
- Page 42 Para programar la señal de sonido de * Ver el cuadro siguiente o la etiqueta de guía OPCIÓN FAVORITA y el reloj del visor: de cocción en la parte de adelante de la cavidad del horno. Pulsar la tecla FAVORITE CHOICE cuatro ◆La función cocción automática tiene tiempos veces.
- Page 43 C a r a c t e r í s t i c a s e s p e c i a l e s ‘Auto Start’ Retrasa START (Comienzo Automático) RETRASA la característica del COMIENZO permite que usted programe su horno para comenzar a cocinar La característica ‘AUTO START’...
- Page 44 ‘Control Lockout’ (Bloqueo de Control) Se puede bloquear el funcionamiento del horno a fin de evitar que el microondas sea accidentalmente encendido. Todas las funciones del horno pueden ser bloqueadas. Para Programar: Oprima y mantenga oprimida la Tecla ‘CANCEL/OFF’ durante tres segundos. El muestra “LOCKED”...
- Page 45 C a r a c t e r í s t i c a s e s p e c i a l e s Uso del ventilador Para programar que el ventilador funcione durante un tiempo específico: Usted puede controlar el ventilador de 2 1.
-
Page 46: Cuidado Y Limpieza
C u i d a d o y L i m p i e z a Interior del Horno de Microondas Bandeja de vidrio/Plato Giratorio El interior del horno debe limpiarse después de Déjelo enfriar antes de sacarlo y limpiarlo. Lave en cada uso con un paño húmedo para mantenerlo agua con jabón o en el lavavajillas. - Page 47 C u i d a d o y L i m p i e z a Campana de Escape Desmontaje del Filtro de Grasa La campana de escape de su horno de microondas Para sacar el filtro de grasa, sostenga la lengüeta está...
- Page 48 Reemplazo del Foco Luz de la Cubierta Luz del Horno Para reemplazar la combinación de luz de la Para reemplazar la luz del horno: cubierta/luz de noche: 1. Desconecte la corriente eléctrica en el fusible 1. Desconecte la corriente eléctrica en el fusible principal o en el disyuntor o desenchufe el principal o en el disyuntor o desenchufe el horno.
- Page 49 Preguntas y Respuesta Comunes & P. ¿Puedo abrir la puerta cuando el horno P. ¿Qué significan las diversas señales está funcionando? sonoras? R. La puera puede ser abierta en cualquier R. Señal sonora corta = se ha oprimido alguna momento durante el funcionamiento. El horno tecla.
-
Page 50: Antes De Solicitar Servicio
A n t e s d e S o l i c i t a r S e r v i c i o Verifique lo siguiente para asegurarse si es necesario hacer una llamada de servicio: Si no funciona nada en el horno: Si el interior del horno acumula humedad: Verifique si hay un fusible del circuito fundido o esto es normal. -
Page 51: Garantía
MC. Modelo Piezas Trabajo Magnetrón (Parte Solamente) Tipo de servicio MCO165UW Uno-Año Uno-Año Ocho Años En Casa MCO165UB Para el servicio o la ayuda llame por favor 888 775-0202 o visítenos en la tela...
Need help?
Do you have a question about the MCO165UW and is the answer not in the manual?
Questions and answers