Table of Contents
Advertisement
Available languages
Available languages
IMPORTANT
IMPORTANTE
BELANGRIJK
Before installing this product, read and follow all warning notices and instructions accompanying this product. Failure to follow
safety warnings and instructions can result in injury, death, or property damage.
Save this instruction manual.
Avant d'installer ce produit, lire et suivre tous les avertissements et les instructions accompagnant ce produit. Ne pas suivre les
avertissements et instructions de sécurité peut entraîner des blessures, des décès ou des dommages matériels.
Conserver ce manuel d'instructions.
Antes de instalar el producto, lea y siga todas las instrucciones que lo acompañan. El incumplimiento de las advertencias e
instrucciones puede causar lesiones, muerte o daños a la propiedad.
Guarde este manual de instrucciones.
Vooraleer dit product te installeren, lees en volg alle waarschuwingen en instructies die bij dit product horen. Het niet volgen van
de veiligheidswaarschuwingen en aanwijzingen kan leiden tot letsel, dood of materiële schade.
Bewaar deze handleiding.
Advertisement
Table of Contents

Subscribe to Our Youtube Channel
Summary of Contents for Kokido Keops K835
- Page 1 IMPORTANT IMPORTANTE BELANGRIJK Before installing this product, read and follow all warning notices and instructions accompanying this product. Failure to follow safety warnings and instructions can result in injury, death, or property damage. Save this instruction manual. Avant d'installer ce produit, lire et suivre tous les avertissements et les instructions accompagnant ce produit. Ne pas suivre les avertissements et instructions de sécurité...
-
Page 2: Table Of Contents
Table Of Contents Safety Warnings & Instructions General Information How It Works Points to Note KEOPS Solar Heater Installation Primary Components Pool layout with KEOPS Solar Heater Hose Connectors on the Main Base Assembling Dome Cover to Main Base Connecting the KEOPS Solar Heater to the pool P.10 For Pools using Hose Connection of Dia. - Page 3 Table des matières Mises en garde & Consignes de sécurité P.16 Information Générale P.17 Comment fonctionne le chauffage solaire KEOPS P.17 Points à noter P.17 Installation du chauffage solaire KEOPS P.18 Composants principaux P.18 Schéma de la piscine avec un chauffage solaire KEOPS P.19 Adaptateurs de tuyaux sur le corps principal P.20...
- Page 4 Indice Advertencias e instrucciones P.27 Información general P.28 Cómo funciona P.28 Apuntes P.28 Instalación del calentador solar KEOPS P.29 Componentes primarios P.29 Disposición de la piscina con el calentador solar KEOPS P.30 Conectores de manguera en la base principal P.31 Montaje de la cúpula en la base principal P.31 Conectar el calentador solar KEOPS...
- Page 5 Inhoudsopgave Veiligheidswaarschuwingen & Instructies P.38 Algemene Informatie P.39 Hoe het werkt P.39 Aandachtspunten: P.39 Installatie van de KEOPSTM zonneboiler P.40 Componenten P.40 Lay-out zwembad met KEOPSTM Zonneboiler P.40 Slangaansluitingen op de hoofdplaat P.41 Monteren van de koepel op de hoofdplaat P.41 De KEOPSTM zonneboiler verbinden met het zwembad P.41...
-
Page 6: Safety Warnings & Instructions
SAFETY WARNINGS & INSTRUCTIONS Read and follow all instructions in this manual and on the equipment. Failure to do so could result in severe or fatal injury. WARNING: This heater is not intended for use by persons (including children) with reduced physical, sensory or mental capabilities, or lack of experience and knowledge, unless they have been given supervision or instruction concerning use of the heater by a person responsible for their safety. -
Page 7: General Information
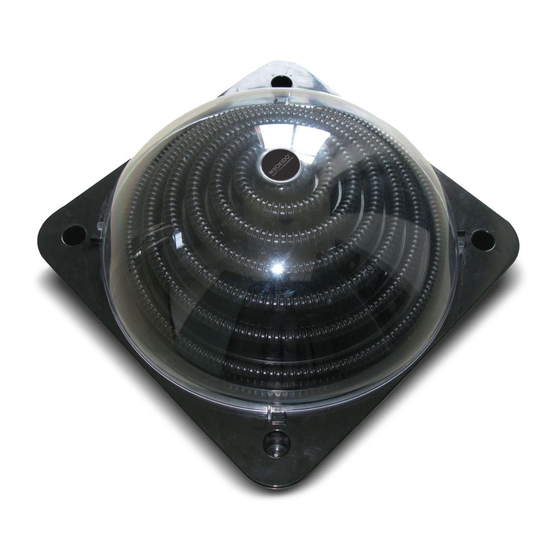
General Information KEOPS Solar Heater features an innovative dome design that provides better heat transfer than traditional solar systems, and also eliminates the need to set aside yard space for conventional solar panels. With the hose connectors provided, KEOPS Solar Heater fits filtration systems which require either Ø32mm (1 1/4in) / 38mm (1 1/2in) soft hose connection or Ø57mm (2 1/4in) threaded nut hose connection. -
Page 8: Keops Tm
3) Linking additional solar heaters Never install additional solar heaters when filtration/pump is under operation. Always turn off the pump before heater installation or disconnection. KEOPS Solar Heater Installation Before installing KEOPS Solar Heater, check to make sure all parts are present in the packag Primary Component 1 x Main base with 2 stand... -
Page 9: Pool Layout With Keops Tm Solar Heater
The only tool you need is a screwdriver with which to secure the hose clamp for hose connections to the hose connectors. Pool layout with KEOPS Solar Heater Typical above-ground pool layout With one Solar Heater With multiple Solar Heaters Under the main base, there are two holes for hose connector assembly;... -
Page 10: Hose Connectors On The Main Base
the pool. Longer hose is provided for the connection of the heater to the pump/filter, and short hose is provided for connection of additional heater as shown. If the length of hoses provided does not fit your pools, you can use another soft hose with same diameter. -
Page 11: Connecting The Keops Tm Solar Heater To The Pool
CAUTION : Don’t hold the dome cover to move the whole unit. Connecting the KEOPS Solar Heater to the pool CAUTION : Before beginning to connect this solar heater to your pool, make sure your pool water outlet and return inlet are closed and already connected with hoses. Refer to your pool manual or consult your pool dealer for proper instructions. -
Page 12: For Pools Using Hose Connection Of Dia. 57Mm(2 1/4In) Soft
2) For pools using hose connection of Dia. 57mm (2 1/4in) soft hose with Threaded Nut a) Detach the pool return hose from your pump/filter. b) Use soft hose of either Ø32mm (1 1/4in) or Ø38mm (1 1/2in) or to connect the center hose connector to the pump/filter. - Page 13 For connection of 3 or more heaters, it requires a 3-way valve (not included) and “T” connector (not included) to be installed. Below is an example of above ground pool with 3-way valve set up in place. ATTENTION: Make sure to completely open the valve (3 holes) in operation.
-
Page 14: Initial Operation
Initial Operation Before turning on your pump, make sure all hose connections are secured and hoses are not kinked or bent at severe angle before operation. Make sure to unblock pool water outlet and inlet to let water flows into the hoses. TIPS: It is recommended to place a pool solar cover on at night to prevent heat loss. -
Page 15: Trouble Shooting
Trouble Shooting Problem Possibilities /Solution Does not heat up the water Make sure the filtration system works to circulate the water Sunshine is not strong Additional solar heaters may be required Put pool solar cover on at night to prevent heat loss. ... - Page 16 © 2018 Kokido Development Ltd. 18011015 All rights reserved. No part of this document may be reproduced or transmitted in any form or by any means, electronic, mechanical, photocopying, recording, or otherwise, without prior written permission of Kokido Development Ltd. (V5)
-
Page 17: Mises En Garde & Consignes De Sécurité
MISES EN GARDE & CONSIGNES DE SECURITE Lire et suivre toutes les instructions présentes dans ce manuel et sur le matériel. Ne pas se conformer à ces instructions peut entraîner des blessures graves voire mortelles. AVERTISSEMENT : Ce produit n’est pas prévu pour être utilisé par des personnes (y compris les enfants) dont les capacités physiques, sensorielles ou mentales sont réduites, ou manquant d’expérience et de connaissance, à... -
Page 18: Information Générale
Les avertissements et les mises en garde ci-dessus n’incluent pas tous les exemples de risques et / ou blessures graves possibles. Les propriétaires de piscine doivent toujours faire preuve de prudence et de bon sens lorsqu’ils utilisent leur piscine et le matériel qui s’y rapporte. -
Page 19: Installation Du Chauffage Solaire Keops
principal ou le couvercle en forme de dôme. 2) Pression en fonctionnement du chauffage solaire S’assurer que la pression en fonctionnement du chauffage solaire ne dépasse pas 1.5bar (21psi). Il est recommandé d’installer un manomètre entre le chauffage solaire et la pompe / le filtre pour surveiller la pression de l’eau qui arrive dans le chauffage solaire. -
Page 20: Schéma De La Piscine Avec Un Chauffage Solaire Keops Tm
1 x Tuyau long (Ø38mm / 1 x Tuyau court (Ø38mm / 2 x Collier de serrage 1 1/2in) (pour la connexion au 1 1/2in) (pour la connexion filtre / à la pompe) d’un autre chauffage solaire) Seul un tournevis est nécessaire pour fixer les colliers de serrage sur les adaptateurs de tuyaux. -
Page 21: Adaptateurs De Tuyaux Sur Le Corps Principal
Sous le corps principal se trouvent deux trous pour le montage d’adaptateurs de tuyaux ; le premier se trouve au centre, le second sur un côté. L’eau circule dans le serpentin du chauffage solaire depuis l’adaptateur de tuyau central, puis ressort par l’adaptateur de tuyau latéral avant de retourner à... -
Page 22: Connexion Du Chauffage Solaire Keops
Il y a 4 languettes sur le couvercle et 4 encoches sur le corps du chauffage solaire. Pousser les languettes dans les encoches pour verrouiller le couvercle sur le corps du chauffage solaire. ATTENTION : Ne pas déplacer le chauffage solaire en le tenant par le couvercle. Connexion du chauffage solaire KEOPS à... -
Page 23: Pour Les Piscines Utilisant Des Connexions En Tuyaux Filetés De
2) Pour les piscines utilisant des connexions en tuyaux filetés de diamètre 57mm (2 1/4in) Déconnecter de la pompe / du filtre le tuyau relié au refoulement de la piscine. b) Utiliser le tuyau de diamètre 32 ou 38mm pour connecter l’adaptateur de tuyau central à... - Page 24 REMARQUE : S’assurer d’avoir un nombre suffisant de colliers de serrage et de réducteurs de tuyaux pour connecter des chauffages supplémentaires. Un réducteur de tuyau est nécessaire pour chaque connexion de tuyau de diamètre 38mm et un collier de serrage doit être utilisé pour chaque connexion de tuyau. Utiliser le tuyau court fourni et un réducteur de tuyau pour connecter un chauffage solaire supplémentaire.
-
Page 25: Première Mise En Service
Première mise en service Avant d’allumer la pompe, s’assurer que toutes les connexions de tuyaux sont fixées et que les tuyaux ne sont pas noués ou coudés. S’assurer que les buses d’aspiration et de refoulement sont ouvertes pour laisser l’eau passer dans les tuyaux. ASTUCE: Il est recommandé... -
Page 26: Dépannage
Dépannage Problème Cause / Solution L’eau ne chauffe pas. S’assurer que le système de filtration fonctionne afin que l’eau circule. L’ensoleillement est insuffisant. Des chauffages solaires supplémentaires sont nécessaires. Installer une bâche à bulles la nuit pour éviter les pertes de chaleur. - Page 27 © 2018 Kokido Development Ltd. 18011015 Tous droits réservés. Aucune partie de ce document ne peut être reproduite ou transmise sous aucune forme ou par quelque moyen, électronique, mécanique, par photocopie, enregistrement ou autre, sans l'autorisation écrite préalable de Kokido Development Ltd.(V5)
-
Page 28: Advertencias E Instrucciones
ADVERTENCIAS E INSTRUCCIONES Lea y siga todas las instrucciones en este manual y en el equipo. De lo contrario podrían resultar lesiones graves o mortales. ADVERTENCIA: Este calentador no está concebido para ser utilizado por personas (incluidos niños) con capacidades físicas, sensoriales o mentales disminuidas, o con falta de experiencia y conocimiento, a menos que sean supervisados o que hayan recibido instrucciones referentes al uso del calentador por una persona responsable de su... -
Page 29: Información General
uso del sentido común y tener un cuidado excelso al utilizar su piscina y al hacer funcionar su equipo. Información General El calentador solar KEOPS cuenta con una cúpula de diseño innovadora que ofrece una mejor transferencia de calor que los tradicionales sistemas de energía solar y elimina la necesidad de ocupar un espacio para los paneles solares convencionales. -
Page 30: Instalación Del Calentador Solar Keops
calentador solar. 2) Presión para el funcionamiento del calentador solar Asegúrese de que la presión de funcionamiento del calentador solar no exceda los 1.5bar (21psi). Es recomendable instalar un medidor de presión entre la bomba / filtro y el calentador solar para controlar la presión del agua que entra al calentador solar. 3) Enlazar calentadores solares adicionales Nunca instale calentadores solares adicionales mientras la filtración y la bomba estén en funcionamiento. - Page 31 1 x Manguera larga (Ø38mm / 1 x Manguera corta (Ø38mm 2 x Abrazadera 1 1/2in) (para conectar con la / 1 1/2in) (para conectar con bomba/filtro) otro calentador) La única herramienta que necesita es destornillador con el que asegurar las abrazaderas de las mangueras con los conectores.
-
Page 32: Conectores De Manguera En La Base Principal
Bajo la base principal, hay dos agujeros para el montaje de los conectores de las mangueras, uno se encuentra en el centro y el otro a un lado. El agua entra al calentador por el conector central y sale hacia la piscina por el conectar lateral. Se incluye una manguera larga para conectar el calentador con la bomba/filtro, y otra manguera corta para conectar un calentador adicional. -
Page 33: Conectar El Calentador Solar Keops Tm A La Piscina
PRECAUCIÓN: No sostenga la cúpula para mover toda la unidad. Conectar el calentador solar KEOPS a la piscina PRECAUCIÓN : Antes de comenzar a conectar el calentador solar a su piscine, asegúrese de que las tomas de entrada y salida de agua estén cerradas y estén conectadas a las mangueras. -
Page 34: Para Piscinas Con Conexiones Para Mangueras Flexibles Con
2) Para piscinas con conexiones para mangueras flexibles con terminación enroscada de 57mm (2 1/4in) de diámetro a) Separe la manguera de retorno de agua de su filtro/bomba. b) Utilice cualquier manguera flexible de Ø32mm (1 1/4in) o Ø38mm (1 1/2in) para conectar la manguera a la bomba/filtro. - Page 35 Para conectar 3 o más calentadores, es necesario instalar una válvula de 3 vías (no incluida) y un conector "T" (no incluido). A continuación se muestra un ejemplo de una piscina elevada con una válvula de 3 vías instalada. ATENCIÓN: Asegúrese de abrir completamente la válvula (3 vías) durante el funcionamiento.
-
Page 36: Puesta En Marcha
Puesta en marcha Antes de encender la bomba, asegúrese de que todas las conexiones de las mangueras estén fijas y las mangueras no estén retorcidas o dobladas. Asegúrese de abrir las tomas de entrada y salida de agua de su piscine para que corra el agua por las mangueras. -
Page 37: Solución De Problemas
Solución de problemas Problema Posibilidades/Soluciones No calienta el agua Asegúrese de que circula el agua por su sistema de filtración. El sol no es fuerte. Requiere calentadores solares adicionales. Coloque un cobertor solar por la noche para evitar las pérdidas de calor. - Page 38 Todos los derechos reservados. Ninguna parte de este documento podrá ser reproducida o transmitida en cualquier forma o por cualquier medio, sea electrónico, mecánico, fotocopia, grabación o cualquier otra manera, sin el permiso previo y por escrito de Kokido Development Ltd. (V5)
-
Page 39: Veiligheidswaarschuwingen & Instructies
VEILIGHEIDSWAARSCHUWINGEN & INSTRUCTIES Lees en volg alle instructies in deze handleiding en op het apparaat. Doet u dit niet, dan kan dit leiden tot ernstig of dodelijk letsel. WAARSCHUWING: Dit apparaat is niet bedoeld voor gebruik door personen (inclusief kinderen) met verminderde lichamelijke, zintuiglijke of verstandelijke vermogens of een gebrek aan ervaring en kennis, tenzij ze onder toezicht het toestel gebruiken, of ingelicht zijn hoe het apparaat te gebruiken door een persoon die verantwoordelijk is voor hun veiligheid. -
Page 40: Algemene Informatie
Algemene Informatie KEOPS zonneboiler is voorzien van een innovatief koepelontwerp dat een betere warmteoverdracht levert dan de traditionele zonne-energie systemen, en elimineert ook de noodzaak om ruimte te voorzien in de tuin voor conventionele zonnepanelen. Met de voorziene slangaansluitingen, past de KEOPS zonneboiler op filtratiesystemen die ofwel Ø32mm (1 1/4in) / 38mm (1 1/2in) zachte slangaansluiting of Ø57mm (2 1/4in) slangaansluiting met moer vereisen. -
Page 41: Componenten
Installatie van de KEOPS zonneboiler Voor het installeren van de KEOPS zonneboiler, controleer of alle onderdelen in de verpakking zitten. Componenten 2 x verloopstuk slang 1 x Hoofdplaat met standaard 1 x Koepel Ø32mm(11/4in)–Ø38mm(1 1/2in) 1 x Platte afdichtingsring 1 x slangaansluiting met 2 x 32mm (1 1/4in) moer (met voorgeïnstalleerde Slangaansluiting... -
Page 42: Slangaansluitingen Op De Hoofdplaat
de slangaansluiting in het midden naar de slangaansluiting aan de zijkant terug naar het zwembad. De langere slang is voorzien voor de aansluiting van de boiler naar de pomp/filter en de korte slang is voorzien voor de aansluiting van andere boilers. Als de lengte van de voorziene slangen niet gaat voor uw zwembad, kunt u een andere zachte slang met dezelfde diameter gebruiken. -
Page 43: Voor Zwembaden Met Een Slangaansluiting Van Dia. 57Mm
a) Koppel de terugvoerleiding van het zwembad los van uw pomp/filter. b) Voor een zachte slang van Ø32mm (1 1/4in), schuif de slang zo ver mogelijk rechtstreeks op de slangaansluitingen. Gebruik de slangklem om de slangaansluiting te bevestigen. c) Voor een zachte slang van Ø38mm (1 1/2in), gebruik ofwel de voorziene lange slang of een andere zachte slang met dezelfde diameter om de pomp/filter te verbinden met de slangaansluiting in het midden. -
Page 44: Voor Meerdere Keopstm Zonneboilers
3) Voor meerdere KEOPS zonneboilers Afhankelijk van de weersomstandigheden, wordt er 1 zonneboiler aanbevolen per 10000 liter zwembadvolume. OPMERKING: Zorg ervoor dat u voldoende slangklemmen en verloopstukken voor slangen hebt voordat u extra zonneboilers koppelt. Een verloopstuk is vereist voor een Ø38mm (1 1/2'in) slangaansluiting, en een slangklem moet gebruikt worden om alle slangaansluitingen vast te maken. -
Page 45: Winterklaar Maken & Onderhoud
slangen kan stromen. TIPS: Het wordt aanbevolen om ‘s nachts een zonnedekzeil op het zwembad te plaatsen om warmteverlies te voorkomen. Doe op warme dagen de textielhoes op de koepel wanneer uw zwembad geen extra verwarming nodig heeft. Winterklaar maken & Onderhoud WAARSCHUWING : Schakel de pomp uit vooraleer u de boiler/slangen loskoppelt van het filtersysteem. -
Page 46: Onderdelenlijst
Alle rechten voorbehouden. Niets uit deze uitgave mag geherproduceerd of overgedragen worden in welke vorm dan ook of op welke wijze dan ook, hetzij elektronisch, mechanisch, door fotokopieën, opnamen, of op andere wijze, zonder voorafgaande schriftelijke toestemming van Kokido Development Ltd. (V5) - Page 47 NOTE/NOTA/ NOTITIE...
- Page 48 Manufacturer/Fabricant/Fabricante/Fabrikant: Kokido Development Limited. Unit 1319, Sunbeam Centre, 27 Shing Yip Street, Kwun Tong, Kowloon, HK...
Need help?
Do you have a question about the Keops K835 and is the answer not in the manual?
Questions and answers