
Subscribe to Our Youtube Channel
Related Manuals for Robur AD

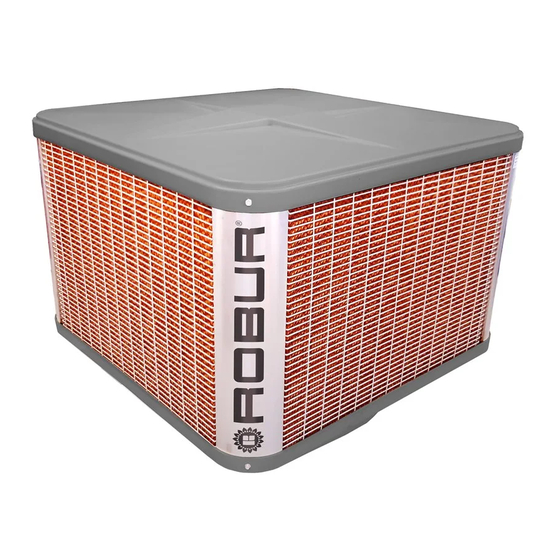
Summary of Contents for Robur AD
- Page 1 Installation, use and maintenance manual AD evaporative coolers For natural, simple and affordable cooling of medium and large buildings...
- Page 2 The rights of those who have legitimately filed the registered trademarks contained within this publication are not affected. With the aim of continuously improving the quality of its products, Robur S.p.A. reserves the right to modify the data and contents of this Installation, use and maintenance manual without prior notice.
-
Page 3: Table Of Contents
7 Maintenance ............... p. 20 System operation ..........p. 12 Warnings ..............p. 20 2 Transport and positioning ........p. 13 End of season maintenance ......p. 20 Warnings ..............p. 13 Pre-season maintenance ......... p. 21 Handling ..............p. 13 Installation, use and maintenance manual – AD... -
Page 4: Iintroduction
CONTROL DEVICE In order to work, the AD unit requires a control device to RECIPIENTS be connected by the installer (see Paragraph 1.4 p. 10 ). This Manual is intended for: SYMBOLS AND DEFINITIONS II.1... -
Page 5: Iii.2 Conformity
Aggressive substances in the air EU directives and standards The AD evaporative coolers comply with the essential re- The air of the installation site must be free of any quirements of the following Directives: aggressive substances or impurities that could con- 2014/30/EC "Electromagnetic Compatibility Directive"... - Page 6 Warnings rendered void by the following conditions: manufacturer. „ Damages caused by external agents such as salts, „ Incorrect installation. chlorine, sulphur or other chemical substances „ Misuse. present in the air of the installation site and/or in „ Failure to comply with the manufacturer's indica- the water supply to the appliance.
-
Page 7: Features And Technical Data
AD14/AD20 EVO: equipped with the advanced EVO ▶ The AD evaporative cooler can be installed in all environ- remote control (Paragraph 1.4.3 p. 10 ). ments where it is necessary to improve the microclimate, AD14/AD20 SC: without individual remote control, ▶... -
Page 8: Dimensions
Features and technical data DIMENSIONS Figure 1.1 AD14 dimensions 1150 1150 Water inlet 3/8" M Water drain 60 mm M Electrical panel... -
Page 9: Electrical Wiring Diagram
Power supply 230 V - 50 Hz Remote control 20 AWG 5x0,5 mm shielded cable Do not connect A1 Main switch onboard the appliance BRO Brown WHI White GRE Green YEL Yellow GRY Grey V- L2 L1 V+ Installation, use and maintenance manual – AD... -
Page 10: Controls
(up to a maximum of 30). The EVO advanced remote control is the advanced con- The functions of the centralised control are: trol system for AD evaporative coolers, which includes a Display and setting of date and time on network ▶... -
Page 11: Technical Data
AD. Selection of automatic/manual/off operation for each The AD cooler used as master will be of the ECO or EVO ▶ individual cooler. type, while the other AD coolers must be of the SC type, Cooling/fan-only/off selection for each individual i.e. -
Page 12: System Operation
The operating principle is very simple: if the system expels The AD evaporative cooler is equipped with a high satu- all the introduced air, the system produces maximum ef- ration efficiency evaporating unit which produces a good ficiency, grants all the planned air renewals and cools the level of cooling even at relative air humidity values of environment under the design conditions. -
Page 13: Transport And Positioning
1. Prepare and secure a flanged air inlet duct having Widen the forks as much as possible to balance the the same dimensions as the appliance's flanged duct load. trunk (Paragraph 1.2 p. 8 ), which must be secured Installation, use and maintenance manual – AD... - Page 14 Transport and positioning to the flange of the previously prepared duct (Figure Figure 2.6 Check the tightening of the hose clamp on the hose 2.3 p. 14 ). connected to the pump Figure 2.3 Prepare a flanged duct. 7. Apply the humidifying panels leaning them against the uprights, keeping the groove, obtained on one 2.
- Page 15 (Figure 2.12 p. 15 be secured to the flange of the previously prepared and Figure 2.13 p. 15 ). duct (Figure 2.15 p. 16 ). Installation, use and maintenance manual – AD...
- Page 16 Transport and positioning than 3 mm or in any case sized in relation to the weight it Figure 2.15 Prepare and secure a machine support frame and will have to bear, taking into account the safety margins a flanged duct imposed by the standards. Do not use aluminium alloy or similar components.
-
Page 17: Heating Engineer
(Figure 1.1 p. 8 and Figure 1.2 p. 9 ). A. Water inlet 3/8" M B. Water drain 60 mm M 3.2.2 Connection to the water supply Always provide, near the appliance: Installation, use and maintenance manual – AD... -
Page 18: Electrical Installer
Electrical installer 3.2 p. 18 ). Figure 3.1 Connecting the 3/8" sleeve to the water mains Figure 3.2 Connect the flexible hose to the sleeve The machine is also equipped with a threaded sleeve Ø 60 mm M for water drainage. If there is a central drainage system, convey the pipe to Connect the flexible hose (supplied) to the sleeve, fixing the central drainage system in accordance with the regu- it by means of a hose clamp, taking care not to stress the... -
Page 19: Control System
SUGGESTIONS FOR THE FIRST START- 5.1.2 Abnormal or hazardous installation situations Should any abnormal or hazardous installation situations For optimal operation of the appliance, it is essential Installation, use and maintenance manual – AD... -
Page 20: Normal Operation
6.2.1 Control device Never power the appliance off while it is run- The AD evaporative coolers must be equipped with a re- ning mote control that allows their operation. Paragraph 1.4 p. 10 details the types of controls availa- NEVER power the appliance off while it is running ble and their features. -
Page 21: Pre-Season Maintenance
5 minutes from appliance switch off. Check for water leaks from tanks and supply pipes. ▶ Check cables conditions. ▶ Replace the cover and make sure that it is securely fas- ▶ tened with the appropriate bolts. Installation, use and maintenance manual – AD... - Page 24 Robur mission Robur is dedicated to dynamic progression in research, development and promotion of safe, environmentally-friendly, energy-efficiency products, through the commitment and caring of its employees and partners. Robur S.p.A. advanced technologies for air conditioning via Parigi 4/6 24040 Verdellino/Zingonia (BG) Italy +39 035 888111 - F +39 035 884165 www.robur.it robur@robur.it...
Need help?
Do you have a question about the AD and is the answer not in the manual?
Questions and answers