
Subscribe to Our Youtube Channel
Related Manuals for HumbleCrew END TABLE ET8647


Summary of Contents for HumbleCrew END TABLE ET8647
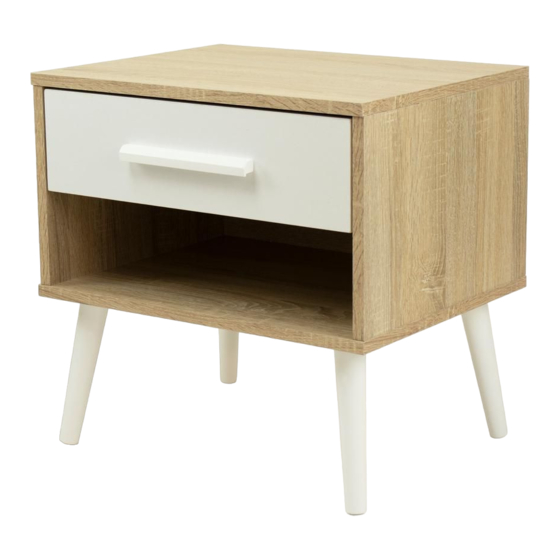
- Page 1 (844) 509-4888 www.humblecrew.com END TABLE Product info Made in Malaysia Model: ET8647 Collection: Stockholm Cleaning Wipe with a damp cloth and mild soap Dry with soft, lint free cloth...
- Page 2 SELF-PREPARED TOOLS: Tools below are NOT included in package. K2 ( L/R ) HAMMER HAMMER SCREWDRIVER SCREWDRIVER Reminder: Reminder: Please ensure that all surfaces and edges with colours/laminations are facing forward/outward. Please ensure that all surfaces and edges with colors/laminations are facing forward/outward. www.humblecrew.com (844) 509-4888...
- Page 3 - Insert hardware A1 onto panel (3) . (Repeat 4 times.) (Repeat 2 times.) - Insert hardware B onto panel (3) . SCREWDRIVER (Repeat 4 times.) REQUIRED PRESS PRESS ROTATE * Ensure the arrows on hardware A1 point towards mounting positions. www.humblecrew.com (844) 509-4888...
- Page 4 - Insert hardware B onto panel (4) . REQUIRED (Repeat 4 times.) J1(L) PRESS PRESS ROTATE Big hole at the center. ROTATE ROTATE Second hole Second hole from the edge. from the edge. * Ensure the arrows on hardware A1 point towards mounting positions. www.humblecrew.com (844) 509-4888...
- Page 5 (Repeat 4 times.) J1(R) Section View ROTATE ROTATE Big hole at the center. PRESS ROTATE ROTATE Second hole Second hole from the edge. * In this step hardware A1, A2 and B are pre-inserted. from the edge. www.humblecrew.com (844) 509-4888...
- Page 6 Connect panel (2) to panel (3) and (4) Insert the panel (5) along the slot. by using hardware C and D . (Repeat 1 times.) (Repeat 4 times.) HARDWARE ROTATE * In this step hardware B are pre-inserted. www.humblecrew.com (844) 509-4888...
- Page 7 MODEL : STEP 9 STEP 10 Assemble part 10 into hardware H. Fix hardware H into panel (2) by using hardware E. (Repeat 4 times.) (Repeat 5 times for each hardware.) SCREWDRIVER SCREWDRIVER REQUIRED REQUIRED ROTATE ROTATE www.humblecrew.com (844) 509-4888...
- Page 8 STEP 12 Fix hardware I onto panel (6) by using hardware G. Assemble panel (7) to panel (6) and (8) by using hardware F . (Repeat 4 times.) (Repeat 3 times for each hardware.) ROTATE ROTATE SCREWDRIVER REQUIRED www.humblecrew.com (844) 509-4888...
- Page 9 ASSEMBLY INSTRUCTIONS ET8647 MODEL : STEP 14 STEP 13 Assemble panel (7) to panel (6) and (8) by using hardware F . Insert the panel (9) along the slot. (Repeat 4 times.) (Repeat 1 times.) ROTATE SCREWDRIVER REQUIRED www.humblecrew.com (844) 509-4888...
- Page 10 Put all the drawer in place along the drawer slides. (Repeat 3 times for each hardware.) ROTATE ROTATE Third hole ROTATE Third hole from the edge. from the edge. Hole at the center. SCREWDRIVER REQUIRED *Hardware J2 (L/R) shall be leaning against panel (6) when assembling. www.humblecrew.com (844) 509-4888...
Need help?
Do you have a question about the END TABLE ET8647 and is the answer not in the manual?
Questions and answers