Advertisement
Quick Links
Advertisement

Related Manuals for Neptune NE7MHDWCB

Summary of Contents for Neptune NE7MHDWCB
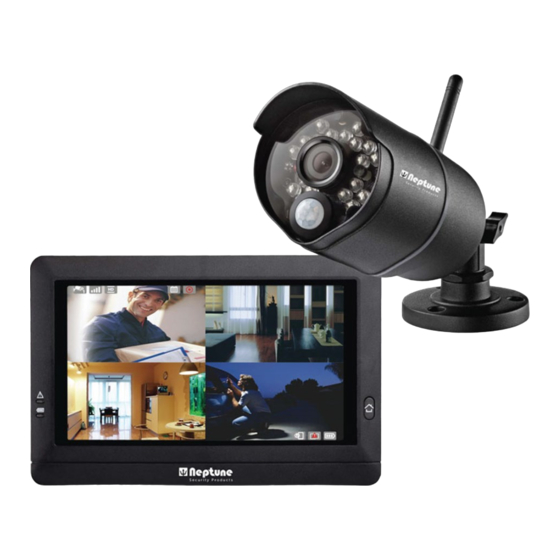
- Page 1 User Manual NE7MHDWCB...
- Page 3 Avoid mounting the camera close to windows, air conditioners, heaters, refrigerators, ovens, in direct sunshine and places where the temperature can change rapidly or flows of air occur frequently. Note: Avoid facing to direct sunlight or glass windows. Note: Motion activity by horizontal movement.
- Page 4 • One camera • One monitor • Two power adapters (9V/800mA for Camera, 5V/3A for Monitor) • Three screws and three anchors • One antenna • One allen key • One ethemet cable • User's manual Antenna Pairing button Allen screw Mounting bracket Screw for mounting Infrared LEDs (Twenty LEDs provide...
- Page 5 Loosen the alien screw (1 ), (2) and the adjustment rin g (3) by turning them counter clockwise.
- Page 6 Adjust the angle of the cameras until the desired view is set. Tighten the alien screw, and the adjustment ring to secure each camera's position. Connect power adapter to the camera power cable. Make sure they are pushed all the way in. Plug the power adapter into a wall outlet.
- Page 7 The system is designed for MicroSD card recording. Please insert a MicroSD card into the MicroSD card slot in the monitor if you want to record video. The system supports MicroSD cards with a maximum capacity of 256GB. ·f Note: The package doesn't include a Micro SD card. ·f Note: The battery needs to be fully charged before you turn on the monitor for the first time.
- Page 8 ·f Note: When a certain alert event has been viewed on the device, then tap the screen or press the Menu button, the LED will turn off. The live screen displays in three views (Quad view, Dual view or Single view) that depends on how many cameras have been selected in the Menu (Menu Camera Selection).
- Page 9 Camera Number: Displays the camera number . (White Icon): Displays the camera image and also provides audio. (Gray Icon): Only displays the camera image. Signal Strength: Shows the strength of the signal being received. Resolution: Displays the current resolution of the camera you are viewing.
-
Page 10: Menu Options
10. TV icon: The icon indicates that the HDMI cable has been connected to the monitor, tap the icon and the video/audio signal will output to the display device. HDMI output Connect a HDMI cable between the monitor and display device. Tap the "TV"... - Page 11 Pairing (Camera 1 - 4) Camera ON/ OFF Selection (Camera 1 - 4) Resolution (FHD/ HD) Brightness (Lever 1 - 8) Anti-Flicker (50 Hz/ 60 Hz) Format HDD/MicroSD card Overwrite/ Non-Overwrite...
- Page 12 Camera Setup .-. The Camera menu contains 5 sub-menus. Pairing: If you have purchased addition cameras, use the pairing function to add the cameras. You will also need to use the pairing button located at the back of the camera. Tap the camera number you want to pair.
-
Page 13: Anti-Flicker
Resolution: In this submenu you can setup each camera's resolution individually. You have the option of viewing and recording your camera(s) in HD (720p) or FHD (1080P). Anti-flicker: If you find that the camera(s) have a flicker effect caused by indoor l ighting, this indicates that the anti-flicker function is not set correctly. - Page 14 Record Setup The record menu contains 4 sub-menus. (1) Tap a camera that you would like to configure. (2) Tap on the i con to change the event type. (3) Tap the i con ► to go to the second page display i ng 12:00pm to 23:00pm.
-
Page 15: Recording Time
Recording Time: In this submenu you can select the recording time for each recording file. Format backup device: Tap Format icon to format the HOD or MicroSD Card. Formatting the device will remove all files that you have on there. Overwrite: T he function allows you to select if you would like to overwrite files when the card is full or to stop recording. -
Page 16: Power Saving
The System menu contains 6 sub-menus. Date and Time: T his function allows you to configure the date and time. Tap the "+" and "-" icons to adjust it. NTP Clock:Tap the icon@ to automatically synchronise system clock with a Network Time Protocol (NTP) time server. - Page 17 Language: T his function allows you to set your preferred language. Upgrade FW: If the monitor has a connection to the Internet, it will auto detect if there is a new version of firmware that can be updated. If there is a new version firmware, the icon �will change to/ �...
- Page 18 IP Setting: The default setting is DHCP and the IP address is automatically assigned to the monitor by your router. You can use a "Static IP" but we do not recommend this unless you have some experience with networking.
-
Page 19: Battery Alert
Alert Setup The Alert menu contains 5 sub-menus. Battery Alert: This selection allows you to choose the alert tones or disable the alerts for low battery. - Page 20 ·j- Note : When the alert tone has been heard, tap the screen or press the Menu button; the alert tone will be stopped.
- Page 21 ffilr 1. Return to file list 2. Return to live view 3. Fast backward 4. Pause/ Play 5. Fast forward 6. Backward speed 7. Forward speed � 8. Playback on display device. >)) Tap the volume up button ◄ and volume down button ◄> to adjust the volume level.
- Page 22 From the system, you can monitor your home on your smartphone or tablet at any time, from anywhere in the world. Make sure your home router is turned on and it can connect to the Internet. An Ethernet connection is required for remote access function. Connect the Ethernet cable to the LAN connection on the monitor, and then connect the other end to a spare port on your router.
- Page 23 Tap the � icon then tap "QR Code" to scan the QR code located on the rear of the monitor. You can also tap "Add" to manually input the UID instead of scanning the QR code. The UID and QR code label is on the rear of the mon itor.
- Page 24 Device photo: Tap the device photo to view a live video. Device name: When you launch the app, all the devices you have added will be shown on the screen. Device status: a. Online: If the device status shows "Online", you can tap the device photo to see the live video of the device .
- Page 26 Back: Tap this to return t o "Device List" screen. Name: Tap this if you want to change the device name. Passw ord: If you have changed the device password with another smartphone or tablet, you need to tap the row to correct the password.
- Page 27 Modify Passw ord: If you want to change the password, please tap this row to carry out the change. Note: If yo u have chang ed the password, yo u can r efer to the new password on the menu (Menu ...
- Page 28 Searching Events Function Tap th e icon then tap > from the "Device List" screen. From the "Event List" screen, tap "Search" to select different search criteria. By tapping "Custom" , you can specify a date and time period to search for events. A list of all video events matching your search criteria will be displayed.
- Page 29 the•'+ icon to enter "Add Device" screen. T he UID and QR code are located at the rear of the monitor. You can manually input the UID or tap "Scan" to scan the QR code. Please hold your smartphone or tablet close to the QR code to scan.
- Page 30 Give the device a new name or leave it as displayed. Enter the default password "12345", and then tap "OK" to finish the device setup. Device List Screen Device pho to : Tap the device photo to view a live video.
- Page 31 Live Video Screen Tap the device photo on the "Device List" screen and you can see a live video from the camera. Camera 1 will be displayed by default. If you have multiple cameras configured, tap the icon and select the camera that you want to view.
- Page 32 Modify Password: If you want to change the password, please tap this row to carry out the change. Note: If you have changed the password, you can refer to the new password on the menu (Menu System Network) at the monitor unit. Video Quality: Tap this to change the video quality for the video.
- Page 33 Note: FHD: high video quality but low frame rate. HD: medium video quality and medium frame rate. QHD: High frame rate but low video quality. Alert Interval: Tap this to adjust the time that the app will alert you when there is an event. You also have the option of turning off alerts.
- Page 34 You are not getting any signal at all If the signal is poor, or there is interference • If there is a microwave oven in use in the path between the camera and monitor, remove the microwave oven or turn it off. •...
-
Page 35: Fcc Information
FCC Information This device complies with part 15 of the FCC Rules. Operation is subject to the following two conditions: (1) This device may not cause harmful interference, and (2) this device must accept any interference received, including interference that may cause undesired operation.
Need help?
Do you have a question about the NE7MHDWCB and is the answer not in the manual?
Questions and answers