Vivitar 1 Series Instruction Manual
Hide thumbs
Also See for 1 Series:
- Service manual (81 pages) ,
- Service manual (89 pages) ,
- Owner's manual (27 pages)
Advertisement
Quick Links
Advertisement

Related Manuals for Vivitar 1 Series


Summary of Contents for Vivitar 1 Series
- Page 1 AF TTL Flash INSTRUCTION MANUAL VIV-DF-183...
-
Page 2: What Is Not Covered By This Warranty
Vivitar warrants this quality product to be free of defects in material and workmanship for a period of one year from the date of purchase. During the period, Vivitar will repair or replace the product at no charge for parts or labor. - Page 3 When service is complete, the product will be returned to you shipping prepaid. In the event the product is deemed to be not faulty or the defect is a result in wear and tear, Vivitar may levy a handling charge for the return ofthe product.
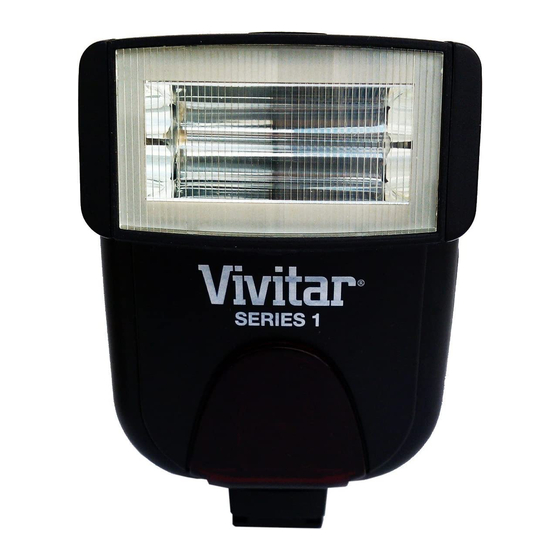
- Page 4 Introduction Congratulations on your purchase of the Vivitar VIV-DF-183 flash unit. This electronic flash is innovatively designed for both digital cameras and film cameras, with advanced technology used to control the correct amount of light output. Please kindly take a few minutes to read this instruction manual before using.
- Page 5 Features The VIV-DF-183 has the following features: • A red focus assist beam for low light focusing • An automatic shutter speed setting • A flash readiness indication • A five position tilted reflector • Red-eye reduction (for VIV-DF-NIK, OLY, PANA and PEN units) •...
-
Page 6: Specifications
Specifications Guide Number (ISO 100) 20(m)/66(ft) Five Position Tilted Reflector 0°/45°/60°/75°/90° Power Source 2 x 1.5V AA size batt. (R6, LR6) Flash Duration 1/2,000 - 1/40,000 sec. Recycling Time 0.3 - 10 sec. with fresh batteries Number of Flashes 100 times with fresh batteries Dimensions Approx. - Page 7 A Quick Look at Your Device Tilted Reflector Type SON Mounting Foot Red Light Mounting Foot...
- Page 8 A Quick Look at Your Device (continued) DF-183 Battery Compartment Cover Auto OK Test/Ready ON/OFF Switch Shoe Release Button Lock Button Type CAN Type PEN...
- Page 9 Inserting Batteries into Your Flash • Turn the ON/OFF switch to the OFF position. • Slide the battery compartment cover open. • Insert 2 AA batteries as indicated by the symbols in the battery compartment. • Close the battery compartment cover. Caution: Make sure your batteries are inserted with the correct polarity (+,-).
- Page 10 Mounting Your Flash to Your Camera and Removing It Mounting Your Flash to Your Camera • For Type CAN, NIK, OLY, PANA and PEN flashes: Release the Lock button. Insert the mounting foot of the flash unit into the camera's accessory shoe clip. Press the Lock button to fasten the flash unit to your camera.
- Page 11 Operating Your Flash and Running a Test Flash Slide the ON/OFF switch to the "ON" position. After a few seconds the Test/Ready lamp should illuminate, indicating that the flash is ready to use. Press the Test/Ready button to make sure that your flash works properly.
-
Page 12: Af - Auto Focus
AF/TTL Operation AF - AUTO FOCUS If the camera is compatible with an external AF mode, when the shutter button is pressed half way down, the focus assist light is automatically activated to help the camera focus properly when the subject is in darkness. The flash performs pre-flashes for cameras to calculate the intensity of flash light output. - Page 13 Front and Rear Curtain Synchronization Some cameras offer the option of rear curtain synchronization (Rear mode) triggering the flash unit at the end of the exposure time. Rear curtain synchronization is particularly advantageous when using slow shutter speeds (slower than 1/30 sec.) or when shooting moving objects that have their own source of light.
- Page 14 Bounce Photography Using direct a flash to illuminate a subject will result in harsh, unnatural and unattractive shadows. This can be avoided by using bounce flash. The head of your flash can be tilted to an angle of 45°, 60°, 75°, or 90°. You can tilt the flash head to bounce the light off the ceiling or walls.
-
Page 15: Power Saving Functions
Power Saving Functions If there is no communication between the flash and your camera for about three minutes, the flash will automatically be switched to power saving mode in order save battery power. -The Ready light will be off while in power saving mode. -To reactivate the flashgun, simply press your camera’s shutter button or switch the main switch off and on again. - Page 16 Maintenance and Tips for Taking Better Photos • When not in use, switch the unit off. Take the batteries out when the flash is being stored or when it will be carried for a long time. Keep your flash away from dust and moisture to prolong its life.
Need help?
Do you have a question about the 1 Series and is the answer not in the manual?
Questions and answers