
Related Manuals for Cadel ZEFIRO3

Summary of Contents for Cadel ZEFIRO3
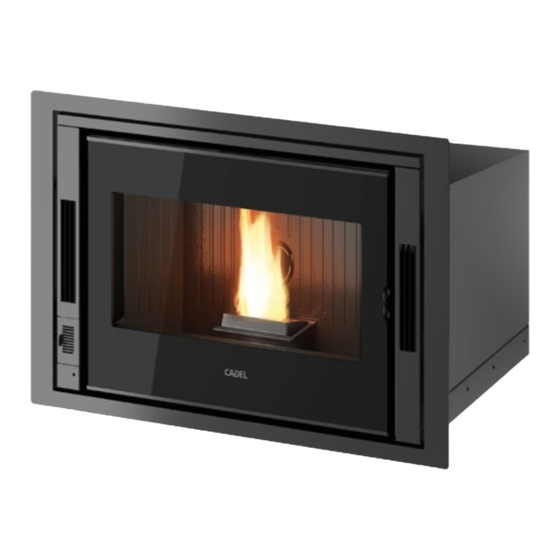
- Page 1 INSTALLER MANUAL Pellet fireplace insert ©2020 CADEL srl | All rights reserved - Tutti i diritti riservati ZEFIRO - ZEN AIRTIGHT...
-
Page 2: Table Of Contents
7.5 GASKET REPLACEMENT .........33 SUMMARY 7.6 GLASS REPLACEMENT ...........33 1 MANUAL SIMBOLOGY ........3 8 IN CASE OF ANOMALY ........33 2 PACKAGING AND HANDLING ......3 8.1 PROBLEM SOLVING ..........33 2.1 PACKAGING .............3 9 TECHNICAL DATAS ........36 2.2 REMOVING THE STOVE FROM THE PALLET ....3 9.1 FUSE REPLACEMENT ..........36 2.3 STOVE HANDLING............4 9.2 FEATURES ..............37... -
Page 3: Manual Simbology
MANUAL SIMBOLOGY USER AUTHORISED TECHNICIAN (ONLY to interpret or the Stove-manufacturer or the Authorized Techni- cian of Technical Assistance Service approved by the Stove-manufacturer) SPECIALIZED STOVE-REPAIRER CAUTION: READ CAREFULLY THE NOTE CAUTION: DANGER OR IRREVERSIBLE DAMAGE POSSIBILITY • The icons with the stylized figures indicates whom the subject dealt in the paragraph is addressed to (between the User and/ or the Authorized Technician and/or the Specialized Stove-repairer). -
Page 4: Stove Handling
• Slightly pull out the machine body from the structure (see INSERT EXTRACTION a pag. 14) • Remove the screws fixed to the base of the insert (see Fig. 1) and then remove it from the pallet. STOVE HANDLING Both whether the stove is packed or not it is necessary to observe the following instructions for handling and transporting the stove from its sale point to its installation point and for any future movements: •... -
Page 5: Technical Features
• Both this solutions must be endowed with an inspection plug (3) and/or an inspection door (4). TECHNICAL FEATURES Fig. 3 - Inclined roof LEGEND Fig. 3 Height over the ridge of the roof = 0,5 mt Roof inclination ≥ 10° 90°... -
Page 6: Height-Depression
Fig. 4 - Example of label HEIGHT-DEPRESSION The depression (draught) of a chimney flue depends also on its height. Check the depression with the values provided at FEATU- RES a pag. 37. Minimum height 3,5 meters. MAINTENANCE • The fumes extraction pipes (fumes conduit + chimney flue + chimney pot) must always be cleaned, scrubbed and checked by an expert stove-repairer, in compliance with current regulations, with the instructions of the stove-manufacturer and the directives of your insurance company. -
Page 7: Chimney Components
CHIMNEY COMPONENTS Fig. 6 - Chimney components LEGEND Fig. 6 Chimney pot Fume outlet Chimney flue Termal insulation External wall Chimney union Fume pipe Heat generator Inspection door T-union with inspection plug CHIMNEY FLUE CONNECTION Your pellet stove works through a fume draught forced by a fan. It is obligatory to check that all pipes are realized in compliance with the following regulation on material selection: EN 1856-1, EN 1856-2 e UNI/TS 11278. -
Page 8: Examples Of Correct Installation
SYSTEM TYPE Ø80 mm PIPE Ø100 mm PIPE Maximum length (with 3 unions) 4,5 mt 8 mt Maximum number of unions Level section (minimum inclination 3%) 2 mt 2 mt Installation at a height above 1200 m a.s.l. Obligatory • Use a plate pipe for stoves of Ø80 mm or Ø100 mm depending on the type of system and with silicone gaskets. •... - Page 9 Fig. 8 - Example 2 LEGEND Fig. 8 Insulating material Inspection plug Chimney inspection entrance Minimum safety distance = 0,5 mt Inclination ≥ 3° Level section ≤ 1 mt • Old chimney flue with an inserted pipe of minimum Ø100/120 mm and with an external door which enables the chimney cleaning.
-
Page 10: Combustion Air
We recommend to check with your chimney flue manufacturer the safety distances which must be respected and the type of insulating material. The aforesaid regulations are valid also for holes made on the wall (EN 13501 - EN 13063 - EN 1856 - EN 1806 - EN 15827). COMBUSTION AIR EXTERNAL AIR INLET Fig. -
Page 11: Combustible Air Inlet For Sealed-Chamber
COMBUSTIBLE AIR INLET FOR SEALED-CHAMBER INSTALLATION Fig. 11 - Air inlet for sealed-chamber installation LEGEND Fig. 11 ≥ 1,5 mt ≥ 0,3 mt Sectional view Shield grid Curve inlet to turn downwards Check if the purchased stove has a sealed-chamber. If the stove is endowed with a sealed-chamber and you want also the whole installation with sealed chamber, please read the following instructions: •... -
Page 12: Installation
Fig. 12 - Phase1 Fig. 13 - Phase 2 Fig. 14 - Phase 3 • Remove the ring inside the combustion air fitting (see Fig. 12 and Fig. 13). • Insert the concentric pipe as in Fig. 14. INSTALLATION INTRODUCTION •... -
Page 13: General Installation
LEGEND Fig. 15 55 cm 6,2 cm 17,7 cm 6,1 cm 49,4 cm 25,8 cm 14,5 cm Exhaust fumes d.8 cm Hole combustion air inlet d.6 cm Hot air outlet 18x3 cm Ducting outlet d.8 cm (optional) 37,7 cm 27,2 cm 7,5 cm 54÷72 cm GENERAL INSTALLATION... -
Page 14: Insert Extraction
DESCRIPTION VALUE Screening temperature 1000 °C Density 245 Kg/m3 Shrinkage at referring temperature (12h) 1,3 % /1000 °C Cold crushing strenght 1,4 MPa Bending strenght 0,5 MPa Thermal expansion coefficient 5,4x10⁻⁶ m/mK Specific heat 1,03 Kj/kgK 200 °C 0,07 W/mK 400 °C 0,10 W/mK Thermal conductivity at medium temperature... -
Page 15: Insert Removal
• Lift the hook (vedi Fig. 18) and pull the machine body firmly towards you (see Fig. 19). • Once the machine body has been extracted, you can access the pellet tank. Fig. 18 - Lift hook Fig. 19 - Machine body extraction INSERT REMOVAL If the insert is inserted on the guides, there is a danger of tipping over! Assembly operations must always be carried out by 2 people! -
Page 16: Installation With External Cover
Fig. 22 - Handle Fig. 23 - Machine body removal INSTALLATION WITH EXTERNAL COVER • It is possible to cover the insert with your liking cover respecting the correct execution as described in GENERAL INSTALLA- TION a pag. 13 and following the under mentioned instructions. •... -
Page 17: Installation On Existing Fireplace
LEGEND Fig. 24 Ceiling plaster to protect from heat Ventilation grid with a minimum entrance of 400 cm for natural hot convective air outlet Self-supporting metal frame Combustible air outlet Pellet load entrance Lower air grid with a minimum entrance of 400 cm for natural cool convective air inlet Floor protecting plate Outlet clutch Ø80 mm... -
Page 18: Door Adjustment
Fig. 25 - Installation on the existing fireplace LEGEND Fig. 25 Ceiling to protect Ceiling plaster to protect from heat Ventilation upper grid minimum entrance 400 cm for natural hot convective air outlet Hot air deflector Combustible air inlet Fireplace's fire plate Lower air grid with minimum entrance 400 cm for natural cool convective air inlet Ventilation cleft of 400 cm2 for convective cool air recycling... -
Page 19: Electric Connection
Fig. 26 - Door adjustment • Open the door. • Loosen the two front screws in the upper hinge and, using the side screw (the one circled in the picture) adjust the door forward or backward (see Fig. 26). • Once the door is centred, lock the 2 front screws. ELECTRIC CONNECTION Warning: the appliance must be installed by an authorized technician! •... -
Page 20: 5.11 Air Regulator
(default setting OFF) as indicated below: • Press the "menu" button. • Scroll with the arrows to "Settings". • Select by pressing "menu". • Scroll with the arrows again to "Ext.Thermostat". • Select by pressing "menu". • Press the - + buttons. •... -
Page 21: Hot Air Ducting (Optional)
• Place the insert above the structure, fixing it with the screws in the appropriate seats (see Fig. 35). Fig. 33 - Assemble reinforcements Fig. 34 - Assemble reinforcements + extensions Fig. 35 - Fix insert above to the structure •... - Page 22 Fig. 37 - Remove the fan Fig. 38 - Break the corner Fig. 39 - Fold the flap • Place the fan and casing on a surface (see Fig. 40). • Loosen the 4 screws (see Fig. 41) and rotate the casing and retighten the screws in the new position. Pay attention to the position of the holes (see Fig.
- Page 23 • Mount the fitting on the air diverter for the air to be ducted (see Fig. 47). • Connect the ducting pipe d.80 and block the pipe with the clamp. Attention: use at least 20 cm of flexible pipe above the fitting since the cover of the insert moves during manoeuvres (see Fig.
-
Page 24: Pellet Drawer Installation (Optional)
• To get the best performance you need to balance the power with the air flow. This operation must be performed with the assistance of an authorised technician. • The ductable fans cannot be deactivated, but they can be operated at a power value between 1 and 5 or in automatic mode. 5.14 PELLET DRAWER INSTALLATION (OPTIONAL ONLY FOR ZEFIRO) The insert is designed for loading the pellet through a drawer. - Page 25 Fig. 56 - Adjustment for centring • If necessary, remove the drawer and adjust, using the 2 wheels on the guides, its centring (see Fig. 56). INSERT WITH DRAWER WITHOUT DUCTING Fig. 57 - Remove the cover Fig. 58 - Insert insertion •...
-
Page 26: Trapdoor Installation (Optional)
ducting pipe (see dedicated chapter). 5.15 TRAPDOOR INSTALLATION (OPTIONAL) The insert is designed for loading the pellet through a trapdoor. The hole in the wall where it will house the trapdoor must have the following dimensions: L = 34 cm H = 23.5 cm Proceed as follows to assemble: Fig. -
Page 27: Frame Installation (Optional)
Fig. 66 - Trapdoor external fixingTrapdoor external fixing Fig. 67 - Trapdoor internal fixing • Fix the trapdoor to the door, both internally and externally (see Fig. 66 and Fig. 67). Fig. 68 - Insert the door in the trapdoor Fig. -
Page 28: Concentric Pipe Installation (Optional)
Fig. 72 - Front fixing Fig. 73 - Rear fixing 1 Fig. 74 - Rear fixing 2 • Remove the insert from the structure. • Loosen the 2 hex screws on the base of the structure, fit the frame and tighten the screws again (see Fig. 72). •... -
Page 29: Wi-Fi Kit Installation
Fig. 78 - Remove the display Fig. 79 - Remove the flat cable Fig. 80 - Remove the screws • Completely remove the door containing the display. • Remove the display (see Fig. 78) and disconnect the flat cable to which it is connected (see Fig. 79). •... -
Page 30: Special Maintenance
Fig. 85 - Faston disconnection (blue - brown) Fig. 86 - Double faston connection Fix the WI-FI module on the bottom of the tank with the power supply cable and the serial cable connected and lock the wi-fi module feeder on the strut with cable ties as shown. (see Fig. 87) Fig. -
Page 31: Feed Screw Maintenance
FEED SCREW MAINTENANCE Proceed as follows for the feed screw maintenance: Fig. 88 - Screw removal Fig. 89 - Coque removal Fig. 90 - Gear motor removal • Enter the tank and loosen the 4 screws of the feed screw coque (see Fig. 88). •... -
Page 32: Fume Pipes Annual Cleaning
Fig. 93 - Loosen the screw Fig. 94 - Remove screw 1 Fig. 95 - Remove screw 2 • Disconnect the wiring and remove the fan (see Fig. 96). • Remove the flue gas extractor screws (see Fig. 97) and proceed with cleaning. Fig. -
Page 33: Gasket Replacement
The cleaning operation must be executed by a specialized stove-repairer who will provide for the cleaning of fume pipe, chimney flue and chimney pot. He will also check their eficiency and will release a written declaration of the safety of the appliance. This operation must be executed at least once a year. - Page 34 PROBLEM CAUSE SOLUTION INTERVENTION The stove is without power Check if the plug is connected. supply Burned protection Replace the protection fuses in the electric socket (3.15A- fuse in the electric 250V). socket The control display Faulty control Replace the control display. does not switch on display Faulty flat cable...
- Page 35 PROBLEM CAUSE SOLUTION INTERVENTION Empty hopper Full the hopper. Auger blocked by a foreign object (for Clean the auger. example nails) The fire extinguish Bad quality pellets Try other types of pellets. and the stove stops Pellet drop value Adjust the pellet loading. too low "phase 1"...
-
Page 36: Technical Datas
PROBLEM CAUSE SOLUTION INTERVENTION The stove is at its Ambient tempera- The stove is at its minimum value. Increase the desired am- highest power but ture reached. bient temperature. does not heat up. Stove running and Reached fume display showing outlet limit tempe- The stove runs at minimum. -
Page 37: Features
FEATURES DESCRIPTION ZEFIRO - 9 kW ZEN AIRTIGHT - 9 kW WIDTH 69,7 cm 69,7 cm DEPTH 55 cm 55 cm HEIGHT 49 cm 49 cm WEIGHT 105 kg 105 kg INTRODUCED THERMAL POWER (Min/Max) 2,83 - 10,46 kW 2,83 - 10,46 kW NOMINAL THERMAL POWER (Min/Max) 2,7 - 9,26 kW 2,7 - 9,26 kW... - Page 38 Rev. 00- 2020 CADEL srl www.cadelsrl.com 31025 S. Lucia di Piave - TV www.free-point.it Via Foresto sud, 7 - Italy Tel. +39.0438.738669 Fax +39.0438.73343...
Need help?
Do you have a question about the ZEFIRO3 and is the answer not in the manual?
Questions and answers