Table of Contents
Advertisement
Advertisement
Table of Contents

Related Manuals for Acer Aspire 3020 Series


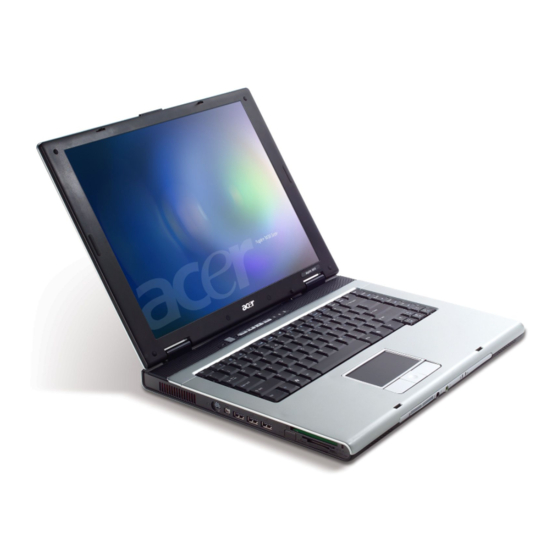
Summary of Contents for Acer Aspire 3020 Series
- Page 1 Aspire 3020/5020 Series User's Guide...
- Page 2 Serial number: ___________________________________ Purchase date: ___________________________________ Place of purchase: ________________________________ Acer and the Acer logo are registered trademarks of Acer Incorporated. Other companies' product names or trademarks are used herein for identification purposes only and belong to their respective companies.
-
Page 3: First Things First
First things first We would like to thank you for making the Aspire series of notebook computers your choice for meeting your mobile computing needs. Your guides To help you use your Aspire, we have designed a set of guides: First off, the Just for Starters... -
Page 4: Taking Care Of Your Computer
• Use the power button Note: You can also use the power button to perform power management functions. See "Moving around" on page 39 of the AcerSystem User's Guide. • Use the customized functions for power management You can also shut down the computer by closing the display cover, or by pressing the sleep hotkey <Fn>... -
Page 5: Taking Care Of Your Battery Pack
FCC certification and your warranty. To prevent radio interference to the licensed service, this device is intended to be operated indoors, and installation outdoors is subject to licensing. For more information about our products, services, and support information, please visit our website: http://global.acer.com. -
Page 6: Table Of Contents
Ejecting the optical (CD or DVD) drive tray 17 Using a computer security lock Audio Adjusting the volume Using the system utilities Acer eManager Acer GridVista (dual-display compatible) Launch Manager Frequently asked questions Requesting service International Travelers Warranty (ITW) Before you call... - Page 7 Acer Arcade (for selected models) Arcade hotkeys Finding and playing content Settings Arcade controls Navigation controls Player controls Cinema DVD settings Album Slideshow settings Video Playing a video file Video authoring Music Burner Copy — Back up your CD/DVD collection Audio —...
- Page 8 PC Card slot BIOS utility Boot sequence Enable disk-to-disk recovery Password Using software Playing DVD movies Power management Acer eRecovery Create backup Restore from backup Create factory default image CD Re-install bundled software without CD Change password Troubleshooting Troubleshooting tips...
- Page 9 FCC notice Modem notices Important safety instructions...
-
Page 11: An Aspire Tour
An Aspire tour After setting up your computer as illustrated in the Just for Starters... poster, let us show you around your new Aspire computer. Front view Item Display screen Power button Microphone Keyboard Touchpad Description Also called Liquid-Crystal Display (LCD), displays computer output. -
Page 12: Closed Front View
Item Click buttons (left, center and right) Launch keys Status indicators Palmrest Closed front view Icon Item Speakers Bluetooth communication button/indicator Wireless communication button/indicator Line-in/mic-in jack Speaker-out/line-out/ headphone jack Battery indicator Description The left and right buttons function like the left and right mouse buttons;... -
Page 13: Left View
Icon Item Power indicator Latch Left view Icon Item Ventilation slots S-video/TV-out port IEEE 1394 port 3 USB 2.0 ports Infrared port PC Card slot 6-in-1 card reader PC Card slot eject button Description Lights when the computer is on. Locks and releases the lid. -
Page 14: Right View
Right view Item Optical drive eject button Ejects the optical drive tray from the drive. Optical disk access indicator Optical drive Note: The slot-load optical drive is only available on selected models. Rear view Icon Item Security keylock Power jack Modem jack (RJ-11) Network jack USB 2.0 port... -
Page 15: Base View
Icon Item External display port Connects to a display device Ventilation slots Base view Item Description Wireless LAN bay Houses the computer's wireless LAN. Battery lock Locks the battery in place. Battery release Releases the battery for removal. latch Battery bay Houses the computer's battery pack. -
Page 16: Specifications
Specifications Operating Microsoft system Microsoft Microsoft Microsoft Microsoft Microsoft Platform Aspire 3020 Series • • Aspire 5020 Series • • ATI RS480M and SB400 chipset System memory 256/512 MB of DDR333 memory, upgradeable to 2 GB using two soDIMM modules... - Page 17 LAN: gigabit Ethernet (for selected models); Wake-on-LAN ready WLAN (manufacturing option): integrated 802.11b/g dual-mode (for selected models), or 802.11a/b/g dual-band tri-mode Wi-Fi CERTIFIED models); Acer SignalUp wireless technology support WPAN (manufacturing option): integrated Bluetooth Software Acer Launch Manager Acer eManager (ePresentation/eRecovery/eSettings)
- Page 18 I/O interface Four USB 2.0 ports IEEE 1394 port Ethernet (RJ-45) port Modem (RJ-11) port External display (VGA) port S-video/TV-out port Microphone/line-in jack Headphones/speaker/line-out port Infrared (FIR) port Type II PC Card slot 6-in-1 card reader DC-in jack for AC adaptor Security Kensington lock slot BIOS user and supervisor passwords...
-
Page 19: Indicators
Indicators The computer has four easy-to-read status indicators on the upper-right above the keyboard, and four on the front panel. The power, battery, and wireless communication status indicators are visible even when the LCD display is closed. Icon Function Description Caps Lock Lights up when Caps Lock is activated. -
Page 20: Launch Keys
" and one user-programmable button. Press " " to run the Acer eManager. Please see "Acer eManager" on page 19. The mail and Web buttons are pre-set to email and Internet programs, but can be reset by users. To set the Web browser, mail and programmable keys, run the Acer Launch Manager. -
Page 21: Touchpad
Touchpad The built-in touchpad is a pointing device that senses movement on its surface. This means the cursor responds as you move your finger across the surface of the touchpad. The central location on the palmrest provides optimum comfort and support. Touchpad basics The following items show you how to use the touchpad: •... - Page 22 Right Function Left button (1) button (4) Execute Quickly click twice. Select Click once. Drag Click and hold, then use finger on the touchpad to drag the cursor. Access Click once. context menu Scroll Note: Keep your fingers dry and clean when using the touchpad. Also keep the touchpad dry and clean.
-
Page 23: Using The Keyboard
Using the keyboard The keyboard has full-sized keys and an embedded keypad, separate cursor keys, two Windows keys and 12 function keys. Lock keys and embedded numeric keypad The keyboard has three lock keys which you can toggle on and off. Lock key Description Caps Lock... -
Page 24: Windows Keys
Windows keys The keyboard has two keys that perform Windows-specific functions. Description Windows Pressed alone, this key has the same effect as clicking on the Windows Start button; it launches the Start menu. It can also be used with other keys to provide a variety of functions: <... - Page 25 <Fn> + < ← > Brightness down Description Displays help on hotkeys. Launches Acer eSettings in Acer eManager. See "Acer eManager" on page 19. Launches the Power Scheme window. Puts the computer in Sleep mode. Switches display output between the display screen, external monitor (if connected) and both.
-
Page 26: Special Keys
Special keys You can locate the Euro symbol and the US dollar sign at the upper-center and/ or bottom-right of your keyboard. To type: The Euro symbol Open a text editor or word processor. Either directly press the <Euro> key at the bottom-right of the keyboard, or hold <Alt Gr>... -
Page 27: Ejecting The Optical (Cd Or Dvd) Drive Tray
Ejecting the optical (CD or DVD) drive tray To eject the optical drive tray when the computer is turned on, press the drive eject button. When the power is off, you can eject the drive tray by using the emergency eject hole. -
Page 28: Using A Computer Security Lock
Using a computer security lock A security keylock notch, located on the rear of the computer, lets you connect a Kensington-compatible computer security lock. Wrap the computer security lock cable around an immovable object such as a table or handle of a locked drawer. Insert the lock into the notch and turn the key to secure the lock. -
Page 29: Using The System Utilities
Using the system utilities Acer eManager The innovative Acer eManager software is designed for easy access to frequently used functions. Press " interface, which features three main settings: Acer ePresentation, Acer eRecovery and Acer eSettings. To set the " " key, see "Launch keys" on page 10. -
Page 30: Acer Gridvista (Dual-Display Compatible)
Acer GridVista is a handy utility that offers four pre-defined display settings so you can view multiple windows on the same screen. To access this function, please go to Start, All Programs and click on Acer GridVista. You may choose any one of the four display settings indicated below:... -
Page 31: Launch Manager
Enjoy the convenience of a well-organized desktop. Note: Please ensure that the resolution setting of your second monitor is set to the manufacturer's recommended value. Launch Manager Launch Manager allows you to set the four launch keys located above the keyboard. -
Page 32: Frequently Asked Questions
Frequently asked questions The following is a list of possible situations that may arise during the use of your computer. Easy solutions are provided for each one. I pressed the power button and opened the display, but the computer does not start or boot-up. Look at the power indicator: •... - Page 33 No audio is heard from the computer. Check the following: • The volume may be muted. In Windows, look at the volume control (speaker) icon on the taskbar. If it is crossed-out, click on the icon and deselect the Mute option. •...
-
Page 34: Recovery Cds
It is important to back up all data files before using this option. Before performing a restore operation, please check the BIOS settings. Check to see if Acer disk-to-disk recovery is enabled or not. Make sure the D2D Recovery setting in Main is Enabled. -
Page 35: Requesting Service
Restart the system. While the Acer logo is showing, press <Alt> + <F10> at the same time to enter the recovery process. Refer to the on-screen instructions to perform system recovery. Important: This feature occupies 2 to 3 GB in a hidden partition on your hard drive. - Page 36 You are required to provide the following information: Name: _____________________________________________ Address: ___________________________________________ Telephone number: _________________________________ Machine and model type: ____________________________ Serial number: ______________________________________ Date of purchase: ___________________________________...
-
Page 37: Acer Arcade (For Selected Models)
Acer Arcade (for selected models) Acer Arcade is an integrated player for music, photos, DVD movies and videos. To watch or listen, click a content button (e.g., Music, Video, etc.) on the Arcade home page. • Cinema — Watch DVDs or VCDs •... -
Page 38: Arcade Hotkeys
Arcade hotkeys When running in the Windows environment, the key combinations listed below are available to control and fine-tune the features and settings of Acer Arcade. Hotkey Function <Fn> + <F1> Online help menu <Fn> + <F3> Acer ePowerManagement with battery information <Fn>... -
Page 39: Finding And Playing Content
Settings There are settings in Acer Arcade that allow you to fine tune its performance to your machine and your personal preferences. The Settings page is reached by the Advanced Settings button on the Home page. -
Page 40: Navigation Controls
Cinema If your computer came with a DVD drive, you can play movies from DVDs and Video CDs (VCDs) with the Cinema function of Acer Arcade. This player has the features and controls of a typical DVD player. When you insert a disk into the DVD drive, the movie begins playing automatically. -
Page 41: Dvd Settings
"Vivid," "Bright" and "Theater" add enhanced color to the video display. • Acer ClearVision is a video enhancement technology that detects video content and dynamically adjusts the brightness/contrast/saturation levels so that you do not need to change the color settings if the movie you are watching contains scenes that are overly dark or too bright. -
Page 42: Album
Album Acer Arcade lets you view digital photos individually or as a slideshow, from any available drive on your computer. Click the Album button on the Arcade Home page to show the Album main page. The content area on the right shows both individual pictures and folders. Click... -
Page 43: Slideshow Settings
To view a slideshow, open the folder containing the pictures you wish to view, then click Play slideshow. The slideshow is played full-screen. Use the pop-up control panel to control the slideshow. To rotate a picture in full-screen, click Rotate right or Rotate left. You can also view a single picture by clicking on it. -
Page 44: Video Authoring
Video authoring Click the Video Authoring button to open the PowerProducer program, which allows you to finalize your digital video productions and burn them to disk. Before you produce your movie using PowerProducer, first gather (or create) its component parts: video clips, photos, and background music. You may collect raw footage yourself with a camcorder or other recording device, or you may simply use files that you have on hand;... -
Page 45: Burner
Burner NTI CD/DVD-Maker simplifies today's digital lifestyle by providing an easy and complete solution for recording data, audio, photos or video. Now you can burn and share anything on CD/DVD — your data, music, photos or videos — faster and easier than ever before. Copy Back up your CD/DVD collection —... -
Page 46: Instant Replay
The Recorded TV option allows you to view files that you have recorded from the TV. See Recorded TV. The Schedule option lets you set TV recording schedules for later viewing. See Scheduling Recordings. The Settings button opens a page containing TV settings. See TV settings. The TV preview option permits you to preview available TV channels. -
Page 47: Scheduling Recordings
Scheduling recordings To set a TV recording schedule, click Schedule, then New schedule. In the page that opens, select the Channel you want to record and the scheduling frequency. Set the Starting date, Starting time, and Ending time of the program you want to record. - Page 48 The recording quality option allows you to set the quality of video recorded from the TV. Selecting a higher quality results in a larger recorded file when recording TV shows. The Audio source option allows you to select your audio input source from a list of available sources.
-
Page 49: Taking Your Notebook Pc With You
Taking your notebook PC with you This section gives you tips and hints to consider when moving around or traveling with your computer. Disconnecting from the desktop Follow these steps to disconnect your computer from external accessories: Save any open files. Remove any media, floppy disks or compact disks from the drive(s). -
Page 50: What To Take To Short Meetings
Note: If the Sleep indicator is off, the computer has entered Hibernation mode and is turned off. If the power indicator is off but the Sleep indicator is on, the computer has entered Sleep mode. In both cases, press and release the power button to turn the computer back on. -
Page 51: What To Take With You
What to take with you Unless you have some items at home, take the following items with you: • AC adaptor and power cord • The printed User's Guide Special considerations Follow these guidelines to protect your computer while traveling to and from work: •... -
Page 52: What To Take With You
What to take with you Take the following items with you: • AC adaptor • Spare, fully-charged battery pack(s) • Additional printer driver files if you plan to use another printer Special considerations In addition to the guidelines for taking the computer home, follow these guidelines to protect your computer while traveling: •... -
Page 53: Special Considerations
Special considerations Follow the same special considerations as when traveling with the computer. In addition, these tips are useful when traveling internationally: • When traveling in another country, check that the local AC voltage and the AC adaptor power cord specifications are compatible. If not, purchase a power cord that is compatible with the local AC voltage. -
Page 54: Entering Passwords
• Password on Boot secures your computer against unauthorized use. Combine the use of this password with password checkpoints on boot-up and resume from Hibernation for maximum security. Important! Do not forget your Supervisor Password! If you forget your password, please get in touch with your dealer or an authorized service center. -
Page 55: Expanding Through Options
Expanding through options Your notebook PC offers you a complete mobile computing experience. Connectivity options Ports allow you to connect peripheral devices to your computer as you would with a desktop PC. For instructions on how to connect different external devices to the computer, read the following section. -
Page 56: Built-In Network Feature
Built-in network feature The built-in network feature allows you to connect your computer to an Ethernet-based network. To use the network feature, connect an Ethernet cable from the network jack on the left hand side of the computer to a network jack or hub on your network. -
Page 57: Universal Serial Bus (Usb)
Universal Serial Bus (USB) The USB 2.0 port is a high-speed serial bus which allows you to connect USB peripherals without taking up precious system resources. IEEE 1394 port The computer's IEEE 1394 port allows you to connect to an IEEE 1394- compatible device like a video camera or digital camera. -
Page 58: Pc Card Slot
PC Card slot The Type II PC Card slot of the computer accepts PC Cards that enhance the usability and expandability of the computer. These cards should have a PC Card logo on them. PC Cards (formerly PCMCIA) are add-on cards for portable computers, giving you expansion possibilities long afforded by desktop PCs. -
Page 59: Bios Utility
Reinstall the battery pack, and reconnect the AC adaptor. Turn on the computer. The computer automatically detects and reconfigures the total memory size. Please consult a qualified technician or contact your local Acer dealer. BIOS utility The BIOS utility is a hardware configuration program built into your computer's BIOS. -
Page 60: Enable Disk-To-Disk Recovery
Enable disk-to-disk recovery To enable disk-to-disk recovery (hard disk recovery), activate the BIOS utility, then select Main from the categories listed at the top of the screen. Find D2D Recovery at the bottom of the screen and use the <F5> and <F6> keys to set this value to Enabled. -
Page 61: Power Management
Note: To change the region code, insert a DVD movie of a different region into the DVD drive. Please refer to the online help for more information. Power management This computer has a built-in power management unit that monitors system activity. -
Page 62: Acer Erecovery
Acer eRecovery Acer eRecovery is a tool to quickly backup and restore the system. You can create and save a backup of the current system configuration to hard drive, CD or DVD. Acer eRecovery consists of the following functions: Create backup... -
Page 63: Restore From Backup
Press <Alt> + <F10> to open the Acer eRecovery utility. Enter the password to proceed. The default password is six zeros. In the Acer eRecovery window, select Recovery actions and click Next. Select the desired restore action and follow the onscreen instructions to complete the restore process. -
Page 64: Change Password
Select the desired driver/application and follow the instructions on screen to re-install. At first launch, Acer eRecovery prepares all the needed software and may take few seconds to bring up the software content window. Change password Acer eRecovery and Acer disk-to-disk recovery are protected by a password that can be changed by the user. -
Page 65: Troubleshooting
Troubleshooting This chapter shows you how to deal with common system problems. Read it before calling a technician if a problem occurs. Solutions to more serious problems require opening up the computer. Do not attempt to open the computer yourself; contact your dealer or authorized service center for assistance. - Page 66 If you still encounter problems after going through the corrective measures, please contact your dealer or an authorized service center for assistance. Some problems may be solved using the BIOS utility.
-
Page 67: Regulations And Safety Notices
Regulations and safety notices ENERGY STAR guidelines compliance As an ENERGY STAR partner, Acer Inc. has determined that this product meets the ENERGY STAR guidelines for energy efficiency. FCC notice This device has been tested and found to comply with the limits for a Class B digital device pursuant to Part 15 of the FCC rules. -
Page 68: Declaration Of Conformity For Eu Countries
Cet appareil numérique de la classe B est conforme a la norme NMB-003 du Canada. Declaration of Conformity for EU countries Hereby, Acer, declares that this notebook PC series is in compliance with the essential requirements and other relevant provisions of Directive 1999/5/EC. (Please visit http://global.acer.com/products/notebook/reg-nb/index.htm for complete documents.) -
Page 69: Modem Notices
Modem notices Notice for USA This equipment complies with Part 68 of the FCC rules. Located on the modem is a label that contains, among other information, the FCC Registration Number and Ringer Equivalence Number (REN) for this equipment. Upon request, you must provide this information to your telephone company. -
Page 70: Notice For Australia
List of applicable countries EU member states as of May 2004 are: Belgium, Denmark, Germany, Greece, Spain, France, Ireland, Italy, Luxembourg, the Netherlands, Austria, Portugal, Finland, Sweden, United Kingdom Estonia, Latvia, Lithuania, Poland, Hungary, Czech Republic, Slovak Republic, Slovenia, Cyprus and Malta. Usage allowed in the countries of European Union, as well as Norway, Switzerland, Iceland and Liechtenstein. - Page 71 Some parameters required for compliance with Telecom's Telepermit requirements are dependent on the equipment (PC) associated with this device. In order to operate within the limits for compliance with Telecom's specifications, the associated equipment shall be set to ensure that automatic calls to different numbers are spaced such that there is not less than 5 seconds between the end of one call attempt and the beginning of another.
-
Page 72: Important Safety Instructions
Important safety instructions Read these instructions carefully. Save them for future reference. Follow all warnings and instructions marked on the product. Unplug this product from the wall outlet before cleaning. Do not use liquid cleaners or aerosol cleaners. Use a water-moistened cloth for cleaning. -
Page 73: Laser Compliance Statement
If the product has been dropped or the case has been damaged. If the product exhibits a distinct change in performance, indicating a need for service. The notebook PC series uses lithium batteries. Replace the battery with the same type as the product's battery we recommend in the product specification list. -
Page 74: Lcd Pixel Statement
ADVARSEL: LASERSTRÅLING NAR DEKSEL ÅPNESSTIRR IKKE INN I STRÅLEN LCD pixel statement The LCD unit is produced with high-precision manufacturing techniques. Nevertheless, some pixels may occasionally misfire or appear as black or red dots. This has no effect on the recorded image and does not constitute a malfunction. - Page 75 European Union (EU) This device complies with the essential requirements of the European Council Directives listed below: 73/23/EEC Low Voltage Directive EN 60950 • 89/336/EEC Electromagnetic Compatibility (EMC) Directive • EN 55022 • EN 55024 EN 61000-3-2/-3 • 99/5/EC Radio & Telecommunications Terminal Equipment (R&TTE) Directive Art.3.1a) EN 60950 •...
-
Page 76: The Fcc Rf Safety Requirement
LAN Mini PCI Card built in to the screen section and all persons. Note: The Acer wireless Mini PCI adaptor implements a transmission diversity function. The function does not emit radio frequencies simultaneously from both antennas. One of the antennas is selected automatically or manually (by users) to ensure good quality radiocommunication. - Page 77 An improper installation or unauthorized use may cause harmful interference to radio communications. Also any tampering of the internal antenna will void the FCC certification and your warranty. Canada - Low power license-exempt radio communication devices (RSS-210) Common information Operation is subject to the following two conditions: 1.
-
Page 78: Declaration Of Conformity
Notebook personal computer MS2171 Aspire 302xxx and Aspire 502xxx Aspire 302xxx and Aspire 502xxx ("x" = 0 - 9, a - z, or A - Z) Acer America Corporation 2641 Orchard Parkway San Jose, CA 95134 Mr. Young Kim 408-922-2909... -
Page 79: Declaration Of Conformity For Ce Marking
Declaration of Conformity for CE Marking Name of manufacturer: Beijing Acer Information Co., Ltd. Address of Huade Building, No.18, ChuangYe Rd. manufacturer: ShangDi Zone, HaiDian District Beijing PRCE marking Contact person: Mr. Easy Lai Tel: 886-2-8691-3089 Fax: 886-2-8691-3000 E-mail: easy_lai@acer.com.tw... - Page 80 Index AC adapter caring for audio adjusting the volume troubleshooting battery pack caring for BIOS utility brightness hotkeys caps lock on indicator care AC adapter battery pack computer CD-ROM ejecting ejecting manually troubleshooting cleaning computer computer bringing to meetings caring for cleaning disconnecting features...
- Page 81 network Notebook Manager hotkey num lock on indicator numeric keypad embedded password types PC Card ejecting inserting ports printer troubleshooting problems CD-ROM display keyboard printer startup troubleshooting questions setting location for modem use safety CD or DVD FCC notice general instructions modem notices scroll lock security...
Need help?
Do you have a question about the Aspire 3020 Series and is the answer not in the manual?
Questions and answers