Advertisement
Smart Hub Self-Install Guide
Pre-Install Check List
•
ADC-SG130Z Smart Hub
•
12 VDC power adapter
•
Ethernet cable
•
Internet connection and an open Ethernet port
•
A computer, tablet, or smartphone with an internet connection
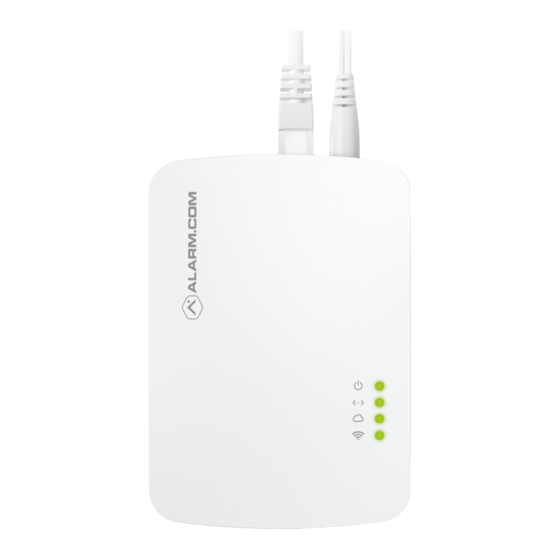
Smart Hub Features
1.
Power LED
2. Data LED
3. Communication LED
4. WiFi LED
5. Z-Wave LED
1
2
3
4
5
6. Reset Button (Pinhole)
7.
WPS Button
8. Z-Wave Button
1
6
7
8
9
10
9. Power Input
10. Ethernet Port (RJ-45)
Advertisement
Table of Contents

Summary of Contents for EastLink ADC-SG130Z
- Page 1 Smart Hub Self-Install Guide Pre-Install Check List • ADC-SG130Z Smart Hub • 12 VDC power adapter • Ethernet cable • Internet connection and an open Ethernet port • A computer, tablet, or smartphone with an internet connection Smart Hub Features 9.
- Page 2 Set Up the Smart Hub Connect the Smart Hub to Ethernet cable. Connect the Ethernet cable to port on the back of the modem. Plug in the power cord to the Smart Hub and power supply. Wait until all lights are solid on the Smart Hub – please allow up to 5 minutes as the Smart Hub may need to complete a firmware update.
- Page 3 • Flashing – WPS mode activated Z-Wave • Off – normal operation • Flashing (slowly) – in add mode • Flashing (quickly) – adding new device • Solid (15 seconds) – device added • Flashing (slowly, 15 seconds) – device removed eastlink.ca...
Need help?
Do you have a question about the ADC-SG130Z and is the answer not in the manual?
Questions and answers