Advertisement
Available languages
Available languages
Quick Links
Advertisement

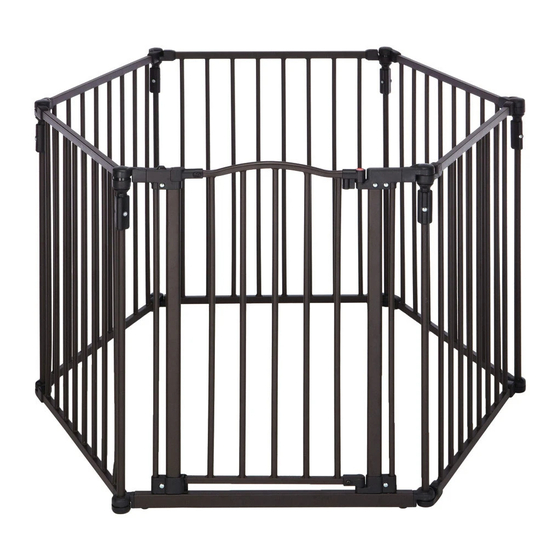
Summary of Contents for NORTH STATES 4936
- Page 2 Floor Spacer D Template To ensure safe op on, add onal or replacement parts should be obtained only from North States or its authorized distributors. Contact inform on appears on the cover of these in ons. Replacement parts can be ordered at www.northstatesind.com...
- Page 3 Figure 1 Figure 2 Step Unfold the -in-1 Superyard. Step Pos on and adjust the se ons to a hexa n. Turn se ons to ali n hexa nal mark with arrow on opposite hin e (see Fi ure 2). Note The Superyard should be placed on a t surface.
- Page 4 Figure 5A Figure 5B Step Insert the al bar into recess of lower hin e mount. Press “A” down and slide it into upper hin e, as shown in Fi ure Note When set up as an enclosure, you will have one extra ve bar.
- Page 5 Figure 7 Step On the end panels, remove the ve bars. Turn clockwise to loosen the ve al bar, then pull down to remove. Note: To repos on the panel with the door, simply follow the dire ons to set up the Superyard as an enclosure.
- Page 6 Wall ttings - A side Wall ttings - B side Step Insert the ve al bars Figure 9A in the upper hin e housin and upper hin e holder, rota n the hand ps un they are hand- ht. Step To secure te as a barrier,...
- Page 7 Use a so cloth or spon e to avoid scratches. Never use solvents or chemicals to clean the Superyard. Distributed exclusively in the United States by North States Industries, Inc. 5455 Hi hway 169 N Plymouth, MN 55442 www.northstatesind.com...
- Page 8 Productos de calidad para su estilo de vida INSTRUCCIONES PARA EL MODELO 4936 IMPORTANTE: ¡CONSERVE COMO REFERENCIA FUTURA! Para obtener consejos útiles e instrucciones, visite nuestro sitio web: www.northstatesind.com, o Comuníquese con nuestro Departamento de Atención al Cliente por correo electrónico: CustomerService@northstatesind.com...
- Page 9 IMPORTANTE: Conserve este folleto para referencias futuras. Léalo detenidamente. Lea todas las instrucciones antes de armar e insta lar este producto. Si vende o regala esta unidad, asegúrese de entregar al nuevo propietario estas instrucciones. Se lo agradec emos. ADVERTENCIA •...
- Page 10 Montaje como un cercado Figura 1 Figura 2 superficie plana. Figura 3 Figura 4 Tapa del orificio entre sí, levante ver�calmente un conectar. Gírelas en sen�do para uso futuro como horario para aflojarlas y �re de barrera.
- Page 11 Figura 5A Figura 5B la barra ver�cal en la cavidad del montaje de la Presione “A” hacia abajo y deslícela superior, como se muestra en la arme como un cercado, tendrá una barra ver�cal adicional. Figura 5C Figura 6 fijar la puerta como un cercado, Ármela adecuadamente como un cercado.
- Page 12 Figura 7 ver�cales. Gírelas en sen�do horario para aflojar la barra ver�cal, Nota: Superyard como un cercado. Seleccione y desconecte superficie. IN E Alojamiento de IN E F L O F L O de pared A, B, C sobre la pared con los tornillos incluidos. Acoplamientos Acoplamientos de pared–C...
- Page 13 Figure 9A ver�cales en el alojamiento de la como una barrera, ajuste cada barra ver�cal en sen�do an�horario (ajuste con la en sen�do horario antes de doblar la Superyard para su almacenamiento. 10A. Presione el botón de liberación. 10B. Levante el panel de la puerta hacia arriba. 10C. Abra la puerta. Figura 10A Caracterís�ca “Stay-Open”...
- Page 14 (12D). Alojamiento del de la puerta Cuidado LIMPIEZA Distribuido exclusivamente en los Estados Unidos por North States Industries, Inc. 5455 Hi hway 169 N Plymouth, MN 55442 www.northstatesind.com Fabricado en China Rev 3/2021...


