Table of Contents
Advertisement
Available languages
Available languages
Quick Links
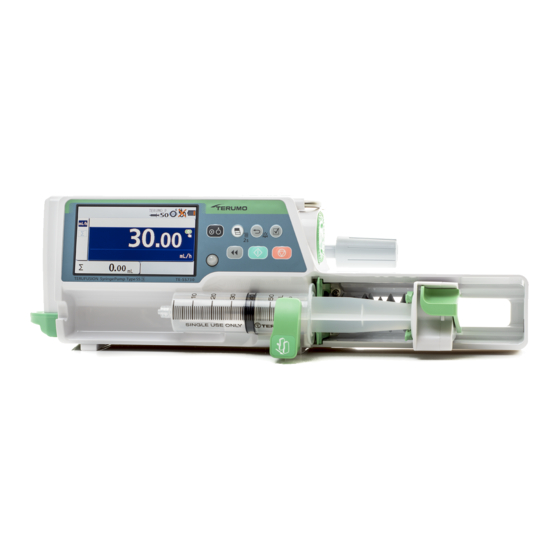
Bơm tiêm điện loại SS3
TE-SS730/TE-SS830
Đặt hướng dẫn sử dụng này ở vị trí thuận tiện để sử dụng khi cần. Đọc kỹ hướng
dẫn trước khi sử dụng thiết bị và vận hành theo hướng dẫn. Tiến hành bảo trì và
kiểm tra để đảm bảo an toàn khi sử dụng và nâng cao tuổi thọ thiết bị.
Hướng dẫn sử dụng
Digitally signed by CÔNG TY TNHH
THIẾT BỊ Y TẾ TERUMO VIỆT NAM
DN: c=VN, st=THÀNH PHỐ HÀ NỘI,
cn=CÔNG TY TNHH THIẾT BỊ Y TẾ
TERUMO VIỆT NAM,
0.9.2342.19200300.100.1.1=MST:01058
81933
Date: 2021.08.06 15:11:34 +07'00'
Adobe Acrobat version: 2021.005.20060
2020-04
Advertisement
Chapters
Table of Contents

Subscribe to Our Youtube Channel
Summary of Contents for Terumo TERUFUSION TE-SS730
- Page 1 Digitally signed by CÔNG TY TNHH THIẾT BỊ Y TẾ TERUMO VIỆT NAM DN: c=VN, st=THÀNH PHỐ HÀ NỘI, cn=CÔNG TY TNHH THIẾT BỊ Y TẾ TERUMO VIỆT NAM, 0.9.2342.19200300.100.1.1=MST:01058 81933 Date: 2021.08.06 15:11:34 +07'00' 2020-04 Adobe Acrobat version: 2021.005.20060 Bơm tiêm điện loại SS3...
-
Page 2: Table Of Contents
Đọc kỹ hướng dẫn sử dụng này để hiểu đầy đủ về sản phẩm và đảm bảo sử dụng an toàn. Để được giải thích về việc giới thiệu sản phẩm này, hãy tham khảo ý kiến của các kỹ thuật viên TERUMO. Tiến hành các buổi huấn luyện an toàn cho sản phẩm này trước khi sử... -
Page 3: Mục Đích, Tổng Quan Và Đặc Điểm Sản Phẩm
, tốc độ truyền lớn hơn thể tích dịch định truyền* và hoàn tất tiêm truyền* : Chỉ với TE-SS830. Liên hệ với kỹ thuật viên của Terumo : Chỉ khi chức năng cài đặt thể tích dịch định truyền được kích hoạt (Mặc định: không kích hoạt) •... -
Page 4: Mô Tả Thành Phần
Mô tả bộ phận Sơ đồ bên ngoài Mặt trước Màn hình LCD ● ● Bảng điều khiển ● Tay cầm Giữ thân máy chính. ● Núm xoay ● Khe Đặt tốc tộc truyền, thể tích truyền, trọng lắp tai xi-lanh lượng... -
Page 5: Bảng Điều Khiển
Mô tả bộ phận Bảng điều khiển ● Phím lựa chọn hiển thị Phím quay lại/ tắt tiếng ● ● Phím nguồn ● Phím xác nhận ● Phím ngừng Stop ● Đèn chỉ thị hoạt động ● Phím khởi động Start ●... -
Page 6: Mô Tả Màn Hình
Mô tả bộ phận Mô tả màn hình Lưu ý • Hướng dẫn sử dụng này mô tả cho model TE-SS830. Tuy nhiên, màn hình và sơ đồ danh mục của mọi model là như nhau Màn hình tốc độ Hiển thị... - Page 7 Mô tả bộ phận Hiển thị các biểu thị cảm biến Hiển thị tình trạng Hiển thị tốc độ Bắt đầu Hiển thị các tab Sẵn sàng bolus Thể tích dịch đã tiêm Mô tả các biểu tượng Khi đã nối vào nguồn AC và sạc đầy (lit) Biểu tượng về...
- Page 8 Hiển thị khi tắt chuông cảnh báo Khi đã quá thời gian bảo dưỡng cài đặt Biểu tượng Bảo dưỡng Để cài đặt, liên hệ kỹ thuật viên Terumo Hiển thị đã quá thời gian bảo dưỡng cài đặt Khi có chuông báo động vấn đề ưu tiên cao (Màu nền: đỏ)
- Page 9 Mô tả bộ phận Hiển thị biểu tượng cảm biến Hiển thị khi vị trí lắp xi-lanh không đúng được phát hiện Xi-lanh lắp không đúng Hiển thị khi xi-lanh được phát hiện gần hết dịch Gần hết dịch Hiển thị...
- Page 10 Chế độ đa bước trội chế độ liều vượt trội.) Chế độ khởi động chậm (chỉ với TE-SS830 Chi tiết, vui lòng liên hệ kỹ chế độ liều kết ― thuật viên Terumo hợp (chỉ với TE- SS830)
- Page 11 (lên tới 10). Mạng tiếp tiếp LAN không dây TẮT/BẬT (chỉ với TE-SS830) Nếu cài đặt password, một số Chỉ có thể hiển thị menu tới KTV Terumo. chức năng đặc biệt sẽ được Password bảo vệ bằng password.
-
Page 12: Phụ Kiện Tiêu Chuẩn
• Khi sử dụng Bộ quản lý thư viện thuốc TERUFUSION và bộ phần mềm TERUFUSION , chắc chắn đã kiểm tra sự tương thích với các model máy được sử dụng. Về version, hãy liên hệ với KTV của Terumo. Nếu sử dụng version không chính xác, một số bộ... - Page 13 Hộp giao tiếp Hộp nguồn AC Giá đỡ máyTERUFUSION (Mở rộng) (TE-RS811) Lưu ý • Có thể kết nối lên tới 3 giá đỡ với nhau • Để kết nối giá đỡ, vui lòng liên hệ kỹ thuật viên Terumo.
-
Page 14: Thận Trọng
Biện pháp phòng ngừa Để đảm bảo sử dụng an toàn và chính xác thiết bị, vui lòng tuân thủ tất cả các biện pháp phòng ngừa sau đây. Nếu không tuân thủ các biện pháp phòng ngừa và sử dụng sai quy cách, hệ thống có thể gây thương tích hoặc làm hỏng thiết bị. Các biểu tượng được sử... - Page 15 Thận trọng Cảnh báo • Sản phẩm này không nên được sử dụng kết hợp với truyền tĩnh mạch. [1. Nếu sản phẩm này chịu tắc nghẽn đường truyền dưới thấp hơn so với kết nối với đường truyền tĩnh mạch, báo động tắc nghẽn sẽ không hoạt động. 2. Nếu bọt khí bị cuốn vào đường truyền dưới do hết đường truyền tĩnh mạch, thì...
- Page 16 động. Nếu có bất kỳ lỗi nào xảy ra, ngay lập tức ngừng sử dụng thiết bị và liên hệ với kỹ thuật viên dịch vụ được đào tạo của TERUMO. • Khi vận chuyển máy bơm đã được cố định với cọc truyền IV, không nắm tay cầm của máy bơm cũng như không gây áp lực từ...
- Page 17 Thận trọng Thận trọng • Thiết bị này chỉ nên được sử dụng với nguồn điện đủ. [Nếu nguồn điện không đủ, pin bên trong sẽ được sử dụng cho hoạt động, điều này có thể dẫn đến không có nguồn điện trong trường hợp khẩn cấp.] •...
-
Page 18: Bơm Tiêm Nhựa Tương Thích
• Chỉ sử dụng xi-lanh được chỉ định với khóa luer. • TERUMO không chịu bất cứ trách nhiệm nào về các lỗi dòng chảy do việc sửa đổi các thông số kỹ thuật xi-lanh được giới thiệu bởi nhà sản xuất. -
Page 19: Chuẩn
Chuẩn bị Trước khi sử dụng bơm, cài đặt ngày giờ để lưu giữ liệu cho đúng (xem trang 79). Trước khi sử dụng, cẩn thận đọc mục "Các biện pháp phòng ngừa" và nhãn sản phẩm. Trước khi sử dụng bơm Cắm nguồn và... - Page 20 Chuẩn bị Lưu ý • Nếu giá kẹp ống bị tuột, hãy làm theo quy trình dưới đây để gắn nó vào. • Khi chèn rãnh của chốt kẹp vào lỗ ở phía sau, thực hiện trong khi kéo chốt kẹp về phía sau. Việc cố gắng chèn vào lỗ có thể làm hỏng rãnh.
-
Page 21: Lắp/ Tháo Kẹp Cọc Truyền
Chuẩn bị Lắp/ Tháo giá kẹp cọc truyền Lắp giá kẹp cọc truyền Kẹp cọc truyền có thể bị khóa ở vị trí gắn vào trên máy theo hướng như hình dưới đây Gắn giá vào các lẫy ở sau thân máy chính theo hướng Gắn vào cọc truyền theo hướng thẳng •... -
Page 22: Lắp/ Tháo Khỏi Cọc Truyền
Chuẩn bị Gắn/ Tháo máy khỏi cọc truyền Kẹp cọc truyền (dạng xoắn ốc) Vặn tay khóa kẹp cọc truyền để cố định bơm lên cọc • Tay khóa truyền IV một cách chắc chắn Lưu ý • Khi tháo bơm ra khỏi cọc truyền IV, giữ máy chính và vặn tay khóa ngược hướng theo hình hướng dẫn. -
Page 23: Kết Nối Nguồn Điện Ac
Chắc chắn đã cắm nguồn điện vào máy Cắm phích nguồn điện có nối đất. Lưu ý • Nếu dây nguồn không bao gồm theo máy, hãy liên hệ bộ phận kỹ thuật của Terumo để được cung cấp. Dây nguồn Kiểm tra Biểu tượng nguồn AC •... -
Page 24: Hoạt Động Bằng Pin Bên Trong
để thay thế pin.) • Nếu có bất cứ lỗi nào xảy tra trong khi sử dụng pin, hãy ngừng sử dụng ngay lập tức và liên hệ với kỹ thuật viên của Terumo. Lưu ý... -
Page 25: Quy Trình Hoạt Động
• Kiểm tra bất kỳ lỗi nào bằng cách tiến hành tự kiểm tra. Nếu thấy có lỗi, ngay lập tức ngừng sử dụng và liên hệ với kỹ thuật viên dịch vụ được đào tạo của TERUMO. Ấn giữ phím nguồn 1 hoặc hơn 1 giây cho tới khi màn hình •... -
Page 26: Lắp Bơm Tiêm
Quy trình hoạt động Lắp đặt xi-lanh 1) Khóa đường truyền và gắn xi-lanh chứa dịch truyền vào bơm bằng kỹ thuật vô trùng. Thận trọng • Chỉ sử dụng xi-lanh được chỉ định với khóa luer cho máy bơm. 2) Kéo kẹp giữ... - Page 27 Quy trình hoạt động 4) Trong khi giữ lẫy giữ đuôi xi-lanh, di chuyển bộ giữ đuôi xi-lanh Kẹp đuôi Bộ giữ đuôi cho đến khi nó gặp đuôi xi-lanh và sau đó nhả lẫy giữ đuôi xi-lanh. Nếu hướng dẫn sau đây trong hình bên dưới không hiển thị, thực Lẫy giữ...
- Page 28 Quy trình hoạt động 6) Xoay núm xoay hoặc ấn phím chọn hiển thị để chọn nhãn xi-lanh Phím chọn hiển thị Cảnh báo • Sau khi chọn loại xi-lanh, hãy kiểm tra lại các cài đặt xem đã được điều chỉnh chính xác chưa Lưu ý...
- Page 29 • Ngay cả sau khi xi-lanh được đặt ở vị trí thích hợp, nếu thấy có bất kỳ lỗi nào xảy ra, ngay lập tức ngừng sử dụng thiết bị và liên hệ với kỹ thuật viên dịch vụ được đào tạo của TERUMO.
-
Page 30: Cài Đặt Tốc Độ
Quy trình hoạt động Cài đặt tốc độ Cài đặt tốc độ theo giờ Sử dụng núm xoay để điều chỉnh tốc độ trên màn hình tốc độ. • Tăng giá trị Lưu ý • Lúc này, màn hình tốc độ sẽ có màu xanh đen (đã chọn). Giảm giá... -
Page 31: Cài Đặt Thể Tích Định Truyền Vtbi
tắt bật (ON) sẽ bật (ON) phím Phím • T VTBI • • Tab VTBI Màn hình VTBI Màn hình thời gian VTBI 2) Sử dụng núm xoay để điều chỉnh VTBI. Tăng giá trị Lưu ý • Khi tốc độ đã được đặt, màn hình thời gian VTBI sẽ chỉ thị thời gian còn lại và thời gian định truyền được tính toán từ... -
Page 32: Cài Đặt Thời Gian Vtbi
Tốc độ được tính toán lại từ thời gian VTBI và VTBI được chỉ định. Để kích hoạt tính năng này, hãy liên hệ với kỹ thuật viên dịch vụ được đào tạo của TERUMO. Việc bật (ON) VTBI để cũng sẽ bật (ON) thời gian VTBI. -
Page 33: Mồi
• Khi ấn giữ phím Purge, màn hình hiển thị thể tích dịch đã truyền sẽ chỉ ra thể tích đã được purge truyền nhanh. • Có thể đặt giới hạn trên của thể tích purge. Liên hệ với kỹ thuật viên dịch vụ được đào tạo của TERUMO. -
Page 34: Lắp Kim Tiêm
Quy trình hoạt động Lấy ven tĩnh mạch Kiểm tra • Bơm đã ngừng Lấy ven tĩnh mạch theo quy trình của bệnh viện Cảnh báo • Thiết bị này không có chức năng báo động nếu phát hiện việc truyền ngoài mạch do kim đã... -
Page 35: Bắt Đầu Truyền Dịch
Quy trình hoạt động Bắt đầu tiêm truyền Kiểm tra cài đặt tốc độ và ấn phím Start để bắt đầu • Nút khởi động truyền. Start Lưu ý • Có âm báo • Đèn chỉ thị hoạt động nhấp nháy xanh •... -
Page 36: Ngừng Truyền Dịch
Quy trình hoạt động Ngừng tiêm truyền 1) Ấn phím Stop để ngừng truyền Phím dừng Stop Notes • Có âm báo và đèn chỉ thị hoạt động tắt, sau đó máy ngừng hoạt động • Thể tích dịch đã truyền ngừng tăng Đèn chỉ... -
Page 37: Tắt Nguồn
Quy trình hoạt động Tắt nguồn Khi truyền xong, ấn giữ phím nguồn trong 3 giây hoặc hơn • để tắt nguồn. Phím nguồn Lưu ý • Trong khi giữ phím nguồn, sẽ có âm báo tắt nguồn, sau đó màn hình LCD hiển thị giá... -
Page 38: Quy Trình Hoạt Động Khác
Các quy trình hoạt động khác Xóa thể tích dịch đã truyền Có thể xóa thể tích dịch đã truyền 1) Ấn phím lựa chọn hiển thị nhiều lần tới khi màn hình thể tích dịch Phím chọn đã truyền được chọn. hiển thị... -
Page 39: Chức Năng Chờ
Lưu ý ▪ Thời gian standby mặc định là 24 giờ. Để thay đổi giá trị này, liên hệ KTV Terumo (thời gian có thể được thay đổi đến 24 giờ hoặc ít hơn) ▪ Quay núm xoay hoặc ấn bất cứ phím nào để ngừng chế độ standby... -
Page 40: Thay Bơm Tiêm Để Tiếp Tục Truyền Dịch
Các quy trình hoạt động khác Thay xi-lanh để tiếp tục truyền dịch 1) Ấn phím Stop để ngừng tiêm truyền. Phím Stop Lưu ý • Để biết chi tiết về cách ngừng tiêm truyền, xem trang 36. Khóa đường tiêm truyền. Tháo xi-lanh ra khỏi máy. -
Page 41: Chọn Chế Độ Liều (Chế Độ Trọng Lượng)
Có thể chọn cài đặt đơn vị liều. Lưu ý • Để tắt chọn đơn vị liều, hãy liên hệ với kỹ thuật viên dịch vụ được đào tạo của TERUMO. 1) Ấn giữ nút lựa chọn hiển thị trong 2 giây hoặc hơn để ngừng tiêm Nút chọn... - Page 42 • Nếu bạn muốn cài đặt bằng dịch pha loãng, liên hệ với kỹ thuật viên dịch vụ được đào tạo của TERUMO. • Nếu ấn phím Xác nhận sau khi cài khối lượng thuốc, vùng nhập sẽ chuyển sang lượng dịch.
- Page 43 Các quy trình hoạt động khác 7) Kiểm tra thông số rồi chọn “OK?” ấn phím xác nhận Phím xác nhận Lưu ý • Việc thay đổi thông số có thể được xác định bằng sự thay đổi màu nền trên màn hình xác nhận thông số.
- Page 44 • Tên bệnh nhân, ID bệnh nhân, Giới tính, Tuổi, Chiều cao và Cân nặng có thể có được qua giao tiếp với thiết bị bên ngoài. Để cài đặt, hãy liên hệ với kỹ thuật viên dịch vụ được đào tạo của TERUMO.
-
Page 45: Chọn Chế Độ Liều (Thư Viện Thuốc) (Chỉ Với Te-Ss830)
Sử dụng phần mềm chỉnh sửa chuyên dụng (Bộ quản lý thư viện thuốc TERUFUSION hoặc gói phần mềm TERUFUSION) để đăng ký. Để biết chi tiết, hãy liên hệ với kỹ thuật viên dịch vụ được đào tạo của TERUMO. - Page 46 2. Nếu bạn muốn nhập dịch pha loãng, liên hệ với kỹ thuật viên dịch vụ được đào tạo của TERUMO. * 1: Tư vấn lâm sàng là một chức năng để hiển thị một thông báo cảnh báo về thư viện đã chọn. Tin nhắn có thể được đăng ký...
- Page 47 Các quy trình hoạt động khác 7) Nếu cần, xoay núm xoay để cài đặt từng thông số (lượng Phím xác nhận thuốc, lượng dịch và cân nặng), rồi ấn phím xác nhận. Tăng giá trị Lưu ý • Khi đã đặt dịch pha loãng vào thư viện thuốc, không thể thay đổi thông số dịch pha loãng Giảm giá...
- Page 48 Các quy trình hoạt động khác 8) Kiểm tra thông số rồi chọn “OK?” ấn phím xác nhận Phím xác nhận Lưu ý • Khi nhấn phím Xác nhận, màn hình tốc độ sẽ xuất hiện. Khi ấn phím chọn hiển thị và chọn tab thông tin thông tin cài đặt sẽ...
- Page 49 • “Báo động áp lực” có sẵn trong thư viện như một chức năng an toàn. Xem “Quản lý Thư viện Thuốc TERUFUSION hoặc Gói Phần mềm TERUFUSION” hoặc liên hệ với kỹ thuật viên dịch vụ được đào tạo của TERUMO để biết chi tiết.
- Page 50 Các quy trình hoạt động khác 9) Xoay núm xoay để điều chỉnh liều lượng Tăng giá trị Giảm giá trị Tốc độ (mL/h) Liều lượng Núm xoay Lưu ý • Dải liều lượng có thể điều chỉnh Đơn vị liều = mL/h : 0.01 đến 150.00 mL/h Lưu ý...
- Page 51 Các quy trình hoạt động khác 10) Kiểm tra việc cài đặt tốc độ và ấn phím Start để bắt đầu tiêm Phím Start truyền dịch Lưu ý • Đèn báo hoạt động nhấp nháy màu xanh • Thể tích dịch đã tiêm truyền tăng và thời gian còn lại giảm. •...
-
Page 52: Các Chức Năng Đặc Biệt
Có thể chọn các cài đặt sau bằng cách thay đổi các cài đặt bên trong thiết bị. Xem xét tác động tiếp theo về hiệu suất sản phẩm, liên hệ với kỹ thuật viên dịch vụ được đào tạo của TERUMO. -
Page 53: Thay Đổi Cài Đặt Trên Menu
Các quy trình hoạt động khác Xem trang 10 và 11 để biết danh sách menu. Lưu ý • Trong khi thay đổi các cài đặt menu, việc ấn Phím Start sẽ không thực hiện truyền dịch • Có thể lựa chọn hoặc thay đổi áp lực báo tắc, khóa bàn phím, bolus, chế độ liều nâng cao và chế độ liều kết hợp trong Menu 1 trong khi đang tiêm truyền. -
Page 54: Áp Lực Phát Hiện Báo Tắc
Các quy trình hoạt động khác Áp lực phát hiện báo tắc Có thể điều chỉnh áp lực phát hiện báo tắc ở 10 mức Mức cài đặt Áp lực phát hiện báo tắc Mức cài đặt Áp lực phát hiện báo tắc ±... - Page 55 Các quy trình hoạt động khác 3) Quay núm xoay hoặc ấn phím lựa chọn hiển thị để lựa chọn tab Phím lựa chọn hiển thị áp lực báo tắc. Lưu ý • Màn hình cài đặt áp lực phát hiện tắc nghẽn xuất hiện Tab áp lực phát hiện tắc nghẽn Núm xoay 3) Ấn phím xác nhận...
- Page 56 Các quy trình hoạt động khác 5) Ấn phím xác nhận để xác nhận lựa chọn Phím xác nhận Lưu ý • Biểu tượng tắc hiển thị mức báo tắc được chọn Biểu tượng tắc nghẽn...
-
Page 57: Chức Năng Khóa Bàn Phím
Thay đổi cài đặt trên Menu Chức năng khóa bàn phím Thao tác bảng điều khiển có thể được vô hiệu hóa để tránh hoạt động vô ý trong khi ngừng truyền dịch hoặc đang truyền Kích hoạt chức năng khóa bàn phím Lưu ý... - Page 58 Thay đổi cài đặt trên Menu 4) Quay núm xoay hoặc ấn phím lựa chọn hiển thị để BẬT (ON) Phím lựa chọn hiển thị Lưu ý • Quay núm xoay hoặc ấn phím lựa chọn hiển thị để di chuyển khung màu trắng Núm xoay 5) Ấn phím xác nhận để...
- Page 59 Thay đổi cài đặt trên Menu Để bỏ chức năng khóa bàn phím Ấn giữ phím Lùi/tắt tiếng trong 2 giây hoặc hơn để hủy bỏ • Phím chức năng khóa bàn phím. lùi/ tắt tiếng Kiểm tra • Biểu tượng khóa bàn phím đã biến mất 2 giây hoặc hơn Lưu ý...
-
Page 60: Bolus
Thay đổi cài đặt trên Menu Truyền nhanh Bolus Có thể tiến hành truyền nhanh bolus khi đang hoặc đã ngừng tiêm truyền dịch. Có hai cách để chọn bolus thông qua menu hoặc ấn phím Purge và phím Lùi/ Tắt tiếng cùng lúc. Ngoài ra, mỗi khi phím Purge được ấn cùng lúc với phím Lùi/ Tắt tiếng, thì có thể chọn Bolus bằng ấn và... - Page 61 • Cài đặt tốc độ của bolus bằng ấn và giữ phím vẫn được duy trì và thực hiện cho lần bolus bằng ấn và giữ phím tiếp theo, tới khi tắt nguồn • Có thể cài đặt giới hạn trên của thể tích bolus. Để thay đổi nó, hãy liên hệ với kỹ sư của Terumo.
- Page 62 Thay đổi cài đặt trên Menu Bolus không ấn và giữ phím Việc cài đặt VTBI bolus và thời gian VTBI Bolus cho phép tự động tính toán tốc độ dòng chảy Bolus (mL/h) và thực hiện truyền dịch bolus mà không ấn và giữ phím Purge. (Chức năng Bolus không cần ấn và giữ phím) 1) Ấn và...
- Page 63 Thay đổi cài đặt trên Menu 5) Ấn phím xác nhận Phím xác nhận Lưu ý • Màn hình cài đặt giá trị bolus xuất hiện • Khi hiển thị màn hình tốc độ, thì màn hình bolus không ấn và giữ phím có thể được hiển thị...
- Page 64 Thay đổi cài đặt trên Menu 8) Quay núm xoay để cài đặt thời gian VTBI bolus hoặc tốc độ bolus Tăng giá trị Lưu ý • Thời gian VTBI bolus hoặc tốc độ bolus (mL/h) được tính toán từ Bolus VTBI, và được hiển thị.
- Page 65 Thay đổi cài đặt trên Menu 10) Việc truyền bolus kết thúc khi đạt đến giá trị VTBI đã đặt Kiểm tra • Màn hình quay lại hiển thị tốc độ khi đã đạt được giá trị VTBI và đã hoàn tất việc truyền nhanh bolus Lưu ý...
-
Page 66: Chế Độ Liều Nâng Cao (Chỉ Với Te-Ss830)
Thay đổi cài đặt trên Menu Chế độ liều nâng cao (chỉ với TE-SS830) Có thể chọn chế độ liều nâng cao từ ba chế độ trong bảng dưới đây tùy theo loại thuốc được chọn. Thư viện phải được đăng ký trước khi chọn chế... - Page 67 Thay đổi cài đặt trên Menu 1) Tuân thủ bước 1) đến 10) trong mục “Lựa chọn chế độ liều (Thư viện thuốc)”để lựa chọn tên thư viện, chỉ ra như "Drug2” trong ví dụ và đặt liều lượng 1 Lưu ý...
- Page 68 Thay đổi cài đặt trên Menu 5) Ấn phím xác nhận Phím xác nhận Lưu ý • Các chế độ liều nâng cao có sẵn được hiển thị 6) Quay núm xoay hoặc ấn phím lựa chọn hiển thị để lựa chọn chế Phím lựa chọn hiển thị...
- Page 69 Thay đổi cài đặt trên Menu 8) Quay núm xoay để nhập thông số và ấn phím xác nhận Tăng giá trị Lưu ý • Mỗi khi ấn phím Xác nhận, vùng nhập liệu sẽ chuyển sang vùng tiếp theo. •...
- Page 70 Thay đổi cài đặt trên Menu 11) Ấn phím Start Phím Start Lưu ý • Việc tiêm truyền đã bắt đầu và được thực hiện ở các cài đặt liều chỉ định. • Đèn báo hoạt động nhấp nháy màu xanh. •...
-
Page 71: Chức Năng Lịch Sử
Thay đổi cài đặt trên Menu Chức năng lịch sử Với chức năng lịch sử, lịch sử hoạt động (chẳng hạn như ngày tháng, thời gian, tốc độ được cài đặt, khi việc truyền dịch được bắt đầu hoặc dừng hoặc khi có báo động xảy ra) có thể được kiểm tra. Khả năng lưu trữ tối đa mới nhất là 10.000 sự... - Page 72 Thay đổi cài đặt trên Menu 4) Quay núm xoay hoặc ấn phím lựa chọn hiển thị để lựa chọn lịch Phím lựa chọn hiển thị sử hoạt động muốn tìm. Lưu ý • Xoay núm xoay hoặc ấn phím lựa chọn hiển thị để chuyển khung màu trắng sang mục lịch sử...
- Page 73 Thay đổi cài đặt trên Menu Màu sắc khu Tình trạng Ví dụ về lịch sử hoạt động vực dưới màn hoạt động hình LCD Hồng Lịch sự hoạt động trong khi ngừng tiêm Màu hồng Xanh dương Lịch sử hoạt động trong khi purge hoặc bolus (ấn hoặc không cần...
-
Page 74: Thay Đổi Âm Lượng
Thay đổi cài đặt trên Menu Thay đổi âm lượng Có thể cài đặt âm lượng chuông báo động, âm lượng bàn phím và báo động kết nối cáp nguồn ở 4 mức. Loại Cài đặt âm lượng Cài đặt mặc định Ghi chú... - Page 75 Thay đổi cài đặt trên Menu 4) Quay núm số hoặc ấn phím lựa chọn hiển thị để chọn mục cần Phím lựa chọn hiển thị thay đổi. núm xoay 5) Ấn phím xác nhận để xác nhận lựa chọn. Phím xác nhận Lưu ý...
- Page 76 Thay đổi cài đặt trên Menu 7) Ấn phím xác nhận để xác nhận lựa chọn. Phím xác nhận Kiểm tra • Âm lượng được chọn sẽ hiển thị 8) Ấn giữ phím lựa chọn hiển thị trong 2 giây hoặc hơn để quay về Phím lựa màn hình tốc độ.
-
Page 77: Thay Đổi Độ Sáng Màn Hình
Thay đổi cài đặt trên Menu Thay đổi độ sáng màn hình Có thể cài đặt độ sáng màn hình ở 5 mức (mặc định là ở mức 5) Sáng Tối 1) Ấn giữ phím Lùi/ Tắt tiếng và phím lựa chọn hiển thị trong 2 giây Phím lựa chọn hiển thị... - Page 78 Thay đổi cài đặt trên Menu 4) Quay núm xoay hoặc ấn phím lựa chọn hiển thị để lựa chọn độ Phím lựa chọn hiển thị sáng màn hình. Lưu ý • Quay núm xoay hoặc ấn phím lựa chọn hiển thị để di chuyển khung trắng •...
-
Page 79: Cài Đặt Ngày Giờ
Thay đổi cài đặt trên Menu Cài đặt ngày, giờ Ngày, giờ có thể được cài đặt gồm: năm, tháng, ngày, giờ, phút. 1) Ấn giữ đồng thời phím Lùi/ Tắt tiếng và phím lựa chọn hiển thị Phím lựa chọn hiển thị trong 2 giây hoặc hơn. - Page 80 Thay đổi cài đặt trên Menu 5) Ấn phím xác nhận. Phím xác nhận Lưu ý • Việc cài đặt ngày được xác nhận và giờ - phút được hiển thị ở màu xanh đậm (đã chọn) 6) Quay núm xoay thể thay đổi giờ. Tăng giá...
-
Page 81: Profile (Chỉ Với Te-Ss830)
Thay đổi cài đặt trên Menu Profile (chỉ với TE-SS830) Profile cho phép các loại thuốc được phân loại theo cách sử dụng của chúng và cần được đăng ký trong phần mềm thư viện thuốc. Việc chọn một Profile có thể giới hạn các loại thuốc có sẵn cho mỗi Profile cá nhân. Có thể đăng ký tối đa 30 Profile. Chỉ có thể chọn các Profile nếu thư... - Page 82 Thay đổi cài đặt trên Menu 4) Quay núm xoay hoặc ấn phím lựa chọn hiển thị để lựa chọn profile Phím lựa chọn hiển thị Lưu ý • Quay núm xoay hoặc ấn phím lựa chọn hiển thị để di chuyển sang khung trắng núm xoay 5) Ấn phím xác nhận để...
-
Page 83: Môi Trường Giao Tiếp (Chỉ Với Te-Ss830)
Để biết chi tiết về cách đăng ký cài đặt môi trường giao tiếp cho thiết bị bơm, hãy liên hệ với kỹ thuật viên dịch vụ được đào tạo của TERUMO. 1) Ấn giữ đồng thời phím Lùi/ Tắt tiếng và phím lựa chọn hiển thị... - Page 84 Thay đổi cài đặt trên Menu 4) Kiểm tra xem "Lựa chọn chế độ giao tiếp" đã được chọn chưa, Phím xác rồi ấn phím xác nhận nhận 5) Quay núm xoay hoặc ấn phím lựa chọn hiển thị để chọn môi Phím lựa chọn hiển thị...
- Page 85 Thay đổi cài đặt trên Menu Cài đặt BẬT/ TẮT mạng LAN 1) Thực hiện theo các bước từ 1) đến 3) của “Môi trường giao tiếp” (trang 83) để hiển thị màn hình cài đặt môi trường giao tiếp. 2) Quay núm xoay hoặc ấn phím lựa chọn hiển thị...
- Page 86 Thay đổi cài đặt trên Menu 6) Ấn giữ phím lựa chọn hiển thị trong 2 giây hoặc hơn để quay về Phím lựa màn hình tốc độ. chọn hiển thị 2 giây hoặc hơn...
-
Page 87: Chức Năng Giao Tiếp Ngoài
Các chức năng giao tiếp bên ngoài Tổng quan Sử dụng giao tiếp hồng ngoại (IrDA), giao tiếp ngoài (RS-232C) hoặc mạng LAN không dây để truyền dẫn tình trạng của bơm tới hệ thống mạng (ví dụ hệ thống theo dõi hoặc CIS). (Tình trạng của bơm không thể thay đổi từ hệ thống mạng.) Đảm bảo rằng hệ... - Page 88 • Tin nhắn được chỉ định (chức năng nhắn tin miễn phí) có thể được hiển thị trên thiết bị bơm thông qua giao tiếp. (Để biết chi tiết, hãy liên hệ với kỹ thuật viên dịch vụ được đào tạo của TERUMO.)
-
Page 89: Kết Nối Hệ Thống Mạng
Kiểm tra xem tất cả các thiết bị đã tắt nguồn chưa Kết nối dây cáp Bật nguồn thiết bị Ví dụ về kết nối cáp (For RS-232C) Hệ thống mạng Bơm Lưu ý • Terumo không đảm bảo việc kết nối này... - Page 90 để có cài đặt chính xác và chỉ cho phép quản trị viên hệ thống thực hiện cài đặt. Lưu ý • Terumo không đảm bảo việc kết nối này Quy trình truyền dẫn Khi hệ thống mạng gửi một lệnh (REQ: REQUEST) đến máy bơm, bơm phản hồi (REP: REPLY) cho lệnh. Bơm giao tiếp với hệ...
- Page 91 Các chức năng giao tiếp bên ngoài Gói <Định dạng gói> Sau đây cho thấy định dạng gói. Định dạng gói. Dữ liệu gói (XMLformat) CRC16 (Kích cỡ tùy ý) 0x02 (4byte) 0x03 (Dữ liệu gói và CRC16 sử dụng mã ASCII) •...
- Page 92 Các chức năng giao tiếp bên ngoài • Định dạng dữ liệu gói phản hồi Thông tin dưới đây sẽ chỉ ra định dạng dữ liệu gói phản hồi được sử dụng khi bơm phản hồi tới gói yêu cầu. Định dạng dữ...
- Page 93 Các chức năng giao tiếp bên ngoài • Kết quả thực hiện: Khi bơm nhận được lệnh yêu cầu và xử lý thành công, bơm sẽ gửi “0x00” chỉ thị thực hiện thành công Nếu lệnh yêu cầu không thực hiện được do lỗi, bơm sẽ gửi một giá trị giữa 0x11 và 0x15 như một kết quả thực hiện. Bảng dưới đây sẽ...
- Page 94 Các chức năng giao tiếp bên ngoài Mục Cỡ (Byte) Chi tiết Thông tin báo động b0 (đặt thấp) Báo động thông báo tắt máy Báo động ngắt kết nối Báo động hoàn tất việc truyền Báo động tắc nghẽn Báo động thân xi-lanh lắp không đúng Báo động đuôi xi-lanh lắp không đúng Báo động đặt bộ...
- Page 95 ấn và giữ phím Giá trị không hợp lệ (khi chức năng bị tắt): 0x000000 Số nhãn xi-lanh Số nhãn của xi-lanh được chọn Tổng số byte * Chi tiết, vui lòng liên hệ kỹ thuật viên của Terumo...
- Page 96 Các chức năng giao tiếp bên ngoài Định dạng của gói chuyển đổi và nhận Khi một hệ thống mạn giao tiếp với bơm, màn hình nhận được ID thiết bị từ việc nhận diện bơm của nó. Sau đó, màn hình theo dõi sẽ...
-
Page 97: Kết Nối Báo Gọi Y Tá
• Nếu kết nối với chuông báo hoặc đèn thay vì báo gọi y tá, nên sử dụng nguồn 112V DC, 1A hoặc ít hơn. Lưu ý • TERUMO không đảm bảo việc kết nối • Nếu có âm thanh báo động, thiết bị này sẽ gửi tín hiệu đến báo gọi y tá trong khoảng 5 giây. -
Page 98: Sau Sử Dụng
Nếu bạn tìm thấy bất kỳ hư hỏng hoặc trục trặc nào, ngay lập tức ngừng sử dụng máy bơm và liên hệ với kỹ thuật viên dịch vụ được đào tạo của TERUMO. -
Page 99: Làm Sạch Các Thành Phần
Sau sử dụng Làm sạch các bộ phận Sau khi sử dụng, làm sạch các bộ phận như hướng dẫn dưới đây Vệ sinh đầu nối AC Vệ sinh bên ngoài bơm và núm xoay Lau nhẹ bụi bẩn bằng tăm bông hoặc Lau bằng vải mềm ẩm (không ướt). - Page 100 Sau sử dụng Làm sạch kẹp cọc truyền Tháo kẹp cọc truyền khỏi bơm. Lau bằng vải mềm ẩm (không ướt). * Không sử dụng ethanol để làm sạch vỏ cao su ■ và các vị trí trượt như được chỉ thị bởi Thận trọng •...
-
Page 101: Lưu Trữ
Sau khi sử dụng Lưu trữ Sau khi kiểm tra máy bơm, lưu trữ nó trong một môi trường phù hợp với các điều kiện lưu trữ sau đây. Nhiệt độ: -20°C đến 45°C Độ ẩm: 10% to 95%RH (không ngưng tụ) Áp suất khí... -
Page 102: Bảo Dưỡng Và Kiểm Tra
* Tùy thuộc vào tần suất sử dụng và môi trường sử dụng mà thời gian thay thế cho từng bộ phận có thể thay đổi và việc thay thế các bộ phận khác so với thời gian thay thế được yêu cầu. Tham khảo ý kiến kỹ thuật viên của Terumo về sự cần thiết và thay thế. -
Page 103: Xử Lý Lỗi
Khi có báo động / lỗi, các yếu tố bên dưới có thể là nguyên nhân. Làm theo quy trình xử lý với từng cảnh báo / lỗi khi xảy ra. Thận trọng • Nếu lỗi vẫn tồn tại ngay cả khi đã áp dụng các biện pháp sau đây, vẫn nghi ngờ có lỗi. Liên hệ với kỹ thuật viên TERUMO để yêu cầu sửa chữa. - Page 104 Xử lý lỗi 7) Xác nhận và ấn phím Start Phím Start Kiểm tra lưu lượng, VTBI,… và tiến hành tiếp tục truyền dịch.
-
Page 105: Báo Động Ưu Tiên Cao
• Nếu sự cố vẫn tiếp diễn, hãy liên hệ với kỹ thuật • Đèn báo hoạt động: Nhấp nháy bộ phát hiện đuôi xi-lanh bị nghi viên dịch vụ được đào tạo của TERUMO để yêu cầu màu đỏ. ngờ. (Sau khi có báo động, sửa chữa. - Page 106 Xử lý lỗi Báo động bộ giữ đuôi xi-lanh lắp không đúng Sự cố Nguyên nhân Xử lý • Màn hình LCD: Màn hình báo • Bộ giữ đuôi xi-lanh đã bị tuột ra trong Lắp lại xi-lanh đúng cách. (Xem trang động bộ...
- Page 107 động thay đổi tùy theo sản phẩm • Đèn báo hoạt động: nháy đỏ. được sử dụng. Bảng dưới đây là một ví dụ. • Âm báo: Kích hoạt. * Khi sử dụng xi-lanh mới của TERUMO • Bơm: Dừng bơm 5 mL 10 mL...
- Page 108 • Nếu sự cố vẫn tiếp diễn, hãy liên hệ với kỹ thuật viên • Không có nguồn điện lưới • Đèn báo hoạt động: nháy đỏ. của TERUMO. • Lỗi pin • Âm báo: Kích hoạt. • Lỗi pin dự phòng hoặc •...
-
Page 109: Báo Động Ưu Tiên Trung Bình
• Chỉnh sửa các cài đặt đó và bắt đầu truyền dịch áp dụng cho chế độ liều • (Xem trang 66. Đối với cài đặt chế độ liều kết hợp, cao hoặc liều kết hợp. hãy liên hệ với kỹ thuật viên dịch vụ được đào tạo của TERUMO.) - Page 110 Xử lý lỗi Báo động chưa cài thể tích dịch định truyền VTBI Sự cố Nguyên nhân Xử lý • Màn hình LCD: Màn hình • Ấn phím Khởi động mà chưa • Cài đặt VTBI và nhấn phím Khởi động để bắt đầu báo động chưa cài đặt cài đặt VTBI truyền.
- Page 111 Xử lý lỗi Nhắc nhở ấn phím Start Sự cố Nguyên nhân Xử lý • Màn hình LCD: Màn hình • Thiết bị được để không trong • Nếu muốn trì hoãn hoạt động trong một thời gian, hãy nhắc nhở...
-
Page 112: Các Vấn Đề Khác
Xử lý lỗi Báo động lặp lại Sự cố Nguyên nhân Xử lý • Màn hình LCD: Màn hình báo • Hoạt động không được • Thực hiện các biện pháp khắc phục theo từng báo động. động tương ứng sẽ nhấp bắt đầu trong vòng 2 phút nháy /sáng lên (các màu nhấp sau khi tắt tiếng báo động... - Page 113 Sự cố Nguyên nhân Xử lý • Chỉ thị thời gian bảo trì • Đến hạn thực hiện • Liên hệ với Kỹ thuật viên của Terumo sáng lên bảo trì Chức năng phát hiện nguồn điện AC Sự cố...
- Page 114 • Biểu tượng cường độ tín hiệu • Máy bơm bị lỗi. • Liên hệ với kỹ thuật viên dịch vụ được đào tạo của TERUMO. (Màu = Xám, Không có thanh tín hiệu) nhấp nháy...
- Page 115 • Hiển thị không đều và âm báo • Máy bơm bị lỗi. • Liên hệ với kỹ thuật viên TERUMO để yêu cầu sửa chữa. • Nguồn tắt đột ngột. • Máy bơm bị lỗi.
-
Page 116: Thông Số Kỹ Thuật
Các xi-lanh được chỉ định tiệt trùng để sử dụng chung và các xi-lanh sẵn dịch được chỉ định (Xem trang 18.) Cỡ xi-lanh 5 mL, 10 mL, 20 mL, 30 mL, 50/60 mL Nhãn xi-lanh TERUMO hoặc các nhãn khác Chế độ liều mL/h μg/kg/min mg/kg/h Thư... - Page 117 được sử dụng với xi-lanh TERUMO 50/60 mL được sản xuất tại Philippines (TERUMO_P) với tốc độ dòng chảy là 1,00 mL / h trở lên (nhiệt độ môi trường: 23 ± 2 ° C) theo tiêu chuẩn IEC 60601-2-24: 2012 (EN 60601-2-24: 2015).)
- Page 118 Thông số kỹ thuật Các chức năng Chức năng cài đặt dải Dải cài đặt tốc độ có thể được kiểm soát trong "dài cài đặt tốc độ" được mô tả an toàn tốc độ B (giới hạn cho từng loại xi-lanh cứng) •...
- Page 119 Thông số kỹ thuật Các chức năng Chức năng giao tiếp Cho phép giao tiếp với hệ thống mạng để kết xuất trạng thái của máy bơm khác mạng LAN không dây (tốc độ , báo động, v.v.) qua mạng LAN không dây. (chỉ...
- Page 120 Thông số kỹ thuật Các chức năng Chức năng hiển thị Hiển thị thông tin thuốc như dịch pha loãng, thông tin bệnh nhân bao gồm khác thông tin thuốc / tên bệnh nhân, tuổi tác, giới tính, cân nặng, chiều cao, v.v. Dịch pha loãng bệnh nhân và...
- Page 121 MDD (Chỉ thị về trang thiết bị y tế) 93/42/EEC (Class IIb) Lưu ý • Nếu cáp nguồn AC không được cung cấp cùng thiết bị, vui lòng liên hệ với kỹ thuật viên của TERUMO để được cung cấp...
-
Page 122: Chủng Loại Sẵn Có
• Các quy trình thiết lập riêng biệt được yêu cầu đối với sản phẩm có kết hợp phích cắm điện áp không được liệt kê ở trên. • Nếu cáp nguồn AC không được cung cấp cùng thiết bị, vui lòng liên hệ với kỹ thuật viên của TERUMO để được cung cấp... -
Page 123: Đặc Tính Thiết Bị
Đặc tính thiết bị Dữ liệu thử nghiệm về các đặc tính về tốc độ dòng chảy và đặc tính về tắc nghẽn được trình bày dưới đây. Các thử nghiệm được tiến hành theo tiêu chuẩn IEC 60601-2-24: 2012 (EN 60601-2-24: 2015). Để biết chi tiết, tham khảo IEC 60601-2-24: 2012 (EN 60601-2-24: 2015). -
Page 124: Đặc Tính Về Tắc Nghẽn
Dữ liệu dưới đây là ví dụ điển hình đo được ở tốc độ 1 mL / h và 5 mL / h, với giá trị cài đặt áp lực tắc nghẽn ba mức (1, 6, 10), và xi-lanh TERUMO (50mL). Các giá trị đo được có thể khác nhau tùy thuộc vào điều kiện thử nghiệm. -
Page 125: Dành Cho Nhân Viên Y Tế
Dành cho nhân viên y tế Thông tin kỹ thuật EMC Thiết bị điện y tế đòi hỏi sự quan tâm đặc biệt liên quan đến EMC, và nó là cần thiết để cài đặt và sử dụng thiết bị phù hợp với thông tin EMC dưới đây Thận trọng •... - Page 126 Cho nhân viên y tế Bảng a) - Công bố của nhà sản xuất - phát xạ điền tự - cho tiêu chuẩn IEC 60601-1-2:2014 (EN 60601-1-2:2015) Công bố của nhà sản xuất - phát xạ điện từ Bơm tiêm điện TERUFUSION loại SS3 được chỉ định sử dụng trong môi trường điện từ chuyên biệt như dưới đây. Khách hàng hoặc người sử...
- Page 127 Cho nhân viên y tế Bảng c) - Mức độ kiểm tra miễn nhiễm với các trường xung quanh các thiết bị giao tiếp RF - đối với IEC 60601-1-2:2014 (EN 60601-1-2:2015) Mức độ kiểm tra miễn nhiễm với các trường xung quanh các thiết bị giao tiếp RF Bơm tiêm điện TERUFUSION loại SS3 được chỉ...
-
Page 128: Biểu Tượng
Biểu tượng Phần này mô tả các biểu tượng được sử dụng với bơm tiêm điện TERUFUSION loại SS3. Mô tả các biểu tượng Mô tả biểu Mô tả biểu Mô tả biểu Biểu tượng Biểu tượng Biểu tượng tượng tượng tượng “CE”... -
Page 129: Các Thông Tin Khác
Công bố đơn giản của EU về sự phù hợp (Chỉ thị về thiết bị vô tuyến, 2014/53 / Bằng văn bản này, TERUMO CORPORATION công bố rằng loại thiết bị vô tuyến Bơm tiêm loại SS3 tuân thủ Chỉ thị 2014/53 / EU. -
Page 130: Ghi Nhớ
Memo... - Page 131 Memo...
-
Page 132: Thông Tin Về Sản Phẩm Terumo
TERUMO EUROPE N.V. INTERLEUVENLAAN 40, 3001 LEUVEN, BELGIUM MADE IN JAPAN All brand names are trademarks or registered trademarks of TERUMO CORPORATION and their respective owners. ©TERUMO CORPORATION 2020-04-01 20A17 Diprivan is owned by or licensed to the Aspen group of companies. - Page 133 【Finalized】 2020-04 Syringe Pump Type SS3 TE-SS730/TE-SS830 Instruction Manual Store this instruction manual in a convenient location for future reference whenever necessary. Read the instructions carefully before using the product, and operate in accordance with instructions. Perform maintenance and inspections to ensure safe use and extend the life of this product.
- Page 134 Contents Read this instruction manual carefully to fully understand this product and ensure its safe use. For an explanation regarding the introduction of this product, consult with TERUMO trained service technicians. Conduct safety training sessions for this product before use.
-
Page 135: Purpose, Overview And Features Of The Product
Volume Judgment alarm* and Completion alarm* : TE-SS830 only. Contact TERUMO trained service technicians for details. : Only if the VTBI setting function is enabled (Default: disabled) • The Occlusion alarm detection sensitivity level can be changed according to the condition of use. -
Page 136: Parts Description
Parts Description Exterior Diagram Front view ● LCD ● Operation panel ● Handle Holds the pump main unit. ● Dial ● Slit Sets the flow rate, Accepts the flange dosage, weight, etc. of a syringe. Selects (Up/Down) the item in the menu. The increase/decrease range ●... -
Page 137: Operation Panel
Parts Description Operation Panel ● Display select switch ● Back/Mute switch ● Power switch ● Confirmation switch ● Stop switch ● Operation indicator ● Start switch ● Purge switch Name Function Turns the power ON/OFF. Power switch In the stop status, press and hold this switch to perform a rapid infusion. In the bolus (Hands On/Hands Free) mode, press or press and hold the switch to start the bolus infusion. -
Page 138: Screen Description
Parts Description Screen Description Note • As an example, this manual uses screen display examples from TE-SS830. However, screen and menu layout is similar for the other models. Flow rate screen Flow rate display Displays the value and information for the flow rate (mL/h), etc. Volume delivered display Displays the volume delivered. - Page 139 Parts Description Sensor icon display Status icon display Flow rate display Start up icon Tab display Ready for bolus icon Volume delivered display Status icon display (lit) When AC power is connected and charge is full. Battery icon and the remaining battery When AC power is connected and battery is charging.
- Page 140 Mute icon Displays when an alarm is muted. When the set time period has elapsed Maintenance icon For the setting method, contact TERUMO trained service technicians. Displays when the maintenance timer set period has elapsed. When a high priority alarm sounds.
- Page 141 Parts Description Sensor icon display Displays when a syringe displacement is detected. Syringe Displacement icon Displays when the syringe is detected to be nearly empty. Nearly Empty icon Displays when an occlusion is detected. Occlusion icon Displays when a plunger displacement or slider displacement is detected. Slider Displacement icon Note •...
- Page 142 Selects an advanced dose mode. (Displayed when a Interval/Intermittent Mode Advanced dose drug library that allows for Multi-step Mode mode advanced dose mode is Delayed Start Mode (TE-SS830 only) selected.) For details, contact TERUMO Combination dose ― trained service technicians. mode (TE-SS830 only)
- Page 143 Selection of Communication Sets the communication Communication environment table (up to 10) environment. environment Wireless LAN ON/OFF (TE-SS830 only) If the password is set, some Displays the menu only special functions are password available to TERUMO trained Password protected. service technicians.
-
Page 144: Standard Accessories
• Pole clamp (Screw type) • Instruction manual Note • If an AC power cable is not included with the pump unit, please contact TERUMO trained service technicians to receive the cable suited for your region. Optional Accessories Optional accessories are sold separately. - Page 145 TERUFUSION Communication Rack System (TE-RS800) <Combination Examples> Communication box AC power box TERUFUSION Communication Rack System (Extension) (TE-RS811) Notes • Up to three rack systems can be joined for use. • To join rack systems, contact TERUMO trained service technicians.
-
Page 146: Precautions
Precautions To ensure safe and correct use of this product, please observe all precautions. Non-compliance with precautions and incorrect use may result in damage or injury. The following are signs used in this manual and their meanings: Warning This label preceding a precaution indicates that there will be a possible risk of death or personal injury if the precaution given is not complied with. - Page 147 Precautions Warnings • This product should not be used in conjunction with gravity infusion. [1. If this product suffers a downstream occlusion lower than the connection with the gravity infusion line, the Occlusion alarm will not operate. 2. If bubbles are entrained in the downstream of the infusion line due to emptied gravity infusion line first, the normal infusion cannot be carried out.] •...
- Page 148 • In a case where a manufacturer has made changes to their syringe, the flow rate accuracy and alarm function may not be guaranteed. If any fault is observed, immediately stop using the product and contact TERUMO trained service technicians.
- Page 149 Precautions Cautions • This product should only be used with a sufficient power supply. [If the power supply is not sufficient, the internal battery will be used for the operation, which may result in no power supply in an emergency situation.] •...
-
Page 150: Compatible Syringes
Cautions • Only use specified syringes with luer lock for the pump. • TERUMO cannot accept any responsibility for errors in flow due to modifications of the syringe specifications introduced by the manufacturer. • Differences in factors such as size and plunger force in compatible syringes may not fulfill flow rate accuracy of infusion. -
Page 151: Preparation
Preparation Prior to the initial use of the pump, set the date and time to record history correctly. (See page 79.) Before use, carefully read “Precautions” and the labels attached to the product. Prior to the Pump being Used Connect to the AC power supply and charge (8 hours or more) with the power turned off. Prior-to-use Inspection Check the following points before use. - Page 152 Preparation Notes • If the tube holder comes off, follow the procedure below to attach it. • When inserting the notch of the tube holder into the hole on the rear side, insert while pulling the tube holder towards the rear side.
-
Page 153: Attaching/Detaching A Pole Clamp
Preparation Attaching/Detaching a Pole Clamp Attach the pole clamp The pole clamp can be locked at the pole clamp lock portion only in the direction shown in the figures below. To attach to a vertical pole • Insert the pole clamp along the grooves on the back of the pump from the lower side. -
Page 154: Attaching/Detaching To The Iv Pole
Preparation Attaching/Detaching to the IV Pole Pole clamp (Screw type) • Turn the pole clamp knob to fix the pump firmly to the IV Pole clamp knob pole. Note • When removing the pump from the IV Pole, hold the main unit and turn the pole clamp knob opposite to the arrow shown in the figure. -
Page 155: Connecting To Ac Power
Connect the plug to an AC power source with an earth connection. Note • If an AC power cable is not included with the pump unit, please contact TERUMO trained service technicians to receive the cable suited for your AC power cable region. Checks AC icon •... -
Page 156: Operating By The Internal Battery
• If any fault is observed while operating using the internal battery, immediately stop using the product and contact TERUMO trained service technicians. -
Page 157: Operation Procedure
• Conduct the self-check (self-diagnosis) of this product without a syringe installed. Otherwise the self-check may not be conducted properly. • Check for any fault by conducting a self-check. If a fault is observed, immediately discontinue use and contact TERUMO trained service technicians. -
Page 158: Setting The Syringe
Operation Procedure Setting the Syringe Close the infusion line and attach a syringe filled with solution to it using aseptic technique. Caution • Only use specified syringes with luer lock for the pump. Pull the clamp forward and turn. Clamp Insert the flange into the slit. - Page 159 Operation Procedure While holding the clutch, move the slider until it meets the Slider hook Slider plunger, and then release the clutch. If the following guidance in the figure below does not Clutch display, perform this step again. Checks • The clutch appearing in the LCD should look as shown below. •...
- Page 160 Operation Procedure Turn the Dial or press the Display select switch to select a Display select switch syringe brand. Warning • After the syringe type is selected, recheck that the setting has been adjusted correctly. Notes • Turning the Dial or pressing the Display select switch moves the white frame. •...
- Page 161 • Even after the syringe is set in the proper position, if any fault is observed, immediately stop using the product and contact TERUMO trained service technicians. • When installing a syringe, make sure that the syringe size and brand displayed on the LCD correspond to the syringe. If they do not correspond with each other, it may cause unintended solution delivery.
-
Page 162: Setting Flow Rate
Operation Procedure Setting Flow Rate Set the flow rate per hour. • Use the Dial to adjust the flow rate in the flow rate screen. Increases value Note • The flow rate screen appears in dark blue (selected). Decreases value Dial Start up icon Notes... -
Page 163: Setting Vtbi
Setting VTBI Set the VTBI for the solution delivery (Default: disabled). To activate this feature, contact TERUMO trained service technicians. Setting VTBI to enable (ON) also sets VTBI time to enabled (ON). Press the Display select switch to select the VTBI display. -
Page 164: Setting Vtbi Time
0.1 mL/h. If the set flow rate is lower than the flow rate of the KVO, solution delivery continues at the set flow rate. If you wish to change the flow rate of the KVO, contact TERUMO trained service technicians. -
Page 165: Priming
• With the Purge switch pressed and held, the volume delivered display shows the volume purged. • The upper limit of purge volume can be set. Contact TERUMO trained service technicians. • The priming function will not work when the syringe pump is stopped by an alarm. -
Page 166: Inserting A Needle
Operation Procedure Inserting a Needle Check • The pump is stopped. Insert the needle according to the internal hospital procedures. Vein Warning • This product does not have an alarm function to detect extravascular infusion due to intravenous needle coming out of vein. Periodically check the puncture site. -
Page 167: Starting Solution Delivery
Operation Procedure Starting Solution Delivery • Check the flow rate setting and press the Start switch to Start switch start solution delivery. Notes • The buzzer sounds. • The operation indicator flashes green. • The volume delivered increases. • Flow rate can be changed during solution delivery. Rotate the Dial in the flow rate display to change the flow rate and the confirmation message appears. -
Page 168: Stopping Solution Delivery
Operation Procedure Stopping Solution Delivery Press the Stop switch. Stop switch Notes • The buzzer sounds and the operation indicator turns off, then the operation stops. • The volume delivered stops increasing. Operation indicator Close the infusion line. Close the three way stopcock. -
Page 169: Turning The Power Off
Operation Procedure Turning the Power Off • When the operation ends, press and hold the Power switch for 3 seconds or more to turn the power off. Power switch Notes • While holding the Power switch, the power off buzzer sounds, then the LCD displays count-down arrows and turns off. -
Page 170: Other Operation Procedures
Other Operation Procedures Clearing the Volume Delivered The volume delivered can be cleared. Press the Display select switch repeatedly until the volume Display delivered display is selected. select switch Note • The volume delivered display appears in dark blue (selected). Volume delivered display Note •... -
Page 171: Standby Function
Notes ▪ The default standby time is 24 hours. To change this, contact TERUMO trained service technicians (the time can be changed to 24 hours or less). • Turning the Dial or pressing any switch cancels standby mode. -
Page 172: Replacing Syringe To Continue Solution Delivery
Other Operation Procedures Replacing Syringe to Continue Solution Delivery Press the Stop switch to stop the solution delivery. Stop switch Note • For details on stopping solution delivery, see page 36. Close the infusion line. Remove the syringe. Note • For details on removing the syringe, see page 36. Operation indicator Check that the syringe brand to be used matches the syringe brand displayed on the LCD, and then place the... -
Page 173: Selecting Dose Mode (Weight Mode)
Selecting Dose Mode (Weight Mode) The dose unit setting can be selected. Note • To disable the selecting dose mode, contact TERUMO trained service technicians. Press and hold the Display select switch for 2 seconds or Display more while the solution delivery is stopped. - Page 174 * Setting range of the dilution = : 0.01 to 999.00 mg/mL Solution • If you want to set by Dilution, contact TERUMO trained service technicians. • If the Confirmation switch is pressed after setting the drug amount, the input area moves to Solution.
- Page 175 Other Operation Procedures Check the parameter value and that “OK?” is selected, Confirmation press the Confirmation switch. switch Notes • Parameter changes can be identified by the change in background colour on the parameter confirmation screen. • When the Back/Mute switch is pressed on the parameter confirmation screen, the parameter input is cancelled and the screen returns to that of step 3.
- Page 176 • Even after the setting is completed, the unit returns to mL/h when the power is turned off. • Patient name, Patient ID, Gender, Age, Height and Weight can be acquired via communication with an external device. For the setting method, contact TERUMO trained service technicians.
-
Page 177: Selecting Dose Mode (Drug Library) (Te-Ss830 Only)
The dose mode can be selected from the drug library. Use the dedicated editing software (TERUFUSION Drug Library Manager or TERUFUSION Software Package) for registration. For details, contact TERUMO trained service technicians. Press and hold the Display select switch for 2 seconds or Display more when solution delivery stopped. - Page 178 • If clinical advisory is set, a message appears. With every press of the Confirmation switch, the screen changes to the input screen of amount and solution, or the input screen of dilution . If you want to set by Dilution, contact TERUMO trained service technicians.
- Page 179 Other Operation Procedures If necessary, turn the Dial to set each parameter (amount, Confirmation switch solution, and weight), and press the Confirmation switch. Increases value Notes • When the dilution is set in the drug library, the dilution parameter cannot be changed.
- Page 180 Other Operation Procedures Check the parameter value and that “OK?” is selected, and Confirmation press the Confirmation switch. switch Notes • When the Confirmation switch is pressed, the flow rate display appears. • When the Display select switch is pressed and info tab is selected, the set information is displayed.
- Page 181 Contact TERUMO trained service technicians for details. • “Pressure alarm” is available in the library as a safety function. See “TERUFUSION Drug Library Manager or TERUFUSION Software Package” or contact TERUMO trained service technicians for details. • “Come and See ME” is available in the library as a special function. See “TERUFUSION Drug Library Manager or...
- Page 182 Other Operation Procedures Turn the Dial to adjust the dosage. Increases value Decreases Flow rate (mL/h) Dosage rate value Dial Notes • The range of the dosage rate is as follows: - Dose unit = mL/h : 0.01 to 150.00 mL/h (when using syringe of 5 mL) 0.01 to 300.00 mL/h (when using syringe of 10 mL, 20 mL, 30 mL) 0.01 to 1200.00 mL/h (when using syringe of 50/60 mL) - Dose unit = other than mL/h : 0.01 to 999.00...
- Page 183 Other Operation Procedures 10) Check the flow rate setting and press the Start switch to Start switch start solution delivery. Notes • The operation indicator flashes green. • The volume delivered increases. • Even after the setting is completed, the unit returns to mL/h when the power is turned off.
-
Page 184: Setting Special Functions
Other Operation Procedures Setting Special Functions The following settings are selectable by changing the internal settings of this product. Taking account of a subsequent impact on product performance, contact TERUMO trained service technicians. Setting item Description of function VTBI setting Allows you to set the VTBI. -
Page 185: Changing Settings On The Menu
Changing Settings on the Menu See pages 10 and 11 for the menu list. Notes • While changing the menu settings, pressing the Start switch does not start solution delivery. • Occlusion detection pressure, keypad lock, bolus, advanced dose mode and combination dose mode on Menu 1 can be selected or set during solution delivery. -
Page 186: Occlusion Detection Pressure
Changing Settings on the Menu Occlusion Detection Pressure The occlusion detection pressure can be set in 10 levels. Setting Occlusion detection pressure Setting Occlusion detection pressure ± 10 kPa ± 70 kPa (Default) ± 20 kPa ± 90 kPa ± 30 kPa ±... - Page 187 Changing Settings on the Menu Turn the Dial or press the Display select switch to select the Display select switch occlusion detection pressure tab Note • The occlusion detection pressure setting display has appeared. Occlusion detection pressure tab Dial Press the Confirmation switch. Confirmation switch Note...
- Page 188 Changing Settings on the Menu Press the Confirmation switch to confirm the selection. Confirmation switch Note • The occlusion icon in the status icon display shows the selected occlusion detection pressure. Occlusion icon...
-
Page 189: Keypad Lock Function
Changing Settings on the Menu Keypad Lock Function The panel operation can be disabled to prevent inadvertent operation while solution delivery is stopped or in-progress. To enable the keypad lock Notes • Even if the keypad lock is enabled, the Power switch and the Start switch can be operated. The keypad lock release operation (press and hold the Back/Mute switch for 2 seconds or more) is also allowed when the keypad lock is enabled. - Page 190 Changing Settings on the Menu Turn the Dial or press the Display select switch to select ON. Display select switch Note • Turning the Dial or pressing the Display select switch moves the white frame. Dial Press the Confirmation switch to confirm the selection. Confirmation switch Checks...
- Page 191 Changing Settings on the Menu To release the keypad lock • Press and hold the Back/Mute switch for 2 seconds or more Back/Mute to release the keypad lock. switch Check • The keypad lock icon has disappeared. 2 seconds or more Note •...
-
Page 192: Bolus
Changing Settings on the Menu Bolus The bolus can be performed when solution delivery is in progress or when stopped. There are two ways for selecting bolus either through the menu or pressing the Purge switch while pressing the Back/Mute switch. In addition, every time the Purge switch is pressed while Back/Mute switch is pressed, you can switch between the Hands On Bolus and Hands Free Bolus. - Page 193 • The dose setting (flow rate) of Hands On Bolus remains set, and is used when the next Hands On Bolus is performed, until the power is turned off or the dose mode is switched. • The upper limit of bolus volume can be set. To change this, contact TERUMO trained service technicians.
- Page 194 Changing Settings on the Menu Hands Free Bolus Setting the Bolus VTBI and Bolus VTBI time enables automatic calculation of the Bolus flow rate (mL/h) and execution of bolus infusion without holding down the Purge switch. (Hands Free Bolus function) Press and hold the Display select switch for 2 seconds or Display more.
- Page 195 Changing Settings on the Menu Press the Confirmation switch. Confirmation switch Notes • The bolus setting display appears. • When the flow rate screen is displayed, the Hands Free Bolus screen can be displayed by pressing and holding the Back/Mute switch and pressing the Purge switch twice.
- Page 196 Changing Settings on the Menu Turn the Dial to set the Bolus VTBI time or the Bolus flow rate. Increases value Notes • The Bolus VTBI time or the Bolus flow rate (mL/h) has been calculated from the Bolus VTBI, and is displayed. •...
- Page 197 Changing Settings on the Menu 10) The bolus ends when the VTBI is reached. Check • The screen returns to the flow rate screen when the VTBI has been reached and the bolus has been completed. Notes • The volume delivered display area displays the amount of bolus during bolus infusion, and displays the sum of the amount of bolus and the volume delivered when the VTBI is attained and the bolus ends.
-
Page 198: Advanced Dose Mode (Te-Ss830 Only)
Changing Settings on the Menu Advanced Dose Mode (TE-SS830 only) An advanced dose mode can be selected from the three advanced dose modes in the table below according to the selected drug. A library should be registered before selecting the advanced mode. Use the dedicated editing software (TERUFUSION Drug Library Manager or TERUFUSION Software Package) for registration. - Page 199 Changing Settings on the Menu Follow step 1) to 9) on “Selecting Dose Mode (Drug Library)” to select the library name, shown as “Drug2” in the example, and set the dosage rate 1. Notes • When using an advanced dose mode, 0.00 can be set for the dosage rate. •...
- Page 200 Changing Settings on the Menu Press the Confirmation switch. Confirmation switch Note • The available advanced dose modes are displayed. Turn the Dial or press the Display select switch to select the Display select switch advanced dose mode. Note • Turning the Dial or pressing the Display select switch moves the white frame. Dial Press the Confirmation switch.
- Page 201 Changing Settings on the Menu Turn the Dial to input the parameters and press the Confirmation switch. Increases value Notes • With every press of the Confirmation switch, the input area moves to the next one. • When the Back/Mute switch is pressed, the parameter input is cancelled and the screen returns to the previous status.
- Page 202 Changing Settings on the Menu 11) Press the Start switch. Start switch Notes • The solution delivery has started and is executed at the specified dose settings. • The operation indicator flashes green. • The volume delivered increases. Operation indicator (green flashing)
-
Page 203: History Function
Changing Settings on the Menu History Function With the history function, operation history (such as date, time, set flow rate, when the solution delivery was started or stopped, or when an alarm occurred) can be checked. The latest records of max. 10,000 items are stored. If 10,000 items are exceeded, the records are deleted from the oldest first. - Page 204 Changing Settings on the Menu Turn the Dial or press the Display select switch to select the Display select switch desired operation history. Notes • Turning the Dial or pressing the Display select switch moves the white frame to the next operation history item.
- Page 205 Changing Settings on the Menu Colour of Example of operation history bottom area of Operation status Pink Operation history during stop Pink Blue Operation history during purge or bolus (Hands On Bolus, Hands Free Bolus) Blue Orange Operation history during standby Orange Press and hold the Display select switch for 2 seconds or Display...
-
Page 206: Changing The Sound Volume
Changing Settings on the Menu Changing the Sound Volume The Alarm Volume, the Key Operating Volume, and the Cable Insertion Alarm can be set on 4 levels. Type Volume setting Default setting Note 0 (very low), 1 (low), 2 (medium), 3 (high), Alarm Volume 1 to 3, Step Step (1 ... - Page 207 Changing Settings on the Menu Turn the Dial or press the Display select switch to select an Display select switch item to change. Dial Press the Confirmation switch to confirm the selection. Confirmation switch Note • The display for the item to be changed has appeared. Turn the Dial or press the Display select switch to select the Display select switch volume.
- Page 208 Changing Settings on the Menu Press the Confirmation switch to confirm the selection. Confirmation switch Check • The selected volume is displayed. Press and hold the Display select switch for 2 seconds or Display more to return to the flow rate screen. select switch 2 seconds or more...
-
Page 209: Changing The Brightness
Changing Settings on the Menu Changing the Brightness The brightness can be set in 5 levels (Default: 5). Bright Dark With the Back/Mute switch pressed and held, press and hold Display select switch the Display select switch for 2 seconds or more. Back/Mute switch Note... - Page 210 Changing Settings on the Menu Turn the Dial or press the Display select switch to select a Display select switch brightness level. Notes • Turning the Dial or pressing the Display select switch moves the white frame. • When the white frame is placed on a desired brightness level, the brightness level is shown.
-
Page 211: Setting The Date And Time
Changing Settings on the Menu Setting the Date and Time The date and time can be set. Set year, month, date, hour, and minute. With the Back/Mute switch pressed and held, press and hold Display select switch the Display select switch for 2 seconds or more. Back/Mute switch Note... - Page 212 Changing Settings on the Menu Press the Confirmation switch. Confirmation switch Note • The date setting is confirmed and hour - minute is displayed in dark blue (selected). Turn the Dial to change the time. Increases value Decreases value Dial Note •...
-
Page 213: Profile (Te-Ss830 Only)
Changing Settings on the Menu Profile (TE-SS830 only) Profiles allow drugs to be classified according to their use and need to be registered in the drug library software. Selecting a profile can limit the drugs available to each individual profile. Up to 30 profiles can be registered. Profiles can only be selected, if a library is uploaded to the pump. - Page 214 Changing Settings on the Menu Turn the Dial or press the Display select switch to select a Display select switch profile. Note • Turning the Dial or pressing the Display select switch moves the white frame. Dial Press the Confirmation switch to confirm the selection. Confirmation switch Check...
-
Page 215: Communication Environment (Te-Ss830 Only)
Wireless LAN can be turned ON/OFF and the communication environment can be set. Up to 10 communication environments can be registered. Communication environment setting For details about how to register the communication environment setting to the pump unit, contact TERUMO trained service technicians. With the Back/Mute switch pressed and held, press and hold Display select switch the Display select switch for 2 seconds or more. - Page 216 Changing Settings on the Menu Check that “Communication Mode Select” is selected, and Confirmation then press the Confirmation switch. switch Turn the Dial or press the Display select switch to select the Display select switch communication environment you want to set from the list of registered communication environments.
- Page 217 Changing Settings on the Menu Wireless LAN ON/OFF setting Follow Steps 1) to 3) of “Communication Environment” (page 83) to display the communication environment setting screen. Turn the Dial or press the Display select switch to select Display select switch Wireless LAN.
- Page 218 Changing Settings on the Menu Press and hold the Display select switch for 2 seconds or Display more to return to the flow rate screen. select switch 2 seconds or more...
-
Page 219: About External Communication Functions
About External Communication Functions Overview Use infrared communication (IrDA), external communication (RS-232C) or wireless LAN to output the status of the pump to a network system (e.g. monitor system or CIS). (The status of the pump cannot be changed from a network system.) Ensure that the network system and the pump use the same communication conditions. - Page 220 • Operating time using the internal battery is decreased when using external communication while using with the internal battery. • The specified message (free message function) can be displayed on the pump unit via communication. (For details, contact TERUMO trained service technicians.)
-
Page 221: Network System Connection
< RS-232C (For external communication terminal)> Check that all the devices are powered off. Connect the cable. Turn on the devices. Cable connection example (For RS-232C) Network system side Pump side Note • TERUMO cannot guarantee the connection. - Page 222 Contact a vendor specialist for the correct settings and allow only the system administrator to perform settings. Note • TERUMO cannot guarantee the connection. Transmission Procedure When the network system sends an instruction (REQ: REQUEST) to the pump, the pump replies (REP: REPLY) to the instruction.
- Page 223 About External Communication Functions Packet <Packet format> The following shows the packet format. Packet format Packet data (XML format) CRC16 0x02 (Arbitrary size) (4byte) 0x03 (Packet data and CRC16 use ASCII code.) • STX 0x02 (Fixed) • Packet data Data division written in XML format (For details, see this page “Packet <Packet data>”.) •...
- Page 224 About External Communication Functions • Reply packet data format The following shows the reply packet data format used when the pump replies to a request packet. Reply packet data format <?xml version="1.0"?> <REP> <DEVID></DEVID> <CMD></CMD> </REP> • REP tag: This tag indicates the reply from the pump to the request command sent by the network system. •...
- Page 225 About External Communication Functions • Execution result: When the pump has received a request command and successfully processed it, the pump sends “0x00” indicating that execution is successful. If the request command failed due to an error, the pump sends a value between 0x11 and 0x15 as the execution result. The following table lists the execution results.
- Page 226 About External Communication Functions Item Size (Byte) Details Alarm information b0 (low order) Shutdown Notice alarm Link Interruption alarm Completion alarm Occlusion alarm Syringe Displacement alarm Plunger Displacement alarm Slider Displacement alarm Syringe Barrel Detection alarm Nearly Empty alarm b9-b12 (Reserved) Power Failure alarm (Reserved)
- Page 227 Hands Free Bolus flow Value of 100 times the flow rate rate Invalid value (when the function is disabled): 0x000000 Syringe brand number Brand number of the syringe selected Total number of bytes * For more details, contact TERUMO trained service technicians.
- Page 228 About External Communication Functions Format of Transmitted and Received Packet When a network system communicates with the pump, the monitor obtains the device ID from the pump identifying itself. Then, the monitor starts to communicate with the pump. The following shows the format of communication packet. Device ID request (network system ...
-
Page 229: Procedure For Connecting To Nurse Call
• If connecting with a buzzer or lamp instead of a nurse call, it should be used with a capacity of 12V DC, 1A or less. Notes • TERUMO cannot guarantee the connection. • If an alarm sounds, this product sends signals to the nurse call for approx. 5 seconds. -
Page 230: After Use
• Clean the AC inlet, slider and clutch on a regular basis. Failure to conduct the regular cleaning may result in damage, failure or malfunction to/of this product. • If any parts (clamp, clutch part etc.) of this product need to be removed for cleaning, contact TERUMO trained service technicians. -
Page 231: How To Clean Components
After Use How to Clean Components After use, clean all components as described below. Cleaning the AC inlet Cleaning the outside of the syringe pump and the Dial Lightly wipe off dirt with a cotton swab Wipe with a damp (not wet) soft cloth. or damp cloth (not wet). - Page 232 After Use Cleaning the pole clamp Detach the pole clamp from the pump, and wipe with a damp (not wet) soft cloth. * Do not use ethanol to disinfect the rubber cover ■ and the sliding sites as indicated by Caution •...
-
Page 233: Storage
After Use Storage After inspecting the pump, store it in an environment which conforms to the following storage conditions. Temperature: -20°C to 45°C Humidity: 10% to 95% RH (non-condensing) Atmospheric pressure: 50 to 106kPa (500 to 1060hPa) Ensure that the battery is charged in preparation for it's next use. Warnings •... -
Page 234: Maintenance And Inspections
Maintenance and Inspection Items by TERUMO Certified Service Technicians Cautions • If any fault is observed, immediately stop using the product and contact TERUMO trained service technicians. • Do not disassemble, make alterations (including actions that interfere with the functionality or performance such as taping the LCD or a movable part) to, or repair this product. -
Page 235: Troubleshooting
Cautions • If the fault persists even after the following measures, a device failure is suspected. Contact TERUMO trained service technicians to request repair. • Even under the same condition, the alarm timing depends on the alarm sensitivity level. - Page 236 Troubleshooting 7) Confirm and restart. Start switch Check the flow rate, VTBI, etc., and resume the solution delivery.
-
Page 237: High Priority Alarm
• The malfunction of the internal • If the problem persists, contact TERUMO trained • Operation indicator: Flashes sensor of the plunger detector service technicians to request repair. red. - Page 238 Troubleshooting Slider Displacement alarm Occurrence Cause Action • LCD: The Slider Displacement • The slider has been displaced during Replace the syringe correctly. alarm display flashes red. solution delivery. (See page 26.) • Operation indicator: Flashes 2. Prime the line, ensuring that the red.
- Page 239 (See page 40.) The time from full-press to alarm • Operation indicator: Flashes sounding varies according to the product used. The red. table below shows an example. • Buzzer: Activates. * When new TERUMO syringes are used. • Pump: Stops. 5 mL 10 mL 20 mL 30 mL...
- Page 240 • Operation indicator: Flashes • No AC power supply If the problem still persists, contact TERUMO trained red. • Battery failure service technicians. • Buzzer: Activates. • Sub-battery failure or low •...
-
Page 241: Medium Priority Alarm
• Some of the flow rate settings • Correct those settings and start solution delivery. do not apply to the advanced (See page 66. For the combination dose mode dose or combination dose setting, contact TERUMO trained service technicians.) mode. - Page 242 Troubleshooting No VTBI alarm Occurrence Cause Action • LCD: The No VTBI alarm • The Start switch was pressed • Set a VTBI and press the Start switch to start solution display lights up yellow. without having set a VTBI. delivery.
- Page 243 Troubleshooting Start Reminder Occurrence Cause Action • LCD: The Start Reminder • The product has been left for • If you want to delay operation for a while, press and display lights up yellow. 2 minutes or more after being hold the Back/Mute switch for 2 seconds or more to set •...
-
Page 244: Other Problems
Troubleshooting Re-alarm Occurrence Cause Action • LCD: The respective alarm • Operation was not started • Follow the corrective action of each alarm. displays flash/light up (the within 2 minutes after the flashing/light up colours are alarm was muted. (The the same as those at the Nearly Empty alarm during respective alarms). - Page 245 (See page 26.) flashes. Maintenance timer Occurrence Cause Action • The Maintenance timer • It is time to perform • Contact TERUMO trained service technicians. indicator lights up. maintenance. AC power detector function Occurrence Cause Action • The pump cannot be turned on •...
- Page 246 (See page 87.) GW, connection destination IP address, communication port, or device ID may not be suitable. • Signal strength icon (Colour = • The pump is defective. • Contact TERUMO trained service technicians. Grey, No signal bar) flashing...
- Page 247 • The brightness becomes two levels lower during using the internal battery internal battery operation or night mode operation. • The equipment is in the night • If it is not the case, contact TERUMO trained service mode. (When the night mode technicians. is enabled) •...
-
Page 248: Specifications
Sterilized specified syringes for general use and specified pre-filled syringes (See page 18.) Syringe size 5 mL, 10 mL, 20 mL, 30 mL, 50/60 mL Syringe brand TERUMO or other specified brands Dose mode mL/h mode μg/kg/min mode mg/kg/h mode... - Page 249 (The hourly precision after one hour has passed since the start of solution delivery, in the case where water or a physiological saline solution is used with a TERUMO 50/60 mL syringe made in the Philippines (TERUMO_P) at a flow rate of 1.00 mL/h or more (ambient temperature: 23±2°C) according to IEC 60601-2-24:2012 (EN 60601-2-24:2015) standard.)
- Page 250 Specifications Safety functions Flow rate range setting The flow rate setting range can be controlled within the “flow rate setting range” function B prescribed for each type of a syringe. (Hard limits) • Values outside the range controlled by this function cannot be set. Keypad lock function Disables switch operations.
- Page 251 Specifications Available External Allows communication with a network system to output the status of the pump Functions communication (flow rate, alarms, etc.) via wireless LAN. function (wireless LAN) (TE-SS830 only) Nurse call function When an alarm is activated, relay contact operates through communication unit.
- Page 252 Specifications Available Drug/patient Displays drug information such as dilution, patient information including Functions information display patient name, age, gender, weight, height, etc. The dilution and weight can be function changed. Dilution setting Selects how to specify the dilution from either Dilution or Amount/Solution. function by amount and solution Interval/Intermittent...
- Page 253 IEC 60601-1-8:2006+A1:2012 (EN 60601-1-8:2007+A1:2013) IEC 60601-2-24:2012 (EN 60601-2-24:2015) MDD (Medical Device Directive) 93/42/EEC (Class IIb) Note • If an AC power cable is not included with the pump unit, please contact TERUMO trained service technicians to receive the cable suited for your region.
-
Page 254: Units Available
• Separate setup procedures are required for the product with voltage-plug combinations other than listed above. • If an AC power cable is not included with the pump unit, please contact TERUMO trained service technicians to receive the cable suited for your region. -
Page 255: Device Characteristics
Start-up curves and trumpet curves, which are used as typical explanations of flow rate characteristics, are shown. The data below is representative examples measured for flow rates of 1 mL/h and 5 mL/h with a new TERUMO syringe (50 mL). -
Page 256: Occlusion Characteristics
The data below is a representative example measured for flow rates of 1 mL/h and 5 mL/h, with a three-stage occlusion pressure setting value (1, 6, 10), and a new TERUMO syringe (50 mL). The measured values may vary depending on the test conditions. -
Page 257: For Medical Staff
For Medical Staff EMC Technical Information Medical electrical equipment requires particular care in regards to EMC, and it is necessary to install and use the equipment in accordance with the following EMC information. Cautions • Ensure that the power cable used is the one provided for this product. If not, this product’s emissions may increase and its immunity may decrease. - Page 258 For Medical Staff Table a) – Manufacturer’s declaration – electromagnetic emissions – for IEC 60601-1-2:2014 (EN 60601-1-2:2015) Manufacturer’s declaration - electromagnetic emissions The TERUFUSION Syringe Pump Type SS3 is intended for use in the electromagnetic environment specified below. The customer or the user of the TERUFUSION Syringe Pump Type SS3 should assure that it is used in such an environment. Emissions test Emissions class and group RF emissions...
- Page 259 For Medical Staff Table c) – Immunity test level to proximity fields from RF communications equipment – for IEC 60601-1-2:2014 (EN 60601-1-2:2015) Immunity test level to proximity fields from RF communications equipment The TERUFUSION Syringe Pump Type SS3 is intended for use in the electromagnetic environment specified below. The customer or the user of the TERUFUSION Syringe Pump Type SS3 should assure that it is used in such an environment.
-
Page 260: Symbols
Symbols This section describes the symbols (icons) used with the TERUFUSION Syringe Pump Type SS3. Description of Symbols Description of Description of Description of Symbol Symbol Symbol Symbols Symbols Symbols “CE” means compliance Purge Humidity limitation with the European Directive 2011/65/EU on the restriction of the use Start Atmospheric pressure... -
Page 261: Other Information
Simplified EU Declaration of Conformity (Radio Equipment Directive, 2014/53/EU) Simplified EU Declaration of Conformity (Radio Equipment Directive, 2014/53/ Hereby, TERUMO CORPORATION declares that the radio equipment type TERUFUSION Syringe Pump Type SS3 is in compliance with Directive 2014/53/EU. The full text of the EU declaration of conformity is available at the following internet address: http://www.terumo-europe.com... -
Page 262: Memo
Memo... - Page 263 Memo...
-
Page 264: For Information About Terumo Products
TERUMO EUROPE N.V. INTERLEUVENLAAN 40, 3001 LEUVEN, BELGIUM MADE IN JAPAN All brand names are trademarks or registered trademarks of TERUMO CORPORATION and their respective owners. ©TERUMO CORPORATION 2020-04-01 20A17 Diprivan is owned by or licensed to the Aspen group of companies.
Need help?
Do you have a question about the TERUFUSION TE-SS730 and is the answer not in the manual?
Questions and answers