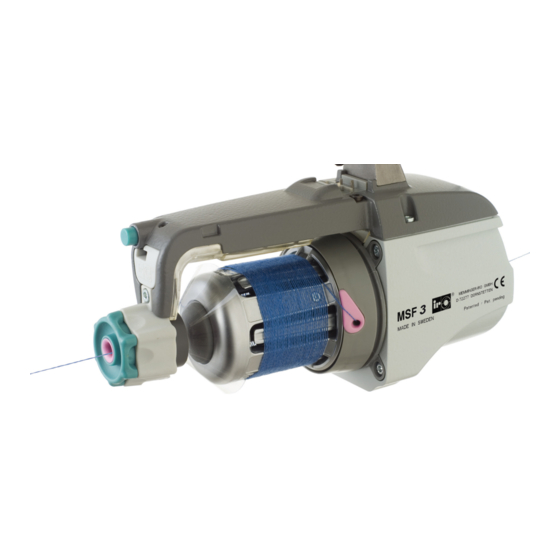
Summary of Contents for MEMMINGER-IRO MSF 3
- Page 1 MSF 3 English translation of the original German instruction manual *08-920-002-01* English 08-920-002-01 20.02.13...
-
Page 3: Table Of Contents
Installation .................................. 4 Connecting the contact cable ............................4 Fitting the flat ring holder ............................. 4 MEMMINGER-IRO GMBH Power Supply Units ......................5 Fitting the round tube holder............................5 Function check ................................5 Installing the input tensioner (optional) ........................6 Fit the compensation tensioner (optional) ........................ -
Page 4: Safety
The power supply for the device must be taken from the circular knitting machine. The power supply to the device The MSF 3 storage feeder is designed solely for feeding must be switched on and off from the main switch of the yarn to textile machines. -
Page 5: General Description
► Yarn control on the winding reel using contactless The reeling device within the winding reel transports and separates the yarn windings making it possible to process sensors to prevent yarn tension peaks. The MSF 3 even the most difficult yarns. operates continuously, without starting and stopping. -
Page 6: Installation
Installation Connecting the contact cable ► Fix the contact cable (4) with cable ties (5) to the feeder support ring (3) (3 to 10 mm thick, 25 to 30 mm wide). 3 mm The red wire (6) of the contact cable must be at the top. The text (2) on the contact cable must be visible. -
Page 7: Memminger-Iro Gmbh Power Supply Units
► Switch off the power supply. ► Install the remaining units. ► Switch on the power supply at regular intervals and check the functional efficiency of up to 10 units. MEMMINGER-IRO GMBH Power Supply Units Max. number of Item no. Power Number of fuse units Max. -
Page 8: Installing The Input Tensioner (Optional)
Installation Installing the input tensioner (optional) The input tensioner is fixed at the yarn inlet of the unit. Fit the rotation stop (4) to ensure that the input tensioner does not rotate out of position. The input tensioner has the following components: ►... -
Page 9: Fitting The Output Stop Device (Optional)
Installation Fitting the output stop device (optional) ► Remove the cover (1). ► Push the plug (3) into the contact socket (2). Ensure that the plug engages fully into the socket. ► Screw the output stop device (4) to the unit. NOTE! Take care not to crush the cable during this operation. -
Page 10: Operation
Operation Switching on ► Press the ON/OFF button (3) once. The unit will check if there are enough yarn windings on the winding reel. If there are not enough, the missing wind- ings will be wound onto the winding reel automatically. The red LED (1) lights up during this function. -
Page 11: Adjusting The Yarn Tension At The Outlet
Operation Adjusting the yarn tension at the outlet The yarn tension must be adjusted to match the yarn type and hardness. ► Turn the knob (4) on the tensioner (3). The pressure exerted by the tension cone (2) on the winding reel (1) increases or decreases depending on the direction in which the knob is rotated. -
Page 12: Calibrating The Unit
Operation Calibrating the unit The unit must be calibrated again if one of the following faults occur: The winding reel runs empty The winding reel will not wind on fully The winding reel is overwound ► Switch off the unit (3). Press the ON/OFF button for at least two seconds. -
Page 13: Servicing
Servicing Changing the magnetic tensioner You can remove the tension cone for cleaning. ► Pull the knob (1). ► Remove the tension cone (3) from the tensioner (2). Cleaning the yarn sensors Only use the sensor cleaner 09-270-001 or the optional cleaning brush 000-680-098 to clean the yarn sensors. -
Page 14: Dimensions
Dimensions / Technical data MSF 3 Technical Data Power supply: 57 V DC (35 V DC for reduced power version) Average current: 0.44 A Max. power: 85 VA (at a yarn speed of 1100 m/min) Average power: 25 VA Max. yarn speed:... -
Page 15: Troubleshooting
Troubleshooting Troubleshooting Fault after installation Possible Cause Solution The unit does not operate. The unit is switched off. Press the ON/OFF button once. The green LED is lit when the unit is switched on. The power supply to the power supply unit and the Switch on the power supply to the power supply unit. -
Page 16: Declaration Of Incorporation And Conformity
72280 Dornstetten, Germany hereby certifies that the following subassembly Product name: MSF 3, MSF 3 CAN conforms to the requirements of the above named directives. The subassembly is supplied complete with an original instruction manual and original technical documentation. The subassembly may not be put into service until the machinery into which it is to be incorporated has been declared as being in conformity with the provisions of the EU Machinery Directive 2006/42/EC, Annex II A. - Page 20 72280 Dornstetten - Germany © 2011 MEMMINGER-IRO GMBH / 72277 Dornstetten - Germany Nachdruck, auch auszugsweise, nur mit schriftlicher Genehmigung der MEMMINGER-IRO GMBH. Änderungen vorbehalten. Reprint, even in extracts, shall require the written approval of MEMMINGER-IRO GMBH. Subject to modifications.


Need help?
Do you have a question about the MSF 3 and is the answer not in the manual?
Questions and answers