Advertisement
Quick Links
Advertisement

Related Manuals for Acer AT2002


Summary of Contents for Acer AT2002
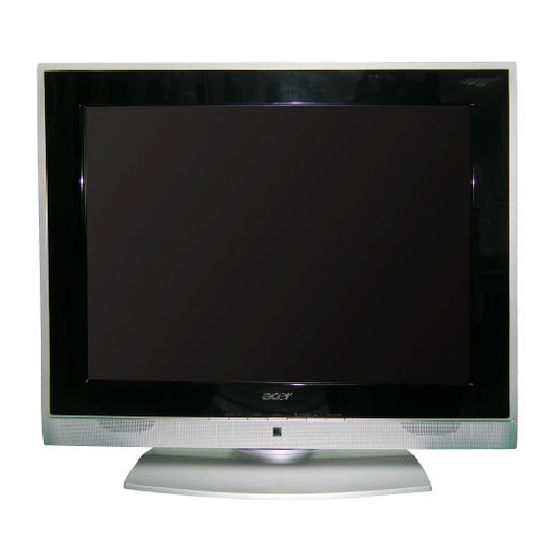
- Page 1 Acer AT2002 Service Guide...
- Page 2 Service Guide Version and Revision Version Release Date Revision Jul-15 -2006 Original release...
- Page 3 "as is". Should the programs prove defective following their purchase, the buyer (and not Acer Incorporated, its distributor, or its dealer) assumes the entire cost of all necessary servicing, repair, and any incidental or consequential damages resulting from any defect in the software.
- Page 4 DIFFERENT part number code to those given in the FRU list of this printed Service Guide. You MUST use the list provided by your regional Acer office to order FRU parts for repair and service of customer machines.
- Page 5 Precautions Do not use the monitor near water, e.g. near a bathtub, washbowl, kitchen sink, laundry tub, swimming pool or in a wet basement. Do not place the monitor on an unstable trolley, stand, or table. If the monitor falls, it can injure a person and cause serious damage to the appliance.
-
Page 6: Table Of Contents
Table Of Contents Monitor Features ……………………………………… General Specifications ……………………………………… LCD TV Description ……………………………………… Precautions And Notices ……………………………………… D-SUB PIN Distribution ……………………………………… Chapter 1 Factory Preset Display Modes ……………………………………… LCD TV Panel Specification ……………………………………… Panel Features ……………………………………… General Specifications ……………………………………… Mechanical Specifications ………………………………………... -
Page 7: Monitor Features
Chapter 1 Monitor Features General Specifications Model AT2002 Panel spec Resolution (pixels) 800 x 600 Brightness (tpe.) 450 cd/m2 Contrast Ratio (tpe.) 600:1 Display colour 16.7 M Viewing angle (tpe.) H: 160 ; V:120 Response (tpe.) 16 ms (gray to gray) -
Page 8: Lcd Tv Description
LCD TV Description The LCD TV will contain a main board (include audio), an I/O board, a switching power board, a function keyboard (include an IR Board) and an Ear phone board. The main board and power board will house the flat panel to control logic I2C bus, DDC, brightness control logic for LCD panel, DC-DC conversion to supply the appropriate power to the whole board and transmitting TTL level signals into LCD Module to drive the LCD display circuit. -
Page 9: Precautions And Notices
Precautions And Notices 1-1 Assembly Precaution (1) Please do not press or scratch LCD panel surface with anything hard. And do not soil LCD panel surface by touching with bare hands (Polarize film, surface of LCD panel is easy to be flawed) In the LCD panel, the gap between two glass plates is kept perfectly even to maintain display characteristic and reliability. -
Page 10: D-Sub Pin Distribution
D-SUB PIN Distribution This procedure gives you instructions for installing and using the LCD TV display. (1) Position the display on the desired operation and plug the power cord into a convenient AC outlet. Three-wire power cord must be shielded and is provided as a safety precaution as it connects the chassis and cabinet to the electrical conduct ground. -
Page 11: Factory Preset Display Modes
Factory Preset Display Modes: Analog RGB Signal Timing Vertical Horizontal Sync Polarity Presence Screen Mode Dots × Lines Frequency Frequency FULL Horizontal Vertical Horizontal Vertical (Hz) (KHz) (16:9) 720 ×400 70.1 31.5 59.9 31.5 640 ×480 72.8 37.9 75.0 37.5 60.3 37.9 800 ×600... -
Page 12: Lcd Tv Panel Specification
LCD TV Panel Specification Panel Features -High brightness (450 nits) - High contrast ratio (700:1) - Fast response time (16ms) - High color saturation NTSC 72% - WXGA (800 x 600 pixels) resolution - DE (Data Enable) only mode - LVDS (Low Voltage Differential Signaling) interface - Optimized response time for 50/60 Hz frame rate - Ultra wide viewing angle: 160(H)/140(V) (CR>20) Super MVA technology - 180 degree rotation display option... -
Page 13: Optical Specifications
Optical Specifications Test Conditions Typ. Item Symbol Min. Max. Unit Remark Input voltage 4.75 5.25 Power supply Current Arms voltage consumption Inrush current Apeak RUSH Power ripple mVp-p voltage Internal Low voltage logic High voltage Optical Specifications Specification Item Symbol Condition Unit Remark... -
Page 14: Connecting Peripherals
Chapter 2 Connecting Peripherals Front panel controls Your LCD TV overview Front panel view Volume +/- Input key Menu key Channel up/down Power On/Off Volume up When the OSD is on, functions the same as the Right arrow Volume down When the OSD is on, functions the same as the Left arrow Input key When the OSD is on, press this button to confirm selection... - Page 15 Rear panel view S-Video SCART CVBS AV-Audio L/R Analog antenna PC Audio-in VGA-in AC-in Earphone S-VIDEO SCART VIDEO AUDIO AC-IN PC AUDIO-IN ANALOG TUNER...
-
Page 16: Remote Control & Osd Operating Instructions
Chapter 3 Remote Control & OSD Operating instructions Using the Remote Control Remote control General keys POWER Press to turn your TV on/off. MUTE Press to toggle audio on and off. VOL (up/down) Press to increase or decrease the volume. CH (up/down) Press to sequentially select the TV channel. -
Page 17: Using The Osd Menus
Using The OSD Menus OSD navigation Many of the advanced settings and adjustments are available through using the OSD (onscreen display) menus, as shown in the example screenshot below. Basic operations required to navigate these menus (Picture, Audio, Channel management, Options, Settings) are described in this section. - Page 18 Adjusting the OSD settings The OSD can be used for adjusting the settings of your LCD TV. Press the MENU key to open the OSD. You can use the OSD to adjust the picture quality, audio settings, channel settings and general settings.
- Page 19 Advanced features Lock TV Locking TV content Lock TV is a handy feature that can block a single channel, multiple channels or all TV sources. Lock TV allows you to enter a password and effectively stop anyone without the password from watching TV. MENU To enable this feature: Setting a personal PIN...
- Page 20 Locking a single channel Navigate to the channel you wish to manage. MENU Press the MENU key on the remote control to bring up the OSD. Use the directional keys to navigate to the Channel management menu. Then select Lock This Channel. MENU Enter your PIN.
- Page 21 Re-scan for channels The first time you completed the setup wizard, all available channels were listed. If you need to re-scan for new channels, please follow the steps below: MENU Scanning for channels MENU Press the MENU key on the remote control to bring up the OSD. Use the directional keys to navigate and select Channel Management.
-
Page 22: Logo
Logo When the monitor is power on, the LOGO will be showed in the center, and disappear slowly. How To Optimize The DOS-Mode Plug And Play Plug & Play DDC2B Feature This monitor is equipped with VESA DDC2B capabilities according to the VESA DDC STANDARD. It allows the monitor to inform the host system of its identity and, depending on the level of DDC used, communicate additional information about its display capabilities. -
Page 23: Machine Disassembly
Chapter 4 Machine Disassembly series de-assembling procedure LCD TV AT2002 1. Move the monitor our from carton 2. Put the monitor on desk & face down 3. Remove the midea cover & SCREW &TV BOX 4. Loose the screws & remove the stand 5. - Page 24 7. Loose the shielding screw & shielding 8. Loose the PCB’A screw & LVDS cable 9. Loose the shielding & tape & LVDS cable earphone/b & speaker 10.Loose the Button/B& screw earphone/b & speaker 12. Loose the bezel screw 11. Remove the Button/B&...
- Page 25 13. Remove the bezel 14. Remove the bkt l/r screw & bkt l/r...
- Page 26 LCD TV AT2002 series packing method 1. Sticker on LCD protection film 2. Put the monitor into the PE or EPE bags 3. Put on the end-cap left / right 4. Put the monitor into carton Face-up 5. Put all accessories into carton 6.
- Page 27 LCD TV AT2002 series handling Notice Correct Method Incorrect method Correct Method Incorrect method Correct Method Incorrect method...
- Page 28 Correct Method Incorrect method Correct Method Incorrect method...
-
Page 29: Chapter 5 Trouble Shooting
Trouble Shooting Chapter 5 1. No Power NO POWER Separate MB & Check Power-board power-board Change CN201 pin1 12V, pin5 5V Check CN201 pin1 Power-board Correct ?? 12V, pin5 5V Correct ?? Check FB14 3.3V FB27 1.8V correct? Separate MB & I/O-board Change Check CN201 pin1... - Page 30 2. No picture, No backlight. No picture No backlight Check Power/B CN201 Pin8 3.3V correct? Change Change power board power board Check LCD panel...
- Page 31 3. No Characters , Missing Color No Characters , Missing Color Check CN6 Change Pin6~9 5V correct? Check Change TTL FFC cable TTL FFC cable Check LCD panel...
- Page 32 4. VGA mode Always show NO SIGNE VGA always show No Signal Check VGA cable Change correct? VGA cable Check input CN2 Change Pin13 H-sync ,pin14 V-sync correct? Check PC...
- Page 33 5. Video mode always show NO SIGNEL Video-mode always show No SignalVideo-mode always show Check Video cable Change correct? Video cable Check I/O board Change correct? Change I/O board...
-
Page 34: Chapter 6 White-Balance, Luminance Adjustment
Chapter 6 White-Balance, Luminance Adjustment Approximately 30 minutes should be allowed for warm up before proceeding white balance adjustment. Before started adjust white balance ,please setting the Chroma-7120 MEM. Channel 1 to 12000 color, MEM. channel 2 to 10000 color, MEM. channel 3 to 8000 color, MEM. ( our 12000 parameter is x = 272 ±... - Page 35 III, Gain adjustment: A. Adjust 12000 color-temperature: 1. Set the Contrast of OSD function to 80 and Adjust Brightness to chroma-7120 Y>350 cd/m2 2. Switch the chroma-7120 to RGB-mode (with press “MODE” button) 3. Switch the MEM.channel to Channel 02 (with up or down arrow on chroma-7120) 4.
-
Page 36: Fru (Field Replaceable Unit) List
SERVICE PROVIDERS, your Acer office may have a DIFFERENT part number code from those given in the FRU list of this printed Service Guide. You MUST use the local FRU list provided by your regional Acer office to order FRU parts for repair and service of customer machines. -
Page 37: Exploded Diagram
Exploded Diagram (Model: AT2002) -
Page 38: Edid Data
Parts CATEGORY PARTNAME DESCRIPTION BOARD MAIN BOARD FIRMWARE CTRL POWER BOARD POWER BOARD BUTTON BOARD KEY CTRL FIRMWARE EARPHONE CTRL EARPHONE BOARD FIRMWARE LCD PANEL 20.1" 20.1" A201SN02 V5 A201SN02 V5 CASE / COVER ASSEMBLY FRONT BEZEL FRONT BEZEL WITH BEZEL PLATE Chapter 4... - Page 39 CATEGORY PARTNAME DESCRIPTION BACK COVER BACK COVER BASE TO SUPPORT BASE THE STAND Chapter 4...
-
Page 40: Chapter 8 Pcb Layout
Chapter 7 PCB Layout... - Page 48 CAM350 V 7.6 : Fri Jun 02 14:18:32 2006 - (Untitled) : silk_top.art...
-
Page 70: Schematic Diagram
0.1uF/6 0R/6 AUDIO_LIN-1 0R/6 AUDIO-1-IN_L 6 AUDIO_LIN-2 AUDIO-2-IN_L /SCART 6 0R/6 0R/6 AUDIO_RIN-1 AUDIO_RIN-2 AUDIO-1-IN_R 6 AUDIO-2-IN_R /SCART 6 AT2002 ,20" TV 47K/6 47K/6 47K/6 47K/6 Title I/O Interface AGND AGND Size Document Number R e v HUDSON PLATFORM SCHEMATIC1... - Page 71 NC/22P/6 NC/9V NC/22P/6 NC/9V 4.7K/6 AGND S-EDID H: EDID FLASH ENABLE L: EDID FLASH DISABLE NC/ 0R/6 S-EDID 2N7002E AT2002 ,20" TV 100R/6 Title VGA INPUT VGA_SDA Size Document Number R e v HUDSON PLATFORM VGA_SCL SCHEMATIC1 Date: Monday, June 26, 2006...
- Page 72 SERIAL FLASH SCAN +3.3V_I/O_HUDSON +3.3V_LVDS_OUT +3.3V_LVDS +3.3V_I/O R129 0R/6 GPIO7/IRQ OSDFLD/A11/PD35/JT_BSCAN EXTCLMP/A15/SPIEN GPIO14/PWM3 PWM3-GPIO14-FB 74HCT4053 R141 R142 AT2002 ,20" TV G ND G ND R143 NC/ 0R/6 47K/6 10K/6 R130 I NTR 22uF/25V 22uF/25V 0.1uF/6 0.1uF/6 0.1uF/6 0.1uF/6 0.1uF/6 22uF/25V 0.1uF/6...
- Page 73 SOIC-8 OPTIONAL R147 R148 ROM_SDO ROM_SDO ROM_SDO ROM_SCLK ROM_SCLK 10K/6 10K/6 ROM_SCLK HOLD# R149 R150 NC/ 10K/6F NC/ 10K/6F AT2002 ,20" TV Title FLASH MEMORY I/F Size Document Number R ev HUDSON PLATFORM SCHEMATIC1 Date: Monday, June 26, 2006 Sheet...
- Page 74 1uF/6 +3.3V_I/O R167 4.7K/6 R168 BRIGHTNESS BRIGHTNESS 8 R169 100/6 100/6 PWM0 C138 C139 CH3904 NC/1uF/6 NC/ SC1uF/6 AT2002 ,20" TV Title PANEL LVDS/TTL OUTPUT Size Document Number R e v HUDSON PLATFORM SCHEMATIC1 Date: Monday, June 26, 2006 Sheet...
- Page 75 +8V_SW R195 R196 R197 R198 4.7K/6 4.7K/6 2N7002E 2.7K/6 2.7K/6 M_SCL 5V_SCL AGND 2N7002E AT2002 ,20" TV M_SDA 5V_SDA AGND AGND Title SOUND PROCESSOR 3.3V / 5V I2C LEVEL SHIFTER Size Document Number R e v HUDSON PLATFORM SCHEMATIC1 Date:...
- Page 76 H : AMP OFF (Default) Bead_121_4A/8 L : NORMAL OPERATION R222 NC/2N7002E S-AMP_MUTE Bead_121_4A/8 NC/75R/6F C216 0.1uF/6 Bead_121_4A/8 AT2002 ,20" TV AGND Title AUDIO AMP OUT Size Document Number R e v HUDSON PLATFORM SCHEMATIC1 Date: Monday, June 26, 2006...
- Page 77 RB081L-20 RB081L-20 FB28 Bead_121_4A/8 AIC1084/TO252/NC C255 C256 MTH276D126 MTH276D126 100uF/25V 0.1uF/6 +1.8V_RPLL NC/Bead_121_4A/8 FB29 Bead_121_4A/8 AT2002 ,20" TV Title MTH276D126 MTH276D126 POWER DPMS AGND AGND Size Document Number R e v HUDSON PLATFORM SCHEMATIC1 Date: Monday, June 26, 2006 Sheet...
- Page 78 AUDIO_RIN-2 AUDIO_LIN-2 AUDIO_RIN-2 SCART-1-OUT_L SCART-1-OUT_R SCART-1-OUT_L SCART-1-OUT_R 4 +12V_SW +5Vt 2401-50p 0.1uF/6 AGND AGND GND 100uF/25V MTH276D126 MTH276D126 MTH276D126 AT2002 I/O Title MTH276D126 MTH276D126 MTH276D126 <Title> Size Document Number R e v HUDSON PLATFORM Date: Wednesday, June 28, 2006 Sheet...
- Page 79 75R/6F AGND AGND +5V_IN 0.1uF/6 BAV99L BAV99L BEAD/6 SV_C SVIDEO_C SVIDEO_C DIN4 SV_Y SVIDEO_Y SVIDEO_Y BEAD/6 22pF/6 22pF/6 22pF/6 22pF/6 75R/6F 75R/6F AT2002 I/O Title <Title> Size Document Number R e v HUDSON PLATFORM Date: Wednesday, June 28, 2006 Sheet...
- Page 80 NC/ 1K/6 AD8072 NC/ 560R/6F 1K/6 SCART-1-OUT SCART-1-OUT 4 NC/ 75R/6F 75R/6F SCART-1-OUT_CVBS 1K/6 NC/220pF/6 +12V_SW AFOUT TUNER_MONO 1 NC/1K1 AD8072 NC/68n AT2002 I/O Title AGND <Title> Size Document Number R e v HUDSON PLATFORM Date: Wednesday, June 28, 2006 Sheet...
- Page 81 +5V_IN SCART SIGNAL INPUT PORT 0.1uF/6 BAV99L BAV99L SCART SCART-IN_CVBS SCART_OUT_CVBS SCART-1-IN_FB 1 SCART_R/C SCART-IN_CVBS SCART-1-IN_CVBS 1 NC/ 75R/6F SCART_G BEAD/6 SCART_OUT_CVBS SCART-1-OUT 3 STATAV1 SCART_B BEAD/6 SCIL1 0R/1% 22pF/6 22pF/6 22pF/6 22pF/6 SCIR1 75R/6F SCART-1-IN_PIN8 1 SCART-1-OUT_L SCART-1-OUT_L 1 SCART-1-OUT_R NC/ 1K/1% SCART-1-OUT_R 1...
- Page 82 HUDSON BUTTON BOARD CONTENTS SCHEMATIC SHEET CONTENT I/O INTERFACE PROJECT : AT2002_Earphone/B Title CONTENT Size Document Number R e v BUTTON 0990 Date: Wednesday, June 28, 2006 Sheet...
- Page 83 5102-54R LINE_R_IN LINE_L_IN ear AUDIO 4501-04-05P-R CONN5P-2_0-RH GND_AUDIO GND_AUDIO PROJECT : AT2002_Earphone/B Title EARPHONE Size Document Number R e v BUTTON-BOARD Date: Wednesday, June 28, 2006 Sheet...
- Page 84 HUDSON BUTTON BOARD CONTENTS SCHEMATIC SHEET CONTENT I/O INTERFACE PROJECT :AT2002 BUTTOM/B Title CONTENT Size Document Number R e v BUTTON 0990 Date: Wednesday, June 28, 2006 Sheet...
- Page 85 LED1 SEN1 MENU 220/8 4500-07 CH_UP 330/8 CH_DOWN 560/8 green VOL_DOWN LED1 1.2K/8 EL-209-2EGW orange VOL_UP 3.3K/8 MTH276D126 INPUT POWER SEN1 MTH276D126 PROJECT :AT2002 BUTTOM/B Title kEY_PAD Size Document Number R e v BUTTON-BOARD Date: Wednesday, June 28, 2006 Sheet...
Need help?
Do you have a question about the AT2002 and is the answer not in the manual?
Questions and answers