Advertisement
Quick Links
CONTROL UNIT START UP PROCEDURES
When energized, Heatizon Systems Control Units turn the primary power on and off to a step-
down, low-voltage Transformer that provides power to the Heatizon Tuff Cable or ZMesh. The
Control Unit can be activated by many different types of activation devices. Examples of activa-
tion devices include simple timers and thermostats, temperature and moisture sensors and tele-
phone computer activators (see your Heatizon Systems supplier for details).
All of Heatizon System's CBX series Control Units employ "soft turn" circuits that turn the Trans-
former on without a high in-rush current from the power source. If there is a problem, the prima-
ry power to the Control Unit must shut OFF.
Warning: Make certain that any relays and circuit boards are properly seated prior to en-
ergizing the Control Unit.
SAFETY FEATURES AND
STARTING UP A CBX6 or
CBX23 SERIES SYSTEM:
GO TO PAGE 6-2 to 6-7
SAFETY FEATURES AND
STARTING UP A CBX7
SERIES SYSTEM:
GO TO PAGE 6-8 to 6-9
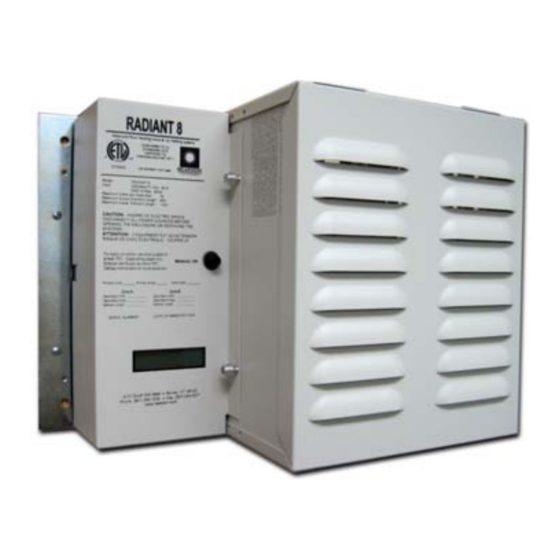
SAFETY FEATRUES AND
STARTING UP A RADIANT 8
SERIES SYSTEM:
GO TO PAGE 6-10 to 6-14
6-1
www.heatizon.com
Advertisement

Summary of Contents for HEATIZON SYSTEMS CBX6
- Page 1 CONTROL UNIT START UP PROCEDURES When energized, Heatizon Systems Control Units turn the primary power on and off to a step- down, low-voltage Transformer that provides power to the Heatizon Tuff Cable or ZMesh. The Control Unit can be activated by many different types of activation devices. Examples of activa- tion devices include simple timers and thermostats, temperature and moisture sensors and tele- phone computer activators (see your Heatizon Systems supplier for details).
- Page 2 F. SCR Failure. The CBX6 and CBX23 has an SCR fault that opens a relay and turns the system off if the SCR fails, or if the activation device is off and the system attempts to stay on.
- Page 3 CBX6/23 START UP PROCEDURES STARTING UP A CBX6 or CBX23 SERIES SYSTEM After all equipment is installed and electrical connec- tions have been made the system is ready to ener- gize and test. The adjustment potentiometer on the Control Board...
- Page 4 CBX6/23 START UP PROCEDURES Step 4: Once the proper amperage readings have been NOTE: The Control Unit will not stay run- verified you may adjust the Control Board adjustment ning until the Control Board is properly ad- potentiometer. justed. Adjustment of the potentiometer...
- Page 5 CBX6/23 START UP PROCEDURES CBX6/23 POTENTIOMETER AND JUMPER ADJUSTMENTS FOR SPECIFIC APPLICATIONS: TUFF CABLE RETROFITS IN ASPHALT OR CONCRETE INTERIOR ZMESHSYSTEMS AND INTERIOR TUFF CABLE SYSTEMS Z MESH SNOW MELT AND ROOF DEICING SYSTEMS TUFF CABLE SNOW MELT AND ROOF DEICING SYSTEMS 5A.
- Page 6 CBX6/23 START UP PROCEDURES 5D. TUFF CABLE SNOW MELT AND ROOF DEICING SYSTEMS INSTALLED DURING THE SUMMER MONTHS. Once all shorts have been corrected and cleared, all damaged or cut Tuff Cable and/or Cold Lead has been appro- priately repaired, and any and all joints have been crimped, soldered, and tightened where appropriate, the follow-...
- Page 7 Transformer overheats the Control Unit will shut the system down until the Transformer cools. The owner of the system should be given a copy of the Owner’s Manual and the warranty Step 10: card to be completed and returned to Heatizon Systems upon completion of the installation.
- Page 8 STARTING UP A CBX7 SERIES SYSTEM The CBX7 Control Unit utilizes phase control to set the current on any given Heatizon Systems Transform- er. The CBX7 incorporates a soft start that will ramp the current on and off from zero to full current in about two seconds.
- Page 9 Heatizon Design and Installation Manual. If the Red LED is on, refer to the Trouble Shooting Sec- tion of the Heatizon Design and Installation Manual or call Heatizon Systems Technical Support De- partment. Note: Air flow around the Control Unit and Transformer is critical and must be maintained.
- Page 10 RADIANT 8 STARTUP PROCEDURES RADIANT 8 CONTROL UNIT SAFETY FEATURES When energized, Heatizon Systems’ Radiant 8 Control Unit turns the primary power “on” to a step- down Transformer that provides power to the Heatizon Tuff Cable or ZMesh heating element. The Ra- diant 8 Control Unit can be activated by many different types of activation devices (see your Heatizon Systems Distributor for additional details on activation device alternatives).
- Page 11 RADIANT 8 STARTUP PROCEDURES RADIANT 8 MONITORING FEATURES DIRECTIONS FOR CONTROLLING THE SYSTEM: Press the “Select” button to move/change categories and to save selec- tions. Press the “Up” and “Down” buttons to select or change from options. Press both the “Up” and “Select” buttons Heatizon simultaneously to move back one step.
- Page 12 Tuff Cable Roof Tuff Cable Retro * Note *Note: If you have both ZMesh and Tuff Cable in series call Heatizon Systems @ (801) 293-1232 Note: If the Radiant 8 Control Unit you are calibrating is for a dual zone system, using an S202 or S203 Transformer, you will be asked to input information for both “sides”...
- Page 13 RADIANT 8 START UP PROCEDURES Load Location: Use up and down switches to select the location of the The Load is heating element. Options that will display are: Interior Exterior Load Length: Use up and down switches to select the number of feet of Side 1 Lgth heating element that was installed and connected to the Radiant 8 Control Folds...
- Page 14 RADIANT 8 START UP PROCEDURES Load Temperature: This display shows the current temperature of the Temperature of heated area within approximately 5º (Note: Thermister 2 must be installed Load area correctly for the load temperature to operate correctly). Audible Alarm: An audible alarm may be selected to notify the user when Sounder with a fault has occurred and the system is not functioning.
Need help?
Do you have a question about the CBX6 and is the answer not in the manual?
Questions and answers