Advertisement
Quick Links
Advertisement

Subscribe to Our Youtube Channel
Related Manuals for BCP SKY2416


Summary of Contents for BCP SKY2416
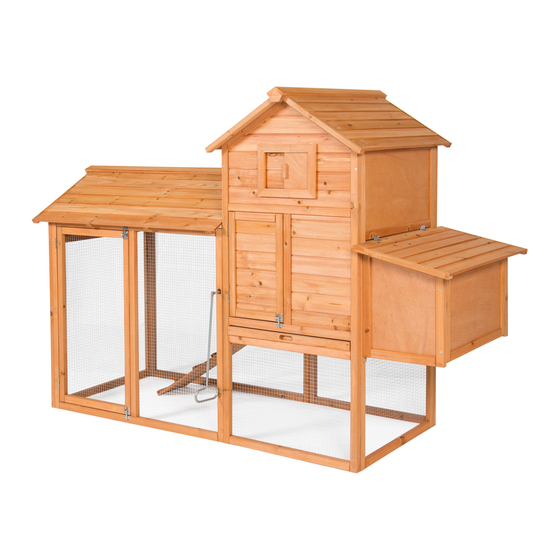
- Page 1 INSTRUCTION MANUAL 80-Inch Wooden Chicken Coop SKY2416 Ver. 2...
- Page 2 As shoppers, we’re always trying to find the perfect balance between quality & value. At BCP, we believe we’ve achieved that. Our diverse catalog of everyday essentials is tailored especially to our customers & guaranteed to hit that sweet spot of high quality & low price.
-
Page 3: Tools Required
NOTICE Please retain these instructions for future reference. • Do not stand on or use any part of this item as a step ladder. • Firmly secure all bolts, screws and knobs before use. • Reconfirm that all bolts, screws, and knobs are secure every 90 days. •... - Page 4 PARTS FRONT BACK RIGHT SIDE 1 PC 1 PC 1 PC LEFT SIDE SIDE FENCE FRONT FENCE 1 PC 1 PC 1 PC BACK FENCE TRAY WINDOW FRAME 1 PC 1 PC 2 PCS MIDDLE SUPPORT ROOF FRAME LONG ROOF FRAME 2 PCS 1 PC 1 PC...
- Page 5 PARTS RAMP ROOF LONG ROOF 1 PC 1 PC 1 PC LEFT BOX SIDE RIGHT BOX SIDE BOX FLOOR 1 PC 1 PC 1 PC BOX FRONT DIVIDER BOX ROOF 1 PC 1 PC 1 PC...
- Page 6 PRODUCT ASSEMBLY Attach a part 9 window frame to part 4 left side with two part A screws. Attach a part 9 window frame to part 3 right side with two part A screws. Attach part 16 left box side and part 17 right box side with four part B screws.
- Page 7 PRODUCT ASSEMBLY Attach part 1 front and part 2 back to part 4 left side with four part B screws. Attach a part I latch to the front door with six part H screws. Attach part 3 right side with six part B screws.
- Page 8 PRODUCT ASSEMBLY Attach part 13 ramp with two part C screws. Attach part 6 front fence with three part D screws. Attach two part I latches to the fence door with twelve part H screws.
- Page 9 PRODUCT ASSEMBLY Attach part 7 back fence with three part D screws. BEHIND Attach part 5 side fence with six part B screws.
- Page 10 PRODUCT ASSEMBLY Attach part 15 long roof with eight part E screws. Attach part 12 long roof frame with six part F screws.
- Page 11 PRODUCT ASSEMBLY Place two part 11 middle supports into the coop. Slide in the part 8 tray. Attach part 19 box front with four part B screws.
- Page 12 PRODUCT ASSEMBLY Place part 18 box floor into the nesting box. Slide part 20 divider into the slot on the box floor. Attach the part 21 box roof with four part C screws, two screws per hinge.
- Page 13 PRODUCT ASSEMBLY Attach part 14 roof with eight part E screws.
- Page 14 PRODUCT ASSEMBLY Attach part 11 roof frame with four part F screws. Attach part J handle with the part G bolt set.
- Page 15 Earn points while you shop. Join today! Give your friends 15% o their first order! For each successful referral you’ll receive 100 points. bestchoiceproducts.com...
- Page 16 HELP CENTER Question about your product? We're here to help. Visit us at: help.bestchoiceproducts.com CHAT Chat Support Product Inquiry Orders FAQ Product Assembly Returns & Refunds PRODUCT WARRANTY INFORMATION All items can be returned for any reason within 60 days of the receipt and will receive a full refund as long as the item is returned in its original product packaging and all accessories from its original shipment are included.
Need help?
Do you have a question about the SKY2416 and is the answer not in the manual?
Questions and answers