Roland RD-170 Owner's Manual
Hide thumbs
Also See for RD-170:
- Catalog (6 pages) ,
- Owner's manual (36 pages) ,
- Owner's manual (42 pages)
Table of Contents
Advertisement
Quick Links
r
RD-170
Digital Piano
Owner's Manual
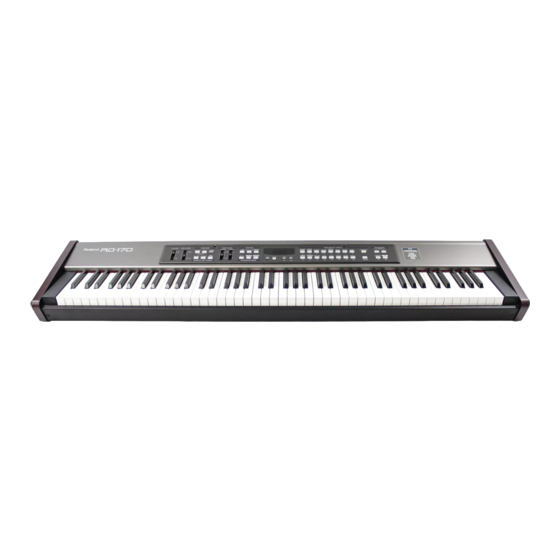
Thank you for choosing a Roland RD-170, the new entry-level stage piano of Roland's acclaimed RD series. The term
"entry level" only refers to the RD-170's price tag, by the way, because this is an incredibly powerful instrument with
excellent sounds that can double as MIDI master keyboard.
To get the most out of the RD-170 and to ensure many years of trouble-free service, we urge you to read through
this Owner's Manual thoroughly.
To avoid confusion, let's agree to use the word "button" for all keys on the front panel, and use "key" only when
referring to the RD-170's keyboard.
Before using this instrument, carefully read the sections entitled "Important Safety Instructions" and "Important
notes". They provide important information concerning the proper operation of the RD-170. Be sure to keep this
manual in a safe place for future reference.
Copyright © 2003 ROLAND EUROPE. All rights reserved. No part of this publication may be reproduced in any form without the written permission of Roland Europe s.p.a.
Advertisement
Table of Contents

Related Manuals for Roland RD-170


Summary of Contents for Roland RD-170
- Page 1 They provide important information concerning the proper operation of the RD-170. Be sure to keep this manual in a safe place for future reference. Copyright © 2003 ROLAND EUROPE. All rights reserved. No part of this publication may be reproduced in any form without the written permission of Roland Europe s.p.a.
-
Page 2: Features
(Upper= red, Lower= green, Setup= orange), while you can also ask the RD-170 to display the name of the currently selected parameter. - Page 3 Roland Service Center, or an authorized • Make sure you always have the RD-170 placed in such a Roland distributor, as listed on the “Information” page way that it is level and sure to remain stable. Never place when: it on stands that could wobble, or on inclined surfaces.
- Page 4 RD-170 Using the unit safely • Do not force the RD-170’s power cord to share an outlet with an unreasonable number of other devices. Be espe- cially careful when using extension cords—the total power used by all devices you have connected to the extension cord’s outlet must never exceed the power rat-...
-
Page 5: Important Notes
Maintenance • Do not use this instrument on the same power circuit with any • For everyday cleaning wipe the RD-170 with a soft, dry cloth or device that will generate line noise (such as an electric motor or one that has been slightly dampened with water. To remove stub- variable lighting system). -
Page 6: Table Of Contents
Tuning the RD-170 ........ -
Page 7: Panel Descriptions
H [KEY TOUCH] button This button provides access to parameters that Press this button to switch the keyboard’s apply to the RD-170 as a whole (see p. 29). Use velocity sensitivity on (button lights) or off the TONE SELECT/SETUP buttons for selecting (button dark). - Page 8 RD-170 Panel descriptions L [METRONOME] button N [LOWER] and [UPPER] buttons Press this button to switch the RD-170’s metro- These buttons serve three purposes: nome on (button lights) or off (button dark). a) you can use them to select parts while play- You can also set several metronome parameters ing;...
-
Page 9: Rear Panel
L (MONO) EXPR. A POWER button F OUTPUT [R], [L/MONO] sockets Press this button to switch the RD-170 on and Connect these sockets to a keyboard amplifier off. (KC series), your HiFi set, a pair of active speak- ers (of the Roland MA series), etc. The RD-170 B AC socket does not contain speakers. -
Page 10: Preparations And Main Functions
Connections Your RD-170 needs to be connected to a HiFi or keyboard amplifier in order to be audible. If your amplifier is mono, connect the RD-170’s L (MONO) output to the amplifier’s input. You can also use one or two pairs of headphones (Roland RH series), in which case you do not need an amplifier. -
Page 11: Connecting Headphones
Stereo headphones (RH-50, RH-25, etc.) Connecting footswitches & pedals The RD-170 provides two Pedal sockets: DAMPER and SOFT/EXPR. Here is how you can use these sockets: (6) Release the damper pedal to switch off the PEDAL OUTPUT... -
Page 12: Volume And Brilliance
Note: The setting of this slider also determines the vol- ume in the headphones. Listening to the demo songs The RD-170 contains 16 demonstration songs. Here’s what you need to do to listen to them: (1) Hold down the [SYSTEM] button while press- (2) Press the Tone selection button ing [EDIT]. -
Page 13: Selecting Sounds
28). Alternating between & using two sounds (Layer, Split) The RD-170 is an extremely flexible instrument that allows you to switch, add or remove sounds quickly. There are four possible combinations: The RD-170 provides two “parts”: Upper and Lower. - Page 14 If you do not need to select other Tones, use step (2) above. Splitting the keyboard The RD-170 allows you to divide the keyboard into You will notice that all related and active but- two sections and to play two different Tones with tons light in green.
- Page 15 Owner’s Manual GChanging the split point • Press and hold [SPLIT] while setting the desired split point with the [DEC÷NO]/[INC÷YES] buttons. When you activate the Split mode, the key- board is split at the “Gb3”, i.e. the Gb key more SPLIT LOWER UPPER...
-
Page 16: Using Effects
RD-170 Preparations and main functions Using effects The RD-170 comes with three digital effects: Chorus, Reverb and Sympathetic Resonance. While Chorus and Reverb are available for all Tones, Sympathetic Resonance can only be used with piano Tones. Adding Reverb Adding Chorus... -
Page 17: Transpose
Transpose Using the Transpose function, you can shift the pitch of the entire keyboard. This means that the RD-170 will sound in another key than the one you are playing in. Transposition can be used for two purposes: (a) to play a song in an “easy”... -
Page 18: Touch Sensitivity (Key Touch)
You can change the keyboard’s touch sensitivity. Though this will not change the “weight” of the keys, you will notice that it becomes easier (or harder) to play loud notes (fortissimo). You can also switch off the RD-170’s veloc- ity sensitivity altogether. -
Page 19: Using The Metronome
Owner’s Manual Using the metronome The RD-170 contains a metronome you may want to use for practising. The beat (time signature) and tempo can be changed to your liking. Furthermore, the metronome’s volume can be set in 128 steps. (1) Press [METRONOME] to start the metronome. -
Page 20: Using The Sequencer
RD-170 Using the sequencer 4. Using the sequencer Recording your own music The RD-170 comes with a two-track sequencer you can use for recording ideas, new songs or your own versions of existing music. (5) Press [PLAY®]. The RD-170 starts recording The RD-170’s tracks can be used to record your... - Page 21 Owner’s Manual Saving your song If you are happy with your song and wish to play it back at a later stage, you need to save it before switching the RD-170 off. (1) Press the [SYSTEM] button (it lights). VOLUME BRILLIANCE...
-
Page 22: Edit Parameters And Setup Memories
5. Edit parameters and Setup memories The RD-170 contains three kinds of parameters you can set: SYSTEM parameters (that apply to the RD-170 as a whole), internal EDIT parameters (for the RD-170’s parts) and external EDIT parameters (for specifying the MIDI behavior of the RD-170’s parts). -
Page 23: Octave
(use [11] for that). The setting range is –2, –1, 0, 1, 2 octaves (down or up). Note that the RD-170’s keyboard can also be Sft The selected part generates and responds to transposed in semitone steps (see p. 17), but the Soft messages. -
Page 24: Midi Channel
To take advantage of these and the remaining Edit apply to the selected part (Upper or Lower). Be sure functions, you need to connect the RD-170 as fol- to select the part you wish to edit – and do not lows: forget to edit the other part if you’re not happy... -
Page 25: Transmitting Volume Values
Owner’s Manual [ENTER] to confirm your setting will immediately Reverb Send level →[MIDI] take you to [6], where you can enter the value for CC32 tr. This parameter allows you to specify the Reverb Send Level value (CC91) to be transmitted by the When you confirm that value by pressing [ENTER], Upper and/or Lower part whenever you select the you can enter the Program Change number. -
Page 26: Pedal/Slider Filters (Tr)
RD-170 Edit parameters and Setup memories (2) Press the [UPPER] (red) or [LOWER] (green) →[MIDI] Pedal/slider filters (TR) button to select the part whose setting you want to change. Here are three parameters that allow you to specify whether (on) or not (off) the damper pedal, foot- (3) Use [DEC÷NO]/[INC÷YES] to set the send level... -
Page 27: Midi Reception (Rc) Filters
(on) or not (off) the fol- tor. lowing messages should be received when the When set to on (default), playing on the RD-170’s RD-170 is controlled by an external sequencer, keyboard causes the corresponding notes to sound. -
Page 28: Setup: Saving And Recalling Your Edit Settings
The RD-170 contains 16 Setup memories where you can save your configurations for quick recall on stage, in the studio, etc. If you are planning to take the RD-170 on the road (or if you need more than 16 Setups), be sure to archive the contents of these memories via MIDI (see p. -
Page 29: System Parameters
Owner’s Manual 6. System parameters System parameters apply to the RD-170 as a whole (and thus also to all Setup memories) and can be saved to a special System memory. Tuning the RD-170 Using other tunings Scale root note (p. 30) Stretch Tuning (p. -
Page 30: Stretch Tuning
(5) Press [EXIT] to leave the System mode. You can connect either a footswitch (DP-2, etc.) or an expression pedal (EV-7, etc.) to the RD-170’s SOFT/EXPR. socket and specify its function for the Upper and Lower parts separately (see p. 22). -
Page 31: Basic Channel
1~16.) Depending on how you want to work with your RD-170, it would be a good idea to choose a MIDI channel that is neither used by the Upper, nor the Lower part. That way, any other MIDI data (like note... -
Page 32: System Memory
Setup bulk data. may happen…) Press [DEC/NO] if you do not want to archive Note: The song in the RD-170’s internal memory cannot be your settings after all. (In that case, you do not archived using this function. -
Page 33: Miscellaneous
Owner’s Manual 7. Miscellaneous Restoring the factory defaults You can reset the RD-170 to its factory settings, Switch on the RD-170 while holding down the [WRITE] button. The display will read fct as soon as which means that your own Setup memories will be overwritten with the settings the RD-170 contained the factory settings have been loaded. -
Page 34: Tone List
Here is a list of the internal Tones and their Program Change numbers. These numbers are transmitted whenever you assign a Tone to the Upper or Lower part. If the RD-170 receives these messages via MIDI, it behaves in the same way as when you press the corresponding Tone selection button. -
Page 35: Specifications
Owner’s Manual Specifications I Keyboard: 88-key hammer action I Demo songs: 16 I Max. polyphony: 64 voices I Master keyboard functions: I Tones: 64 (16 families x 4 variations) Zones : 2 independent zones I Sliders: Master Volume, Brilliance, Part Level MIDI data Tx (Upper/Lower) : Program change Upper &... -
Page 36: Midi Implementation Chart
RD-170 Miscellaneous MIDI Implementation Chart [Digital Piano] Date: March 2003 Model: RD-170 Version: 1.00 Function... Transmitted Recognized Remarks Basic Default Upper: 1/Lower: 2 Upper: 1/Lower: 2 Channel Changed 1~16, Off 1~16, Off Mode Default Mode 3 Mode 3 Message Altered...
Need help?
Do you have a question about the RD-170 and is the answer not in the manual?
Questions and answers