Table of Contents
Advertisement
Quick Links
MODEL # 60600
ALL
MODELS
ATTACH TO
90950 50LB
SPREADER
ATTACH TO
2150, 90365,
90399 & 2170
MODELS
P60600_M52133_Rev_Nov2021
ASSEMBLY HARDWARE – BY SPREADER MODEL
#12299
#12303
Front Panel
Side Panel
#12304 Hopper
Mounting Clamps
#12305 Hopper
Mounting
Clamps
ASSEMBLY INSTRUCTIONS
Thank you for selecting EarthWay for your
deflector needs. Our production team in
Northern Indiana takes pride in building each
and every product.
Our customer support team is standing ready to
ensure your success. Please contact us at
www.EarthWay.com to see our full line of lawn,
garden, and professional tools.
#60161
#12298 Panel
Frame
Mounting
#36222
¼‐20X1
Screw
#36210
¼‐20X1
DEFLECTOR KIT
#36201
#363300 ¼‐20
¼‐20X3/4
Locknut
Clips
Bolt
#36305
¼‐20 Hex
Nut
#36330
0 ¼‐20
Locknut
PAGE 1
Advertisement
Table of Contents

Summary of Contents for EarthWay 60600
- Page 1 DEFLECTOR KIT MODEL # 60600 ASSEMBLY INSTRUCTIONS Thank you for selecting EarthWay for your deflector needs. Our production team in Northern Indiana takes pride in building each and every product. Our customer support team is standing ready to ensure your success. Please contact us at www.EarthWay.com to see our full line of lawn, garden, and professional tools. ASSEMBLY HARDWARE – BY SPREADER MODEL ...
- Page 2 DEFLECTOR KIT MODEL # 60600 ASSEMBLY INSTRUCTIONS Step 1: Open each of the seven clips (#12298) and stretch each one over the wire deflector frame (#60161). Place approximately the locations shown with two clips on each side and three across the front of the deflector. SIDE FRONT Step 2: Select a side deflector (panels with only two holes). Both side panels are the same. Orient as shown and insert side panel between clip ears. Align holes in clip with holes in deflector. Insert ¼‐20 bolts (¾” long) through one clip at a time. Attach ¼‐20 locknut to bolt to backside of deflector. P60600_M52133_Rev_Nov2021 PAGE 2 ...
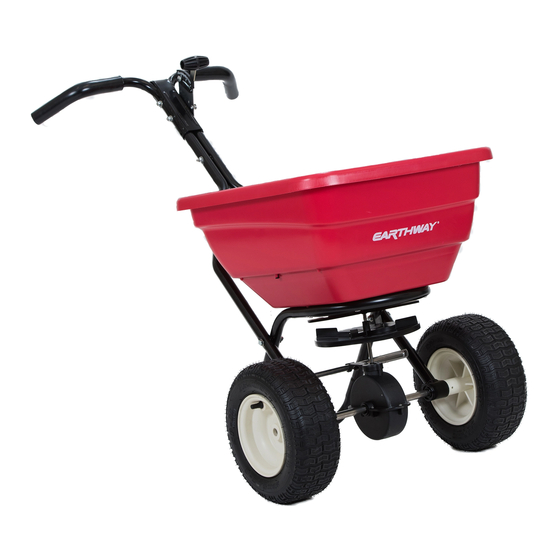
- Page 3 DEFLECTOR KIT MODEL # 60600 ASSEMBLY INSTRUCTIONS Step 3: Repeat step 2 with the other side panel. Step 4: Select the front panel (the one with three holes). Follow the same process as in step one and insert three bolts and attach with three nuts. TO ATTACH DEFLECTOR TO 90950 50LB ICE MELT SPREADER Step 5: Locate the deflector mounting brackets (#12304). Using a screwdriver, slightly pry the bracket open and insert over each end of the deflector frame. ...
- Page 4 DEFLECTOR KIT MODEL # 60600 ASSEMBLY INSTRUCTIONS Step 6: Locate on the spreader the cross‐bar lock nuts. Remove the locknuts and place the deflector bracket over the bolt. The deflector bracket has a c‐shaped section that will fit flush on the end of the spreader stand (black bent hoop bar). Step 7: Re‐install each lock nut through the deflector mounting bracket so that the deflector will now be attached to the 90950 spreader. Step 8: Adjust deflector so that side ...
- Page 5 ASSEMBLY INSTRUCTIONS Step 6: Slide bracket over frame of spreader. Step 7: Adjust location of clamps so that deflector panels can be rotated past wheels. Hand tighten all bolts (#36210) and locknuts (# 36330). Do not use an impact wrench. CUSTOMER SERVICE 574.848.7491 | SUPPORT@EARTHWAY.COM | www.EARTHWAY.com | 1009 Maple Street, Bristol, IN 46507 ONE YEAR WARRANTY The manufacturer warrants this product free of defects in original workmanship and materials for a period of one year to the end user with the original purchase receipt. If a manufacturing non‐conformance is found, the manufacturer. at its discretion will repair or replace the part(s)/product at no charge provided the failure is not the result of incorrect installation, mishandling, misuse, tampering, or normal wear and tear as determined by the manufacturer. The manufacturer at its discretion may require that the part(s) or product be returned along with the original purchase receipt for examination and compliance with the terms of this warranty. Do not return any product without first receiving authorization. To seek remedy under this warranty, contact the manufacturer at 574‐848‐7491, or write 1009 Maple Street, Bristol, IN 46507 and describe the nature of the manufacturing defect. SPECIFIC LIMITATIONS: This warranty covers only the part(s) or product; any labor charges associated with repair or replacement of non‐conformances are specifically excluded. Due to the corrosive nature of most fertilizers and ice melt products, the manufacturer makes no warranty against and specifically excludes part(s) or product degradation or failure due to corrosion or its effects. P60600_M52133_Rev_Nov2021 PAGE 5 ...

Need help?
Do you have a question about the 60600 and is the answer not in the manual?
Questions and answers