
Related Manuals for FONESTAR ZSM-1050

Summary of Contents for FONESTAR ZSM-1050
- Page 1 ZSM-1050 MESSAGE PROGRAMMER, EVENTS AND BACKGROUND MUSIC PLAYER WITH 4 OUTPUT ZONES INSTRUCTION MANUAL...
-
Page 2: Table Of Contents
11. Dashboard window ........................12. Exporting and importing ......................Export ............................Import ............................13. Updating ........................... Remote method (Internet or LAN)....................14. Local control of ZSM-1050 device .................... 15. Controls and functions ......................16 Technical specifications ......................Warranty ............................ - 2 -... -
Page 3: Security And Environment
We take this opportunity to thank you for buying this product. We recommend you read the instruction manual before switching on the machine and follow the instructions that are given. Keep the manual for future reference. SECURITY AND THE ENVIRONMENT ELECTRICAL SECURITY Check that the current in the mains connection where the machine is to be installed corresponds to the power supply of the machine. -
Page 4: Significance Of The Symbols On The Machine
The characteristics of the equipment and the content of the manual can change without forewarning. FONESTAR, S.A. does not assume responsibilities regarding the inappropriate use of the equipment or the information supplied in this instruction manual, and specifically disclaims any implied liability for marketability or fitness for any other use. -
Page 5: Description
1.- Make sure the device is connected to the local network. In the ZSM-1050 device itself, enter the Configuration menu -> Network -> Status. If it appears as “disconnected”, check the configuration of your network, the connection of the device, the Ethernet cable, etc. -
Page 6: New Connections
3. NEW CONNECTIONS In order to connect to the ZSM-1050 device, create a new connection with the new option in the General dropdown menu: Create access to ZSM-1050: ACCESS DATA Name: the name which identifies the access to the device. -
Page 7: Options
OPTIONS Connect when starting the application: When launching the application, an attempt will be made to connect to the device. Automatic reconnection: Only in automatic mode. Whenever a device is available on the local network and is not connected, it will connect automatically to it. Synchronize date and time when connecting: the device will configure the time and date of the PC upon each connection. -
Page 8: Basic Controls
4. BASIC CONTROLS There are several options when it comes to operating a connected device. ICON BUTTONS: Help. Show/Do not show list of next messages. Information about the device: time and date, IP address, network name, ports, current status. Open background music control window. Open dashboard window. -
Page 9: Configuration
SIP connection status If the device has been configured to connect to a SIP server, then an icon representing the current state of the connection will be displayed. (orange) Attempting to connect to the SIP server (green) Connection established (red) Connection error (green) SIP call in progress 5. -
Page 10: Inputs/Outputs
INPUTS/OUTPUTS Relay sleep mode: Mode in which the relays are normally in when not activated. Sensor activation: Alarm activation configuration (see section on alarms). AUDIO Volumes: Each type of audio has its own volume control. Sound: Mono or stereo output. Default Zone Output: Indicates the default audio source in the zone. -
Page 11: Comunications
Block mode is much faster reaching speeds of up to 3.8 Mb/s. Conversely, the Serie mode is slower but provides an alternative when slow connection problems occur. MAX TRANSFER SPEED ZSM-1040 ZSM-1000/ZSM-1050 ZSM-1000/ZSM-1050 (Megabits per second) SERIE TRANSFER BLOCK TRANSFER... -
Page 12: Sip
There are 2 ways of accessing the file manager: - Right button -> File manager - From the screen: “Dashboard” -> “File manager” Audio files are divided into 3 categories: - Background music files. - Message files. - Alarm files (ZSM-1050 only). - 12 -... -
Page 13: Background Music
BACKGROUND MUSIC The buttons on the left side are divided into two groups: Channels - New channel: Allows the creation of a new empty channel. - Send directory: Select a PC directory to create a channel with the same name and send your files. Files are not sent in sub-directories. -
Page 14: Messages
MESSAGES The buttons on the left side allow you to: - Send: Send files to use as audio for scheduled or direct messages. - Download: Download the marked files to the PC. - Delete: Deletes the marked files. - Copy: Copies the marked files to another device as message files. A connection must be established with the target device. -
Page 15: Background Music
The buttons on the left side allow you to: - Send: Send files to use as audio for scheduled or direct messages. - Download: Download the marked files to the PC. - Delete: Deletes the marked files. - Copy: Copies the marked files to another device as message files. A connection must be established with the target device. -
Page 16: Scheduled Messages
8. SCHEDULED MESSAGES In this window all the messages that are scheduled in the device are shown. It also allows new scheduled messages to be created and edited or existing messages to be deleted. NEW MESSAGE General - Message: - Name: message identification name. - Priority: allows the priority among messages to be managed. -
Page 17: Alarms
Schedules Date intervals: the program allows the use of the message to be limited to a given period of time. Set the period of time by selecting the starting date and ending date. Days of the week: allows the days of the week on which the message will be played to be selected. Schedules: - Once a day: the message will be played once a day at the specified time. -
Page 18: Alarm Configuration
Once the alarm has been set, activate it by checking the activate box. For the alarm to work, it must be set and activated. It is also possible to eliminate the alarm connected to each sensor. ALARM CONFIGURATION - Priority: Allows you to manage priority among the different alarms, with 1 corresponding to lowest priority and 5 corresponding to highest priority. -
Page 19: Direct Messages
10. DIRECT MESSAGES Direct messages are useful in cases where you want to play an audio file manually and quickly. In this window the messages that have already been scheduled in the device are shown. It is also possible to create new messages and to edit or delete existing ones. NEW DIRECT MESSAGE Name: direct message identification name. -
Page 20: Dashboard Window
11. DASHBOARD WINDOW The window is divided into 3 main blocks: 1- General: a. Tab which allows switching between the connected devices. b. File manager direct access button. c. Configuration direct access button. 2- Zone control: indicates the current audio in each zone. 3- Functions control: a. -
Page 21: Exporting And Importing
12. EXPORTING AND IMPORTING The program allows a file containing all the data of a device to be saved on the PC. The saved file serves as a backup or as a way to duplicate settings and audio files on other devices. The saved data consists of: - Files of background music, messages and alarms - Configurations of messages and alarms. - Page 22 Alarms Select the message files that you wish to save. If programmed messages have been selected in advance, the files associated with them will be marked as necessary. Background music Select the background music channels you wish to save. - 22 -...
- Page 23 Programmed message files Select the message files that you wish to save. If programmed messages have been selected in advance, the files associated with them will be marked as necessary. Alarm files Select the alarm files that you wish to save. If you have previously selected alarms that have associated audio files, these files will be marked as mandatory.
-
Page 24: Import
Download and save At any time that you have the items you wish to save, click "Download and save" and the process of downloading the files will begin. Once completed, a notification will appear at the bottom with a "Save" button. - Page 25 Programmed messages Select the scheduled messages you want to load to the destination device. The files necessary for playback will be loaded automatically. Alarms As the alarms do not have identifying names, to configure them you must select the configuration you want to load from the drop-down list.
- Page 26 Background music channels Select the background music channels you want to load onto the target device. Message files Select the alarm files you want to upload to the target device. If you have previously selected alarms that have associated audio files, these files will be marked as obligatory. - 26 -...
- Page 27 Alarm files Select the alarm files you want to upload to the target device. If you have previously selected alarms that have associated audio files, these files will be marked as obligatory. Send and import At any time, click the "Send and Import" button with the items that you want to be loaded to the device. The window will close and the file transfer process will start.
-
Page 28: Updating
3. Select the new version that you wish to load for the update. 4- Press the update button. Once the update has completed, the device will restart. NOTE: Fonestar provides the update files for the devices and the ZSM-GO program on its website. - 28 -... - Page 29 LOCAL METHOD Download the update file provided by Fonestar through its website in your PC. Put the file in the USB storage device or in the SD memory card. Put the file in the root of the media. There are 2 methods of local updating: through the device menus and through the security update.
-
Page 30: Local Control Of Zsm-1050 Device
14. LOCAL CONTROL OF ZSM-1050 DEVICE INITIAL SCREEN This is how the screen looks when the device starts up: The information displayed is as follows: Device time and date. Current type of audio (scheduled message, direct message or alarm) or background music. - Page 31 1. CONFIGURATION DISPLAY Allows access to this menu, composed of the following sections: - Audio configuration. - Network configuration. - Inputs/Outputs configuration (sensors/relays). - Time and date configuration. - Passwords. - Device default values. The following actions can be performed using the buttons on the front panel of the device: - w/s: buttons to select the required submenu.
- Page 32 1.1.2. CONFIGURATION SCREEN OF DEFAULT AUDIO OUTPUTS IN THE ZONES The audio output configuration screen allows the type of audio in each zone to be modified if there is no event. The following actions can be performed using the buttons on the front panel of the device: - w/s: buttons to select the required zone.
- Page 33 1.2.2. NETWORK CONFIGURATION EDITING SCREEN Allows the device to be configured with DHCP or fixed IP address. The following actions can be performed using the buttons on the front panel of the device: - w/s: buttons to select the required option. It is marked with an asterisk. - a/d: buttons to select ACCEPT/CANCEL.
- Page 34 1.3.1. SENSOR ACTIVATION CONDITION SCREEN Allows the sensor activation condition to be configured, that’s to say, the status that they must detect in order to trigger the alarms. The following actions can be performed using the buttons on the front panel of the device: - w/s: buttons to select the required sensor.
- Page 35 1.5. PASSWORD SCREEN This screen allows the local password to be activated or deactivated in order to block the actions of the buttons on the front panel of the device. The following actions can be performed using the buttons on the front panel of the device: - w/s: unused.
- Page 36 2. BACKGROUND MUSIC SCREEN Allows access to this menu, composed of the following sections: - Selection of current background music channel. It also allows the background music playback to be stopped. - Background music configuration. The following actions can be performed using the buttons on the front panel of the device: - w/s: buttons to select the required submenu.
- Page 37 3. INFORMATION SCREEN Displays information about the device (type of device, MAC address, communications port and file transfer port). The following actions can be performed using the buttons on the front panel of the device: - a: allows you to return to the main menu. 4.
-
Page 38: Controls And Functions
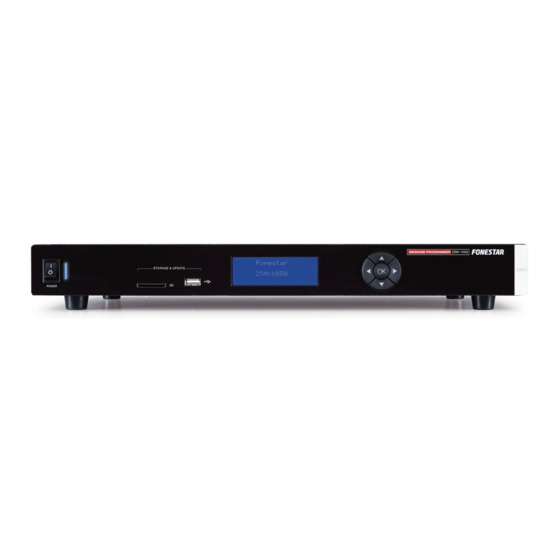
15. CONTROLS AND FUNCTIONS FRONT PANEL 1.- POWER: device on/off switch. 2.- Device LED power indicator. It will blink in blue when the device is starting up. It will light up in solid blue when the device is connected and working. A steady red light will appear when the device is in operation but not connected to the local network. -
Page 39: Technical Specifications
16. TECHNICAL SPECIFICATIONS ZSM-1050 CHARACTERISTICS Message programmer, events and background music player with 4 output zones. Message scheduling and general purpose outputs. ,Live message playback. Events and alarms activated through contact closure. Specific message and alarm player. Does not cut off background music. -
Page 40: Warranty
2 months after being conscious of the problem. It is only necessary to contact FONESTAR if it is impossible or imposes an undue burden for them to solve it..
Need help?
Do you have a question about the ZSM-1050 and is the answer not in the manual?
Questions and answers