Table of Contents
Advertisement
Quick Links
Advertisement
Table of Contents

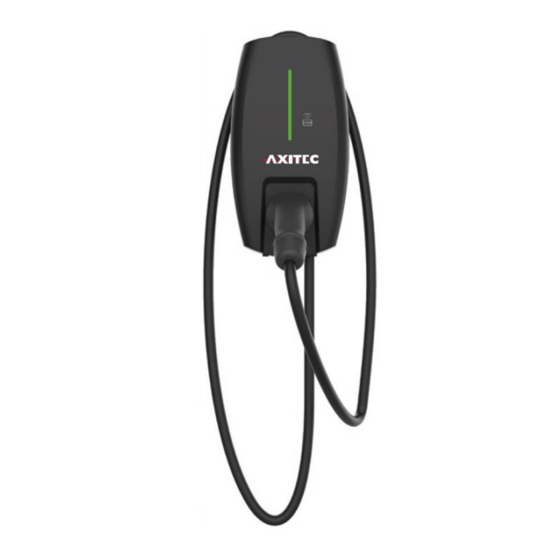
Summary of Contents for AXITEC AXIbox 11K
- Page 1 Installation and operation Manual AXIbox 11K...
-
Page 2: Table Of Contents
Installationsanleitung AXIbox 11K INDEX TARGET GROUP OF THIS DOCUMENT ..............3 GENERAL REGULATIONS AND SAFETY MEASURES ..........3 DESCRIPTION OFT HE PRODUCT ................4 Function and intended use ......................... 4 Scope of delivery ..........................4 Technical data ............................4 OPERATION ......................... 5 Operation with Acces restriction ....................... -
Page 3: Target Group Of This Document
Installationsanleitung AXIbox 11K 1 Target group of this document This document refers to the assembly, installation and operation of the AXIbox 11K charging station and is intended for the installer and the users. Chapters 5-7 are intended exclusively for the charging station installer with the appropriate qualification. -
Page 4: Description Oft He Product
3.1 Function and intended use The AXIbox 11K is used for charging electric cars. There is a choice of two modes, which can be set during installation: In Plug & Play mode, no authentication by the user is necessary. Charging can be started without unlocking after inserting the charging plug into the car's charging socket. -
Page 5: Operation
Download the Chargein App • Create an account • Sign in to your account Connect with the AXIbox 11K • Requirements: 2,4 GHz W-LAN; Bluetooth, W-LAN and location must be activated at the smartphone • Select your Charger under User / Charger Management / Add Charger and confirm the serial number. -
Page 6: Ending The Charging Process
Installationsanleitung AXIbox 11K 4.2.2 Ending the charging process 1. Stop the charging process at the car. When the car is fully charged, charging will stop. 2. Disconnect the charging plug from the vehicle and stow it in the wallbox. 4.3 Changing the operation mode The change between the operating modes Plug &... -
Page 7: Requirements
The AXIbox 11K has residual current monitoring for currents >6 mA DC. Therefore, the charging station must be fused with an RCD with at least type A. No other circuits may be connected to the residual current circuit breaker. -
Page 8: Installation
Installationsanleitung AXIbox 11K 6 Installation Electrical device should be installed, operated, serviced, and maintained only by qualified personnel. No responsibility is assumed by the manufacturer for any consequences arising out of the use of this device. A qualified person is one who has skills and knowledge related to the construction, installation and operation of electrical device and who has received safety training to recognize and avoid the hazards involved. -
Page 9: Setting The Operating Mode
Installationsanleitung AXIbox 11K 6.2 Setting the operating mode The AXIbox has two operating modes. The changeover may only be carried out by a specialist, taking into account all necessary safety precautions. 6.2.1 Control via RFID When delivered, the AXIbox is protected against unauthorised use by a lock. The charging process is started by the RFID cards supplied. -
Page 10: Electrical Installation
Installationsanleitung AXIbox 11K 6.3 Electrical installation The electrical supply to the wallbox is three-phase, a cable with 3 conductor phases, a neutral conductor and a PE conductor is required. Feed the cable through the left-hand opening at the bottom of the AXIbox housing. Clamp the wires of the cable into the terminals provided. -
Page 11: Troubleshooting
Installationsanleitung AXIbox 11K 7 Troubleshooting 7.1 Error detection via LED-indicator State Description LED State Standby Normal Flashing green, 1S on, 4S off Charging Normal Breathing green, 1S on, 1S off Cable connected Normal Breathing yellow, 1S on, 1S off Software upgrade... -
Page 12: Possible Solutions
Installationsanleitung AXIbox 11K 7.2 Possible solutions Problems Possible Causes Solutions Input over voltage AC input voltage may be too 1. Check the input voltage from the backend. high. 2. If the voltage is over 276Vac for a short time, wait till the power grid recovers to normal voltage range. -
Page 13: Disposal
Installationsanleitung AXIbox 11K 8 Disposal The AXIbox is subject to the EU Directive 2012/19/EU on Waste Electrical and Electronic Equipment (WEEE). The AXIbox must therefore not be disposed of with household waste, but must be disposed of in accordance with national and regional regulations for electrical and electronic equipment. The unit should be rendered inoperable before disposal.
Need help?
Do you have a question about the AXIbox 11K and is the answer not in the manual?
Questions and answers