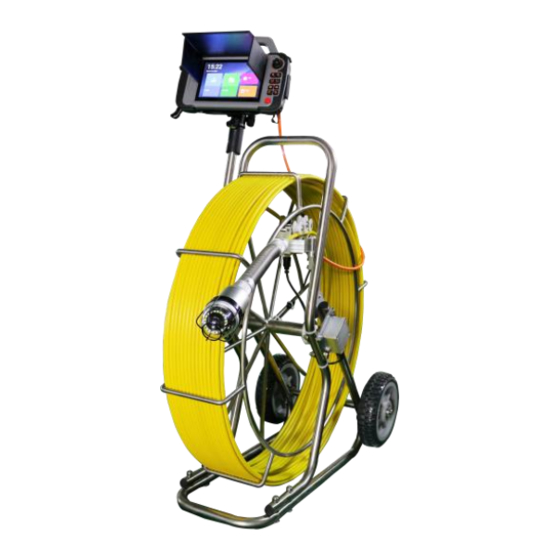
Summary of Contents for Forbest 3388Y Series
- Page 1 Pipe Video Inspection Camera System 3388Y/3688Y Series User Manual (3388Y) (3688Y) ----------------------------------------------------------------- Please read the manual carefully before you use...
-
Page 2: Table Of Contents
WARNING Contents Par ts and Draw in g Lis t ..............1 NEVER USE THIS DEVICE IN AN ENVIRONMENT WITH EXPLOSIVE MATERIALS Application .....................2 MONITOR SPECIFICATIONS ..................2 SUCH AS GAS, OIL, ETC. -
Page 3: Parts And Drawing List
Parts and Drawing List Application Application: Description WATER SUPPLY SYSTEM 7 inch Android Touch Screen WASTE WATER PIPES Pan Tilt Camera(Option: C40B self levelling camera) ELECTRICAL AIR CONDITIONER charger CABLE DUCTING □60M(200FT) □90M(300FT) □120M(400FT) CABLE DUCTED VACCUM SYSTEMS CFIBERGLASS CABLE CCCABLCABLE SUPPORTING TUBE PLUMBING... -
Page 4: Pan Tilt Camera Head
II. Pan Tilt Camera I、7 inch Monitor I.Working Environment: 触 摸 显 示 启动按钮 外置 MicroSD 卡槽 镜头控制摇柄 按键 Camera control Joystick 1. Temperature: -20℃~+55℃ Keyboard 2. Humidity:90%RH (Non Condensing) Touch screen II. Main Specifications: External Micro SD Power input: DC 9~15V,8W(Maximum) card slot II. -
Page 5: Cable & Reel
III. Cable & Reel 1. Connecting and Disconnecting the Monitor 1. Cable Reel Connecting the monitor * Please ensure the monitor power is off during the connection. Align the DB9 plugs to the slot of DB9 on the monitor and then insert it. ①... -
Page 6: 2、 Connecting The Cable Reel And Camera Head
2. Connecting the Cable Reel and Camera Head 5. Assembling the monitor and supporting tube 1) Cable GX16-6 aviation female plug is connected to the GX16-6 male plug on the meter counter box of the cable reel. 2) Pan Tilt Camera head is screwed on the fiberglass cable connector. Attention: When using C40B camera head on 3688 cable reel, a 10CM long 6 pin cable of male-female cable is needed to be connected on the slot in the meter counter and in the meantime a 8-4 pin spring kit is needed... -
Page 7: Detecting And Operating Software& Setting
6.Turning on 1.Monitor Operation and Software This monitor uses the Android operating system. Please ensure the lithium battery is installed in the right way. Press and hold the power button for 2 seconds to turn on the system. The following is the desktop after turning on the monitor. -
Page 8: 2、Software Interface
2.Software Interface Interface of the Camera Head Dimming Increase Main Light Source; Press the button to increase the main light to the upper level. Press and hold the button to increase the light continuously and release the button to stop. The light percentage will vary. Decrease Main Light Source;... - Page 9 ( Note: When you first click the icon to view the videos, there will be a reminder: Do you want to convert the format H264 to MP4 to play the video? If you need the conversion to MP4 format, please click “Yes”) Images Review;...
- Page 10 4.3. Remote Management: when it is connected to the local area network, remote management is available; Click the button to operate FTP; Then (2) Calculator open My computer in the computer terminal and input the ftp address in the address line as shown in the following picture and click return ; then you can enter the files stored in the memory of the monitor or SD card to copy, paste;...
- Page 11 Click the main interface setting to enter the system setting to set the network parameter; WIFI; time; backlight; volume; sleep mode; time and language and you can also check the operation system information; (1) Ethernet Connect the wire in the LAN port; It is possible to set the static and (5)...
- Page 12 (5)Volume When it is in Ethernet and it is connected to WIFI at the same Volume can be set by sliding the volume bar. time; the priority is to use the WIFI network. (3)Date and Time When the automatic selection of the date and time and the time zone is clicked, the system needs to be connected to the internet;...
- Page 13 (9)Turn off The system can be set to be timing turn-off; Click the timing turn-off icon to turn on the function and set the time. (7)Language/Input The language can be set as Simplified Chinese; Traditional Chinese and English; click the icon to set the language. (10)About the system Choose About the system in the setting interface to check the system model;...
- Page 14 VI 、Trouble Shooting (11)Mouse Click the mouse button to enable the function. Please refer to the list for the solution before you ask for help: Problems Potential Reason 1、Check if 7inch monitor is connected. Not turning on 2 、 Check if the power button is turned 1、Check the memory and see if there is the space.
-
Page 15: 3、Snapshot And Video Taping
VII 、Key Points Please follow this diagram to check before you operate the system to avoid any problems. After all the check, the initial system check is completed. Category Check Description Test Index Test Result Ranging(if this Ranging Normal feature is included) adjustable Image Proportion Adjustable...

Need help?
Do you have a question about the 3388Y Series and is the answer not in the manual?
Questions and answers