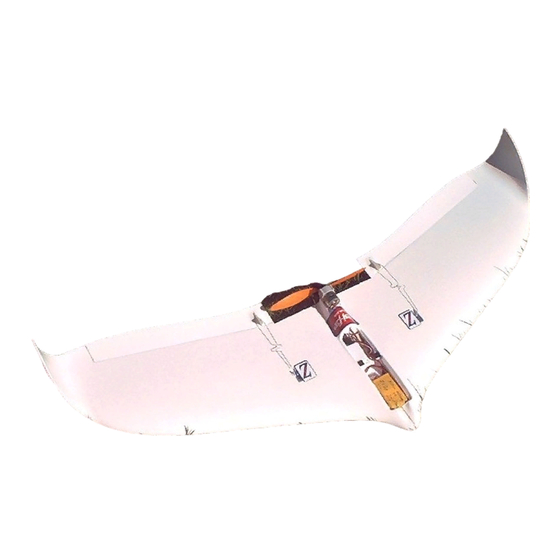

Summary of Contents for ZAGI Zagi-Fixx
- Page 1 Trick R/C Products, LLC 938 Victoria Avenue Venice, California 90291 voice 310 301-1614 310 822-7695 email Zod@zagi.com online orders www.Zagi.com...
- Page 2 The urethane paint with connector however is not. Repairs can be made with Zagi-Lock and clear tape. Avoid 1! Zagi 5 amp electronic speed control overflowing the glue onto the painted with BEC surfaces. Isopropyl alcohol (rubbing alcohol) or Windex can be used safely to 1! GWS EPU-3.5:1 motor and gear set...
- Page 3 The servo bay of the Zagi FiXX was designed to fit the Hitec HS-55 servo. The HS-55 is a moderately priced readily available servo with more than adequate torque. Clip both of the mount tabs off of the servos Find the control arm with small holes in the parts bag supplied with the servo.
- Page 4 Trim levers are provided to adjust the zero position of the servos. Center the trim levers. The control surfaces of the Zagi FiXX are called elevons because they com- bine the functions of the elevator and aileron by means of an elec- tronic mixer.
- Page 5 Always turn the transmitter switch to the on position before plugging in the airplane battery. Check the battery condition indicator on the transmitter to make sure that the battery is charged. Plug the ESC into a charged battery. The male and female JST connectors have a polarity lock.
- Page 6 Cut out the square paint thick membrane in the corner of the servo Stick the servo plug through the square hole to the bottom of the wing. Push the servo into the servo bay while pulling the wire from the bottom.
- Page 7 Cram the wire into the cutout. Use a probe to push the wire toward the receiver bay. Hold the servo connector and pull the wire into the receiver bay. Pull the wire and apply a piece of tape over the channel to hold the servo wire in place.
- Page 8 Squeeze a thin bead of Zagi-Lock CA glue in the slot located at the inboard end of the elevon. Center the control horn in the slot.
- Page 9 Locate the 2 3/4” wood motor mount stick in the hardware bag. Smooth the four sides of the stick on a piece of medium sandpaper. Round both ends of the stick by drawing it backwords across the sandpaper. Rounding the ends of the motor mount stick will make it easier to fit in the gearbox and the motor pylon.
- Page 10 Locate the red Zagi-FiXX decal on the decal sheet. The decal is used as a glue clamp for the motor pylon. Stick it on top of one of the panels.
- Page 11 Apply a bead of Zagi-Lock CA glue to the flat surfaces above the motor wire hole. Pinch the seam together and pull the tape over to the other side.
- Page 12 The antenna groove is located on the right panel. It extends from the center pod all the way to the tip. At the pod end of the antenna groove, spin a 1/8” drill bit or a pointed tool to make a hole. Aim the drill at an angle to come out in the corner of the receiver bay.
- Page 13 Separate the hook from the loop sides. Peel the backing from the hook sides. Squeeze a zigzag bead of Zagi-Lock CA on the glue side of the Velcro. Glue one in the receiver bay and one in the forward most end the battery bay.
- Page 14 Wipe the painted surfaces with alcohol before applying any decals. Glass cleaners like Windex work also. Use the big blue Z decal to cover the servos Use the large white rectangle for the canopy hinge and lock. The logo print or the all white rectangle may be used.
- Page 15 Locate one of the two 14 1/2 X 3/ 4” clear armor strips on the decal sheet. These strips are provided as crash armor for severe head-on crashes. In the event of such a crash the strips help to prevent the trailingedge of the wing from cracking or separating.
- Page 16 Remove one nut and both washers. Slide the prop onto the shaft with Slide the prop onto the shaft with Slide the prop onto the shaft with Slide the prop onto the shaft with Slide the prop onto the shaft with the raised letters toward the motor the raised letters toward the motor the raised letters toward the motor...
- Page 17 Plug the motor wire into the ESC. The polarity to the motor should be reversed so that the motor will work as a pusher. It is easy to see the red side of the motor plug being plugged into the black side of the ESC wire.
- Page 18 Balance the airplane on your fingertips 1/8 of an inch forward of the servo wire channel The Zagi-FiXX will fly best with the elevons set between zero and .03” of up elevator. The most common reason for balance problems is over decorating the wings.
- Page 19 F F F F F irst time motor power irst time motor power irst time motor power irst time motor power-up -up. The following steps are provided for a safe first time The following steps are provided for a safe first time The following steps are provided for a safe first time The following steps are provided for a safe first time irst time motor power...
- Page 20 Zagi-FiXX pitches up and immediately dives, add 2 or 3 clicks of down trim. Repeat the glide test until the Zagi-FiXX flies straight ahead with a slow sink rate to a sliding landing. Increase the launch speed each time to provide longer controlled flights.
- Page 21 The Zagi-FiXX is supplied with a balanced power system. Changing the prop will change the load on the motor ESC and the battery. The Zagi-5 ESC is rated at 5 amps continuous. The Zagi-FiXX with a 370 mAh battery and the stock prop draw 2.5 amps at full throttle.
- Page 22 Orient the stars to half way over the break to straddle both parts. Apply a bead of Zagi-Lock to the Z- Foam. Put the pieces back together and press the star onto the replaced part.
- Page 23 Trick R/C guarantees this kit to be free from defects in both workmanship and material at the date of purchase. This does not cover any components or parts damaged by use, misuse or modification. In no case shall Trick R/C’s liability exceed the original price of the pur- chased kit.
- Page 24 Zagi, Zagi Fixx, Z-Foam and Zagi-Lock CA are Trademarks of Trick R/C Products LLC...
Need help?
Do you have a question about the Zagi-Fixx and is the answer not in the manual?
Questions and answers